Waveshaping with Roar: Saturation, Distortion, LoFi
Waveshaping with Roar: Saturation, Distortion, LoFi
Overview of Functions
Roar is a saturation effect that is capable of adding overtones and color or extreme distortion and glitchy effects.
It features several non-linear saturation curves to deliver character, three saturation stages to deliver power and several ways to combine them to deliver a lot of versatility. Roar can comfortably move from subtle and precise, mastering-grade warmth to wild and unpredictable sound mangling.
Input signals can be routed into one of five different processing modes: Single, Serial, Parallel, Multiband, Mid/Side, and Feedback.
Roar offers a selection of saturation shaper curves, varying from gentle to distorted, that can be shaped further using Amount and Bias controls. The filter frequency can be adjusted and applied before or after the shaper.
There are two LFOs, an Envelope Follower, and a Noise generator for complex modulation possibilities, as well as an expansive Modulation Matrix for easy mappings for most of the device’s parameters.
Feedback can be added to the output, as well as a built-in compressor with a sidechain high-pass filter.
You can use Roar to beef up sounds, tracks or even entire mixes. Or you can use it to absolutely change and destroy the sound.
Like Meld, it features a great modulation matrix that is even easier here on the eye and also easier to use.
Combined with the feedback routing, the modulation matrix can deliver predictable and (very) unpredictable results.
Workflow
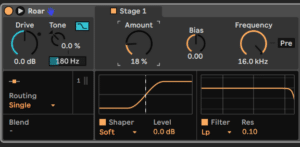
At the very left of Roar, the first Drive control can push the input level of the signal, adding some distortion from the off if you want to go in hard. Tone, as on Meld, adds higher frequencies while pulling back the lower ones as you dial right, and pushes the lows and pulls back on the highs as you dial left, with a kind of crossover frequency set beneath it. It’s not an EQ knob per se, as the results can be more dramatic in either high or low areas and it has a similar feel to a dramatic filter.
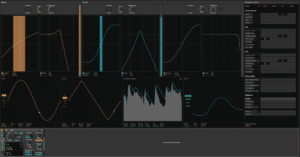
As with Meld, one beautiful aspect of this plugin is its expandability. Click on the arrow far left and you get to see everything bigger, above the plugin. And here it’s a lot more graphical, with a detailed overview of each of Roar’s saturation stages and its modulation sources.
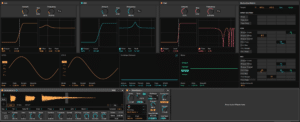
We have up to three stages of saturation depending on how we route them together. There’s a tiny drop-down menu under Routing revealing the five options to route these saturation stages together.
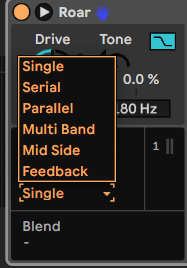
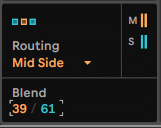
Single just means a single stage of saturation; Serial means two, one processing after the other, with the second able to feedback on itself; Parallel means both stages running side-by-side together; Multiband gives the full three stages in parallel, each split into low, mid and high frequency bands; Mid Side means the middle part of your signal is processed by one saturation stage, the sides by another; and finally Feedback looks to be parallel processing with feedback running back into the bottom stage.
Here’s the Mid Side setup with two saturation stages, filtering and modulation.
Next we choose one of the 12 shapes of the Shaper for each saturation block in our setup. The waveforms can be pretty standard, more gentle Soft Sines or distorted Tube Preamp shapes, more gritty Diode Clipper and Bit Crusher, or full-on and aggressive Tri Fold and Shards. Lots to play with here !
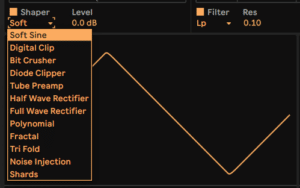
Level adjusts the impact and gain of each of your choices while Bias effects how the sound clips or dies out. This is harder to describe as it varies a lot with each shape but it can result in incredible clipping effects that ties in well with the modulators. Finally Filter is allowing us to sweep the effect across the frequency range.
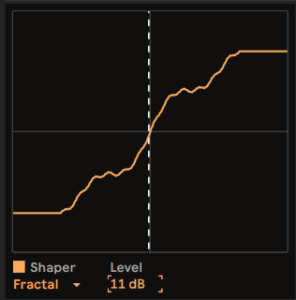
We’re covering the main modulation stage in the middle of the plugin below, as that is a particular highlight that needs some depth, so that leaves the feedback stage on the right. This has its own useful compressor that comes in handy when things get out of control (which they do).
Feedback
The Feedback dial is very cool as you can choose to set a feedback time or by note pitch or timing and set it in sync to create a rhythmic movement.
Adjusting the Frequency affects the tone of the feedback signal which you can easily hear (and also modulate).
The Width too, really thickens the effect and can also be modulated.
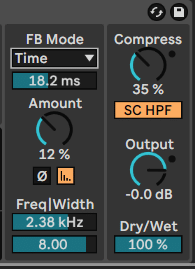
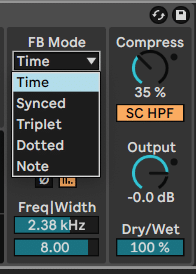
The yellow icon to the right under Amount is the Feedback Gate. When on, this ensures that the feedback is silenced once no signal is detected at the input of the device. By enabling the switch to the left of it we can invert the Phase of the feedback as well.
The Frequency slider sets the center frequency of the band-pass filter in the feedback path.
A Sidechain HP Filter in the Compressor section activates a high pass filter for the analysis signal used in the compressor’s sidechain. This is useful to reduce the amount of gain reduction for low frequency signals.
The feedback Note and Frequency can also get modulated.
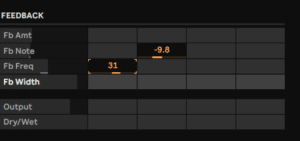
Roar Mid/Side using Feedback Note modulation

