Mixing Electronic Music
The Noise Gate
Some of you may be aware that the primary use for a gate is to reduce noise and any unwanted signal that is present in your recordings. For example you may have a vocal take with rumble, computer noise or heavy breathing in- between phrases. A gate is the perfect tool for removing these problem areas, often with zero impact on the parts you want to keep.
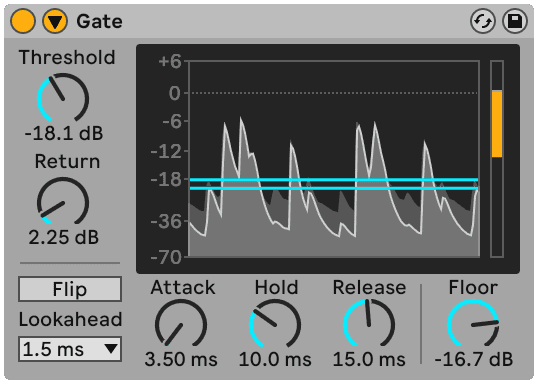
As a gate is really just an automated level control, they use very little to no CPU power. Most DAWs include one or even two gates as standard and these will often be bundled with a number of pre-sets to get you going.
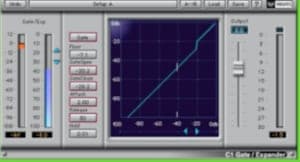
(Waves C1 Gate/Expander)
As the process of gating isn’t particularly exciting and is often seen as purely a problem-solving exercise, the gate can be somewhat overlooked as a creative effect.
First up let’s take a look at using our gates in an almost traditional way, but instead of reducing, we’ll try using it in a similar way to a transient designer. This basically means that we can actually remove parts of a drum track or loop. This can be really useful for cleaning up our overall sound.
Choose a loop with a fair bit of noise present. This technique can quite easily be applied to a drum group / buss and will work equally well on acoustic drums as it does on electronic sounds.
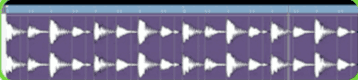
Initialise the plug-in so that no gating takes place and no signal can be heard, this is a good starting point and is often the best way to go when using dynamics processors in general.
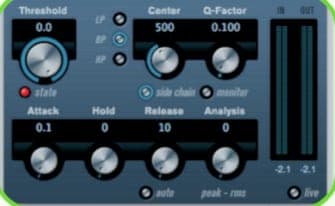
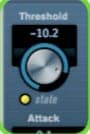
The next step is to bring the gate’s threshold control down until you can hear the peaks of the loop come through. Keep pushing the threshold until the majority of the major elements are playing but the other sounds are still gated.
Although we can filter out many of the sounds in the loop, to make the remaining sounds a little more realistic we have to alter the release and hold times. When doing this, try to mimic the actual release times of the drum sounds themselves. In doing this you may get
some ‘bleed’ from the other sounds in the loop but this is to be expected and shouldn’t be too obvious in the mix.
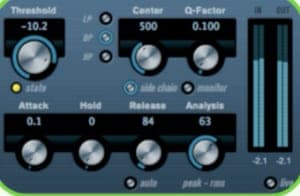
When comparing the before and after you should hear a dramatic change in the loop. Using this technique, you can slightly clean up your drum parts or completely transform them depending on the intensity of your settings.
Gated Reverbs
Most fully featured, modern reverb plug-ins will contain some kind of gated reverb effect and they can work really well on short percussive sounds or drums. Although these presets can work well, you can gain much more control over this effect if you can create it using your own processors.
You can hear that in their dry form many snare sounds are not particularly interesting. By adding a gated reverb we can make many a lot more useable.
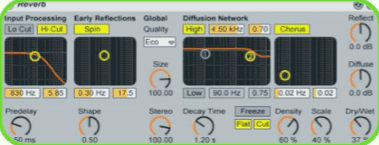
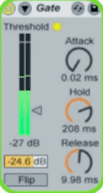
So that we can achieve the effect and size of the reverb we need to add a gate to the end of the chain. With a super- fast attack dialled in, you should be able to play with the threshold to allow the majority of the sound through. The reverb tail will be cut off and stop the sound from becoming to washed out.
At this point you’ll want to play with the reverb mix, gate release and gain reduction amount. This will allow you to match the reverb time to the snare’s release and also ensure there are no unwanted clicks and pops introduced by the gating.
Rhythmical Gating and Gated Patterns
One of the most creative ways to use your gate plug-ins is to produce rhythmical patterns with them. As a lot of DAWs now feature native side chaining, you can now feed your gate with just about any signal you like. This allows you to use the gate as a sort of automated tremolo or pattern generator. Some really excellent results can be achieved with a little imagination.
The gate is placed on an instrument loop and the percussion loop is set to control the side chain circuit. This will allow us to use the peaks of the percussion pattern to activate the gating effect.
Once this configuration is set up, start to bring the threshold of the gate down until you hear some gating occur.
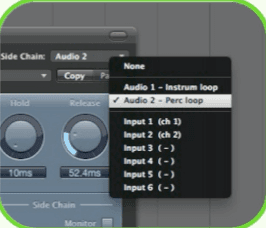
Once the gating is taking place try sending the percussion to loop to ‘no output’ or a muted group. You should now hear the instrument loop with only the gated effect. This will allow you to make more exact adjustments to the gate’s settings.
Of course you can always leave the percussion loop out of the mix and just use it as a trigger. If you prefer, you can program your own trigger part using MIDI, this will allow a more personalized pattern to be produced.
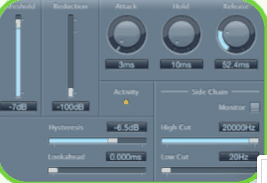
Creative and Alternative Uses for Side-chaining
Many people use side-chaining as a way to make their tracks pump in time with their kick drum or to lower the level of music when a voice is present, but there is so much more we can do with the process. So let’s get into it and see what can be achieved.
Using side chain based compression is a great way to make your drum parts a little more dynamic and interesting. You can also use this method to create more realistic clutch and choke effects.
Let’s say you have a running 16th high-hat pattern, this maybe programmed or it could be a loop and you want to introduce some open high-hat elements to the pattern. These extra hat sounds can often get lost in an already busy sequence or loop, of course you could go through removing the closed hats manually from the original sequence to create space, but side-chaining can offer a better solution.
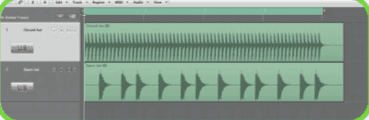
By using a side-chain capable compressor on the original closed hat pattern and routing the new open hats to the key input, the closed hats ‘duck’ every time the new hat sound plays. This not only gives the open hat sound the space it deserves but also gives you a very organic sound, something that is very difficult to achieve with programming alone.
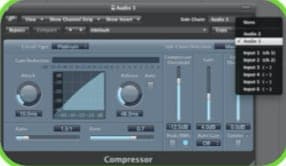
With the routing set up you should start to hear the original hat line ducking when the open hat appears. It’s now just a case of deciding how much reduction you want to occur and fine tuning the release time to match your project’s tempo.
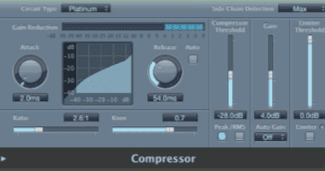
(The compressor with tweaked settings in action)
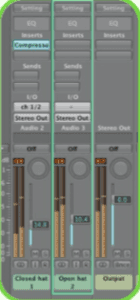
When it comes to utilizing side-chaining with drum parts, you aren’t just limited to high- hats, you can literally route any sound in your composition to any other. This can create complex dynamic relationships between the elements and give your overall mix a more cohesive feel.
Try using a snare or percussion sound for a fill or variation during a transition in your arrangement.
Then apply a side chain compressor to the rest of your drums and percussion. The new snare fill will cut right through the mix, and the effect will create an aggressive feel.
Cleaner Effects
When using any effect with a tail (i.e. reverb, echo or delay) there is always a danger of muddying a good mix. There are times when a really large reverb or delay are called for and with the use of side chain compression we can generally use these larger-than- life effects, without detrimentally effecting our mix.
To use this technique we first need to set up a send / return routing. The compressor is then placed on the return channel or buss. The key input for this compressor can be any element in your mix, traditionally the kick drum or drum group would be used but things get a little more interesting if alternative sources are used.
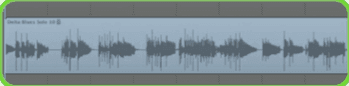
Try using the actual signal that you are affecting as the key input. For example, if you are affecting a guitar solo you can try using this to cause the ducking on your effects bus. This will allow your guitar to pass through the dense effect without being too confused. When the part stops the effects buss level will rise allowing you to hear the reverb or delay you are using.
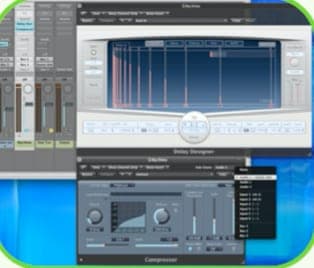
This technique is great for lead lines, guitar solos and generally anything monophonic in nature. Real definition can be added to parts even when very intense effects are being applied. Also experiment with using other random elements from your mix as the key input on the effects buss. Sometimes the results can be quite surprising.
If you are producing electronic music with a number of different synth lines, or rock music with multiple guitar parts, it’s likely that these instruments can be fighting for space. Ducking can be used to create spaces for these sounds to live in and enable them to be in the mix at the same time.
Marrying Synth and Guitar Parts
If you are producing electronic music with a number of different synth lines, or rock music with multiple guitar parts, it’s likely that these instruments can be fighting for space. Ducking can be used to create spaces for these sounds to live in and enable them to be in the mix at the same time.

Simply choose one of the sounds as the one that will be compressed and another that will act as the key input. It’s a good idea to use a sound that is only used for small bursts as the key input, this way your ‘main sound’ will be ducked when it appear.
The same effect can be used to duck a rhythm guitar or pad sound when a more prominent lead is playing. Again it’s all about control and making space. These methods can really lead to a cleaner more intelligible mix.
Pre- and Post-fader
A common question is whether or not to send tracks to an effects send using pre-fader or post-fader. Most DAWs will let you route to an effects send using either pre or post. When an Aux send is configured post-fader, the effect’s wet-to-dry ratio is preserved as you raise and lower the dry channel fader. So lowering a channel’s fader simultaneously lowers the Aux send signal level. That keeps you from having to adjust effects return fader levels in the mixer or wet/dry ratios at the effects processor every time you make a level adjustment with a track’s channel fader.
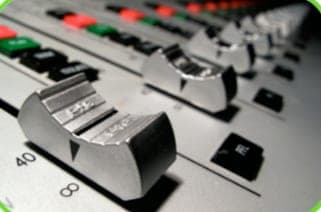
In most cases, you’ll want to keep the balance between a dry track and its effects relatively constant throughout the mixdown process, so post-fader effect sends are used more often than pre-fader effect sends.
However, there are some interesting uses for the pre-fader setting, for example creating an effect such as a sound disappearing into expansive reverb. A good example of this is when you hear someone in a film walking and the steps emerge out of a distant reverberant sound, come closer and more present as they “approach” you, and then return to the distant echo as they walk away. This is done using a blend of the original and effects channels and changing their levels independently of each other using the ‘pre’ setting.
As its name suggests, a pre-fader send is not influenced by the dry channel-fader moving, because the signal is sent to the processor through the Aux send before it gets to the dry channel fader. Therefore, the processed signal level from a pre-fader Aux send remains constant, no matter how you move its corresponding dry channel fader.
So, in the case of the “footsteps” example mentioned above, this is achieved by keeping the effect send reverb level constant while you slowly increase its dry level (giving the sense that the person is “approaching”) and then returning it to a low level (giving the impression that they are walking away).
Upward Compression
As with any art form, advanced techniques develop out of need and the want to get a better sounding record. The sound of compression is now on nearly every music recording we hear. The subtle distortion the non-linear circuit of compressors, limiters and levelling amplifiers offers is pleasant to the ear.
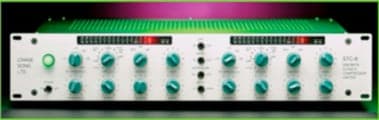
(The Crane Song STC-8)
The downside is that with the most common form of compression, downward compression has an increased level of distortion which may negatively affect a single sound or groups of sound, hazing over the programs clarity, clamping down on the dynamic range of the song and ultimately robbing the song of feel, punch and drive. This takes away from the natural dynamics and excitement of the music.
A method to preserve the dynamic range and add punch and character to the program is upward compression. As opposed to downward compression, upward compression increases the loudness of low level sounds without the pushing louder passages down. For example, it can amplify the dirty hissing noise of a drum loop.
The way we do this is to sum the source audio with the compressor’s output signal. The result is free from the negative side effects of 100% non-linear compression.
Upward compression can be achieved by transparent parallel compression, which you learnt about earlier in the course. Upward compression adds more depth and separation to the mix and/or master. It also has an aggressive side, lending an attitude to the music. Upward compression can beef-up lows, make clear and punchy mids and preserve the dynamics of high frequency information as well.
If you think about it, parallel compression is adding more frequencies to the sum of the originating source. The ‘crushed’ (to a greater or lesser extent) sound of the compressed signal has had the transient sounds squashed, resulting in the bulk of the signal (that below the threshold) becoming ‘louder’. You do not always need to have your compressor set to punishing levels. And mixing this signal with the original source means that you are mixing in extra (near-identical) sound below the threshold of the compressor – increasing the volume…
Bear in mind also that today more and more plug-in compressors have a wet/dry control so that there isn’t always a need to set up a separate channel to experiment with this technique.
(The A-Designs HM2 Nail Compressor/Limiter)
It does not go without saying that upward compression is like any other technique. Learn it well and apply when necessary because, like all audio processes, abuse or overuse makes it unexciting. But if done properly this technique yields excellent results. Enjoy!
Do this now
- Side-chain a pad to the kick and set the release so it recovers just before the next hit.
- Gate a sustained sound from a hi-hat pattern to make it rhythmic.
- Try upward compression on a quiet element - bring the low level up rather than the peaks down.
- Flip one send to pre-fader and automate the dry fader out, leaving only the effect.
That last one is how a sound dissolves into a reverb instead of just getting quieter.