Dynamics
Compression
The human ear uses compression for pretty much the same reasons that we do in music, that being to control the level of an audio signal. As you may already be aware, the concept is to simply boost those signals that are quiet and suppress the ones that are too loud. Imagine you are recording a vocalist and at some parts of the piece he or she sings quietly and in others sings at full blast. This not only causes problems when trying to obtain a suitable recording level, but also along the chain of recording right through to the mixing process. If you were to try and compensate for these changes in dynamics manually, you would be adjusting the faders in response to varying amplitudes of the instrument or singer that you are recording – a technique called ‘riding the gain’ – but as you can imagine, this method would be very unpredictable and would require an extremely fast response. Enter the compressor, which essentially does just this. It could be most usefully described as an audio circuit that automatically ‘rides the gain’ – pumping up the volume when things get too quiet and reducing the peaks down when things get too loud. The goal of the compressor is to achieve a more uniform, consistent audio signal that is optimum for recording and listening.
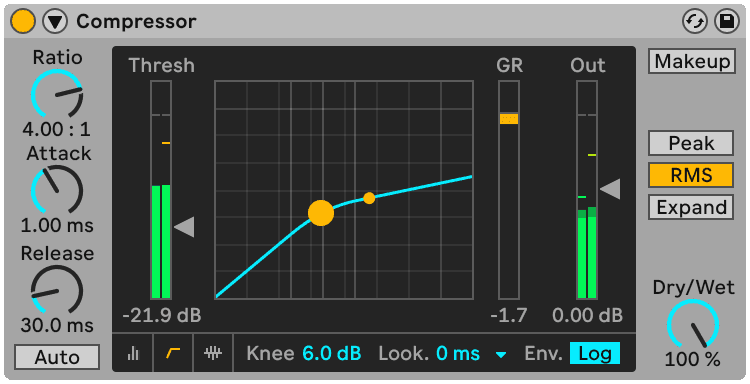
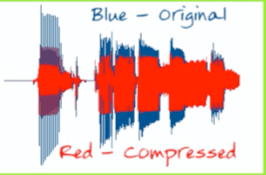
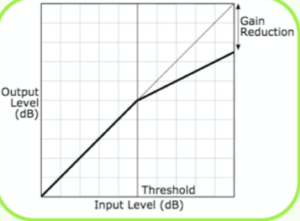
While some are able to operate completely automatically, most will allow us to control the parameters of the compressor to allow for a more reflexive and even creative response. Specifically, we can program a compressor to reduce the audio signal when it exceeds a particular threshold level of our choosing. If, for example, we set a ratio level of 6:1, the output for every 6dB over the threshold will only produce an output of 1dB over the threshold. Simple mathematics will tell you that if the output has exceeded the threshold by 12dB, the resulting output will only be 2dB over the designated threshold, and so on. If the signal falls below the threshold, then the gain will return to normal – exactly the same process as turning the fader down, just a lot faster to respond then the human ear and fully automated.
As with most technology, compressors can be too good at what they do, which can often produce artificial-sounding effects. This might be handy in some creative instances, but for the most part, we want to achieve a more natural- sounding response.
Aside from the threshold and ratio, there are many other parameters that work together to produce either more natural or artificial responses. What follows below is a detailed discussion of each.
Attack
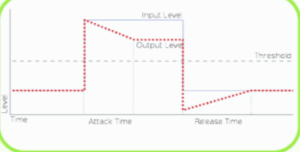
The attack time refers to the time it takes the compressor to reach its maximum level of gain reduction after the threshold has been reached.
Typical attack times range from less than 1 millisecond at the fastest, to more than 100 milliseconds at the slowest. Attack time settings affect the sound quality in terms of overall perceived brightness or high-frequency content. If you use very fast attack time settings, the compressor will activate very quickly, reducing gain instantly at the waveform level of the sound.
A fast attack can be useful for damping percussive peaks so the overall track level can be increased. It can also add punch to a track. However, since transient information at the front or attack portion conveys brightness character, especially with percussive sounds, immediately reducing it with the compressor will dull the sound. Selecting a slower attack time will allow the transient portion of the sound to pass through before the compressor starts clamping. However, if the attack time is too slow, ineffective and tardy compressor action may result.
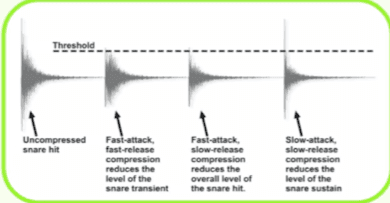
If you compress a snare drum track with a fast attack, you may notice a diminished or shortened attack of the front portion of the snare drum sound. Instead of a good “hit” at the beginning, you will hear a very short “blip”. If the attack time were even faster, you wouldn’t hear any snare attack at all. Adjusting the attack control to a slightly slower attack time will lengthen this blip back to the original snare attack length. Engineers use a compressor to get more attack out of a snare drum by using a low threshold and a high ratio. After making up gain with the output level control of the compressor, the attack portion ends up greatly amplified just before the compressor starts squashing the trailing portion of the snare drum sound. I like to mix this (sometimes called) “thwacked” sound with the original un-processed snare drum track.
Release time is the time the compressor uses to return to unity gain after the input signal has fallen below threshold. The compressor is said to “release” from gain reduction. Typical release times on popular compressors go from as fast as 20 milliseconds to over 5 seconds. Most engineers envision their compressors doing their job of gain reduction quickly and then releasing quickly to get out of the way. For the most part this holds up for pop recordings, but super-fast release times, along with a fast attack time setting, will distort low-frequency sounds, as the compressor is capable of gain change within the period (the 360-degree cycle of the lowest fundamental frequency) of the sound’s waveform. You can demonstrate this by using a very fast release on a bass guitar compressor and have the player play loud and sustained notes.
A long release time can be useful for adding sustain to a signal – on guitar solos for example. But an overly long release time setting can introduce another form of distortion, since gain reduction is “stuck” clamping the sound down for an unnaturally long time period. “Pumping” and “breathing” are engineer jargon words for obvious compressor artefacts or side effects with maximum compression. Sudden and usually unwanted deep gain reduction is called pumping, while a slower return (release) to operating level with a noticeable rise of the noise floor is called breathing. Newer compressor designs have clever predictive and adaptive schemes that reduce these side- effects, making the compressor’s action nearly undetectable, or at least tolerable in most intense gain reduction situations.
Knee
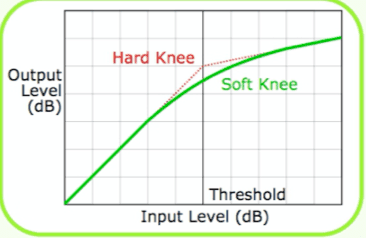
The exact moment the compressor starts gain reduction is called the ‘knee.’
‘Hard Knee’ compression describes this moment as sudden and certain.
‘Soft Knee’ or smooth knee compression is a less obtrusive change from simple amplifier to compressor.
Soft knee widens or broadens the range of threshold values necessary for the onset of compression. On quality compressors you can switch between hard and soft knee compression. The amount of gain reduction is measured and read on a standard VU meter whose needle rests on the 0 VU mark. The needle will deflect negatively downward to indicate how much gain reduction is occurring in dB. VU meters are RMS or average level responding and do not indicate fast or peak gain changes. LED’s are also used for VU meters, and they will better indicate peak levels. A well-designed compressor will have a good meter that reads input level, output level, gain reduction and any excessive peak output with an LED clip indicator. Once the amount of gain reduction is determined, the recording or operating level is re-adjusted with the output or make-up gain control on the compressor.
What this all means is that the soft-knee will generally be used to provide a smoother transition from amplifier changes from a unity gain amplifier (like the “theoretical” straight piece of wire) into a compressor that is reducing gain. Once the signal passes the threshold, the full ratio as set by the user is applied, but because some compression is applied to signals approaching the threshold, the transition from no gain reduction to full gain reduction is far smoother.
The question that might be asked then is: why don’t we use soft-knee compression all the time? We have hinted at the answer earlier when we talked about using compression as an effect rather than a tool for dynamic control. And this is basically the reason why sometimes hard compression can give us artificial pumping responses that sound great and give a desirable artificial perception of loudness and presence.
Another reason is that at higher settings, the hard-knee compression provides a tighter gain control – so if your signal is fluctuating to larger degrees, the soft-knee may not be able to produce the desired degree of levelling. In the end you will have to let your ears be the judge.
As if hard-knee and soft-knee compressors didn’t confuse the picture enough, there are other ‘side effects’ to consider. In a theoretically perfect compressor, once gain reduction is applied (in other words, once the input is above the threshold), the response is reasonably linear, so no matter by how much the input exceeds the threshold, the output level increase will always be the fraction of that amount determined by the ratio control. Both hard-knee and soft-knee compressors settle down into this type of linear response above the threshold. However, there are some compressor types that don’t exhibit a linear response above the threshold, and it’s not uncommon for the amount of gain reduction actually to reduce at very high signal levels. In effect, this means that at very high signal levels the compression ratio tends to fall to a lower value.
Look-Ahead
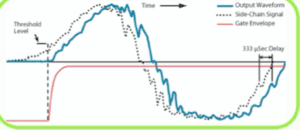
The look-ahead function is designed to overcome the problem of being forced to compromise between slow attack rates that produce smooth-sounding gain changes, and fast attack rates capable of catching transients. Look- ahead is a misnomer in that the future is not actually observed. Instead, the input signal is split, and one side is delayed. The non-delayed signal is used to drive the compression of the delayed signal, which then appears at the output. This way a smooth-sounding slower attack rate can be used to catch transients. The cost of this solution is that the signal is delayed, but this will not cause a problem if your DAW features plug-in delay compensation
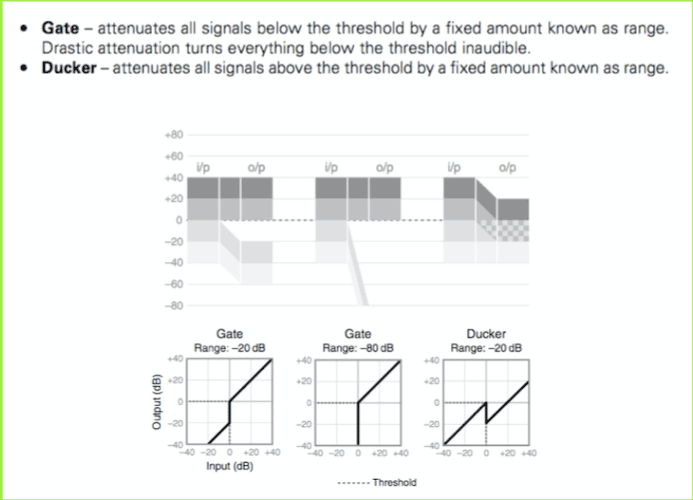
Gate
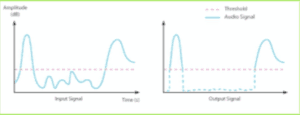
A gate is a switch that turns off the audio when it goes below a defined threshold. It’s great for removing room noise, and makes the recording dead silent when it kicks in. It removes completely any sound (noise) below a certain level. Check your vocal track for example: it is probably full of clicks, shuffles, breaths and headphone spill. You can set the right noise level floor with the threshold command.
Using the Noise Gate is especially important after compression: compression always raises the noise level! This is because compression brings the soft sounds closer to the loudest and so it boosts any noise in the track.
When producing music essentially within a DAW (computer & software), the need of a gate for basic noise removal isn’t as vital, since we can edit, cut out, automate, etc, any piece of unwanted audio. However, there are still times when using a noise gate is the fastest solution to the problem.
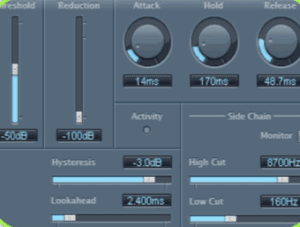
However, there are times when a very simple noise gate just won’t do the job either. For example, if a gate is used to clean up the snare drum sound, it is quite likely that the nearby hi-hats will spill into the snare drum microphone and cause the gate to open. Increasing the threshold level may cure this problem, but then there is a very real danger that any quieter snare drum beats may not cause the gate to open at all. Some gates offer other parameters to improve that problem.
When it comes to hardware noise gates, the Drawmer DS201 has become the ‘classic’ gate found in nearly every commercial recording studio. In addition to the four parameters we mentioned earlier, it offers two more controls (actually three).
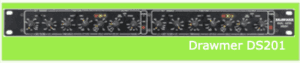
First is the inclusion of two variable filters, one high-pass and one low-pass, which act upon the side-chain keying circuitry.
The second is the “HOLD” parameter. It determines the amount of time the gate is held open after the signal falls below the Threshold. It is variable from 2mS to 2 Seconds.
Side Chain
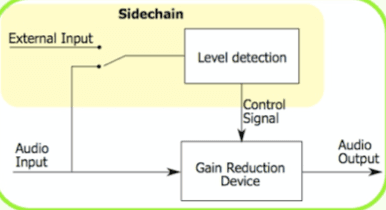
To better explain the range control on a noise gate, let’s introduce the extra input that some gates (and compressors) feature: the sidechain input. A signal, usually from a microphone, is connected to the sidechain input, and instead of the threshold functioning as normal, the sidechain input now takes control of it. As you speak, the noise gate drops anything else playing through it that’s below the threshold to the volume or “range”, set by the range control. It’s the same with a compressor – as you speak (or sing), the ‘background’ music going through the main inputs and outputs of the unit will be compressed to the level determined by the ratio control.
There are plenty of uses for a sidechain with both compressors and noise gates. With compressors, the most common use is to ‘duck’ instruments to make room for vocals. For example, a guitar can swamp the bandwidth that it shares with the vocals in a mix, so by side-chaining the vocals into a compressor that has a guitar signal as the input, when the vocalist sings, the guitars get compressed, allowing the vocals to sit in the mix better. Noise gates are popular with DJs, as by side-chaining their voice and setting a low range, when they speak, the music drops in level, allowing you to hear them more clearly.
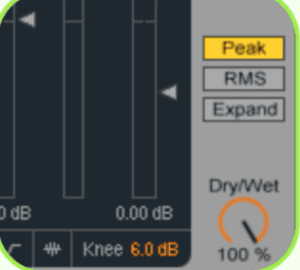
Siechains can be found on products such as the Focusrite Red 3, The Focusrite Liquid Channel & Liquid Mix, and the Focusrite ISA220 & 430MKII. We will explore some of the practical aspects of side-chaining later on.
Peak or RMS?
The side-chain of the compressor is the part of the circuitry that listens to the incoming signal to see if it needs turning down or not. Most often, compressor side-chains are designed to respond pretty much like the human ear, which means that short sounds aren’t perceived as being as loud as longer sounds of exactly the same level. This is called an RMS response.
The implications of using a compressor with an RMS control law are that the compression will sound natural, but short duration, high amplitude sounds may pass through at a higher level than you expect. One solution when feeding digital systems that can’t tolerate overload is to use a fast acting peak limiter after the compressor.
Some compressors offer switchable RMS/Peak operation, and in Peak mode, the gain control responds more accurately to brief signal peaks than in the RMS ‘averaging’ mode. This ensures peaks are more accurately controlled, but at the same time introduces a greater risk that the audio will be squashed unacceptably whenever a loud, short transient sound occurs, an irremediable problem if recorded that way.
Stereo Link
The other important control you will always find on a compressor is the Stereo Link switch. This can be quickly explained: if you are compressing a stereo signal, the levels in the two channels will be unequal and will change from moment to moment. Unless something is done, the amount of compression will be different in the two channels, making the stereo image shift from one speaker to the other according to which channel is being compressed the most. To avoid this, the Stereo Link switch mixes the control signals for the gain elements together so that each channel is compressed to the same extent.
Output or Gain
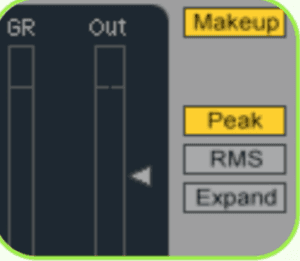
This sets the overall output level of the effect (dB). It can be useful to whack up the output level again after it’s been reduced from applying compression to a signal. This is commonly known as ‘make-up gain’.
Compressors are not inherently noisy devices, but because they reduce the dynamic range of the signal being treated, some make-up gain is needed to bring the peak signal level back to where it originally was. In other words, although compressors really just turn down loud sounds, once you’ve adjusted the make-up gain control, the loud sounds are back where they were and the quieter sounds are much louder. The quietest of quiet sounds is noise, so if you’re compressing to achieve 10dB of noise reduction, any noise that happens to be part of the signal will also be increased by 10dB for all input levels that are below the threshold. Periods of silence between words or phrases are most vulnerable, as it’s here that the compressor gain is highest. As well as starting off with the cleanest signal you can, it might be wise to gate the signal before it enters the compressor. Some compressors have built-in expander gates for this purpose; used properly, they really can make a difference.
Affecting the Top End
As we have already discovered, compressors can be most usefully thought of as automated faders, but on occasion their action can be somewhat at odds with the way that audio behaves. We know already that the production of bass frequencies requires far more energy than a loud high- pitched sound, and a great deal of contemporary music and subsequent energy is derived from the bass kicks, synths or guitars. When you come to mastering, placing a compressor on the overall mix means the compressor will respond to these frequencies in such a way that when a loud bass kick is played, for example, the level of the entire mix will be reduced for the same duration as the sound that the compressor is acting upon. Unless the amount of compression has been subtly applied, you will experience an audible pumping of the higher frequencies as they are reduced and returned to normal. You can set the attack time long enough to allow for the high-frequency transients to remain unaffected, but this is not always achievable and in some instances a faster attack time will be required to achieve a tighter overall finish.
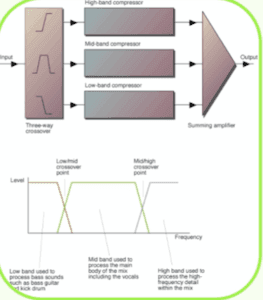
Enter the multi-band compressor as one solution to this problem, but not to be outdone, software designers of conventional compressors have come up with rather clever ways to counter this issue. Some designs employ circuitry that allow for a small amount of the high-frequency signal to bypass the effect of the compressor, meaning that the top-end remains unaffected by the compressor’s response to loud low-end amplitudes.
Although interesting, the technicalities are really matters for the software or hardware designers. What we as producers and engineers are primarily concerned with is the effect on the music that we are shaping. So with this in mind, use the knowledge you have gained here and listen to the different effects that we have described. Learn how to control your compression techniques so that it becomes more of a science than a hit-and-miss affair.
Limiters
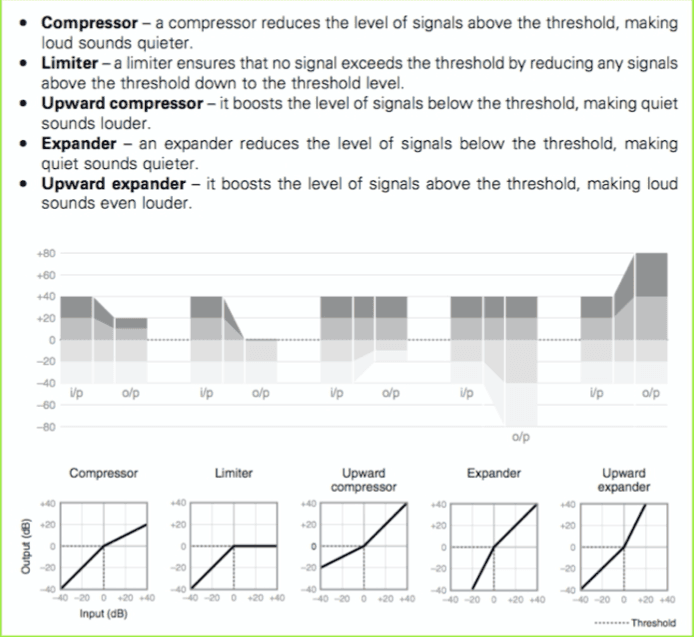
A limiter is a type of compressor designed for a specific purpose – to limit the level of a signal to a certain threshold. Whereas a compressor will begin smoothly reducing the gain above the threshold, a limiter will almost completely prevent any additional gain above the threshold. A limiter is like a compressor set to a very high compression ratio (at least 10:1, more commonly 20:1 or more). The graph below shows a limiting ratio of infinity to one, i.e. there is no gain at all above the threshold.
Limiters are used as a safeguard against signal peaking (clipping). They prevent occasional signal peaks, which would be too loud or distorted. Limiters are often used in conjunction with a compressor — the compressor provides a smooth roll-off of higher levels and the limiter provides a final safety net against very strong peaks.
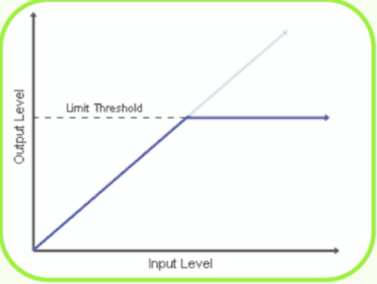
Limiters can be used as mentioned here at the recording stage to prevent digital overload, and are almost always used nowadays for mastering.
Compression in Practice
We have discussed at length the technical aspects of compressors; now it is time to look at the more practical applications.
An important tip for those going mixerless: before you buy a n audio interface with built-in preamps, consider if you will ever want t o add a compressor. If you think you will, make sure the audio interface has inserts or sends. If it does not, there will be no way to add a compressor to the rig without buying yet another preamp. Those buying a mixer should take care that the mixer has direct outs or inserts, though you can get b y using the alt 3-4 buss
There are 3 places i n the audio chain where compression can be used to enhance your work of art. They are:
The Recording Chain
The tracking chain and the mix down chain. We will spend a little time on each one The Recording Chain. Here the compressor is put on a direct out or insert of the mixer which takes the microphone signal after it is boosted by the preamp. Other methods are to place the compressor “in-between” a microphone preamp and an audio interface, or on the inserts of an audio interface or preamp.
The purpose here is to optimize the material for the recorder. You want to make sure all low -volume passages actually do have a strong enough level where they won’t bring in noise later, and you also want to stop loud “peaks” from overloading the recorder’s input, which will ruin the track. That is compressor theory 101.
However, there is a strong bias among those recording to computer sequencers not to record with compression, but to record at 24 bits. The idea is that 24-bit audio offers such a significantly lower noise floor it is best to simply record at full dynamics (louds and softs) at a level so low that the highest peak will never approach 0db fs. When you have the audio recorded as pristinely as possible, then you apply compression in the digital domain, usually, with a plug-in.
Even recording to analogue tape, or 16 bit files, you can decide to avoid compression while recording, if you are good at riding the gain or you have performers that understand how to position themselves with the microphone (meaning they back off a few feet before letting out the loud parts, and eat the microphone when they whisper). However, the more out of control your performers are, the more likely you will need compression as you record. It is also true that some people like to record through compressors because they want to work that way. Finally, if you are recording live audio direct to a twotrack stereo feed, say, for live T V, you may simply have to have a whole lot of compressors working for you, particularly on the vocal channels.
There are many products specifically designed for the task of compression. If you see a mic preamp on a single channel compressor, these are designed for this part of the chain. Sometimes these are called vocal compressors. But like any other gear, you can use it for other uses too, such as guitars, acoustic instruments, etc.
The Tracking Chain
Once you have your audio tracks recorded on your computer or multi-track, you will be in the process of tweaking each track to make it sound the best it can, in reference to all the other tracks. Here the compressor is added as an insert on a mixer. That is, the signal goes out of the fader, goes through the compressor, and then goes back to the fader’s channel. If you recorded your vocals and acoustic instruments without compression, and you are mixing on an analogue board, you almost certainly have to use one here to get the track up to spec. This can be done in the computer sequencer’s mixer with a plug -in, in the multi track if it has onboard compressors, or you can do it on an analogue board via inserts o r busses. No matter how you mix, the idea is to get the tracks uniform, so you don’t have instruments or vocals suddenly dropping out because they went soft on you.
You may also need to clamp down on those pesky peaks. Compression helps. If you have a single guitar note that peaks 15 db higher than the rest of the material, for example, your whole track will have to be mixed 15db down, which will definitely put it in the background. The compressor, b y clamping down on that peak, allows the whole guitar track to be boosted higher in the mix, where it can, at least, be heard
Compressors can also be used as effects in their own right on drum tracks. Drums are “peaky” by nature, and by clamping down on the peaks you can make the drums louder and fuller-sounding. If you have ever heard any strong rock drums on the radio, you are hearing drums squashed down with compression and then boosted with volume. Drums without compression cannot hold up next to screaming vocals and distorted guitars. The same is true even for light jazz, where the engineer might only compress enough to tame the peaks without affecting the transparency of the audio.
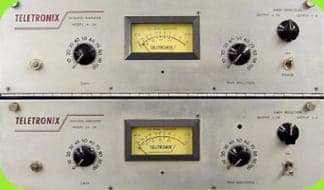
A classic compressor such as the U A LA2A is a nice choice for a vocal track. It helps keep the vocal above the band in a very pleasing way. But you won’t be finding too many of these at your local pawnshop. Thanks to software modelling you can have an authentic replica of the LA2A o n your sequencer track.
The Mixdown Chain
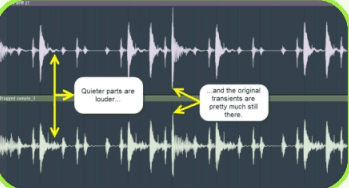
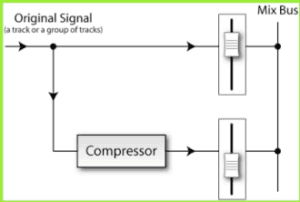
In the mix, a variety of compression techniques may be used. Compressors can be put on busses or even on sends and returns to affect (and effect!) certain parts of the mix. An advanced mix technique is often called ‘Parallel Compression’, where the uncompressed source tracks are mixed in with the compressed signal coming back on a return or on a bus. The advantage here is that the compressor fattens the overall sound, yet the peaks (which come from the source signal) remain clear and ‘on top’ of the compressed signal. Parallel compression can work for drums and vocals, or anything really. It can also be done with groups of tracks.
But sometimes there is a temptation to put the compressor on the master bus (the main outs) particularly among beginners.
OK, a compressor may be added here too, and can have a dramatic affect, for better or worse. Some professionals advise against using compression here. Particularly if you are sending the mix to a mastering house for CD replication – let them use their gear. However, if this is a A classic compressor such as the U A LA2A is a nice choice for a vocal track. It helps keep the vocal above the band in a very pleasing way. But you won’t be finding too many of these at your local pawnshop. Thanks to software modelling you can have an authentic replica of the LA2A on your sequencer track. home CD production, you will have to master it yourself. But as before, you will need to exercise caution. See if your mastering software has any software tools for the finalizing task. Mix to a wave without compression and use a mastering processor there. But if you are mixing down directly to a CD recorder or DAT and this is the last stop, then go ahead and compress the mix. If done properly, the whole thing will come out louder and stronger.
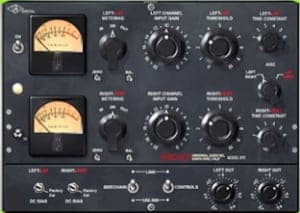
There are some exotic compressors like the Fairchild, which has been modelled by UAD and Waves, which is designed to be strapped on a 2 – channel mix. These impart a character on the whole mix in a pleasing way. Universal Audio has released a hardware replica of their famous 1176 Limiting amplifier. You can also get an 1176 in software in the UAD2 system.
What Comes First, Compressor or EQ?
This is a question that is often asked and whilst the general consensus is t o place the compression before the EQ, it really depends o n what sound you are looking to achieve.As a rule, using EQ in front of your compressor produces a warmer, rounder tone, while using EQ after your compressor produces a cleaner, clearer sound. So, the question you
need to ask yourself for each channel in your mix is. Do I want to EQ the compressed signal or do I want to compress the EQ’d signal? What sound do I want for this signal?
Having said this, there is one pretty straightforward reason why you should consider compressing first, particularly if you are new to processing techniques. Let’s say, for the moment, that you’ve already set u p a c ompression sound you like for a particular track in your mix, and then decide to use a pre-compression equaliser to adjust the track’s tonality. Any boost or cut you apply with the EQ controls will change the overall level of the signal relative to the compressor threshold setting you’ve already chosen, and will therefore mess with your carefully tweaked compression sound, unless you keep revisiting the threshold and/or ratio controls to compensate. Pre-compression EQ also usually appears less responsive than post-compression EQ, as the compressor’s gain changes fight the EQ gain adjustments. This can b e disconcerting when you’re still getting to grips with this kind
General Tips for Compression
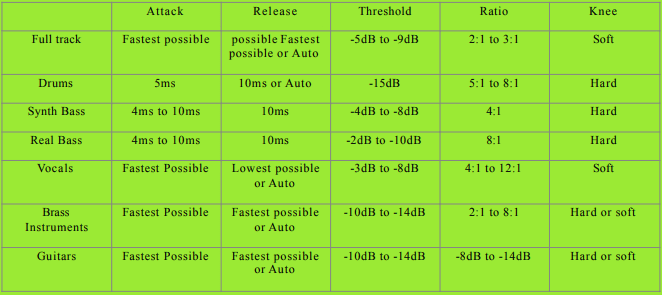
The following instructions and table is intended as a general reference guide to help get you on your way.
1. Turn your compressor on and set it to soft-knee
2. To begin with, set the compressor’s ratio to its minimum of 1:1 – typically – and the threshold as high as it will go. These settings will make the compressor inactive but still within the signal path.
3. If using an analogue compressor, set u p the compressor for unity gain throughput. Most units h ave hash marks, typically labeled 0 dB, screened around the input and output control knobs. If your unit provides those reference marks, set both knobs at 0 dB for unity gain. If no marks are provided, you’ll either need to call the manufacturer to find the unity gain for each knob or use a tone generator in conjunction with the unit’s input and output meters to determine unity settings. If the compressor has no input meter, you’ll have to rely on the manufacturer’s word. To determine unity with a tone generator (the one in your console will do), feed a 1 kHz tone to the compressor’s input and set the input-control knob so the compressor’s input meter reads the same level as the tone generator’s output. Then switch the compressor’s meters to show output levels and adjust the compressor’s output control knob for the same reading. It’s not a bad idea to mark unity gain settings for future reference
4. Next you should set the attack and release parameters to an average value of around the 1 2 o’ clock mark and start to move the ratio u p to around 2:1 or 3:1. These are mild settings and will ensure that you do not over-compress the signal. Make sure you can observe the gain reduction on the compressor and begin to lower the threshold until you reach between 4 –6dB gain reduction on the peaks. The most important part here is that you ensure that the lowest signal levels do not exceed the threshold and trigger the compressor.
You do not want the quieter parts to kick in the compressor.
5 . Having set the threshold, you can begin t o vary the ratio, attack and release time t o taste. If more compression is needed then you can increase the ratio and if you need less then reduce. If you only want to compress the peaks then use a faster attack and release time and slower ones for a denser natural sound. Above all, let your ears be the judge.
6. After finding settings that provide the results you want, adjust the output control to make u p the gain that was lost to gain reduction. O f course, you can add more or less than that amount if you wish, but don’t boost the compressor’s output if doing s o requires you to lower the input o n the next device or channel mixer.
Choosing the Ratio:
As a rule, different instruments will demand their own set of compressor parameters and we will spend a little time outlining some possible suggestions for you to start practicing with. Taking a near-perfect recording of a vocal track for a gentle ballad, a ratio setting of 2:1 will be soft enough to deal with any major peaks, and with an appropriate threshold setting the vocals should sit nicely without the quieter phrases becoming lost and the louder phrases becoming overpowering. On the other side of the spectrum, bass guitars – which alternate between mellow finger-pad styles to the more aggressive pop and slap technique – will have large fluctuations in dynamic range. To achieve a greater degree of control, a ratio setting of 10:1 will probably be more appropriate.
It is important to note that the ratio and threshold work together to alter the output of the signal: the lower the threshold, the lower the signal level subject to compression. The relationship between the two controls affords flexibility and sonic variation. There are, for example, two differentsounding ways to get the same amount of gain reduction out of a compressor — low threshold and low ratio or high threshold and high ratio.
Some Examples:
Vocals:
One of the main uses of compression as a n effect is recording vocals. Trained singers can sing at a consistent level and keep the difference between loud and soft passages within acceptable limits. Untrained singers usually don’t have the same degree of breath control. Indeed, singing according to the rulebook involves breathing from the diaphragm rather than the chest, and this does not form part of the vocal style of many of the most popular vocalists, so we need to compress. Compression is used to bring down the highest peaks, above the threshold level, leaving the lower levels just as they were. After that the level is restored so that the peaks are the same level as they were to start with, but the overall dynamic range is reduced. The result is a much more controlled sound
Drums:
Unlike drum machines, live drummers will hit with differing degrees of amplitude, so compression will be an essential part of regaining the dynamic control of the recording. The
kicks and snares are nearly always compressed, and doing the same to the overheads will help bring about a more consistent-sounding kit. Side-chaining can be very effective, but you will need to watch out for the high-frequency cymbal timbres.
Compressing drums is a highly subjective topic. It always depends o n the style of the music. For example, the song we’re using a s our reference is an alternative rock song. Heavily compressed drums fit well with the overall sound. If you’re recording jazz, folk rock, or light country, you’ll want to use less (if any) compression. The best advice I can give you is to experiment with these techniques, and decide, along with the drummer you’re recording, what works out best.
There are many ways to approach compressing drums. One technique is to insert a compressor o n the drum buss and compress the overall drum mix. If I employ this technique, I
usually am looking to reduce some of the higher peaks of the drum kit. Most of the time I will only run the kick, snare, and toms into this type of configuration because I don’t
want this to affect the attack or sustain of the cymbals. The ratio, attack and release time will vary depending on how fast and percussive the material is.
Here is a guide:
· To start you can set the ratio at around 4:1 with a fairly fast attack (around 8 -15ms) and a fairly fast release time of 30 to 100ms.
· Be careful not to use an attack time that is too fast (unless that’s the sound you want) or you will lose transient information.
· Change the Threshold up and down until you get the sound of compression you are looking for.
(Parallel Compression Routing)
Another technique, Parallel compression (also known as New York compression), is very effective. The basic technique involves running an aux buss with heavy compression routed to the mix buss in parallel to the unaffected drum tracks, or cloning the drum tracks and having one set of tracks running into the mix buss without effects and the other set of drum tracks with a compressor on a separate buss; both are then sent to the mix buss. This technique will give you the ability to mix the compressed drums in with the uncompressed drums. You can use high compression ratios and a low threshold to mix with the unaffected drums, bringing up the lower level subtleties in the drum track without loosing the transients inherent when using fast attack times. Add low-level compression on the unaffected mix to add more continuity.
Another technique is to EQ the heavily compressed aux buss, which will produce some interesting effects. Try the EQ before the compressor and then after the EQ in the effects chain.
Guitars:

Other sound sources you might want to compress include acoustic guitar or a clean electric guitar. Compressing an acoustic guitar will result in a smoother better-sustained sound, and with practice, you should be able to increase the compressor attack time to get a desirable ping at the beginning of each chord or note. There is generally no advantage to compressing heavily distorted guitar, aside from a slight sustain. The reason is that the mechanism of an overdriven amp will already have some form of limiter in place. Generally all that will occur is a gain increase of background hum and hiss. Probably not what you want!
Acoustic instrumentation is generally prone to revealing unpleasant compressor artifacts – far more so then electronic instruments. So for ‘invisible’ gain control, use your most transparent compressor, set to soft-knee if there’s a choice, and a fairly low ratio, probably 4:1 or even less. Set the threshold to give you just as much gain reduction as you really need, and if there’s any sign of pumping, increase the release time until it stops. A fast attack time will retain the natural attack of an instrument or voice. If you need a more defined attack for a percussive instrument, though, the compressor attack time can be slowed slightly.
If using electronic instrumentation, you can compress this in the same way that you would for their acoustic counterparts. But you should be aware that many of the electronic sound sources will have already been compressed. As such, you may well find that adding more compression will do little in th e way of adding any extra punch or density.
If it is more punch and snap you are looking for, on a snare for instance, then set a slower attack of something in the region of 1-5ms. This will allow for the initial crack of the snare to be heard before the compressor kicks in. You can achieve similar results on other instruments, but it works best with sounds that possess a hard attack.
Different Sound Compression
Given as we discovered last lesson, each piece of technology that you use will possess its own set of characteristics and resulting sound. Each compressor will also have its own unique sound and many different sounding compression engineers will use the particular characteristic of a compressor to colour the sounds in place of the equalization process.
If you are familiar with the sound of your compressor, you may be able to use it to achieve the desired EQ . Some compressors, for example, can be quite transparentsounding, whilst others can colour the subsequent sound. With cheaper compressors the result can be unfavourable, whilst the more expensive ones can yield very musical results. The latter compressors have tended to become the ‘classics’ as a consequence.
Whenever you are looking to buy studio equipment, like most things in life, it will generally be down to the timehonoured ‘you pay for quality’ premise. If you want to achieve the kind of sound that you hear on your much – admired commercial recording, you are unlikely to get it through budgeting on your equipment. The rise of the home -recording studio has undoubtedly incentivised companies to produce some very good budget equipment and software applications, but even so, the top -end gear will offer markedly superior-sounding finished results – if used correctly of course. Flaws in the cheaper brands will usually begin to appear when driven hard, and over EQ’ing and compression will start to corrode the audio fidelity. Although, it must be said, simulated software algorithms are becoming increasingly more proficient at their task and there are some superb software equivalents on the market today.
Compressor types
Out of all the musical production processes, compression is perhaps the most misunderstood. To the untrained ear, the subtle effects of compression can be hard to decipher, and often result in unnecessarily over-compressed distorted audio. As we have discussed, the various compressor parame ters work together and subtle changes can make big differences in the wrong direction. Another problem, which we touched on with equalization brands, is the amount of dials and knobs, which can be bewildering to even a highly proficient engineer. It is far better to get to learn and master your favourite one then attempt to understand of them all! As if this wasn’t enough, there have been different designs that utilize different types of technology, each with their own set of unique sounds and characteristics. We will spend some time covering them now, so you are, at least, aware of their existence. Other than that, choosing your particular favourite will be a matter for your subjective taste after sampling them.
Gain reduction could be divided into five types based on the electronic method used. Knowing how they each work on a simple level will help you in proper selection and to understand why certain units always seem to excel in particular applications.
Optical Isolators
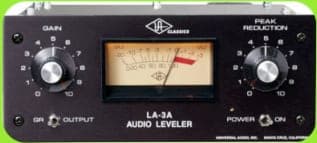
The optical isolator section of compressors uses a light bulb (or an LED) to glow brighter or dimmer in response to incoming audio. A photocell (or phototransistor) is used to track the varying brightness o f the bulb and change gain accordingly. This is a good example of an average – re sponding detector. The inherent lag time that the bulb/photocell has in response to the audio is factored into the attack and release time performance. The Universal Audio LA 2A Classic Levelling Amplifier and the transistorized UREI or Universal Audio LA-3 levelling amps are examples of this type of compressor. Compressors using this method are used a lot for bass guitar, vocals, program mixes and drums. These compressors offer simple, natural sounding control (unless pressed hard). Vintage-style optos generally have only two control knobs, typically labelled gain reduction and gain. Turning up the gain reduction knob feeds more signal to the opto cell, effectively lowering the threshold and causing more compression. The gain knob sets post-compression output level, or make -up gain
Optical compressors, especially those that don’t use very well-behaved integrated optical circuits (or those that use them imaginatively), usually impose more of their own character o n the material being treated, making it sound larger-than-life. In this context, the compressor is as much an effect as a gain-control device, and this is why these compressors are popular for treating vocals, drums and basses.
FET
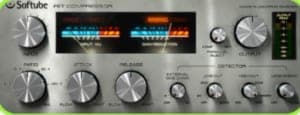
Field Effect Transistor compressors use a special transistor to vary gain. FET’s were the first transistor to emulate the way that tubes worked internally. Inherently a high-impedance
device, the FET compressor sounds like no other box, and not many examples exist because of the expense of the extra attendant circuitry required. FET compressors are extremely
fast, clean and reliable. I like to use these on vocals where a healthy amount of compression sounds good, and on drums (for room microphones or individual drum microphones). Universal Audio’s 1176LN Solid State Peak Limiting Amplifier and LA Audio’s Classic II Dual Compressor/Limiter are examples of FET-based compressors. FETs offer attack and release times that are much faster than optos can provide, and even faster than many VCAs. The downside is FETs have a somewhat limited dynamic range. In traditional FET designs, very hot levels can cause amplitudemodulation artifacts (for example, pumping) and waveform distortion.
The UREI solid-state 1176LN Limiting Amplifier (late 60’s) has become a standard in the recording industry, and w e have seen lately few reissues (by Purple Audio and Universal Audio, selling for around £1300). It exists as well in various plug-in formats (UAD card, Mackie, TDM). It is great on electric guitars, bass, live drums and vocals. Whereas the LA2 A shines on thin, piercing vocals, the 1176LN sounds particularly flattering on woolly vocals by improving clarity and intelligibility.
VCA
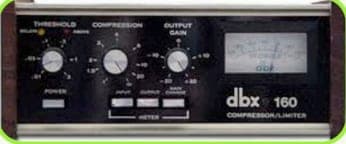
Voltage Controlled Amplifier compressors are the most versatile of all, and so are the greatest in number. The VCA can quickly change gain in response to many different detectors looking at the same signal. VCA compressors are for the really tough cases where you want strict control over level and dynamics. However, they can be as gentle as any other compressor – or anywhere in-between. I like a good VCA compressor on vocals, drums, guitars, synths, and bass, an entire mix – basically anytime I need a compressor.
However, VCA -based compressors’ quality ranges widely, and some units sound far better than others, such as the DBX 160 (fast and full of character), SSL desk (a classic in mix compression), Focusrite (more transparent, great for mastering), and many others. The original DBX 160, a fast and furious VCA compressor, really keeps those peaks under control, with plenty of character.
Vari-Gain Compressors
Variable Gain compressors include all units that incorporate discrete circuitry other than VCA’s, FET’s or opto-isolators. I put the Manley Variable-M u tube unit in this category, and I like using these types for vocals, drums and a stereo mix. The first compressors ever made incorporated a Variable M u design, using a vacuum tube for the gain control
element. Variable-M u compressors d o not offer an adjustable ratio control. What people love about the Variable-M u compressors is that they continuously increase their ratio the harder they’re pushed , resulting in a n increasing densification of the sound.
Though Vari-M u compressors offer faster attack and release times than optos, they are not as fast as VCA designs, and therefore they’re not as effective at handling peaks as
VCA-based units. Also, as a class, Vari-M u compressors cannot produce as much gain reduction as other types of compressors because the employed tube typically runs out of dynamic range sooner than other types of gain-control elements. A Vari-M u usually gets 12 to 15 dB of gain reduction and sometimes considerably more.
On the plus side, the best of them sound really FAT. Few Variable-M u models are currently o n the market (The Manley stereo compressor costs £3000).

With its 14 transformers, 20 vacuum tubes, and 6 rack-space encompassing girth, the Fairchild 670 (mid 50’s) is the heavyweight champion of compression, weighing in at 6 5 lbs (costing around £20,000 secondhand & extremely hard to find). Originally used for mastering applications, rock drums wouldn’t be the same without it. Some nice plug-in simulations are around but yes, you guessed it, they’re not quite the same.
Its unique compression curve has n o real knee but is a continuous curve giving increasing compression with signal level. The curve even bends into slight expansion of the lowlevel signals, hence the fatness.
Valves:
You have probably heard many a n engineer sing the praises of good valve equipment for the lush warm tones that they are renowned for. When driven hard, tubes generally produce more even -ordered harmonics than the solid -state models, and also tend to saturate in a more gentle, pleasing fashion. However, good solid-state gear can offer a more focused response with greater transient detail. It will b e useful to know that some compressors are marketed a s tube processors despite having a solid-state device in the audio path. Purists maintain that a compressor cannot be heralded as ‘all tube’ unless the gain control is also delivered via tube design, as in the variable-M u models. But a well-designed tube output amplification stage is certainly capable of provided the rich well-rounded tones that we would expect of the tube device.
Irrespective of this, just because a compressor is lacking a tube does not mean that is not capable of issuing a full, fat sound. And it is worth noting that even some tube devices can sound terrible. It is, as before, a case of getting what you pay for, and the high – end quality tube gear is unsurprisingly not particularly cheap.
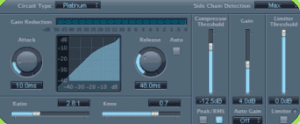
Whilst the top-end hardware is generally superior, digital software by nature of its design does have one a dvantage unique to its type. The facility to ‘look ahead’ is a feature that many digital models provide, giving it the ability to analyze the process that is about to take place and place the attack on the onset of the sound or even before it. This results in a zero attack time, which is great for catching the transients. It is to be used carefully though, for as we outlined earlier, in many instances we want the initial crack of the snare to evade the effect of the compressor, so use it with sensitivity.
The biggest downside for software compressors is their quality. There are good ones, but many can drain the audio of its life, leaving a flat, dull quality. The sound would not be a reflection o f the engineer, it’s just the way that they are. You may well be familiar with some of the plug-in applications that have enabled pretty competent, affordable simulations of the real thing.
Native or DSP
Native plug-ins run on your computer's own CPU. DSP plug-ins run on dedicated processors somewhere else - a card, or an interface with chips of its own - so they cost your computer nothing. That distinction used to decide what you could and could not run in a mix. It matters far less now: a current Mac will carry a large session of native plug-ins without complaining, and DSP has become a specialist choice rather than a requirement.
The formats worth knowing:
AAX is Avid's format, and it is Pro Tools only - you will not load one into Logic. It comes in two flavours: AAX Native runs on your CPU, AAX DSP runs on Pro Tools HDX hardware, which is what you find in commercial studios. If you see a plug-in advertised as TDM or RTAS, those are the older Avid formats AAX replaced in 2013.
VST, developed by Steinberg and now in its third version, is the most widely supported format there is. Nearly every DAW on Windows and Mac loads VST3 - with one notable exception, below.
Audio Units (AU) is Apple's own format, Mac only. Logic, GarageBand and Final Cut Pro are AU-only and will not load a VST at all. In practice this costs you very little: almost every developer ships AU, VST3 and AAX in the same installer, so buying a plug-in for Logic is rarely a question of format.
A Few Recommended ‘Quality’ Plug-ins:
Waves covers an enormous range, from clean workhorse EQs and compressors to the SSL emulations made with SSL themselves, modelled on the EQ and dynamics of their mixing desks. Available in every format that matters, and a professional tool for both mixing and mastering.
UAD plug-ins are the best-known emulations of the classic hardware - Fairchild, Pultec, Urei, the old Neve and API circuits. They used to need UAD's own DSP hardware, and they still run on it, inside Apollo interfaces and Satellite units. Most of the range is now also sold in native versions that need no hardware at all, which is how most people buy them.
Dedicated DSP cards have largely gone. TC Electronic's PowerCore and the plug-in cards that went with it were discontinued years ago; what replaced them is DSP built into the audio interface itself, which is the Apollo approach above. Nothing is wrong with the idea - it is just no longer something you buy separately.
Use Your Musical Ear
So now you are armed with all the technical and practical knowledge needed to make some informed decisions, the rest is up to you to go and explore the options. It is clearly important that you choose the compressor that is going to do the job i n hand, but i n all honestly, even though the differences between the types of design are important, they
are not as important as the engineer using it. If you are looking for an exact science on the subject, you will be disappointed. Sounds are unique and, as such, demand a unique set of parameters. There are a host of different variables to consider, including the unit’s detectorcircuitry response, the amount of peak versus average energy in the track you want to process, the dynamics of the performance, what kind of envelope shape or sound is present, the outboard gear’s noise floor, and so on. We can offer you general guidelines, but it will be up to you to train your ear and learn the trade.
Being told to ‘use your ears’ may seem a bit of a cop -out, but it is ultimately the ear that needs to be trained. Like anything in life, you can do as much theory as you like, but
it can never replace the process of actually doing things over and over again. Using your ears will b e the best and only way to evaluate and make good judgements on the sound that is being produced. Use the bypass button, and see if you have made any improvement to the sound, or whether it has been corroded. If it sounds wrong, you are either using the wrong compressor for the job, or you have set the parameters incorrectly.
“Go forth and compress to impress.”
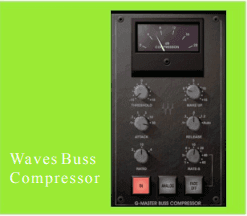
Group Compression
We have discussed the ways in which a number of instruments can be grouped together to be sent to the same effect unit, preserving processor power and creating a sense of unity between the selected groups. Compression can be used in the same fashion and is particularly effective when grouping instruments of the same type together – backing vocals, drums, horn sections, etc. You can really start to exploit a number of different effects, including what is more commonly known as the’ pumping effect’. This is an effect that really comes into its own when you start to hear the gain-reduction being driven quite hard. When compressing a n overall mix, the kick will often trigger the gain reduction to the extent where the whole mix quietens. This is not always good, as previously touched upon, but for certain groups of instruments it can be quite effective. This technique is often used in rock productions. If you are looking t o get a more obvious effect from a transparent compressor, then you can increase the ratio and shorten the release time. As you shorten the release time the pumping affect will become more audible. Keep an eye on the gain reduction meter, as this will indicate the amount of gain reduction. If you are compressing while recording, 5–6dB of reduction should be sufficient, but when compressing a track that is already recorded you may need to use as much as 12dB (or for a really strong effect, even more). A trick here, if you are uncertain about the relation between the attack and release time, is to use a model with an Auto setting. If you d o not have one of these then set the attack time at its fastest, and the release time to between 300ms and half a second. If you’re using compression as an effect but don’t like that squashed kind of sound, then use the compressed channel as your main signal and then bring u p the unprocessed channel to restore some of the dynamics.
Some Practical Applications of Side-Chaining
De-essing
First note that most side -chains come as inserts (a stereo jack that accepts input & output, like on a mixing console), so that you can insert, for example, an equalizer. A typical
use would be de-essing vocals with excessive sibilance, where the S s sometimes are just a bit too much and EQ can’t solve the problem. There is a device called a de-esser, which is basically a compressor with a side-chain filter especially designed to attenuate high frequencies. However, you can emulate the effect of a de -esser using a compressor and an EQ inserted into the side-chain of the compressor.
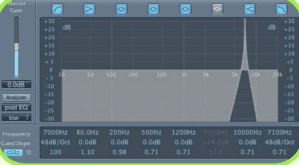
- First patch the send and receive from the compressor’s insert into an equalizer’s input and output, respectively.
- Next, boost the equalizer’s high frequencies and cut its lows and mids. That causes the compressor’s detector to hear the vocal as having excessive highs.
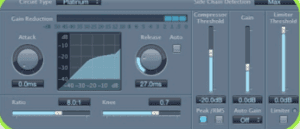
- Whenever the whistling sound of sibilance raises its ugly head, the sensitized detector circuit hears it much louder than it really is, causing the circuit to vigorously reduce gain in the audio path. With the attack time set to very fast and the release time between 50ms and 60ms, the compressor can be made to quickly attenuate the sibilance and get
out, so the rest of the vocal is left unchanged. Of course, the compressor’s threshold must also be set properly (above the vocal’s average levels) for that to work.
Ducking
You can also use a sidechain insert to make the detector react to a signal entirely unrelated to the audio-input signal (i.e. another audio track). The classic example here is called
‘ducking’ – a side -chain application in which an announcer’s voic e is set to trigger a music bed’s attenuation (used a lot o n radio). The result being that the music plays at a given level, and each time the announcer speaks, the music drops automatically in level (as set up with
the compressor’s settings)
- To set u p this type of ducker, play stereo music tracks through a dual-channel compressor and patch the voice-over track (or channel) into the sidechain insert’s receive jack.
- Next, set the compressor threshold low enough so that it responds to every vocal utterance. When the announcer speaks, the detector hears the voice and instructs the compressor to lower the music You can also use this technique to automatically lower, for example, guitar levels whenever a lead vocal comes back in. To accomplish this, patch the vocal into the insert receive jack of the guitar’s compressor channel.
Pumping Bass
Using the technique previously described, another ‘classic’ trick used in dance music is to attenuate the level of the bass when the kick is playing, so that the bass only plays in
between each kick, giving a ‘pumping’ effect. This works great with long bass notes, and can be used as a programming/sequencing trick
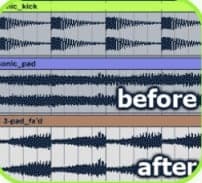
- First program a kick drum.
- Select a bass sound, and insert a compressor across its channel.
- Then patch the kick drums into the side -chain of the bass’s compressor.
- Now play the track. The compressor only reacts to the kick, thus attenuating the bass when the kick triggers it.
- Now if you play long bass notes, instead of hearing a continuous bass sound, you will notice the bass creeping in between each kick – that’s the ‘pumping’ bass.
- Experiment with the settings to get the best effect. The attack and release define how quickly the bass creeps in and disappears, changing the groove slightly. The threshold and ratio define the differences of level in the effect (heavy compression usually works best), and I find that sometimes digital compressors do a better job, as they are less subtle – the bass completely disappears when compressed and then nicely creeps back in.
NYC Style Buss Compression Trick
Now here’s a trick that will give you HUGE drums – as used by many engineers on the Rock/RnB and Hip Hop scene.
1. Create a group channel track or buss and call it ALL DRUMS
2. Route the output of all your drum tracks into this group/buss
3. Create another group/buss, call this NYC and bring the fader level right down
4. On the ALL DRUMS fader send 100% level into the NYC group/buss
5. Bring down the fader on the NYC group/buss and add the following:
- a. A compressor with an 8:1 to 10:1 ratio, a fast attack and release, and a low threshold. Play the track and observe the gain reduction meter; we’re aiming for about -10dB reduction almost constantly.
- b. Add an E Q post-compressor with a low shelf boost at 100Hz of about 6dB and a high shelf boost of
about 6dB at 10-12kHz
6. Now slowly bring the level of the NYC group/buss up. You should notice the fatness creeping in! Don’t go too
mad as you can oversaturate things. If you feel you need a little more energy, adjust the compressor’s
Noise Gate Trickery
There are four main gate parameters (depending o n the
model): threshold, attack, release and control range.
1. Threshold determines at which level the gate opens, any signal below the threshold will b e unheard, a s the gate will be closed.
2. The ability to set the time it takes for the gate to open is known as the attack control. A fast attack means you won’t miss any sharp transients, such as drums, but on a more slowly attacking sound you might hear a click as the gate opens. For this reason, try to match the gate attack time to the attack characteristics of the sound you’re dealing with.
3. The release is the ability to control how quickly the gate will close once the level has dropped below the threshold. If this is set too fast, a long decay, such as a
reverb tail, might get cut short. O n the other hand, if you use a long release time with for example, a drum beat, you’ll hear the noise that follows the drumbeat fade gradually rather than quickly. Again, match signal release and gate release times for the best result.
4. The amount of attenuation when the gate is closed can be set by the range control (not every device has this parameter). Often there will b e complete attenuation meaning no signal will pass when the gate is closed. In some circumstances complete attenuation is not desired and the range can b e changed, s o that even when the gate is closed, there is still a certain amount of signal coming through. Because a badly set-u p gate can fail to open in the presence of quiet sounds, or close too quickly (chopping off the tail end o f a steadily decaying sound), gating while recording is risky, and is hardly used. You might get it right, but on the other hand you could ruin the only good performance of the day.
It’s far better to gate when mixing, a s you then have the opportunity to run through the track a s often a s you like when setting u p the gate. Furthermore, any noise added to the track during the recording process will also be gated.
Expert Use
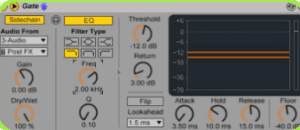
To illustrate how filters might be used is best achieved by example. Suppose, for instance, that you’re gating a snare drum and want to stop the hi-hat (which is bleeding though into the snare mic at quite a high level) from opening the gate. Without the filters, you can’t find a Threshold level where the snare drum opens the gate and the hi-hat doesn’t. However, the two sounds have very different frequency characteristics – the snare drum covers pretty well the full frequency range, while the hi-hat is strong mainly at high frequencies. It seems obvious that if you can prevent the high frequencies from getting through to the triggering circuitry, only the lower frequencies of the snare will open the gate. In this case, all you need to d o is turn down the high frequency control to 2kHz or so. You can hear the effect o f the filter in ‘Key Listen’ mode, and the object is to retain a s much of the snare sound as possible, while removing or reducing the contribution from the hi-hat. You’ll have to tinker with the threshold again, in all probability, but there’s now a good chance that you’ll b e
able to gate out the hi-hat completely, with no unwanted false triggering.
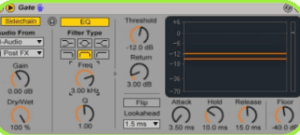
The next example concerns vocals: much of the background noise entering a vocal mic is probably low – frequency in character, since low frequencies tend to leak more readily than high. The human voice, o n the other hand, has very strong harmonics between about 1kHz and 5kHz, so set the L F and H F controls to these frequencies respectively. Achieving a p recise setting may be difficult, because you may now find that ‘s’ and ‘f’ sounds at the beginning of lines don’t have enough energy between 1kHz
and 5kHz to trigger the gate. In this case, lower the frequency of the L F filter until the gate triggers reliably but the low-frequency spill is still excluded. For very lowfrequency spill, a lower filter setting of around 250Hz might be more appropriate and is less likely to cause the gate to ‘miss’ wanted sections of vocal.
Chopping Effect
Most Noise Gates have a key input (sometimes called trigger or side-chain). A creative trick that the DS201 tackles extremely well is gating one sound from another. The key is the signal that opens the gate, and in normal operation it will be the same signal that you’re gating. But it doesn’t have to be. You can send one signal through the gate and use a completely different signal to switch the gate on and off. This trick works best with long sustained sounds, such as pads, strings, and is great with big guitar power chords as well as long notes in backing vocals
Insert the noise gate across the desired track.
- Now you need to select a sound to trigger the gate, usually a short percussive sound, like a Hi-hat.
- Patch the output from the module supplying the hi-hat sound to the key input of the same channel of the gate.
- Switch the key source to ‘ext’, so that the gate will open when you play the hi-hat sound.
- Now play the track. The gated sound only opens when you play the hi-hat. Once you’re happy with a pattern, record the hi-hat pattern in your sequencer.
- You may need to adjust the threshold setting to get this working cleanly.
- To fine tune the effect you may want to adjust the attack, hold and decay.
- Since the hi-hat is a very short sound (at least, I hope you used a short one), you shouldn’t have any trouble with jitter and you’ll have complete freedom to set the envelope of gated sound according to the needs of the track. If you set a long attack, you might need to advance the hi-hat so the gate opens a little bit earlier.
- Hold, you will find, sets the length of time the gate will stay fully open, after which it will close abruptly. Decay sets the time it takes for the gate to go between fully open and fully closed once the level of the triggering signal has descended below the threshold. This allows you to experiment with various envelope shapes. Gates with no hold control are a little more restrictive in this department.
Deep Bass:
Let’s consider now an example of non-MIDI multi-track recording. You may find that the bass drum you recorded didn’t really have the depth of sound or produce the degree of satisfaction you were looking for. You could, by other means, replace the bass drum with a triggered sample, but then you’d lose the natural sound and the subtlety of real drumming (and even after all these years of MIDI, good drummers are still worth their weight in gold). Another solution is to find a low-frequency sine wave from somewhere, from your console’s oscillator, your Akai S1000 or synthesizer, and patch it to the gate’s input. Route the real bass drum to the key input (while still including it in the mix) and carry out the external triggering procedure as before. Now you’ll get the bass drum plus a low-frequency pulse to mix in to provide all the beef you need. You’ll probably want to experiment with the frequency of the sine wave (don’t blow your speakers!) and with the attack, hold and decay of the gate, so that the addition of the sine wave isn’t too obvious.
Tightening up vocals (or else for that matter)
A clever use of a gate’s external triggering is to make particular parts start and finish at the same time. It’s common with backing vocals that the starts and ends of the lines can get messy. To deal with this, mix the whole lot into a subgroup and send it through the gate. Use the backing vocal with the best timing as the trigger for the gate and you’ll find that the whole thing has tightened up considerably. This technique won’t do anything for discrepancies in timing during the line, but the start and finish are really the most important things to get right. This trick works well on sloppy horn sections too, for example.
Gated Reverb
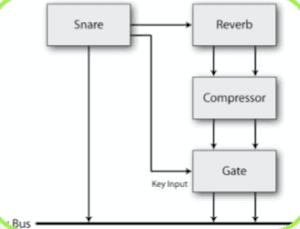
Just to finish off, let’s take a look at gated reverb. Nowadays, we invariably use the gated reverb preset on our trusty multi-effects units, but sometimes the traditional ways are still best. Remember that big Phil Collins snare sound.
The best way I find is to feed the dry signal to the key input (in our example the snare) and the dry signal plus reverb, or even the reverb only to the normal input of the gate. In this way you have full control over the gating, and you can get a very wide range of reverb envelopes, which are normally not available with multi-effects units. You can also use this technique with real reverb, if your bathroom or stairwell is big enough.
Ducking
The most widely used form of ducking is by radio presenters who need the ambient sounds to be reduced whenever they speak. If you listen attentively to a football commenter you will notice that background noise drops as they begin their tomes. In ‘duck’ mode a gate can simulate this effect. The music signal is routed to the input and the voice signal is fed into the key input.
The range control is used to set the level to which the music will drop when the ducker is triggered from the key input, and the envelope controls determine the rate at which the level will drop and then recover. It is usual to select a fairly fast Attack time (so that the music level drops rapidly as soon as the announcer begins to speak), with a slow release time of a second or so. This will bring the music level back up slowly and smoothly, and is less disconcerting to the listener. This same technique can be used to reduce the level of other instruments, i.e. during lead vocal, solos, etc…
Extra tips
- Always gate signals prior to adding reverb if you can – gates can easily chop off the tail end of a long reverb. Furthermore, if you add reverb or echo after gating, any minor gating artifacts may be completely hidden by thenatural decay of the reverb or echo. Any noise added to the mix by the reverb unit should be negligible providing you’ve paid attention to the gain structure and level setting when adjusting the effects.
- Don’t always set your gate to fully attenuate the signal when the gate is closed. In some situations, it may sound more natural if a low level of background sound is still audible between wanted sounds, and when working withdrums, you’ll find the gate opens faster if the range control is set to around 12dB rather than to maximum.In a busy mix, try ‘ducking’ mid-range instruments such as overdrive guitars and synth pads under the control of the vocals, so that whenever the vocals are present, the conflicting sounds fall in level by two or three dBs. Just a little ducking can significantly improve the clarity of a mix. Use a fairly fast attack time for the ducker (which may be either a compressor or a noise gate that has ducking facilities), and set the release time by ear. Shorter release times will cause more obvious gain-pumping, but in rock mixes, this can add welcome energy and excitement.
Try rolling off some low end and occasionally taking out any excessive top end. This is sometimes known as spectral mixing, where each sound or instrument is given its own space in the audio spectrum. A good example of this is the acoustic guitar, which, in a rock mix, can muddle the low mid. If you roll off the low end, you still get plenty of definition, but the mix will seem far cleaner. Side-chain filters on noise gates (set to Key Listen mode) are often very good tools for trimming the high and low ends of sounds without unduly changing the section that you want to keep.
Five Simple Ways to Add Punch to Your Drum Parts
We are now going to take a look at how to add punch, shine and edge to your drum parts. So whether you have a cool drum loop that lacks that certain something or an entire drum group that needs a lift, these simple steps should point you in the right direction.
You can more-or-less ignore the specific DAW or plug-in I will use as these techniques are generic in nature. You should be able to easily recreate the results I achieve here by using a similar plug-in your chosen DAW.
Step 1: Simple Gating
One of the most effective ways to add focus to any drum part is the use of a simple gate. I have friends who are producers who literally swear by this production technique. The beauty of using a gate to effect your drums is that it’s super quick and leaves the core characteristics of your drum sound untouched.
Simply insert a gate plug-in on your drum group or loop channel and move the threshold all the way to zero. At this point you should hear nothing as the gate will be completely shut. This is also a good time to change any attack, hold and release functions to zero.
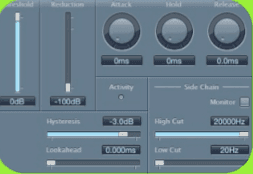
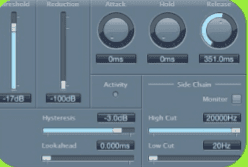
With your gate in this initialized, silent state you are ready to start processing your drums. Slowly bring down the threshold until you hear the peaks of the drum part trigger the gate. Now keep going until the main drum hits are almost completely exposed. You can now alter the release setting to bring the other parts of your loop into focus.
What this achieves is a basic ‘cleaning’ of your signal. Excess reverb, delay and general noise is reduced and the focus is returned to the main hits. This can be perfect for treating a sampled loop that is perhaps a little busy. Remember you can also use gates to clean up single drum hits that display similar issues.
(The initialized gate)
(The threshold and release are finely tuned.)
What this achieves is a basic ‘cleaning’ of your signal. Excess reverb, delay and general noise is reduced and the focus is returned to the main hits. This can be perfect for treating a sampled loop that is perhaps a little busy. Remember you can also use gates to clean up single drum hits that display similar issues.
Step 2: Surgical Equalization
If you’re serious about your beats and drum production, the humble EQ has to be part of your essential toolkit. Even tiny tweaks here can make the difference between something dull and lack luster and a full, energetic drum sound. When treating an entire group the real trick is not to go over the top.
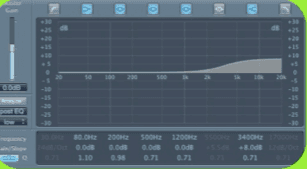
The best approach here is to use something called subtractive equalization. This basically means you are using the EQ filters to take certain frequencies away as opposed to adding them. For instance if you wanted to boost a loop’s high or low end, you would actually remove the opposite frequency and boost the overall level. This has a similar effect to boosting frequencies except you should end up with a more natural end result using less processing.
(An overhyped EQ setting)
You can also use this approach to remove very small problem areas from your drum parts. With pretty high Q points dialed in you can home right in on a single sound within a loop.
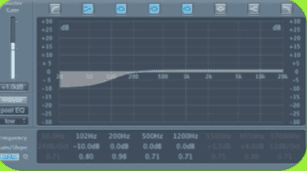
(A more natural subtractive EQ)
You can also use this approach to remove very small problem areas from your drum parts. With pretty high Q points dialed in you can home right in on a single sound within a loop.
Maybe there is too much cowbell or an annoying click within a loop you what to subdue. Try this method – it can be very effective.
Step 3: Easy Compression
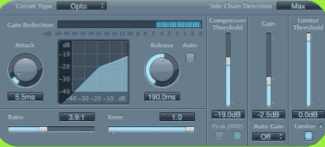
Another great tool for bringing out the nuances of your drum parts is compression. Again, it really pays to go easy here and not overcook things. This is basically buss compression and when you are treating large groups of instruments or entire loops you should always use subtle settings.
(A pretty moderate compressor patch is applied to our loop.)
Try strapping a good quality compressor across a complex and dynamic drum loop. Dial in 3-4 dB of gain reduction with reasonably slow attack and release settings. Even this sort of subtle treatment should help bring out the quieter elements of such a loop and reign-in any wayward peaks.
Step 4: Transient Design
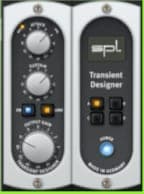
A quick and simple way to add real punch to your drum sound is to use a transient designer (or shaper). These deceptively simple processors can become your secret weapon when mixing any form of percussion. Quite a few DAWs now feature transient designers but the best plug-ins for the job are currently made by third-party companies.
The undisputed king of the transient designer is SPL and their excellent algorithms are available as both native and DSP driven plug-ins. The two controls can increase (or decrease) both the attack and release phase of a sound, giving a drum part more snap, or even a shorter, more aggressive tone.
(An SPL transient designer adding attack and sustain effects)
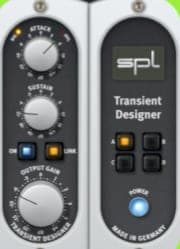
(The same SPL removing some sustain from the loop.)
Step 5: Saturation and Distortion
A great way to add instant grit and attitude to your drums is the use of some flavor of distortion. Of course there is a huge range of sounds you can achieve here from warm tube-like saturation, to complete sonic destruction, and everything in-between. I tend to find the former works very well when treating entire drum parts.
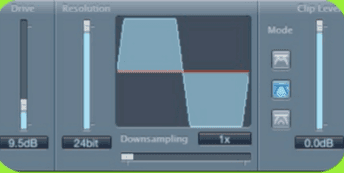
(Logic’s Bit-crusher creating a nice saturation effect)
Try a tube or tape emulation strapped across your entire drum buss and you might be quite surprised by the energy that can be injected to your sound. This simple treatment can go a long way, while more powerful distortion effects might be better left for individual sounds and parts.
Give Drums Impact with Parallel Compression
It seems that the more elements your drum mix is comprised of, the harder it is to give them impact. With mics on the majority of drums, plus overheads, room mics and even the occasional hallway mic, there are so many different sounds competing with each other, even though together they comprise one instrument. Parallel compression is a really easy way to give some impact to the most important elements of the kit.
Step 1
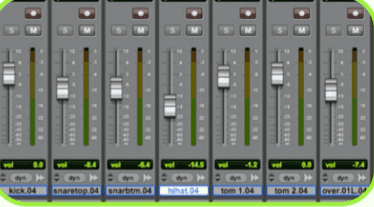
Once you’ve got your drums recorded, do a basic mix and try to get the levels where you want them. You want to get the best relative mix between the elements of the kit that you can — don’t despair too much if the kit as a whole is not as strong as you’d like it to be at first, since that’s what this tutorial will teach you to fix.
Step 2
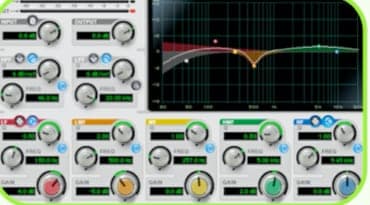
At this point, with a relative mix done, solo each track and fire up an EQ plug-in. Listen to each sound carefully and boost and reduce frequencies as you feel necessary. If you’ve done a great job of recording a great kit in a great room with great hardware, you may not need to do this, but usually you will.
Step 3
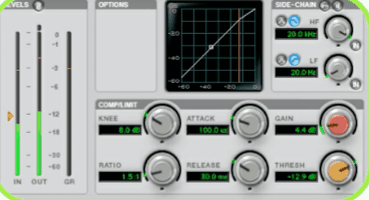
At this point, apply compression to your drum tracks to keep the peaks down and to prevent drum sounds from totally disappearing after mixing to a particularly loud section. That said, keep the compression as light as you can, because our aim is to ensure that the majority of our kit sound is a natural one with very little compression so we can pull up the parallel compression auxiliary as necessary to fortify it.
Step 4
Set up two stereo auxiliary tracks and choose a free stereo bus for each. Now’s a good time to name each appropriately — the first can simply be Drums while the second might be Drums Parallel or whatever will remind you of the track’s purpose quickly.
Step 5
Set the output on each drum track to the first auxiliary track’s buss input. This is your main drum level controller. At this stage it may be wise to solo the main drum aux and check your relative mix without any processors applied to the group aux. Ensure that there are no peaks showing on it and check that you haven’t missed any level adjustments you should’ve made after applying EQ and compression.
Step 6
With your drum aux still soloed, have a close listen and decide which drums are lacking in punch need to be more upfront in the mix, and also require more impact and tightness. Create a send on each of these tracks to the second aux. Un-solo the first aux and solo the second so that you can get the mix right with the send faders.
An alternative method is to create a send directly from the drum auxiliary to the compression auxiliary, but I like the ability to choose which drums are given that extra oomph, especially since most of my projects have a large number of drum tracks recorded.
Step 7
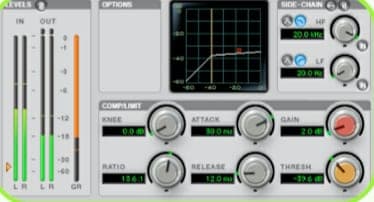
Set up a compressor on the second auxiliary. I’ve used the standard compressor/limiter. Dial in the settings you’d like. You can afford to set the compressor to work considerably harder than you normally would, as this will be mixed in under the main drum mix. As you can see in the screenshot, I like to work it particularly hard, especially on rock tracks. This is largely because rock tracks use more drums and more ambience microphones in order to get a big stadium feel, and lose a lot of that crucial rock impact as a result. Get the threshold down until the gain reduction meter is showing no less than 6dB of gain reduction and probably closer to 12dB for this purpose. You could even go as far as 12 to 18dB.
Often the attack and release are brought way, way down — even as low as the Compressor/Limiter can go. I didn’t want too much pumping to occur for this particular track and was happy with the impact of my drums, so I’ve actually used reasonably tame settings for a parallel compression buss.
Step 8
Mix the drum and parallel compression mix together to taste. I prefer to use much less of the parallel compression mix than the main drum mix to retain a natural feel, with the parallel fader brought up just enough to get the tightness I need. Whether you follow my route or want heaps of compressed drums in there, do keep it tucked under the main drum mix at least a little.
It still retains the natural character of a rock drum kit but gives the kick, snare, hat and toms more power and also more presence in the mix. Despite the crazy compression settings we used, though, nothing sounds like it’s pumping too much. This is the effect you’re after when using parallel compression on a drum mix.
How to Build Practical Effects Chains
In some cases great multi-effects chains can be simply thrown together and the results of this random approach can be impressive, but unfortunately, more often than not, we have to put a bit of work into getting things right.
Step 1: Considering the Chain’s Intended Purpose
It may sound obvious but it’s a good idea to start out by thinking about what you want to achieve. Often if you can visualize the job in hand the chain will be easier to put together and some of the obstacles we’ll hit later should be easier to deal with. For instance, if you have a vocal line that needs cleaning up, you can start to think about the processes you may want to apply. Some obvious choices will pop into your head such as gating, compression, equalization and some spatial effects, such as reverb or delay. Of course the vocal chain is just an example – the processors you pick will depend hugely on what the source audio consists of and what you want to do to it. It’s the workflow we are concentrating on here.
Once you have visualized your chain you can start to build it and you should find you already have a plan in mind.
(A useable well thought-out vocal effects chain)
(An unorganized vocal effects chain)
Step 2: Making a start, Keeping it simple
I’d say that the first processors you want to insert into your new chain are the most simple ones. These are often the tools you plan to use for more corrective purposes as opposed to ‘special effects’. Try starting with equalizers, compressors and gates. I often like to start by using an EQ to remove and unwanted frequencies and enhance any areas that are lacking.
Follow up this first treatment with any other corrective processes you want to try – so think about dynamics treatment and gating to remove any noise or unwanted signal. Once you have made these initial moves it should be much easier to focus on what the sound needs next.
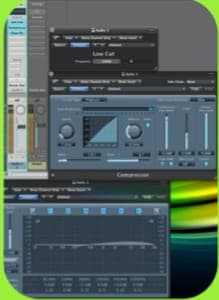
(The guitar is processed with some EQ and compression to enhance it slightly)
Step 3: Getting Decorative
I tend to divide effects processing into two distinct areas: corrective and creative. Once we have the corrective stuff out of the way we should have a real basis on which to apply more decorative, creative processes. These creative processes can be anything really but things like modulation- based effects and distortions work very well at this stage.
When you are building more run-of-the-mill chains you may not need these special effects but I find that it can be a good idea to include a few. This way they can be activated or bypassed at will to create ‘spot’ effects at key points in your project.
Finally you will need to add any spatial effects you plan to use, so delays and reverbs are generally best left until the end of your chain. If you don’t what to include these as inserts then you can obviously set up send/return busses, but placing them early in the chain is not always a good idea. We’ll see why in the next step.
Step 4: The Order of Things
Now we get to the real meat of this subject and that’s the order in which the plug-ins are inserted in our chain. This is nothing less than crucial and completely dictates the final sound that is produced by your processing. Alter the order of just one plug-in out of three and your sound can be completely changed.
Let’s think about a few examples. Placing a distortion after a delay or reverb in your chain would not be a great move as this would distort the repetitions or reverb tail. Place the distortion plug-in before the spatial effects and you should get a great effect. Another good example of this would be where you place a gate in your chain. Placing gates after the same delay effect could completely destroy a good delay patch. Gates should generally be placed very early in your chain.
As you come to the end of putting your chain together it’s worth just taking a step back and thinking about the order you have things in. Maybe experimenting with different set ups to see what sounds best to you.
Step 5: Watching the Signal Path
When you have constructed your effects chain it’s well worth taking the time to quickly the check the level at every stage. This means checking none of your plug-ins are being heavily overloaded. The vast majority of modern plug-ins have amazing amounts of headroom and are very difficult to hard clip but it pays to make sure everything is running well within its limits.
Step 6: Save It for Later
Now with everything running correctly you can save your custom chain for use at any time in the future. Get things right here and you should start to compile a really nice, usable library of effect chains for any eventuality. Mixing is arguably the most important stage of the music production process.
Bibliography:
Cascone, K. (2000) “The Aesthetics of Failure: ‘Post-Digital’ Tendencies in Contemporary Computer Music”
Barthes, R. (1977) The Grain of the Voice. In Image: Music: Text. London: Fontana
Beard & Gloag, (2005) Musicology: The Key Concepts. London & New York: Routledge
Burns, M.E. (1999: 1982) Intervals, Scales, and Tuning. In Deutsch, D. (ed.) The Psychology of Music. Second Ed. London: Academic Press. Ch. 7
Deutsch, D. (1999: 1982) The Psychology of Music. Second Ed. London: Academic Press
Katz, M. (2004) Capturing Sound: How Technology Has Changed Music. Berkeley: Los Angeles: London: University of California Press
Manning, P. (2004), Electronic and Computer Music Oxford University Press
Rodaway, P. (1994) Auditory Geographies In. Sensual Geographies. London: Routledge
Do this now
- Put a compressor on a vocal at 3:1 and set the threshold for 3 to 6 dB of gain reduction on the loudest phrases.
- Set the attack too fast, listen to the consonants disappear, then back it off until they return.
- Set the release too slow, hear it breathe, then match it to the tempo of the track.
- Now set up parallel compression on the drums - crush a copy, blend it under the original - and A/B against the uncompressed bus.
Attack controls how much of the transient survives. Release controls whether it sounds like music or like a machine.