Working with Regions
Working with Regions
The Tracks area is where you arrange the recordings, Apple Loops, and other musical material in your project, organizing them into sections such as intro, verse, and chorus to build an arrangement. The Tracks area shows a visual representation of time moving from left to right. You build a project by arranging regions in rows called tracks, that run horizontally across the Tracks area.
Regions are the building blocks of a project. When you record an instrument, drag an Apple Loop to the Tracks area, or add a media file, a region containing the music from the recording, loop, or media file is created. Regions appear as rounded rectangles in the Tracks area.
You can arrange and edit the following types of regions in the Tracks area:
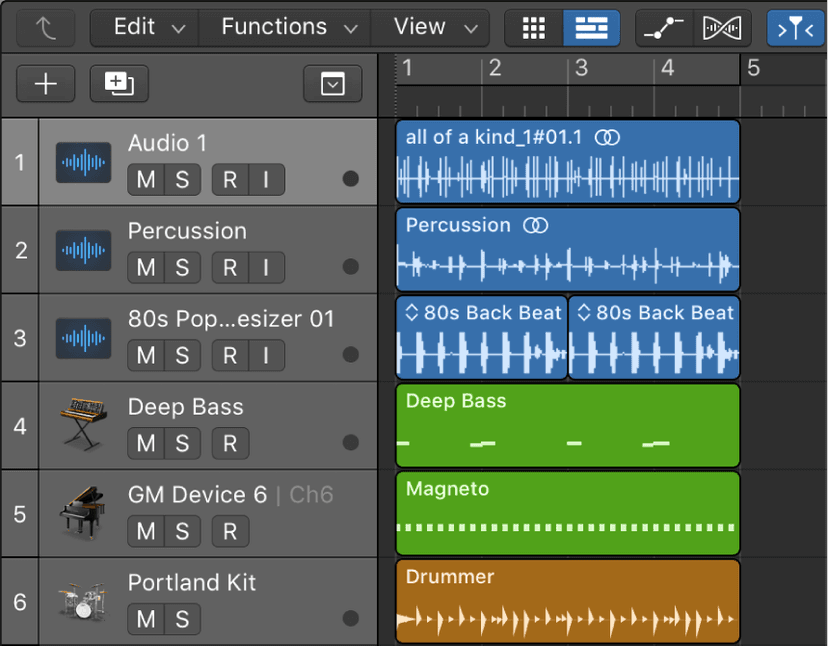
- Audio regions from audio recordings, audio Apple Loops, and imported audio files on audio tracks
- MIDI regions from software instrument (and external MIDI instrument) recordings, software instrument Apple Loops, and imported MIDI files on software instrument tracks
- Drummer regions generated on Drummer tracks or from Drummer Apple Loops
You can edit regions in the Tracks area in several ways. For example, you can:
- Select regions
- Cut, copy, and paste regions
- Move regions to another track or to another point in the Tracks area
- Loop regions
- Shift the playback position of regions to create subtle changes in the rhythmic feel
- Resize regions to change how long they play
- Time stretch regions to change the relative distance between notes and other events
- Split and join regions
- Demix MIDI regions
- Create aliases of MIDI regions and clone audio regions
- Change the color of regions
- Convert audio regions to Sampler zones in Logic Pro
- Delete regions
- Edit region parameters in the Region inspector
You can arrange regions in a variety of ways in the Tracks area, by moving, looping, resizing, splitting, joining, and deleting them. Try following the tasks below, using regions in the project.
Selecting regions in the Tracks area
To perform some edits on regions, you must first select the regions. You can select one or multiple regions, select regions on different tracks, and quickly select muted regions, overlapped regions, or regions meeting other criteria. Selected regions appear brighter in the Tracks area than unselected regions.
Select a region:
- Click the region in the Tracks area.
Select multiple regions:
Do one of the following:
- Press and hold Shift as you click the regions in the Tracks area.
- Drag around the regions to enclose them.
Select all regions in a track:
- Click the track header.
Select all regions in a project:
- Choose Edit > Select > All from the Tracks area menu bar.
Select regions meeting specific criteria:
Choose any of the following from the Tracks area Edit menu:
- To select all following regions in the project: Choose Select All Following.
- To select all following regions on the same track: Choose Select All Following of Same Track.
- To select all regions between the left and right locators: Choose Select Inside Locators.
- To select all empty regions in the project: Choose Select Empty Regions.
- To select all overlapped regions: Choose Select Overlapped Regions.
- To select all muted regions in the project: Choose Select Muted Regions.
- To select all regions of the same color: Choose Select Same-Colored Regions.
Selecting parts of regions:
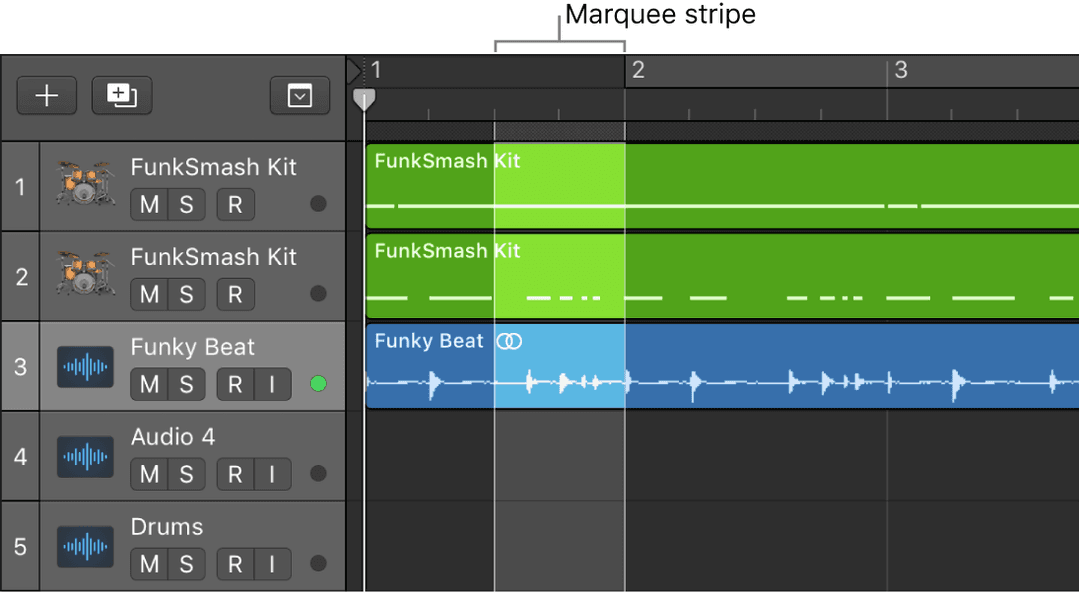
You can select and edit parts of one or more regions, using the Marquee tool or the marquee stripe:
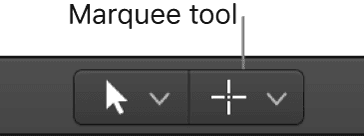
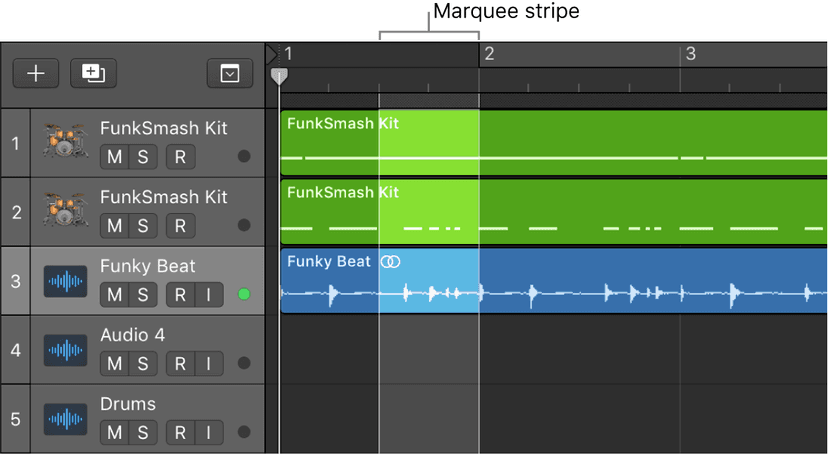
- Marquee tool: Use to select and edit region parts by dragging across them. The Marquee tool looks like a crosshair.
- Marquee stripe: A thin stripe shown at the top of the ruler
Only the part of the region inside the marquee is selected, letting you select inside, or across portions of, regions. You can perform most edits, such as moving, cutting, copying, and deleting, in the selected area. After editing, the selected area becomes a new, separate region. The marquee selection uses the current Tracks area Snap value.
If you play a project after making a marquee selection, playback starts at the left edge of the selection, and ends at the right edge. If you create a marquee selection while the project is playing, playback continues past the end of the selection.
If you start recording after making a marquee selection, Autopunch mode is activated, and the marquee selection is replaced by the punch locators. All tracks within the marquee selection are record-enabled, and all other tracks are record-disabled
Moving regions
In order to move a region, you can do any of the following:
- Drag a region left or right to move it to a new time position.
- Drag an audio region up or down to another audio track.
- Drag a MIDI region up or down to another software instrument track.
You can move regions to a different point in the same track, or move them to another track of the same type. You can move an audio region to another audio track, for example, but not to a software instrument track, or vice versa. You can also move regions between open Tracks area windows, or between different open projects.
When you move a region, it snaps to the nearest position on the Tracks area grid, using the current Snap value. You can override the grid by holding down Control while dragging regions to move them in steps of one division, or by holding down both Control and Shift while dragging to move them by single ticks or samples (depending on the zoom setting).
- You can nudge regions (move them in small increments) left or right using key commands. To nudge regions, you first set the nudge value, then move selected regions by this value. Alternatively, you can nudge regions by a set value.
- You can slip regions, which moves the content of the region left or right by the nudge value without moving the boundaries of the region. The content effectively moves inside the region, which remains stationary. Slipping a region is possible only when the source content exceeds the length of the region by the amount you slip (or greater).
- You can also rotate regions. Similar to slipping, rotating moves the region content left or right by the nudge value, but with the difference that content that extends past the region border on one side reappears on the other side, as though the region were a loop. When an audio region is rotated, it is converted to a one-track folder (indicated by a folder icon in the upper-left corner of the region) containing two regions. If it is rotated multiple times, the number of regions in the one-track folder stays the same, but the junction point between the two regions moves through the folder, reflecting the extent of the cumulative rotation. You can unpack the one-track folder, or unpack and merge it to a single region, by clicking the folder icon and choosing corresponding commands from the menu that appears.
You can use slip and rotate to move the content of audio or MIDI regions. When you slip or rotate a Drummer region, it is first converted to a MIDI region, then the content of the MIDI region is slipped or rotated.
Tip: You can also move and resize regions numerically by opening an Event Float window.
To move a region, do any of the following:
- Drag a region left or right in the Tracks area to move it to a new point in the same track.
- Drag an audio region up or down in the Tracks area to another audio track.
- Drag a MIDI region up or down in the Tracks area to another software instrument track.
Move a region to the current playhead position:
- Select the region, then use the Move Region/Event to Playhead Position (Pickup Clock) key command.If more than one region is selected, all subsequent regions are moved. For audio regions, the region anchor is placed at the current playhead position.
Move an audio region back to its recorded position:
- Select the audio region, then choose Edit > Move > To Recorded Position.This command only works for timestamped audio files, such as those recorded in the current project, and imported Broadcast Wave or SDII files. Timestamped files are indicated by a clock symbol in the Project Audio Browser.
Move regions to the selected track:
- Sselect the regions, then choose Edit > Move > To Selected Track. The regions are moved to the selected track, keeping their existing time positions.
Nudge regions by the nudge value:
Select the regions you want to move.Press and hold Option and press the Left or Right Arrow key.
Slip regions by the nudge value:
- Select the regions, then do one of the following:
- Choose Edit > Move > Slip Left (or use the corresponding key command: Control-Option-Left Arrow).
- Choose Edit > Move > Slip Right (or use the corresponding key command: Control-Option-Right Arrow).
Rotate regions by the nudge value:
- Select the regions, then do one of the following:
- Choose Edit > Move > Rotate Left (or use the corresponding key command: Control-Option-Command-Left Arrow).
- Choose Edit > Move > Rotate Right (or use the corresponding key command: Control-Option-Command-Right Arrow).
Positioning items using the ruler
As we know, the ruler runs horizontally across the top of the Tracks area. For projects set to use the musical grid, the ruler shows the time format in bars and beats; for projects that don’t use the musical grid, the ruler shows the standard time format of minutes and seconds. If you can't see the time format, follow the previous instructions to show the secondary ruler by choosing Secondary Ruler from the Tracks area View menu.
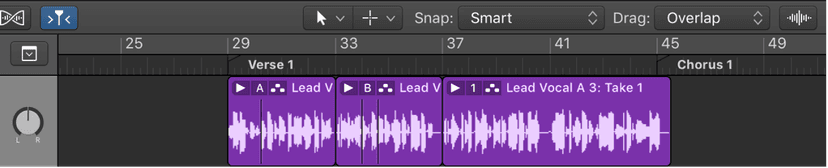
As the project plays, you can see the part currently playing by watching the playhead move across the Tracks area. When you move the playhead or move regions or other items in the Tracks area, you can use the ruler to place them at the correct point in time. Alignment guides appear when you move regions and other items to help you align them with other items in the Tracks area.
When Smart Snap is chosen from the Snap pop-up menu, the units shown in the ruler reflect the value set in the Tracks area grid.
To set a project to use the musical grid, go to File > Project Settings > General.
Using alignment guides
Alignment guides appear when the edges of a region you are moving align with another region in the timeline and when automation points you are moving align with other items in the timeline. Alignment guides briefly appear as the edge of the region or automation point aligns with other items in the timeline.
You can turn alignment guides on or off in the Snap pop-up menu. Go to Snap > Alignment Guides in the Tracks area menu bar.
Cutting and pasting regions in the Tracks area
You can cut or copy regions in the Tracks area, and paste them at a different position. You can also paste a copied region at the same time position, to double the content of the region to use on another track. You can quickly double a region or cut it in half at its existing location.
Cut a region:
- Select the region, then choose Edit > Cut (or press Command-X).
To copy a region, do one of the following:
- Select the region in the Tracks area, then choose Edit > Copy (or press Command-C).
- Option-drag the region.
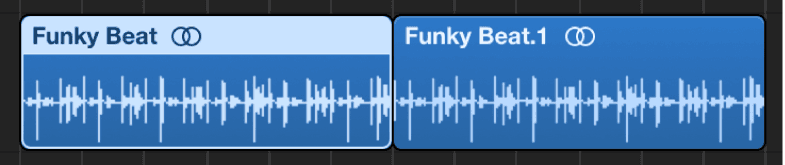
When you copy an audio region, a new region is automatically created in the Project Audio Browser. The new region retains the name of the original, followed by a sequential number. For example, for a region named MyLoop, the first copy is MyLoop.1, the second copy is MyLoop.2, and so on.
Paste the region:
- Move the playhead to the point in the Tracks area where you want the region to start, then choose Edit > Paste (or press Command-V).
Paste a region at the same position as the copied region:
- Select the track you want to paste the region into, then choose Edit > Paste at Original Position (or use the corresponding key command).
The copied region is pasted into the selected track, at the same position as the source region. This is useful if you want to copy a region to the same spot on a different track, to independently process or thicken the part, for example. This function is also ideal for creating layered MIDI or instrument parts.
Paste multiple copies of a region:
Select the region. Choose Edit > Repeat Multiple from the Tracks area menu bar.
In the Repeat Regions dialog, do any of the following:
Enter the number of copies to paste in the Number of Copies field. To have the copies snap to a particular grid value, choose a grid value from the Adjustment pop-up menu .To paste the copies as regions, click the As Copies radio button. To paste the copies as clones (for audio regions) or aliases (for MIDI regions), click the As Aliases or Clones radio button.
Cut a region in half:
When you cut a region in half, the region is cut at its center and the right half is discarded, leaving only the left half.
- In Logic Pro, select the region, then choose Edit > Length > Halve.
Double a region:
When you double a region, its length is doubled and the contents are repeated in the right half.
- In Logic Pro, select the region, then choose Edit > Length > Double.
Resizing regions
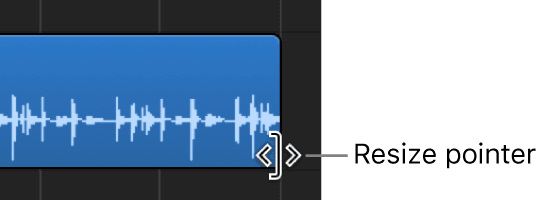
In the Tracks area, move the pointer over the lower-right edge of a region. The pointer becomes a Resize pointer. Drag the edge of the region horizontally to shorten or lengthen it.
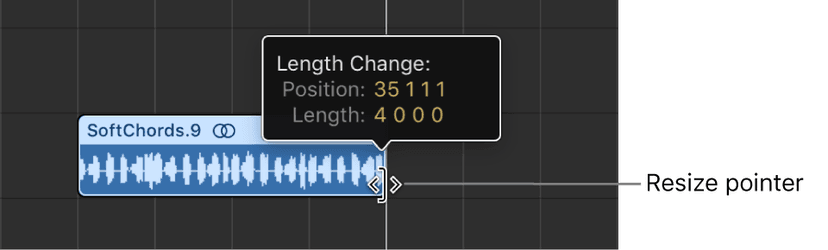
You can shorten both audio and MIDI regions so that only part of the region plays. You can lengthen MIDI regions to add silence to the beginning or end of the region. In addition, you can resize the common edge of two adjacent regions to control the transition between them and remove overlaps.
You can also move and resize regions numerically by opening an Event Float window.
To resize a region:
Move the pointer over the lower-right edge of the region.When the Resize pointer appears, drag the region to shorten or lengthen it.
Resize two adjacent regions:
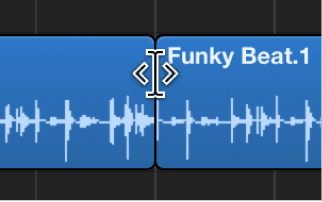
In Logic Pro, select the Pointer or Pencil tool, then place the pointer over the upper edge where two adjacent regions meet.The pointer changes to the Junction pointer. Note: If there is a gap between the regions, the Loop pointer appears when you move the pointer over the upper-right corner of the earlier region.Drag left or right.Both regions are resized accordingly, with no gaps between them.
Resize selected regions to the same absolute length:
- Press and hold Option-Shift while resizing the regions with the Pointer tool.
Resize selected region start or end points to the playhead position:
Do one of the following:
- Use the Set Region/Event/Marquee Start to Playhead Position key command.
- Use the Set Region/Event/Marquee End to Playhead Position key command.
For audio regions, using the Set Region/Event/Marquee Start to Playhead Position key command also moves the anchor point to the playhead position.
Remove overlaps between regions:
Select the overlapping regions, or select all regions on the track by clicking the track header.Choose Edit > Trim > Remove Overlaps (or press \).Where the selected regions overlap, the length of the left (earlier) region is reduced to remove the overlap.
Remove overlaps by reducing the length of the later region:
elect the left (earlier) region of a pair of overlapping regions.Choose Edit > Trim > Remove Overlaps (or press \).Where the regions overlap, the length of the right (later) region is reduced to remove the overlap.
Lengthen regions to remove gaps between them:
Select the regions you want to lengthen.Choose Edit > Trim > Region End to Next Region (or use the corresponding key command).The selected regions are lengthened to end at the start point of the next region on the track.

Lengthen selected regions between locators
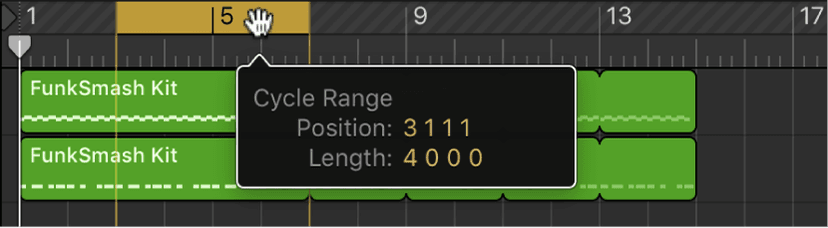
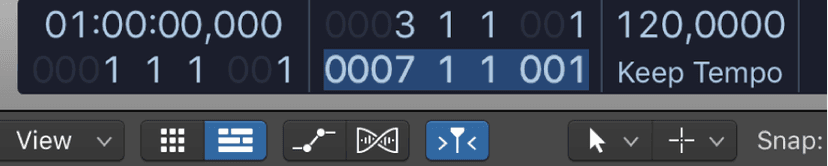
Set the left and right locator positions by doing one of the following:Drag from left to right across the upper part of the ruler. Set the value in the locator fields in the LCD.Select the regions within the locator boundaries. You can quickly select all regions inside the locators by choosing Edit > Select > All Inside Locators.Choose Edit > Trim > Fill within Locators (or use the corresponding key command).All selected regions within the locator boundaries are lengthened, closing the gaps between them. On each track, the last region within the locator boundaries is not lengthened.
Splitting regions in the Tracks area:
You can split a region in the Tracks area, and use the split segments of the region in different places in the Tracks area.
When you split a MIDI region, any notes at the split point are shortened to that point. If notes in a split MIDI region overlap other notes by more than a 1/16 note, a dialog appears, asking if you want to keep, shorten, or split the notes.
You can also split regions by selecting part of the regions using the marquee stripe in the ruler.
Split regions at the playhead position:
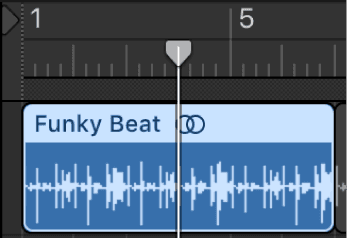
In the Logic Pro Tracks area, select the region or regions you want to split. Move the playhead over the point where you want to split the regions, then choose Edit > Split > Regions at Playhead. The selected region is split into two regions at the playhead position. Only the selected region is split, even if a region on another track is under the playhead as well. If multiple regions are selected and are under the playhead, they are all split.
Tip: To cut at the nearest bar, use the Split Regions/Events by Rounded Playhead Position key command.
Split regions using the Scissors tool:
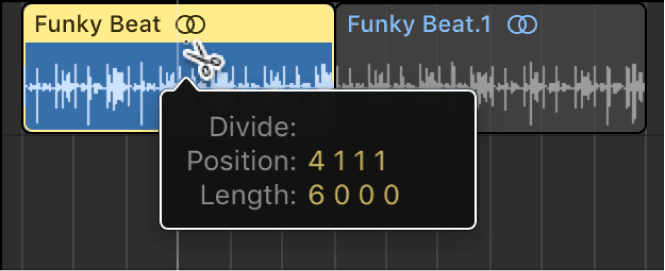
- Select the regions you want to split.
- Select the Scissors tool, then click and hold the regions you want to split.The help tag shows the current split position.
- Release the mouse button.All selected regions are cut at the position shown in the help tag.
When selecting a cut point with the Scissors tool, you can move backward and forward in steps of one division. The grid is based on the Snap pop-up menu setting.
Split regions at the locator positions:
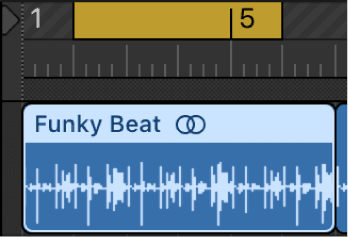
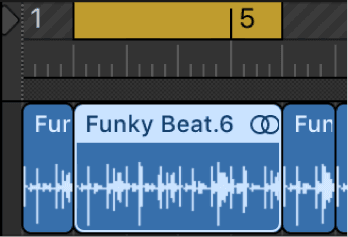
- Set the left and right locator positions.
- Select the regions you want to divide within the locator boundaries.
- Choose Edit > Split > Region(s) by Locators (or use the Split Regions/Events by Locators or Marquee Selection key command).All selected regions located wholly, or partly, between the locators are cut at the left and right locator positions. All regions created between the locator positions as a result of the Split operation are then automatically selected.
Tip: You can achieve the same effect by defining a cycle with the pointer in the ruler, while holding down Command.
Split regions at the marquee selection border:
Choose View > Marquee Ruler from the Tracks area menu bar.Drag in the thin marquee stripe area of the ruler to select parts of one or more regions (also shown on selected tracks). Control-click the marquee stripe, then choose Split Regions/Events at Locators or Marquee Selection from the shortcut menu.
Split a region into portions of equal length:
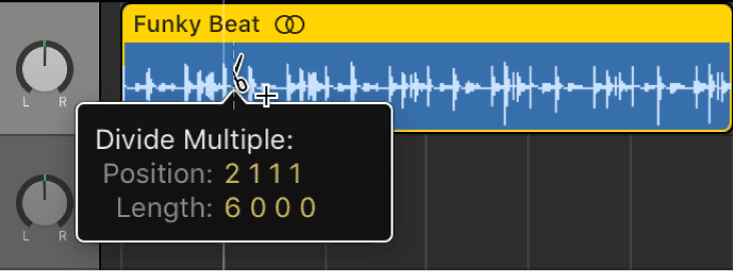
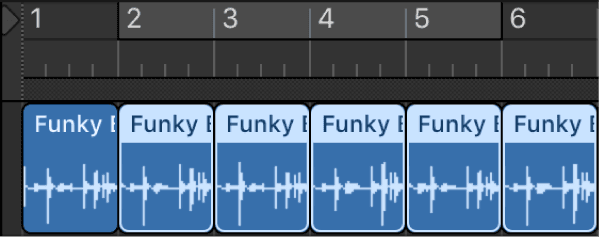
- Press and hold Option while cutting a region with the Scissors tool. A plus sign appears next to the Scissors tool.The selected region is cut into several pieces—each the same length as the first segment.For example, to divide a 16-bar region into eight 2-bar regions, cut the region at the start of bar 3, while holding down Option.
How to handle overlapping notes in split MIDI regions
If any notes in a split MIDI region overlap other notes by more than a 1/16 note, a dialog appears, asking if you want to keep, shorten, or split the notes.
- Select one of the following options:
- Keep: Leaves all notes unaltered. The MIDI region is cut as intended, but there may be notes in the left half (earlier region) that are much longer than the MIDI region containing them. Such notes play normally, unless Clip Length is activated.
- Shorten: Truncates all overlapping notes, so that they end at the point where the original MIDI region was split.
- Split: Splits overlapping notes across the two MIDI regions; two notes are created, with the same pitch and velocity as the original, and with the same total length as the original note.
When you split a region containing region-based automation, automation points are added at the split points.
You can split an audio recording into segments based on amplitude levels, using the Audio > Remove Silence function in the toolbar.
Joining regions in the Tracks area
You can join untransposed audio regions, and join MIDI regions. Regions from audio Apple Loops, and audio regions that have been transposed, can’t be joined.
When joining audio regions, the regions must be adjacent to each other on the same track. If you join segments of compressed audio files, the files are converted to AIFF format. Audio regions are joined non-destructively. Logic Pro creates a new file for the joined audio (called a mixdown) that replaces the original regions. The new audio file is stored on your hard disk and is added to the Project Audio Browser.
Join one or more regions:
- Select the regions, then choose Edit > Join > Regions.
Join regions with the Glue tool:
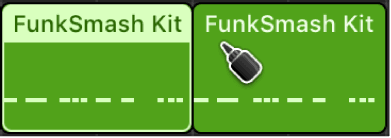
Select the Glue tool. Do one of the following:Select multiple regions by dragging, then click them with the Glue tool.Shift-click regions with the Glue tool.
Join regions per track:
Select the regions you want to join on each track (by Shift-clicking, dragging, or using Command-A). Choose Edit > Join > Regions per Tracks (or use the Merge Regions per Tracks key command). The selected regions on each track are joined into a single region on that track. For example, if you select regions on four different tracks, and then choose Edit > Join > Regions per Tracks, a single region is created on each of the tracks from the regions selected on that track.
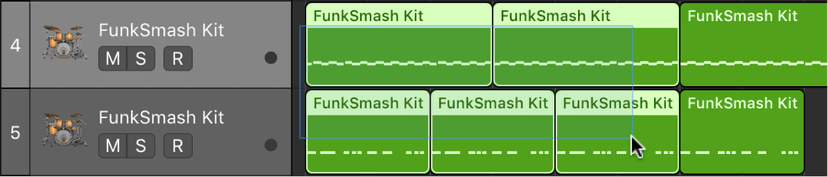
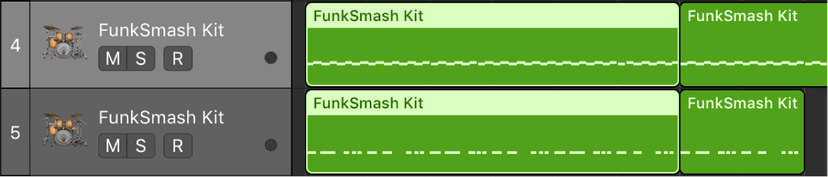
MIDI regions must be on the same track or on adjacent tracks. When you join MIDI regions, the joined region takes the name (and track) of the first original region. If the Transposition, Velocity, and Dynamics region parameters are different for the selected regions, they are normalized before being joined. (This means that all parameter values are written as data changes for each region. The parameters of the joined MIDI region are all set to neutral (default) values.)
Coloring regions in the Tracks area
You can change the color of regions to identify sections of your arrangement, distinguish between track types, or for other uses. Newly recorded or added regions use the color of the track channel strip.
Change the color of one or more regions:
Select the region or regions. Note: If you select all regions on a particular track, and no regions on other tracks are selected, coloring them alters the hue of all selected regions. This also changes the color of the selected track’s channel strip. Control-click one of the selected regions, then choose Name and Color > Show/Hide Colors from the shortcut menu. Click a color.

Set regions to match the track color:
- Select the regions you want to change.If all regions are on a single track, click the track’s header to select all regions.
- Choose Functions > Color Regions by Track Color from the Tracks area menu bar.The colors of all selected regions are replaced with the colors of the corresponding track channel strips.
Tip: This feature is handy after copying or moving regions between tracks, when you may find that the Tracks area resembles a patchwork quilt.
Looping regions in the Tracks area
You can loop regions so that they play repeatedly, and extend them to fill any amount of musical time in the Tracks area. When you play the project, the region repeats the number of times you have extended (looped) it.
You can also loop a region that has been resized. When you loop a resized region, only the visible portion of the region repeats when you play the project. If you add silence by lengthening a region, the silence is included in each repetition when you loop it.
Loop a region:
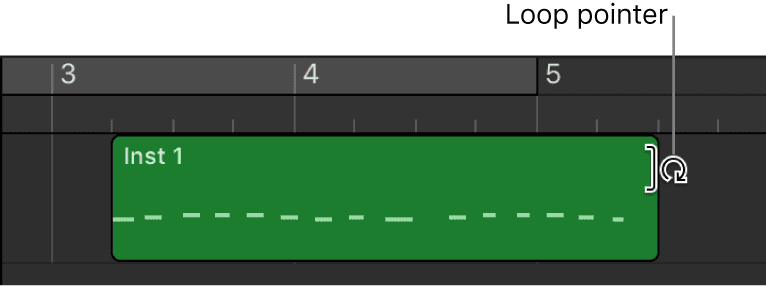
- Place the pointer over the upper-right edge of the region.The pointer becomes a Loop pointer.
- Drag the right edge of the region until it aligns with the point where you want it to stop playing. As you drag the edge of the region, “notches” appear at the top and bottom of the region, showing the beginning and end of each complete repetition.
Note: When track automation curves are visible in the Tracks area, in some cases the Loop pointer may not be shown when you place the pointer over the edge of a region. In this case, you can press and hold the Option key while placing the pointer over the upper-right edge to loop the region.
Loop a region continuously:
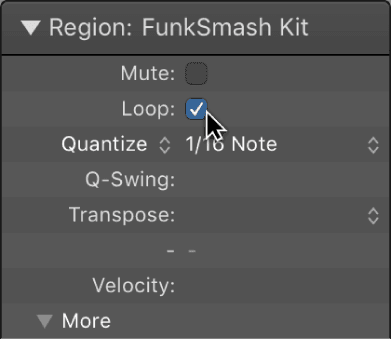
- Select the region, then select the Loop checkbox in the Region inspector.
The region loops continuously until the start of the next region in the track, or until the end of the project. You can unloop the region by deselecting the Loop checkbox, or by pressing L again.
Note: Deselecting the Loop parameter resets the manually created loop length. The next time the Loop parameter is used, the region is repeated until it either encounters another region in the same track, or reaches the end of the project (or folder).
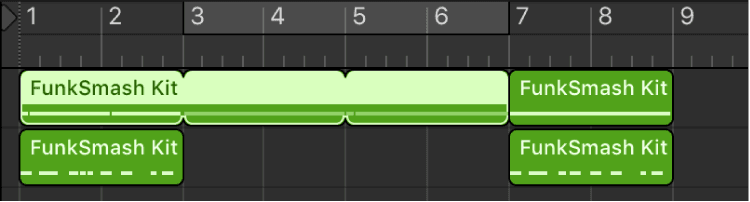
Convert loops into aliases or clones:
- Select the original region, then choose Edit > Convert > Loops to Aliases (or use the Convert Loops to Aliases key command).
Software instrument loop repeats are converted into aliases. Audio loop repeats are converted into cloned audio regions. As such, any alterations to the length of the original region affect all aliases and cloned regions.
Repeating regions in the Tracks area
You can repeat one or more selected regions in the Tracks area. Repeating a region pastes one or more copies (or aliases) of the regions following (to the right of) the regions in the same track.
Paste single copies of selected regions:
- Choose Edit > Repeat from the Tracks area local menu bar (or use the Repeat Regions key command).
Paste multiple copies of selected regions:
Choose Edit > Repeat Multiple from the Tracks area local menu bar (or use the Repeat Regions Multiple Times key command). Enter the number of desired repetitions in the Number of Copies field.To have the repeated regions snap to a particular grid value, choose a value from the Adjustment pop-up menu. To paste the copies as regions, select As Copies (default).To paste the copies as clones (for audio regions) or aliases (for MIDI regions), select As Aliases or Clones.
Muting and soloing regions in Tracks area
You can mute one or more regions in the Tracks area to exclude them from playback. You can also solo individual regions, to hear them in isolation, and lock the solo status of regions.
Mute individual regions:
Do one of the following:
- Select the Mute tool, then click the regions you want to mute.
- Select the regions, then select the Mute checkbox in the Region inspector.
- Select the regions, then press Control–M.
Muted regions appear gray in the Tracks area, for easy identification.
Unmute muted regions:
Do one of the following:
- Select the Mute tool, then click the muted regions.
- Select the muted regions, then deselect the Mute checkbox in the Region inspector.
- Select the muted regions, then press Control–M.
Solo individual regions:
Click and hold the region you want to solo with the Solo tool.The region plays in isolation from the pointer position until you release the mouse button.You can solo multiple regions by clicking them, then clicking and holding one of the selected regions with the Solo tool. Playback starts from the position of the pointer until you release the mouse button.
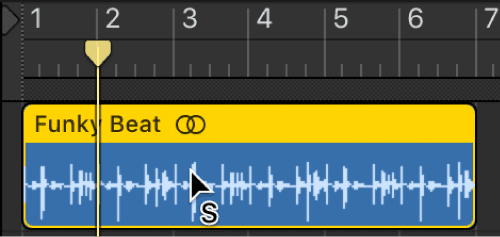
Solo regions using the Solo button:
Click the Solo button in the control bar (or press S).Select the regions you want to solo.While the project is playing, you can Shift-click additional regions to hear them. Select a soloed region (or Shift-click multiple soloed regions) to unsolo them.When you’re finished, click the Solo button (or press S) again.
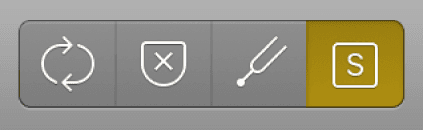
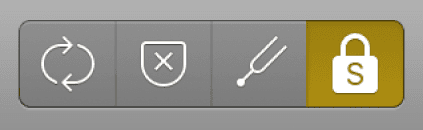
Lock the solo status of regions:
Option-click the Solo button in the control bar (or press Option-S).Select the regions you want to solo.Selecting regions while the project plays does not affect their solo status.When you’re finished, click the Solo button (or press S) again.
Working with Regions
The Tracks area is where you arrange the recordings, Apple Loops, and other musical material in your project, organizing them into sections such as intro, verse, and chorus to build an arrangement. The Tracks area shows a visual representation of time moving from left to right. You build a project by arranging regions in rows called tracks, that run horizontally across the Tracks area.
Regions are the building blocks of a project. When you record an instrument, drag an Apple Loop to the Tracks area, or add a media file, a region containing the music from the recording, loop, or media file is created. Regions appear as rounded rectangles in the Tracks area.
You can arrange and edit the following types of regions in the Tracks area:
- Audio regions from audio recordings, audio Apple Loops, and imported audio files on audio tracks
- MIDI regions from software instrument (and external MIDI instrument) recordings, software instrument Apple Loops, and imported MIDI files on software instrument tracks
- Drummer regions generated on Drummer tracks or from Drummer Apple Loops
You can edit regions in the Tracks area in several ways. For example, you can:
- Select regions
- Cut, copy, and paste regions
- Move regions to another track or to another point in the Tracks area
- Loop regions
- Shift the playback position of regions to create subtle changes in the rhythmic feel
- Resize regions to change how long they play
- Time stretch regions to change the relative distance between notes and other events
- Split and join regions
- Demix MIDI regions
- Create aliases of MIDI regions and clone audio regions
- Change the color of regions
- Convert audio regions to Sampler zones in Logic Pro
- Delete regions
- Edit region parameters in the Region inspector
You can arrange regions in a variety of ways in the Tracks area, by moving, looping, resizing, splitting, joining, and deleting them. Try following the tasks below, using regions in the project.
Selecting regions in the Tracks area
To perform some edits on regions, you must first select the regions. You can select one or multiple regions, select regions on different tracks, and quickly select muted regions, overlapped regions, or regions meeting other criteria. Selected regions appear brighter in the Tracks area than unselected regions.
Select a region:
- Click the region in the Tracks area.
Select multiple regions:
Do one of the following:
- Press and hold Shift as you click the regions in the Tracks area.
- Drag around the regions to enclose them.
Select all regions in a track:
- Click the track header.
Select all regions in a project:
- Choose Edit > Select > All from the Tracks area menu bar.
Select regions meeting specific criteria:
Choose any of the following from the Tracks area Edit menu:
- To select all following regions in the project: Choose Select All Following.
- To select all following regions on the same track: Choose Select All Following of Same Track.
- To select all regions between the left and right locators: Choose Select Inside Locators.
- To select all empty regions in the project: Choose Select Empty Regions.
- To select all overlapped regions: Choose Select Overlapped Regions.
- To select all muted regions in the project: Choose Select Muted Regions.
- To select all regions of the same color: Choose Select Same-Colored Regions.
Selecting parts of regions:
You can select and edit parts of one or more regions, using the Marquee tool or the marquee stripe:
- Marquee tool: Use to select and edit region parts by dragging across them. The Marquee tool looks like a crosshair.
- Marquee stripe: A thin stripe shown at the top of the ruler
Only the part of the region inside the marquee is selected, letting you select inside, or across portions of, regions. You can perform most edits, such as moving, cutting, copying, and deleting, in the selected area. After editing, the selected area becomes a new, separate region. The marquee selection uses the current Tracks area Snap value.
If you play a project after making a marquee selection, playback starts at the left edge of the selection, and ends at the right edge. If you create a marquee selection while the project is playing, playback continues past the end of the selection.
If you start recording after making a marquee selection, Autopunch mode is activated, and the marquee selection is replaced by the punch locators. All tracks within the marquee selection are record-enabled, and all other tracks are record-disabled
Moving regions
In order to move a region, you can do any of the following:
- Drag a region left or right to move it to a new time position.
- Drag an audio region up or down to another audio track.
- Drag a MIDI region up or down to another software instrument track.
You can move regions to a different point in the same track, or move them to another track of the same type. You can move an audio region to another audio track, for example, but not to a software instrument track, or vice versa. You can also move regions between open Tracks area windows, or between different open projects.
When you move a region, it snaps to the nearest position on the Tracks area grid, using the current Snap value. You can override the grid by holding down Control while dragging regions to move them in steps of one division, or by holding down both Control and Shift while dragging to move them by single ticks or samples (depending on the zoom setting).
- You can nudge regions (move them in small increments) left or right using key commands. To nudge regions, you first set the nudge value, then move selected regions by this value. Alternatively, you can nudge regions by a set value.
- You can slip regions, which moves the content of the region left or right by the nudge value without moving the boundaries of the region. The content effectively moves inside the region, which remains stationary. Slipping a region is possible only when the source content exceeds the length of the region by the amount you slip (or greater).
- You can also rotate regions. Similar to slipping, rotating moves the region content left or right by the nudge value, but with the difference that content that extends past the region border on one side reappears on the other side, as though the region were a loop. When an audio region is rotated, it is converted to a one-track folder (indicated by a folder icon in the upper-left corner of the region) containing two regions. If it is rotated multiple times, the number of regions in the one-track folder stays the same, but the junction point between the two regions moves through the folder, reflecting the extent of the cumulative rotation. You can unpack the one-track folder, or unpack and merge it to a single region, by clicking the folder icon and choosing corresponding commands from the menu that appears.
You can use slip and rotate to move the content of audio or MIDI regions. When you slip or rotate a Drummer region, it is first converted to a MIDI region, then the content of the MIDI region is slipped or rotated.
Tip: You can also move and resize regions numerically by opening an Event Float window.
To move a region, do any of the following:
- Drag a region left or right in the Tracks area to move it to a new point in the same track.
- Drag an audio region up or down in the Tracks area to another audio track.
- Drag a MIDI region up or down in the Tracks area to another software instrument track.
Move a region to the current playhead position:
- Select the region, then use the Move Region/Event to Playhead Position (Pickup Clock) key command.If more than one region is selected, all subsequent regions are moved. For audio regions, the region anchor is placed at the current playhead position.
Move an audio region back to its recorded position:
- Select the audio region, then choose Edit > Move > To Recorded Position.This command only works for timestamped audio files, such as those recorded in the current project, and imported Broadcast Wave or SDII files. Timestamped files are indicated by a clock symbol in the Project Audio Browser.
Move regions to the selected track:
- Sselect the regions, then choose Edit > Move > To Selected Track. The regions are moved to the selected track, keeping their existing time positions.
Nudge regions by the nudge value:
Select the regions you want to move.Press and hold Option and press the Left or Right Arrow key.
Slip regions by the nudge value:
- Select the regions, then do one of the following:
- Choose Edit > Move > Slip Left (or use the corresponding key command: Control-Option-Left Arrow).
- Choose Edit > Move > Slip Right (or use the corresponding key command: Control-Option-Right Arrow).
Rotate regions by the nudge value:
- Select the regions, then do one of the following:
- Choose Edit > Move > Rotate Left (or use the corresponding key command: Control-Option-Command-Left Arrow).
- Choose Edit > Move > Rotate Right (or use the corresponding key command: Control-Option-Command-Right Arrow).
Positioning items using the ruler
As we know, the ruler runs horizontally across the top of the Tracks area. For projects set to use the musical grid, the ruler shows the time format in bars and beats; for projects that don’t use the musical grid, the ruler shows the standard time format of minutes and seconds. If you can't see the time format, follow the previous instructions to show the secondary ruler by choosing Secondary Ruler from the Tracks area View menu.
As the project plays, you can see the part currently playing by watching the playhead move across the Tracks area. When you move the playhead or move regions or other items in the Tracks area, you can use the ruler to place them at the correct point in time. Alignment guides appear when you move regions and other items to help you align them with other items in the Tracks area.
When Smart Snap is chosen from the Snap pop-up menu, the units shown in the ruler reflect the value set in the Tracks area grid.
To set a project to use the musical grid, go to File > Project Settings > General.
Using alignment guides
Alignment guides appear when the edges of a region you are moving align with another region in the timeline and when automation points you are moving align with other items in the timeline. Alignment guides briefly appear as the edge of the region or automation point aligns with other items in the timeline.
You can turn alignment guides on or off in the Snap pop-up menu. Go to Snap > Alignment Guides in the Tracks area menu bar.
Cutting and pasting regions in the Tracks area
You can cut or copy regions in the Tracks area, and paste them at a different position. You can also paste a copied region at the same time position, to double the content of the region to use on another track. You can quickly double a region or cut it in half at its existing location.
Cut a region:
- Select the region, then choose Edit > Cut (or press Command-X).
To copy a region, do one of the following:
- Select the region in the Tracks area, then choose Edit > Copy (or press Command-C).
- Option-drag the region.
When you copy an audio region, a new region is automatically created in the Project Audio Browser. The new region retains the name of the original, followed by a sequential number. For example, for a region named MyLoop, the first copy is MyLoop.1, the second copy is MyLoop.2, and so on.
Paste the region:
- Move the playhead to the point in the Tracks area where you want the region to start, then choose Edit > Paste (or press Command-V).
Paste a region at the same position as the copied region:
- Select the track you want to paste the region into, then choose Edit > Paste at Original Position (or use the corresponding key command).
The copied region is pasted into the selected track, at the same position as the source region. This is useful if you want to copy a region to the same spot on a different track, to independently process or thicken the part, for example. This function is also ideal for creating layered MIDI or instrument parts.
Paste multiple copies of a region:
Select the region. Choose Edit > Repeat Multiple from the Tracks area menu bar.
In the Repeat Regions dialog, do any of the following:
Enter the number of copies to paste in the Number of Copies field. To have the copies snap to a particular grid value, choose a grid value from the Adjustment pop-up menu .To paste the copies as regions, click the As Copies radio button. To paste the copies as clones (for audio regions) or aliases (for MIDI regions), click the As Aliases or Clones radio button.
Cut a region in half:
When you cut a region in half, the region is cut at its center and the right half is discarded, leaving only the left half.
- In Logic Pro, select the region, then choose Edit > Length > Halve.
Double a region:
When you double a region, its length is doubled and the contents are repeated in the right half.
- In Logic Pro, select the region, then choose Edit > Length > Double.
Resizing regions
In the Tracks area, move the pointer over the lower-right edge of a region. The pointer becomes a Resize pointer. Drag the edge of the region horizontally to shorten or lengthen it.
You can shorten both audio and MIDI regions so that only part of the region plays. You can lengthen MIDI regions to add silence to the beginning or end of the region. In addition, you can resize the common edge of two adjacent regions to control the transition between them and remove overlaps.
You can also move and resize regions numerically by opening an Event Float window.
To resize a region:
Move the pointer over the lower-right edge of the region.When the Resize pointer appears, drag the region to shorten or lengthen it.
Resize two adjacent regions:
In Logic Pro, select the Pointer or Pencil tool, then place the pointer over the upper edge where two adjacent regions meet.The pointer changes to the Junction pointer. Note: If there is a gap between the regions, the Loop pointer appears when you move the pointer over the upper-right corner of the earlier region.Drag left or right.Both regions are resized accordingly, with no gaps between them.
Resize selected regions to the same absolute length:
- Press and hold Option-Shift while resizing the regions with the Pointer tool.
Resize selected region start or end points to the playhead position:
Do one of the following:
- Use the Set Region/Event/Marquee Start to Playhead Position key command.
- Use the Set Region/Event/Marquee End to Playhead Position key command.
For audio regions, using the Set Region/Event/Marquee Start to Playhead Position key command also moves the anchor point to the playhead position.
Remove overlaps between regions:
Select the overlapping regions, or select all regions on the track by clicking the track header.Choose Edit > Trim > Remove Overlaps (or press \).Where the selected regions overlap, the length of the left (earlier) region is reduced to remove the overlap.
Remove overlaps by reducing the length of the later region:
elect the left (earlier) region of a pair of overlapping regions.Choose Edit > Trim > Remove Overlaps (or press \).Where the regions overlap, the length of the right (later) region is reduced to remove the overlap.
Lengthen regions to remove gaps between them:
Select the regions you want to lengthen.Choose Edit > Trim > Region End to Next Region (or use the corresponding key command).The selected regions are lengthened to end at the start point of the next region on the track.
Lengthen selected regions between locators
Set the left and right locator positions by doing one of the following:Drag from left to right across the upper part of the ruler. Set the value in the locator fields in the LCD.Select the regions within the locator boundaries. You can quickly select all regions inside the locators by choosing Edit > Select > All Inside Locators.Choose Edit > Trim > Fill within Locators (or use the corresponding key command).All selected regions within the locator boundaries are lengthened, closing the gaps between them. On each track, the last region within the locator boundaries is not lengthened.
Splitting regions in the Tracks area:
You can split a region in the Tracks area, and use the split segments of the region in different places in the Tracks area.
When you split a MIDI region, any notes at the split point are shortened to that point. If notes in a split MIDI region overlap other notes by more than a 1/16 note, a dialog appears, asking if you want to keep, shorten, or split the notes.
You can also split regions by selecting part of the regions using the marquee stripe in the ruler.
Split regions at the playhead position:
In the Logic Pro Tracks area, select the region or regions you want to split. Move the playhead over the point where you want to split the regions, then choose Edit > Split > Regions at Playhead. The selected region is split into two regions at the playhead position. Only the selected region is split, even if a region on another track is under the playhead as well. If multiple regions are selected and are under the playhead, they are all split.
Tip: To cut at the nearest bar, use the Split Regions/Events by Rounded Playhead Position key command.
Split regions using the Scissors tool:
- Select the regions you want to split.
- Select the Scissors tool, then click and hold the regions you want to split.The help tag shows the current split position.
- Release the mouse button.All selected regions are cut at the position shown in the help tag.
When selecting a cut point with the Scissors tool, you can move backward and forward in steps of one division. The grid is based on the Snap pop-up menu setting.
Split regions at the locator positions:
- Set the left and right locator positions.
- Select the regions you want to divide within the locator boundaries.
- Choose Edit > Split > Region(s) by Locators (or use the Split Regions/Events by Locators or Marquee Selection key command).All selected regions located wholly, or partly, between the locators are cut at the left and right locator positions. All regions created between the locator positions as a result of the Split operation are then automatically selected.
Tip: You can achieve the same effect by defining a cycle with the pointer in the ruler, while holding down Command.
Split regions at the marquee selection border:
Choose View > Marquee Ruler from the Tracks area menu bar.Drag in the thin marquee stripe area of the ruler to select parts of one or more regions (also shown on selected tracks). Control-click the marquee stripe, then choose Split Regions/Events at Locators or Marquee Selection from the shortcut menu.
Split a region into portions of equal length:
- Press and hold Option while cutting a region with the Scissors tool. A plus sign appears next to the Scissors tool.The selected region is cut into several pieces—each the same length as the first segment.For example, to divide a 16-bar region into eight 2-bar regions, cut the region at the start of bar 3, while holding down Option.
How to handle overlapping notes in split MIDI regions
If any notes in a split MIDI region overlap other notes by more than a 1/16 note, a dialog appears, asking if you want to keep, shorten, or split the notes.
- Select one of the following options:
- Keep: Leaves all notes unaltered. The MIDI region is cut as intended, but there may be notes in the left half (earlier region) that are much longer than the MIDI region containing them. Such notes play normally, unless Clip Length is activated.
- Shorten: Truncates all overlapping notes, so that they end at the point where the original MIDI region was split.
- Split: Splits overlapping notes across the two MIDI regions; two notes are created, with the same pitch and velocity as the original, and with the same total length as the original note.
When you split a region containing region-based automation, automation points are added at the split points.
You can split an audio recording into segments based on amplitude levels, using the Audio > Remove Silence function in the toolbar.
Joining regions in the Tracks area
You can join untransposed audio regions, and join MIDI regions. Regions from audio Apple Loops, and audio regions that have been transposed, can’t be joined.
When joining audio regions, the regions must be adjacent to each other on the same track. If you join segments of compressed audio files, the files are converted to AIFF format. Audio regions are joined non-destructively. Logic Pro creates a new file for the joined audio (called a mixdown) that replaces the original regions. The new audio file is stored on your hard disk and is added to the Project Audio Browser.
Join one or more regions:
- Select the regions, then choose Edit > Join > Regions.
Join regions with the Glue tool:
Select the Glue tool. Do one of the following:Select multiple regions by dragging, then click them with the Glue tool.Shift-click regions with the Glue tool.
Join regions per track:
Select the regions you want to join on each track (by Shift-clicking, dragging, or using Command-A). Choose Edit > Join > Regions per Tracks (or use the Merge Regions per Tracks key command). The selected regions on each track are joined into a single region on that track. For example, if you select regions on four different tracks, and then choose Edit > Join > Regions per Tracks, a single region is created on each of the tracks from the regions selected on that track.
MIDI regions must be on the same track or on adjacent tracks. When you join MIDI regions, the joined region takes the name (and track) of the first original region. If the Transposition, Velocity, and Dynamics region parameters are different for the selected regions, they are normalized before being joined. (This means that all parameter values are written as data changes for each region. The parameters of the joined MIDI region are all set to neutral (default) values.)
Coloring regions in the Tracks area
You can change the color of regions to identify sections of your arrangement, distinguish between track types, or for other uses. Newly recorded or added regions use the color of the track channel strip.
Change the color of one or more regions:
Select the region or regions. Note: If you select all regions on a particular track, and no regions on other tracks are selected, coloring them alters the hue of all selected regions. This also changes the color of the selected track’s channel strip. Control-click one of the selected regions, then choose Name and Color > Show/Hide Colors from the shortcut menu. Click a color.
Set regions to match the track color:
- Select the regions you want to change.If all regions are on a single track, click the track’s header to select all regions.
- Choose Functions > Color Regions by Track Color from the Tracks area menu bar.The colors of all selected regions are replaced with the colors of the corresponding track channel strips.
Tip: This feature is handy after copying or moving regions between tracks, when you may find that the Tracks area resembles a patchwork quilt.
Looping regions in the Tracks area
You can loop regions so that they play repeatedly, and extend them to fill any amount of musical time in the Tracks area. When you play the project, the region repeats the number of times you have extended (looped) it.
You can also loop a region that has been resized. When you loop a resized region, only the visible portion of the region repeats when you play the project. If you add silence by lengthening a region, the silence is included in each repetition when you loop it.
Loop a region:
- Place the pointer over the upper-right edge of the region.The pointer becomes a Loop pointer.
- Drag the right edge of the region until it aligns with the point where you want it to stop playing. As you drag the edge of the region, “notches” appear at the top and bottom of the region, showing the beginning and end of each complete repetition.
Note: When track automation curves are visible in the Tracks area, in some cases the Loop pointer may not be shown when you place the pointer over the edge of a region. In this case, you can press and hold the Option key while placing the pointer over the upper-right edge to loop the region.
Loop a region continuously:
- Select the region, then select the Loop checkbox in the Region inspector.
The region loops continuously until the start of the next region in the track, or until the end of the project. You can unloop the region by deselecting the Loop checkbox, or by pressing L again.
Note: Deselecting the Loop parameter resets the manually created loop length. The next time the Loop parameter is used, the region is repeated until it either encounters another region in the same track, or reaches the end of the project (or folder).
Convert loops into aliases or clones:
- Select the original region, then choose Edit > Convert > Loops to Aliases (or use the Convert Loops to Aliases key command).
Software instrument loop repeats are converted into aliases. Audio loop repeats are converted into cloned audio regions. As such, any alterations to the length of the original region affect all aliases and cloned regions.
Repeating regions in the Tracks area
You can repeat one or more selected regions in the Tracks area. Repeating a region pastes one or more copies (or aliases) of the regions following (to the right of) the regions in the same track.
Paste single copies of selected regions:
- Choose Edit > Repeat from the Tracks area local menu bar (or use the Repeat Regions key command).
Paste multiple copies of selected regions:
Choose Edit > Repeat Multiple from the Tracks area local menu bar (or use the Repeat Regions Multiple Times key command). Enter the number of desired repetitions in the Number of Copies field.To have the repeated regions snap to a particular grid value, choose a value from the Adjustment pop-up menu. To paste the copies as regions, select As Copies (default).To paste the copies as clones (for audio regions) or aliases (for MIDI regions), select As Aliases or Clones.
Muting and soloing regions in Tracks area
You can mute one or more regions in the Tracks area to exclude them from playback. You can also solo individual regions, to hear them in isolation, and lock the solo status of regions.
Mute individual regions:
Do one of the following:
- Select the Mute tool, then click the regions you want to mute.
- Select the regions, then select the Mute checkbox in the Region inspector.
- Select the regions, then press Control–M.
Muted regions appear gray in the Tracks area, for easy identification.
Unmute muted regions:
Do one of the following:
- Select the Mute tool, then click the muted regions.
- Select the muted regions, then deselect the Mute checkbox in the Region inspector.
- Select the muted regions, then press Control–M.
Solo individual regions:
Click and hold the region you want to solo with the Solo tool.The region plays in isolation from the pointer position until you release the mouse button.You can solo multiple regions by clicking them, then clicking and holding one of the selected regions with the Solo tool. Playback starts from the position of the pointer until you release the mouse button.
Solo regions using the Solo button:
Click the Solo button in the control bar (or press S).Select the regions you want to solo.While the project is playing, you can Shift-click additional regions to hear them. Select a soloed region (or Shift-click multiple soloed regions) to unsolo them.When you’re finished, click the Solo button (or press S) again.
Lock the solo status of regions:
Option-click the Solo button in the control bar (or press Option-S).Select the regions you want to solo.Selecting regions while the project plays does not affect their solo status.When you’re finished, click the Solo button (or press S) again.
Muted tracks and regions appear slightly differently in the Tracks area, depending on how they are muted:
- When a track is muted using its Mute button, the regions on the track are gray, but the region names are in color.
- When a track is turned off using its On/Off button, both the regions on the track and the region names are gray.
- When an individual region is muted, the region and its name are gray, and a small colored dot precedes the name.
- When a track is muted because another track is soloed, the regions on the track are gray, but the region names are in color.
Muted tracks and regions appear slightly differently in the Tracks area, depending on how they are muted:
- When a track is muted using its Mute button, the regions on the track are gray, but the region names are in color.
- When a track is turned off using its On/Off button, both the regions on the track and the region names are gray.
- When an individual region is muted, the region and its name are gray, and a small colored dot precedes the name.
- When a track is muted because another track is soloed, the regions on the track are gray, but the region names are in color.
Do this now
- Record or drag in an eight-bar part.
- Split it at bar 5, move the second half two bars later, then loop it.
- Now do it all again using only key commands and the alignment guides.
Regions are the raw material. Getting fast here makes everything after it faster.