What Is Logic Pro ?
Logic Pro X is Apple's flagship music production software. It is their Digital Audio Workstation (DAW) that allows you to do everything you need to do from start to finish in order to get your songs completed. You can sketch ideas, record your instruments, arrange, mix and master. It is a DAW that is used by professionals in studios all over the world, to create anything from singer-songwriter EP's and chart topping records to podcasts and movie scores. Any type of music project can be done in Logic Pro X!
Digital Audio Workstations allow you to work with and manipulate audio- this may be audio that you have recorded, or pre recorded ones (like loops) and Logic Pro X is one of many available. Others are available on both Windows and Apple computers, though Logic Pro X is exclusive to Apple computers since they acquired the company that initially developed the software, Emagic, in 2002. The software was initially developed in 1993- hence, Logic Pro has been around for a long time!
A DAW like Logic Pro X naturally allows to work with audio, though you can also work with MIDI in order to trigger sounds from its software instruments. MIDI is a technology that has been around since 1982, it stands for Musical Instrument Digital Interface. MIDI is often thought of as a simple trigger for sounds, though in reality it is a a complex language that allows you to do more than trigger a note on a piano, or a drum hit. Once you dive into the world of MIDI, you'll be able to change parameters like velocity, panning and even the tempo of a track. But more about all that later!
A (nowhere near exhaustive) list of things that you can do in Logic:
- Record MIDI information via connected MIDI input devices, such as keyboards, and play back this information via any connected MIDI device or Logic’s integrated software instruments.
- Create, arrange and edit MIDI songs and print out musical notation via a printer connected to your computer.
- Digitally record acoustic and electric instruments or vocal performances into your songs and process these audio recordings with Logic’s in-built realtime effects.
- Make use of the integrated software instruments, external Instruments (i.e hardware synths) and/or add third-party Audio Unit instruments to Logic.
- Load songs or Channel Strip settings from Apple’s Garage Band application and edit them, making use of the additional processing and editing possibilities afforded by Logic.
- Mix your MIDI and audio tracks, including effects and software-based instrument settings, via a sophisticated total recall mix automation system.
- Bounce all audio data including effects and mix automation settings, to a stereo (or multiple Surround format) file(s) for mastering or further processing.
Introduction to the Main Window
Most of what we do in Logic occurs in the "Main Window," previously known as the "Arrange Window." This window has many sections, buttons and functions and it's a good idea to get familiar with it and what's what with it all.
In order to get to it- you must open Logic in one of these two ways:
• Click the Logic Pro icon in Launchpad or Dock. • Double-click the Logic Pro icon in the Applications folder.
If it's the first time you're opening Logic Pro, it downloads basic content, including software instrument presets and Apple Loops that you can use in your projects. After the download is complete, the Project Chooser opens so you can create a new project or open an existing one.
This window presents you with quite a few options- including the ability to choose from preset templates to work from, as well as work from your own ones that you might create. You can also open existing projects from this dialog box, and see recent projects you have worked on.
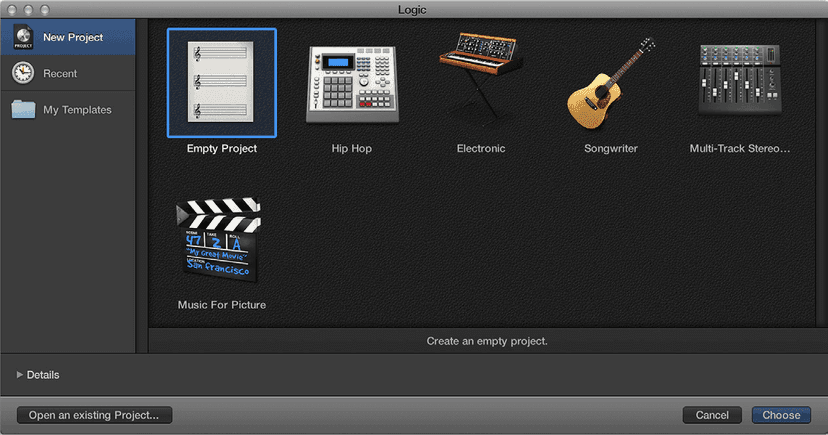
In order to start with a clean slate- click on "Empty Project" and then "Choose" and you'll be presented with an empty Main Window.
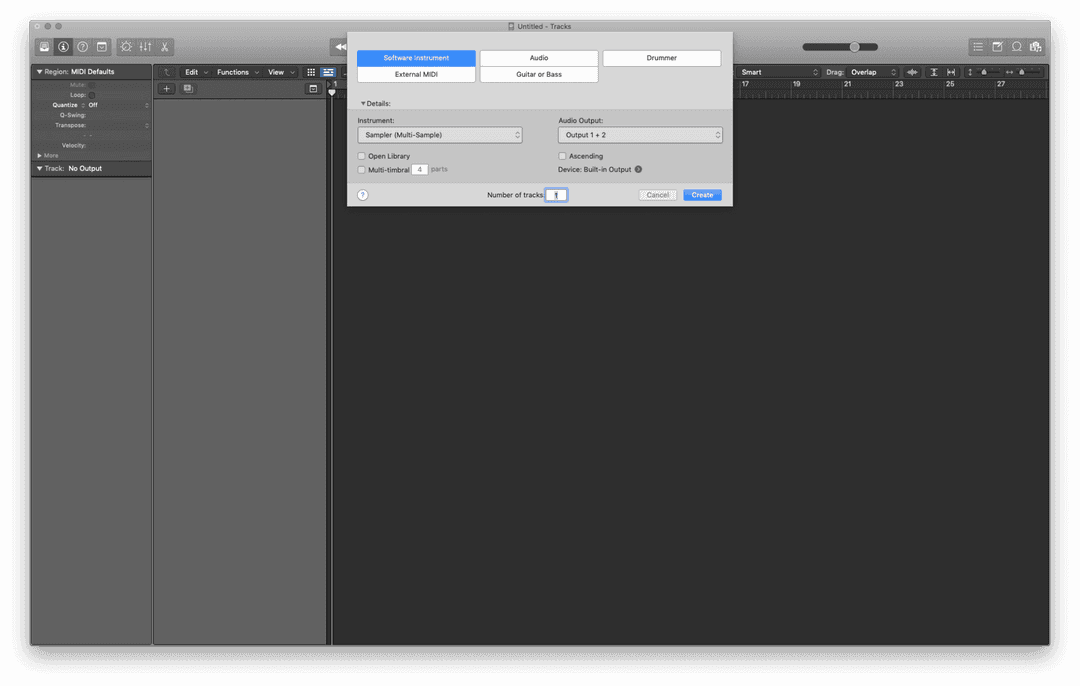
You won't be able to continue until you select at least one "Track" type- either "Software Instrument" or "Audio" will do fine to get you in to the Main Window.
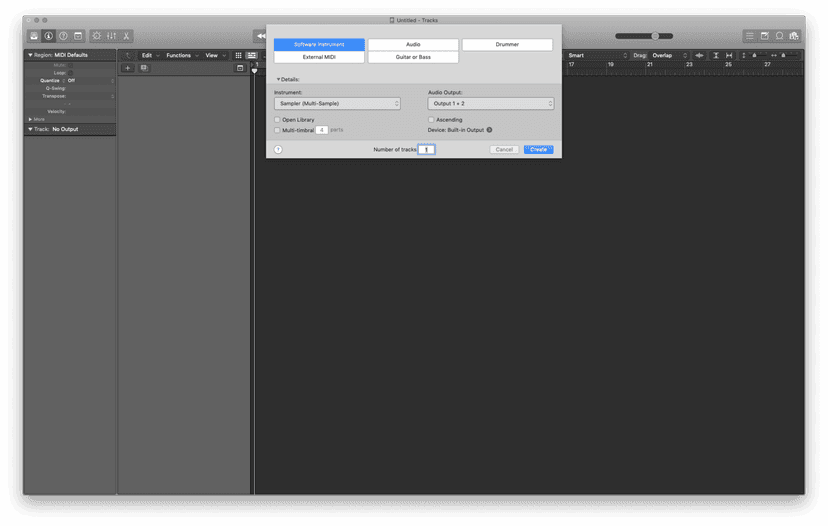
Once you're in, you'll be presented with a basic Main Window- which will have one Track and many buttons!
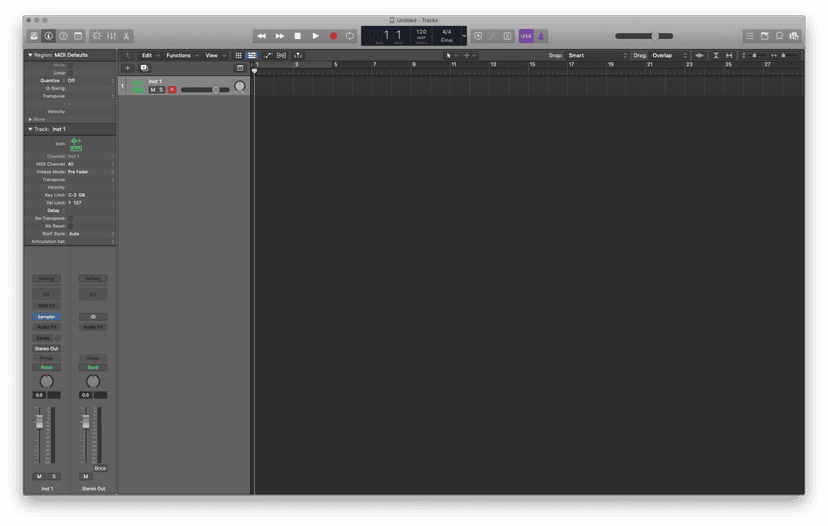
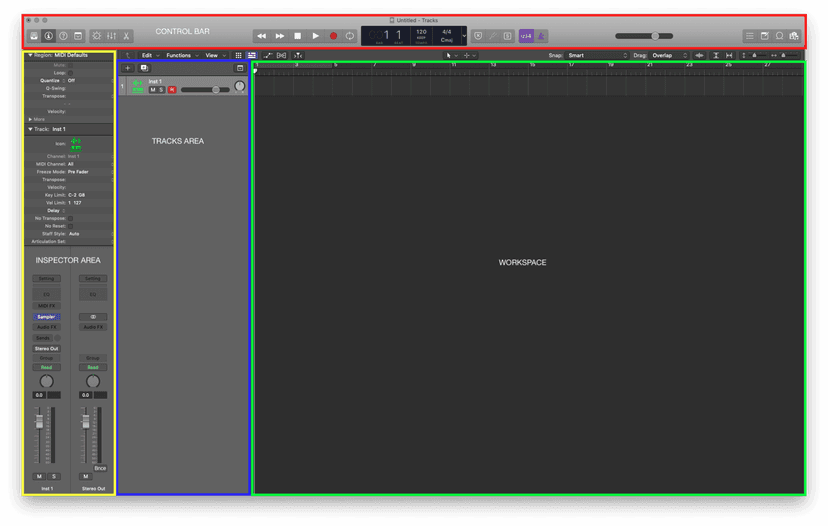
The Main Window can be split up like it is below:
The red area is the Control Bar & Display area.
The yellow area is your Inspector area, where you will be able to see your Region Parameters and Track Parameterboxes, as well as your Channel Strip.
The blue area is your Track Header area, which will be populated with your Audio and Software Instrument tracks.
The green area is your Workspace, where your Regions will show once you populate them.
You may also see the Library section on the far left hand side, shown below:
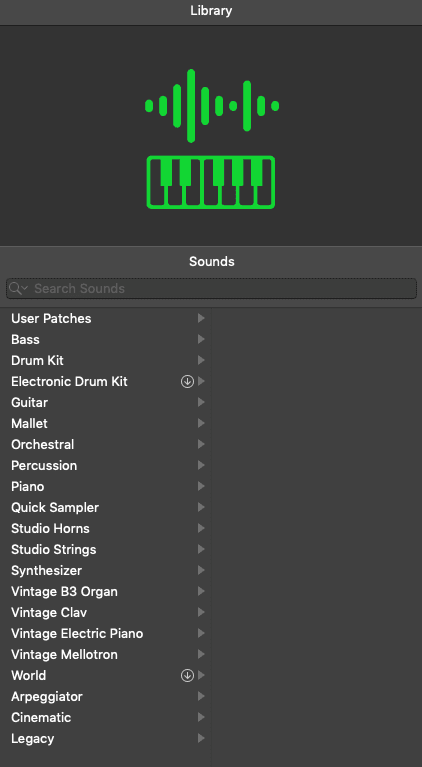
We'll explore these in a little more detail in order to get more familiarised with Logic Pro X.
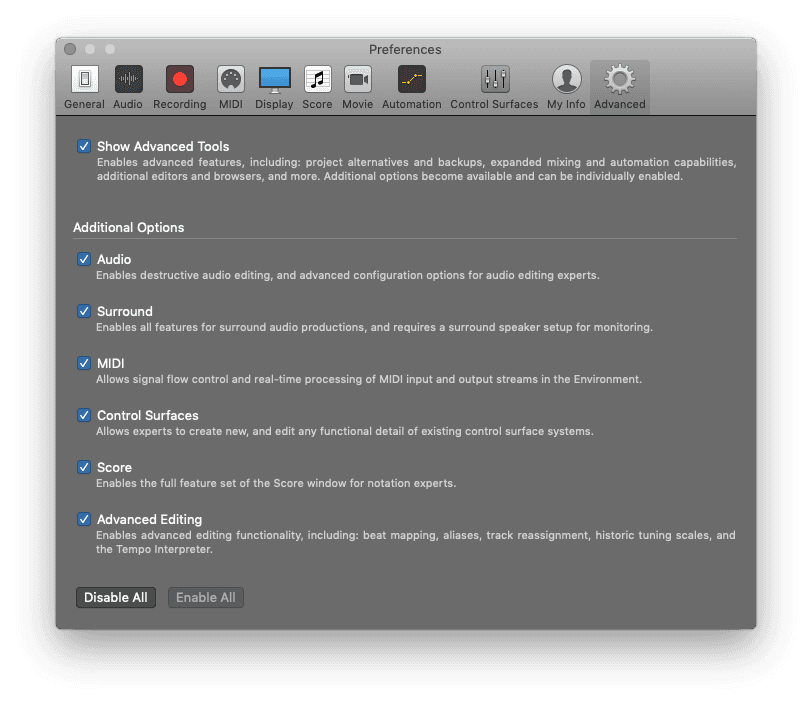
Before we continue, it's a good idea for you to: Preferences (shortcut: Cmd + ,) and the Advanced tab. Make sure all the boxes are ticked, so you're getting the most out of Logic Pro X, otherwise some of the functions we discuss later might not work! Click the "Enable All" button at the bottom in order to save yourself checking all the boxes manually!
It's a good idea to make sure you have all the additional content downloaded that comes as part of the free Logic Pro X Sound Library.
After you install Logic Pro on your computer, additional content, including software instruments, Drum Kit Designer drum kits, loops, and compatibility content may still be available. You can view the available content not installed on your computer, and select content to download, any time you are working, using the Additional Content window. Click on Logic Pro X> Sound Library to see if the "Download All Available Sounds" option is available. If it isn't and it's greyed out, you have all that you need!
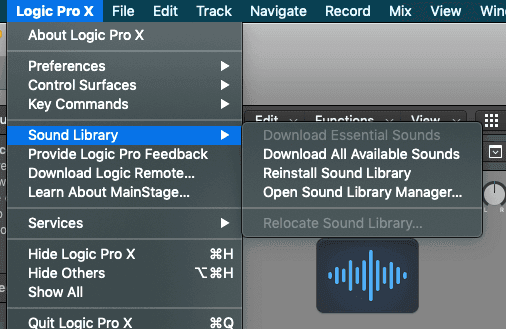
If it's available to click on some additional content is available and may be needed to perform certain tasks. In these instances, a dialog appears, informing you that additional content is needed, and asking if you want to download it. In the Drum Kit Designer plug-in, drum kits not yet installed include a Download button that opens the Additional Content window. Jam Packs and some other content packages have a disclosure triangle, which you can click to show and select individual content types (instruments or loops) to download.
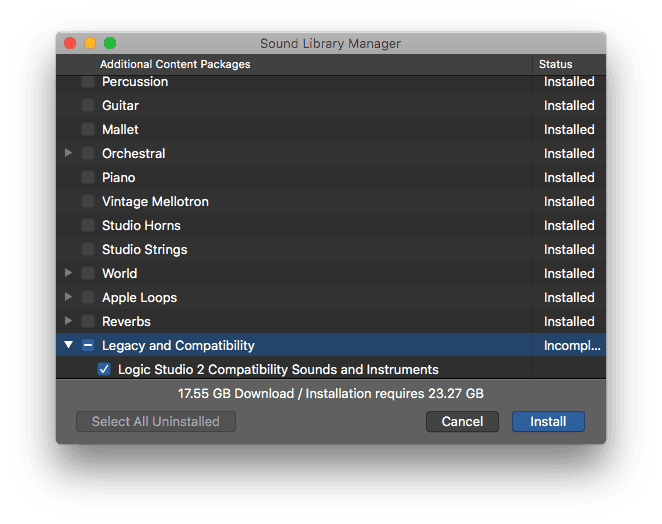
If you don't have space on your computer hard drive, you can now move/save the content to an external drive. Do this by clicking Logic Pro X> Sound Library> Relocate Sound Library
Control Bar & Display: Views, Transport, LCD, Modes & Functions
Logic Pro X can get pretty complicated at times, and has the ability to display lots of information at once. In order to not get lost, let's look a little bit closer at what you can see and where.
At the top of the project, under the Project Name, you'll see the Control Bar & Display area:

This area Includes the transport controls you use to control playback of your project, buttons to show and hide the different areas of Logic Pro X and access to other toolbars too.
You can fully customize the control bar to suit your way of working by adding or removing buttons.
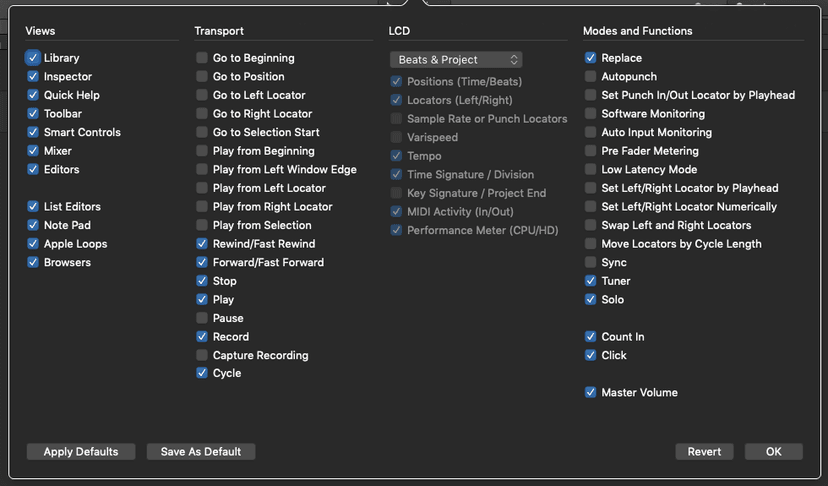
Let's take a closer look at some of the functionality of this area.
Views:
The buttons that toggle on or off different windows are collectively known as the "Views"
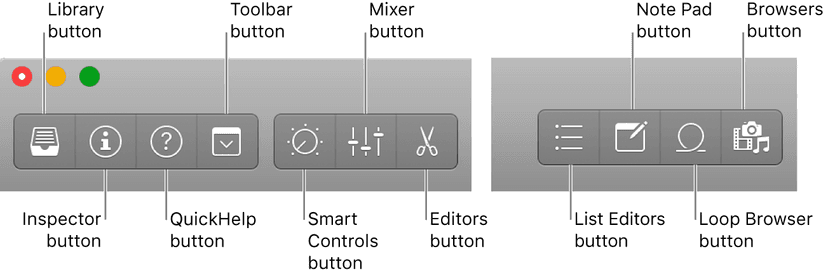
Library (Shortcut: Y)
The Library button will toggle open the window on the left hand side of the screen. To close it, you would click the button again.
The functionality of the Library area will change based on two main things- what type of track you have open and what it's pointing at in the Inspector. If you have an Audio Track open and you point it towards the 'Channel Strip Setting'button (as shown below), you'll end up getting a list of ready to load, set and forget effects that will employ Logic Pro X's wide range of processing options.
Categories appear on the left, and patches for the selected category are displayed on the right. You can search for patches, create, save, and delete patches, and choose routing options.
[INSERT WITH TIRANGLE POINTED TO SETTINGS]
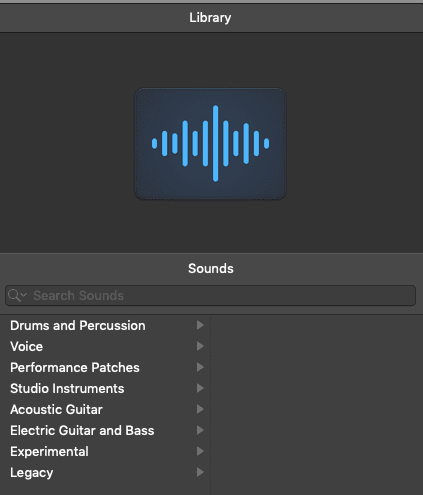
If you were to have a Software Instrument pointing at the 'Channel Strip Setting' button, you'd be presented with a range of categories to choose from Logic's enormous bank of virtual instruments, and picking one of these would load a chain of effects for you to get creating with.
When a Drummer track is selected, you can choose drum genres and drummers in the Library, which apply to all regions in the Drummer track. You can choose preset settings for the selected drummer from the left side of the Drummer Editor.
If the blue triangle is pointing at something else, like an instrument or an effect- you'll see the presets of that populate in the Library.
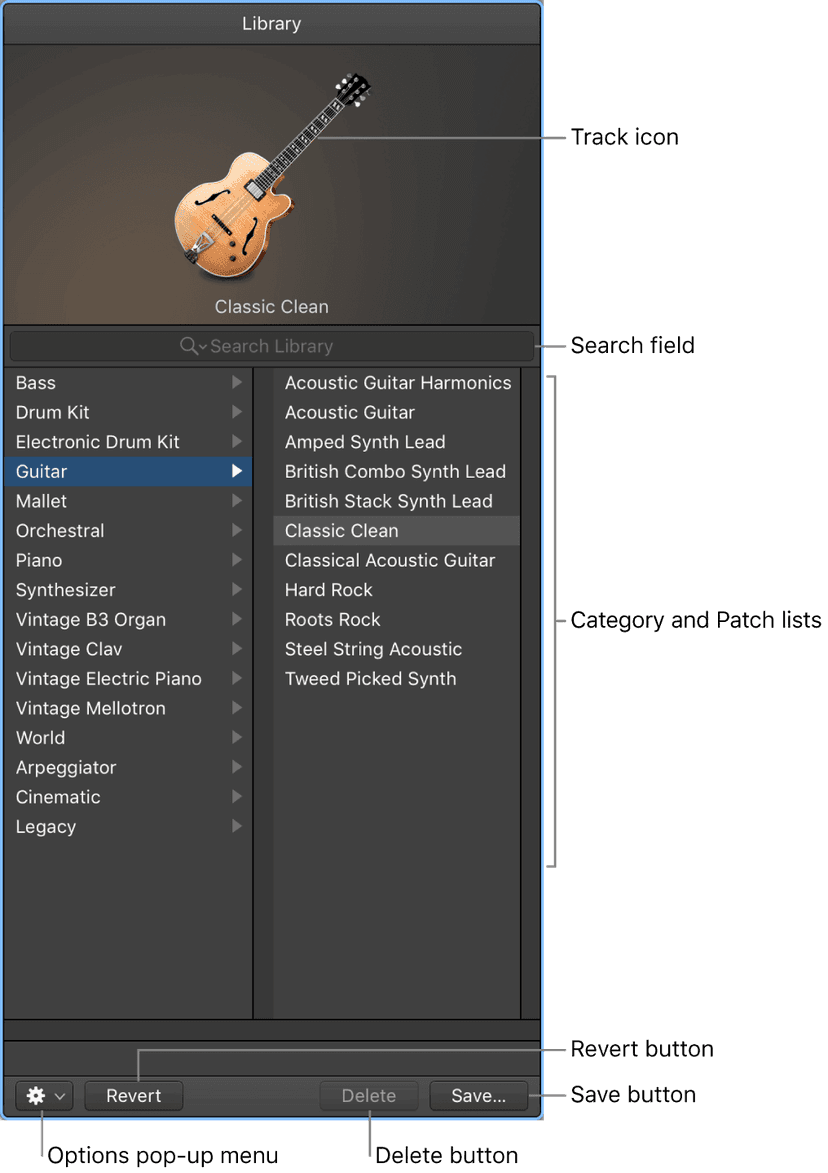
- Track icon: The icon for the selected track is displayed in the upper part of the Library.
- Search field: Quickly search for patches by name.
- Category and Patch lists: Select a category on the left, then select a patch on the right.
- Options pop-up menu: Define the default patch and merge patches.
- Revert button: Revert to the saved settings for a patch, erasing any changes you have made.
- Delete button: Delete a saved patch.
- Save button: Save the patch with its current settings as a new custom patch.
You can also access the following file types in the Library, when the corresponding item is selected: Channel strip settings (.cst), Plug-in presets (.pst), Sampler instruments (.exs), Environment instruments, and programs or banks of MIDI instruments created in the Audio MIDI Setup utility
In summary, the Library is the area to go to in order to load patches and presets very easily. You can also save patches in the Library area. Once you have one selected you can bank through the other settings by using your up and down arrow keys, making it super simple to audition sounds and settings whilst making music!
Inspector (Shortcut I)
The Inspector shows you parameters for selected regions, tracks, and other items. The available parameters change depending on the area in which you are working, and what type of item is selected. For instance, it will populate differently on an Audio track to a Software Instrument track. In the former case- you'll be able to reverse the audio from the Region Parameters, in the latter- you can't reverse MIDI information. If you're unable to see the Region or Track parameters box, you'll have to click on the disclosure triangle next to them to open them, and you can click them again to toggle them back to closed.
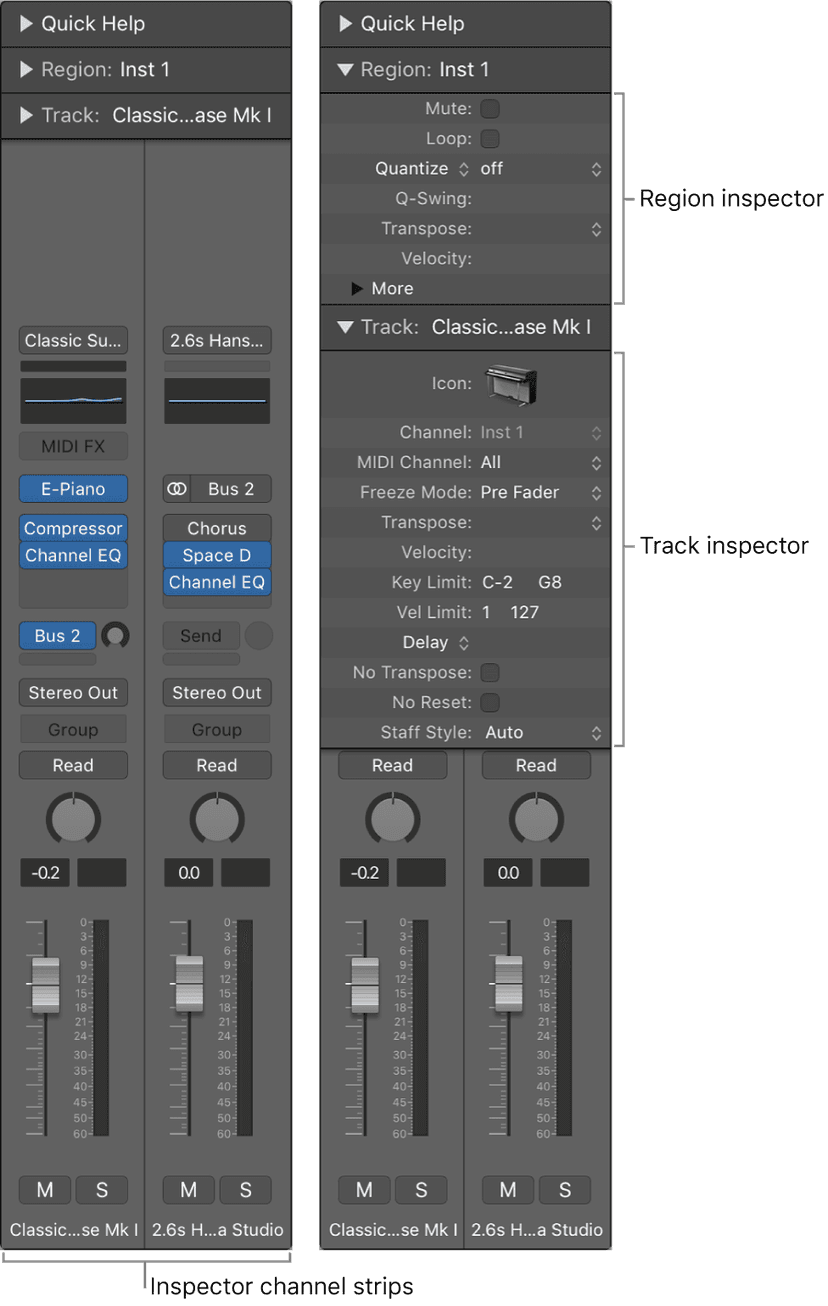
One thing you'll always be able to see on all track types is the Channel Strip. This is very handy as it saves you from having to constantly open the Mixer to add or change effects, volume and panning of the track. You always have two channel strips within the Inspector area- the left one shows the strip for the track you're working on and the one on the right shows the destination that signal is going to. If that doesn't quite make sense yet, it will when you know more about signal flow!
Quick Help (Shortcut: Shift + /)
A very handy section for beginners, this button will toggle on and off a little dialog box that will show handy help tips when you hover an area, a button or anything else in Logic really. Helpful if you're familiarising (or re-familiarising!) yourself with the user interface of Logic.
Toolbar (Shortcut: Ctrl + Opt + Cmd + T)

The toolbar can be thought of as a secondary Control Bar, as it contains additional buttons and controls for the Tracks area and other areas of Logic Pro. You can toggle between show and hide to optimize available screen space.
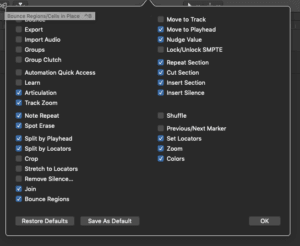
It's worth noting that there's some cool features in the default toolbar, but if you right-click anywhere inside of the Toolbar, you get the ability to customize it and take away anything you may not need and add the stuff that you will find more useful. Right-click within the Toolbar and you'll see the buttons you can add and takeaway:
Smart Controls (Shortcut: B)
Smart Controls are a simplified set of visual controls that you can use to quickly modify the sound of the current patch without having to load an individual channel strip or plug-in settings. The window appears in the bottom half of the screen when you press the button (or use the shortcut). This works seamlessly with all of Logic's own plug-ins, but putting the most important controls at your fingertips.
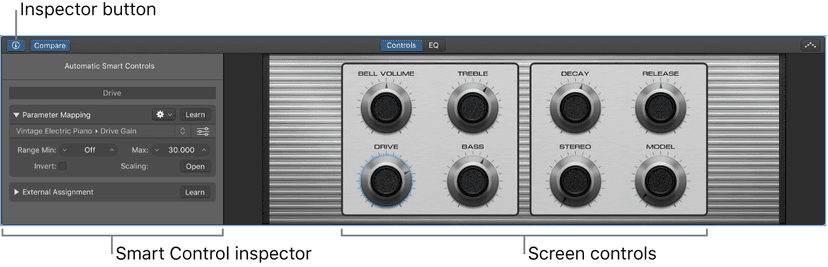
- Smart Control inspector: Choose a different layout, view existing mappings, map screen controls to parameters, and assign hardware controllers to screen controls.
- Screen controls: Visual controls that modify aspects of the sound of the track. Each Smart Control has a set of screen controls optimized for the type of track or instrument. Screen controls are labeled to make their functions easier to understand.
Mixer (Shortcut: X)
The Mixer area shows channel strips for each track in the project, as well as auxiliary, output, and master channel strips. You can view and edit channel strip controls, customize routing options, and add and edit plug-ins in the Mixer, which appears in the bottom half of the screen.
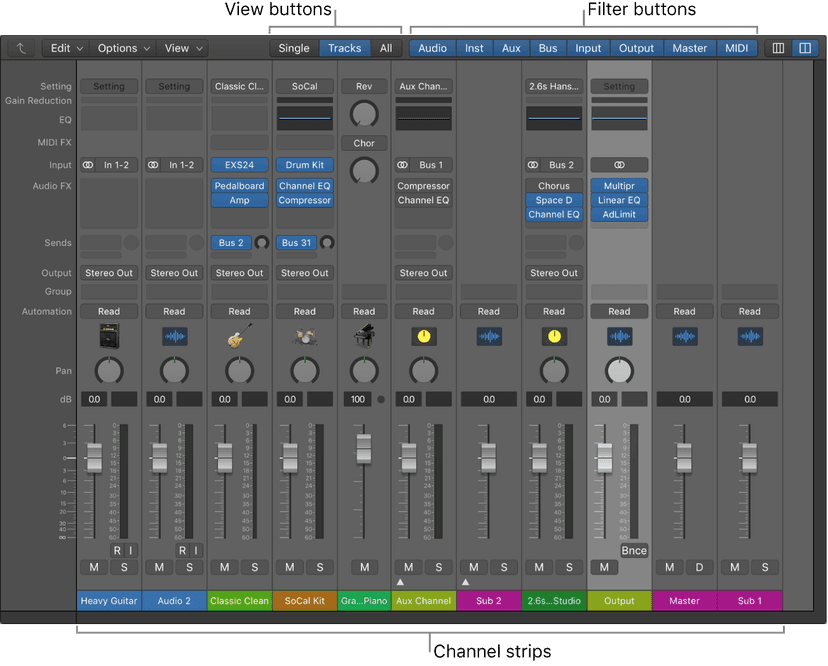
- Channel strips: Use to process audio or MIDI information that is routed from tracks.
- Channel strip controls: Adjust the level and other aspects of the audio signal played through the channel strip.
- View buttons: Use to switch between Single, Tracks, and All views, limiting the Mixer view to channel strips required for the task at hand.
- Filter buttons: Use to limit the channel strips displayed in the Mixer to specific types.
Editors (Shortcut: E)
Logic Pro X features a set of editors, including the Audio Track, Audio File, Drummer Editor, Piano Roll, Score, Step Sequencer, and Smart Tempo Editors. These show in the bottom half of the page, just like the Smart Controls and Mixer.
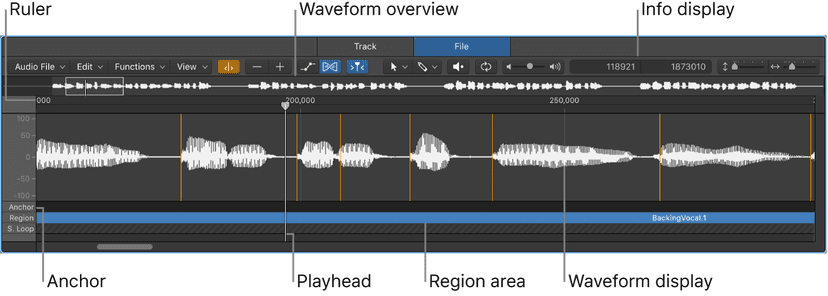
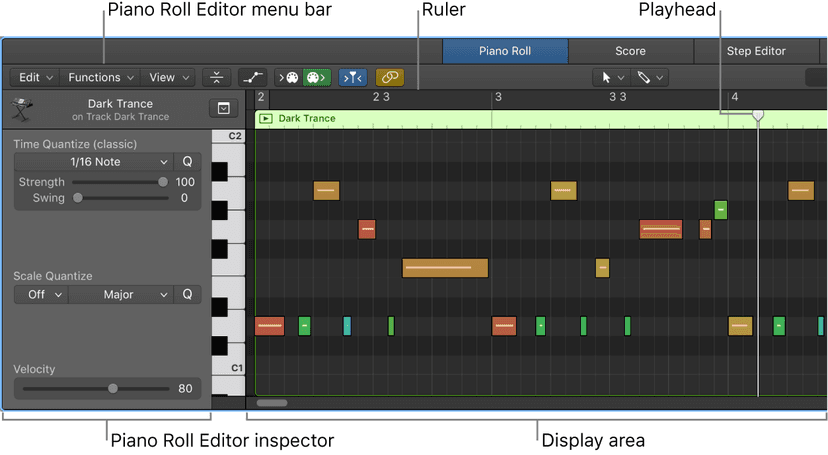
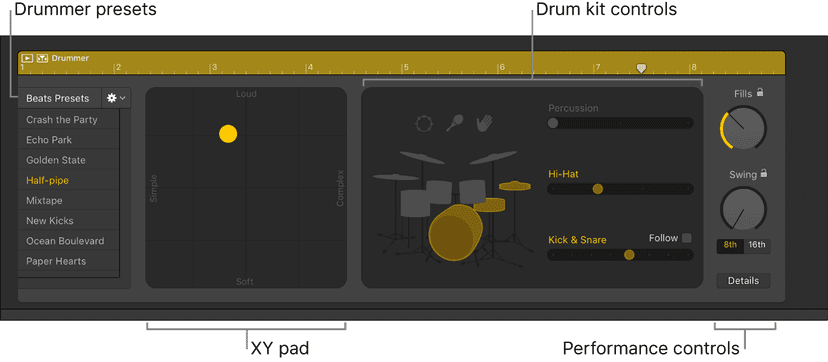
List Editors (Shortcut: D)
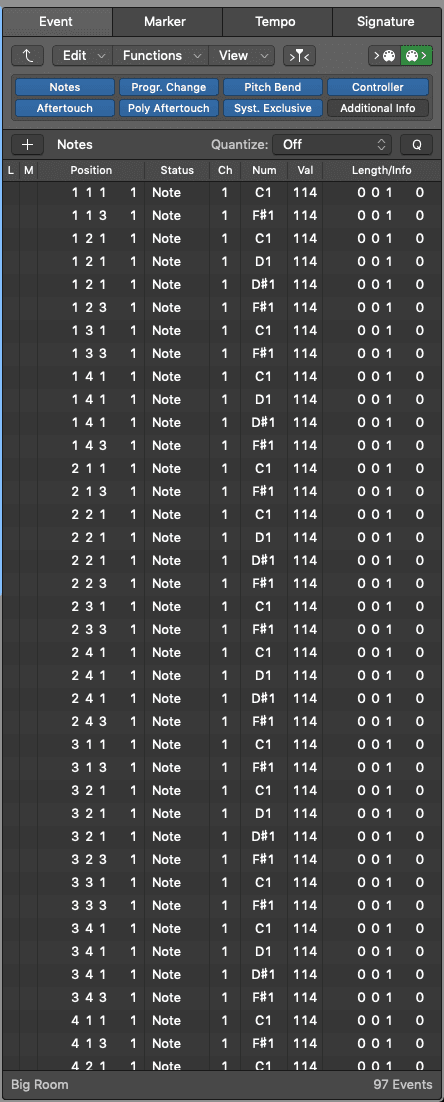
The List Editor shows , in list form: MIDI events, markers, tempo, and time signature events numerically- in order that they can be easily edited.
Note Pad (Shortcut: Opt + Cmd + P)
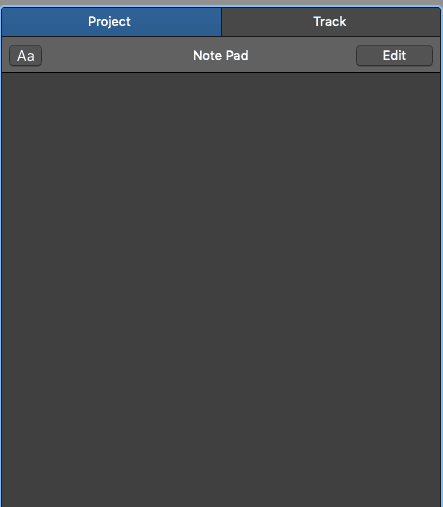
The Note Pad is one of Logics most handy features- which is a text area where you can create, view, and edit project and track notes. You can also drag in pictures in to this area. As it works on Track level and Project level- you can have one set of notes for the entire project and other individual sets of notes per track- just click between the tabs to switch.
Loop Browser (Shortcut: O)
The Loop Browser is home to the included Apple Loops library so you can search for loops and preview them, then add them to your project. The system of searching is intuitive and tag based, so it's easy to find the perfect Apple Loop!
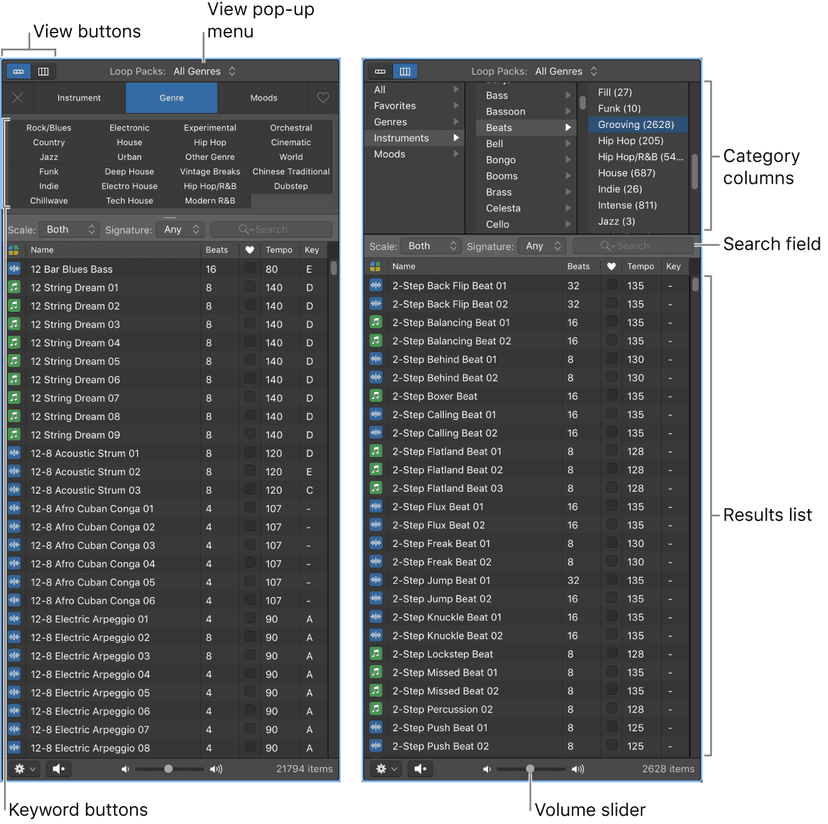
- View buttons: Switch between column view, button view, and sound effects view.
- View pop-up menu: Choose which loops to display. You can display all available loops, or filter loops by Jam Pack or the user’s loop library.
- Search field: Type text to search for loops by name.
- Keyword buttons: Filter loops by clicking keyword buttons. Matching loops appear in the results list below.
- Category columns: Filter loops by choosing categories and subcategories from left to right. Matching loops appear in the results list below.
- Results list: Displays all loops that match the search criteria. Click a loop to preview it, and drag a loop from the results list into the Tracks area to add it to your project.
- Volume slider: Adjusts the volume of loops you are previewing.
Browsers (Shortcut: F)
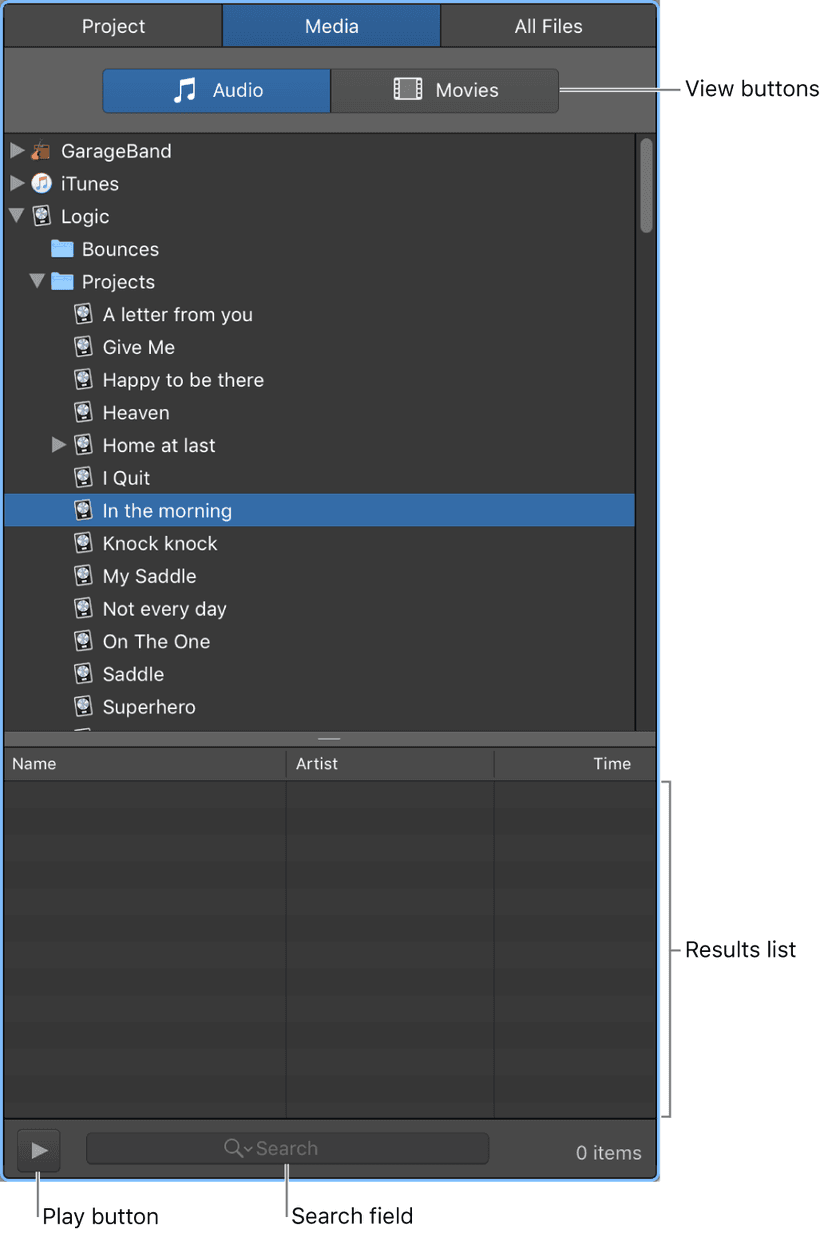
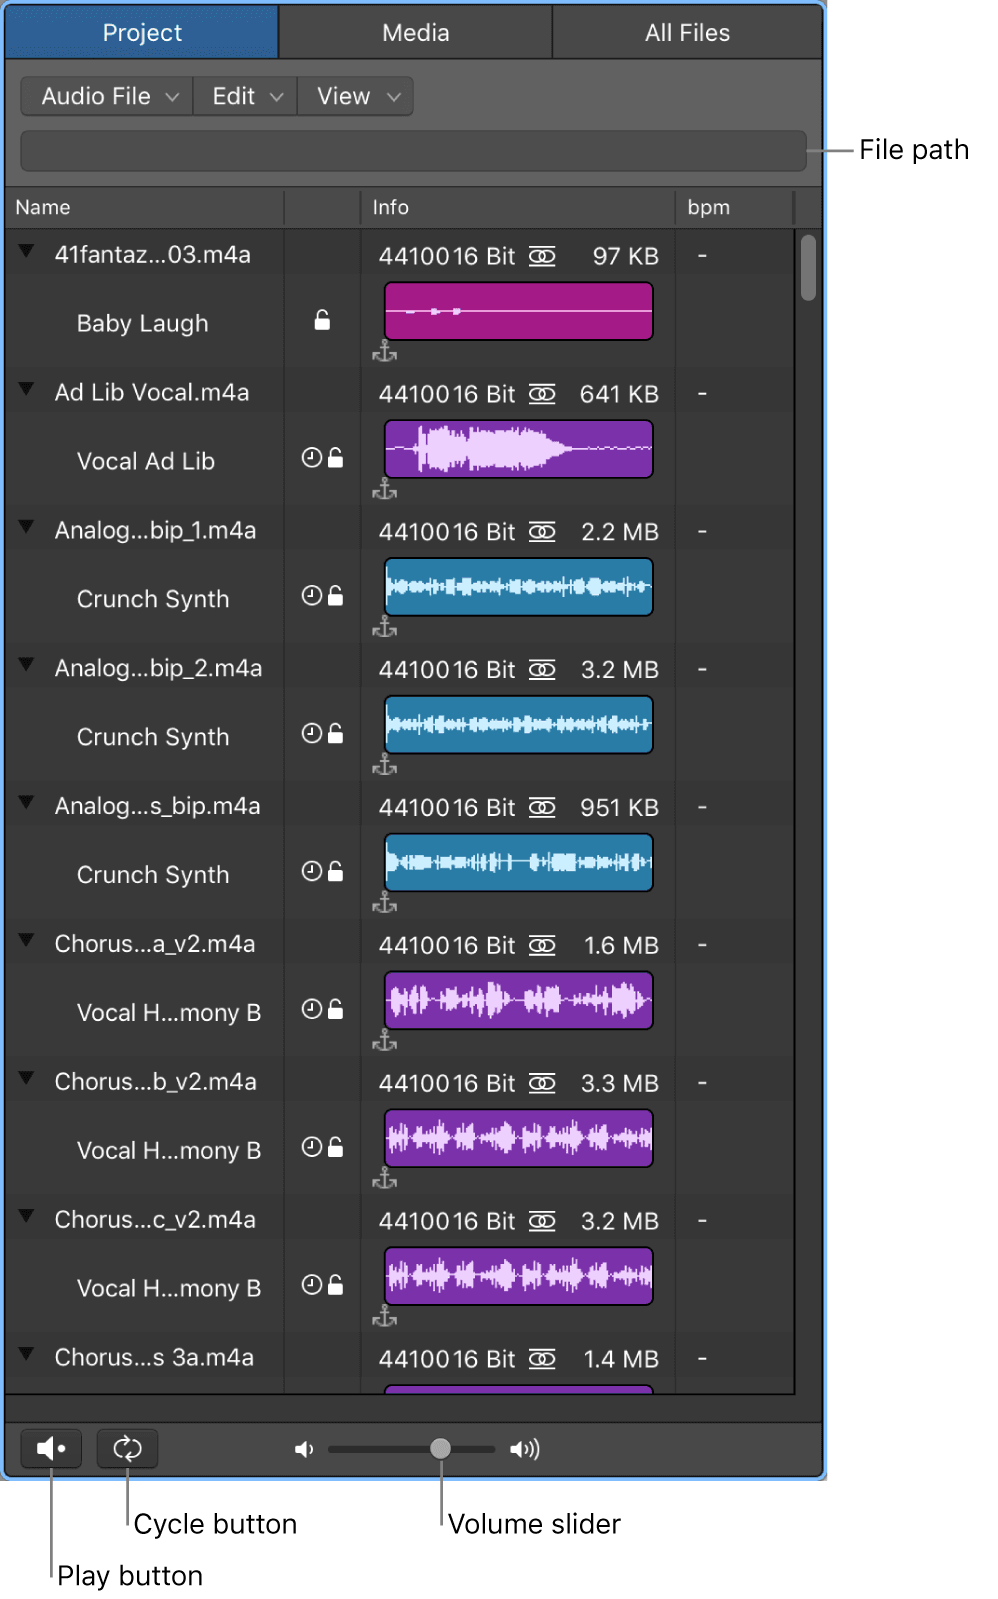
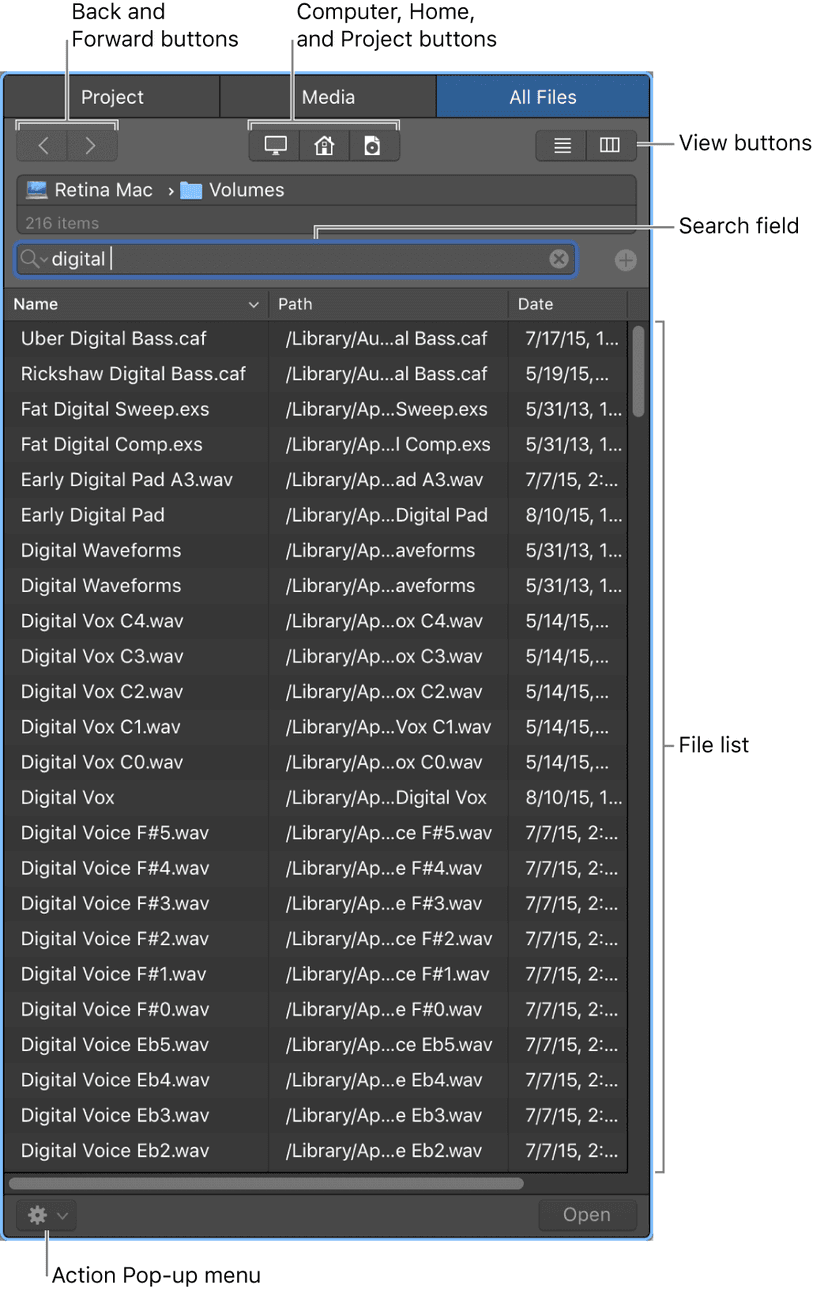
You can view the audio files in your project in the Project Audio Browser, add audio and movie files from the Media Browser, and browse your computer and connected storage devices using the All Files Browser. One of the key features that's often overlooked in this view is the ability to import session data from another project. Had a killer vocal chain or created a monster synth in a session a couple of months ago? no worries- find the project and click on the "Import" button in the bottom right to bring those things into your current project.
Key Focus
As you may have noticed, you can have more than one View open at a time, and these views can accept any typing you input with your computer keyboard in that area. If you're ever unsure of where your typing might be going- just look for a bright blue border around a portion of the screen. This is where the "key focus" is and if you're using shortcuts (aka key commands) they'll be relating to that view. If you want your key focus to be elsewhere, just click in the area you're wanting to work in- you'll see the blue frame surround it.
The bits in between the "Views" buttons make up the rest of the Control Bar & Display, so lets take a look at what we can find there.
Transport Area:
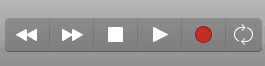
This part of the Control Bar brings the buttons you need to your attention on order to playback, stop and record inside of your project. In truth, all of these buttons have shortcuts, which you would be much better off learning, rather than clicking the buttons every time. You can see the factory setup buttons and their shortcuts below:
Rewind (,) (Add Shift key to jump 8 bars back)
Forward (.) (Add Shift key to jump 8 bars forwards)
Play (Space Bar)
Stop (Space Bar)
Record (R)
Loop (C)
It's worth noting, you can choose to add or remove buttons from this area by right-clicking in the Control Bar area and clicking on 'Customize Control Bar & Display' and then selecting the checkboxes of buttons you want to appear in the Transport area.
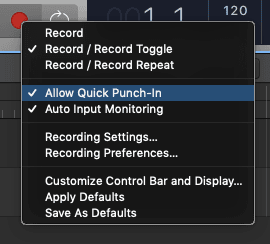
It's also worth being aware that many of the buttons in the Transport area have more options under them when you right-click on them. If you were to do this on the Record button for instance, you'd be able to choose different recording behaviours, including turning on or off 'punch' recording and also you could go straight to the recording settings and preferences menus from here!
LCD/Display Area:
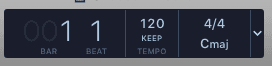
The LCD or Display area shows you lots of important information about your project- including tempo, bars and beats as well as key and time signatures. Like other sections of Logic, this can be customized to show you less or more information. You access this function in the same way as you did before- by right-clicking in the Control Bar area and clicking on 'Customize Control Bar & Display' and then selecting the checkboxes of buttons you want to appear in the LCD area. Use one of the preset setups or choose 'Custom' in order to view all the info you want to see, including SMPTE time (a must if you're working with video) and CPU performance.
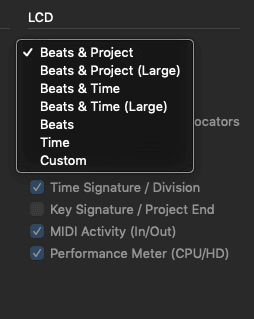
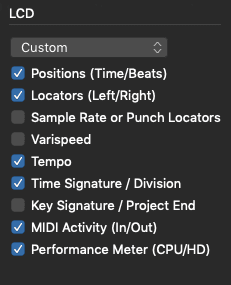
Modes & Functions Area:

This area comes pre loaded with a few buttons, like the Click aka Metronome button- which is handy- but really a button like the Replace one isn't so much for people who don't use that mode of recording. The real power in this section comes when you customise it, and as you will see, you have a lot of buttons to choose from! Once again, right-clicking in the Control Bar will allow you to customise the Modes and Functions. Some people like to see the Master Volume fader and others would like to get rid of it. Some people like to see Pre Fader Metering and others don't. Whatever you like or dislike, you can easily have your most useful buttons at your fingertips in this area.
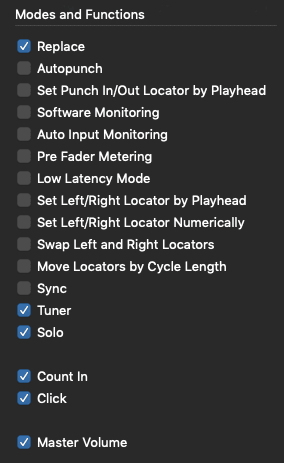
Once again, it's worth noting that just as with the Transport buttons, many of the Modes and Functions buttons will also have more options if you right click them. The Click/Metronome button, when right clicked, allows you to change the behaviour of the click and can also take you straight to the window to change the volume, and even the sound if you like!

The Workspace
The Workspace is where you record audio and MIDI regions, add Apple Loops and other media files, edit and arrange the regions to build your project. As we saw in the earlier screenshot, it's pretty boring and pretty grey, until you start filling it up with some tracks and regions- and then it gets quite wild, quite quickly! The Workspace can change to show Tracks and Regions, or the Live Loops Grid and all its Cells, with just a couple of clicks with some buttons. It's an area we don't need to know too much about, except for what we can expect to see there.
Do this now
- Open a new empty project.
- Show and hide each of the panes in turn with its shortcut: Y for the Library, I for the Inspector, B for Smart Controls, X for the Mixer.
- Leave open only the ones you actually used, and note the shortcut for the one you kept reaching for.
The layout you end on is the one you will use for months. Choose it rather than inheriting it.