You know Drummer. Logic now has the other two members of the band: a Bass Player and a Keyboard Player. Between them you can put a rhythm section under an idea in about a minute, and they all follow the same chords.
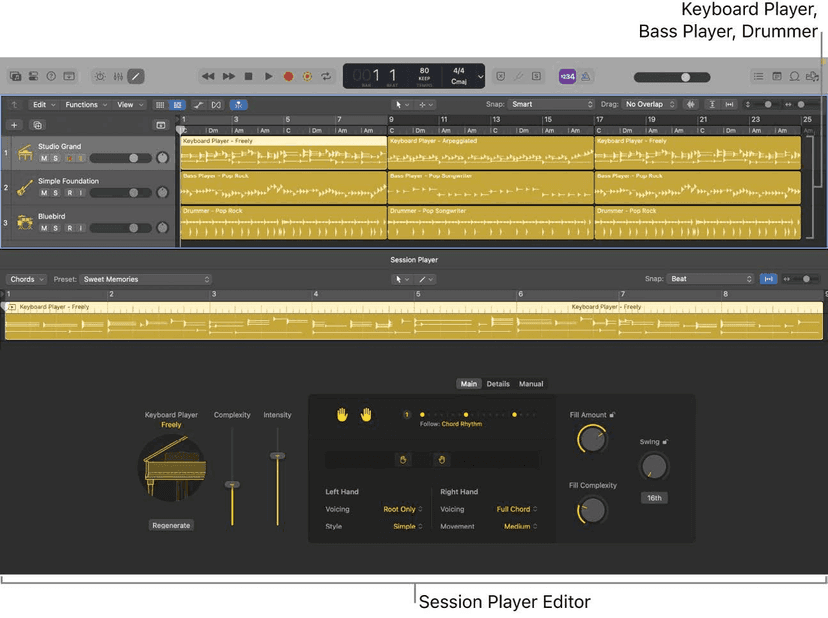
They are not loops. Each one generates a performance that reacts to the chords you give it, the style you pick, and how hard you tell it to play. Change the chords and the parts change with them. Change the tempo and they play like musicians who noticed.
The three players
- Drummer - acoustic kits through Drum Kit Designer, electronic kits through Drum Machine Designer.
- Bass Player - plays through the Studio Bass plug-in. Follows your chords, and you can tell it how far to wander from the root.
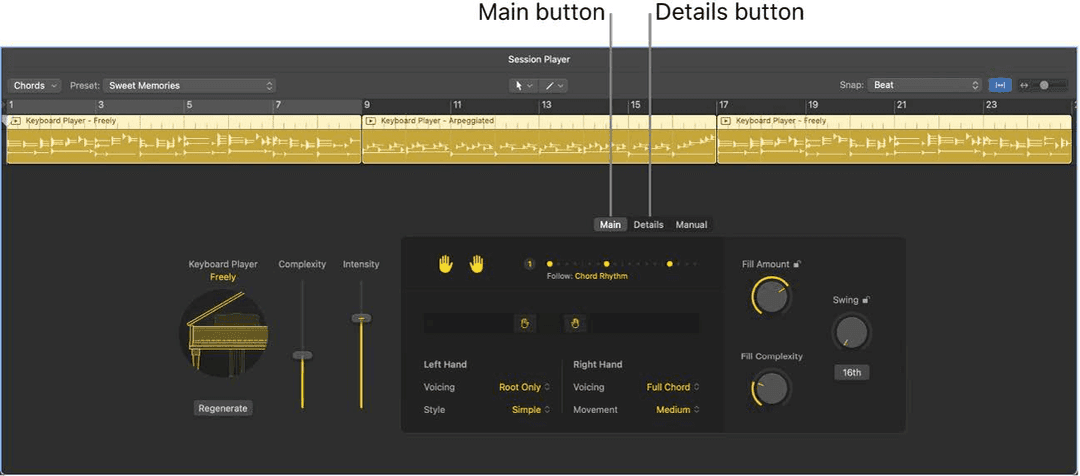
- Keyboard Player - plays through Studio Piano. Left and right hand are voiced separately, and they interact: mute the left hand and the right hand revoices to cover for it.
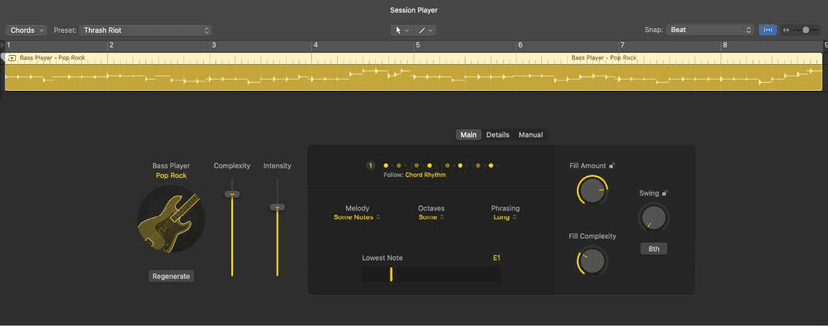
Bass Player and Keyboard Player also have Synth Player styles that run on Alchemy instead - Modulated Pad and Rhythmic Chords on the keys, Pump Bass, 808 Bass and Sequenced Bass on the low end. Treat those as instruments in their own right rather than the acoustic players with a different sound.
Add a player
- Click the Add Tracks button above the track headers, or press Option-Command-N.
- Choose Drummer, Bass Player or Keyboard Player in the Session Player button.
- Open the Details arrow and pick a style if you don't want the default.
- Click Create.
What you get depends on what is already in the project, and this is the part worth knowing before you click:
- Nothing set up yet - one 8-bar region.
- Arrangement markers in place - one region per marker, named and sized to match your sections.
- Cycle area on - one region the length of the cycle.
- Marquee selection active - one region the length of the selection, ignoring any cycle.
So mark out your verse and chorus first. Logic then builds the parts around the arrangement instead of you cutting regions afterwards - and each region can have its own style, so the verse can be brushes and the chorus sticks on the same Drummer track.
To add another region later: Control-click an empty part of the track and choose Create Session Player Region, or hover after the last region and click the + that appears.
Give them chords to follow
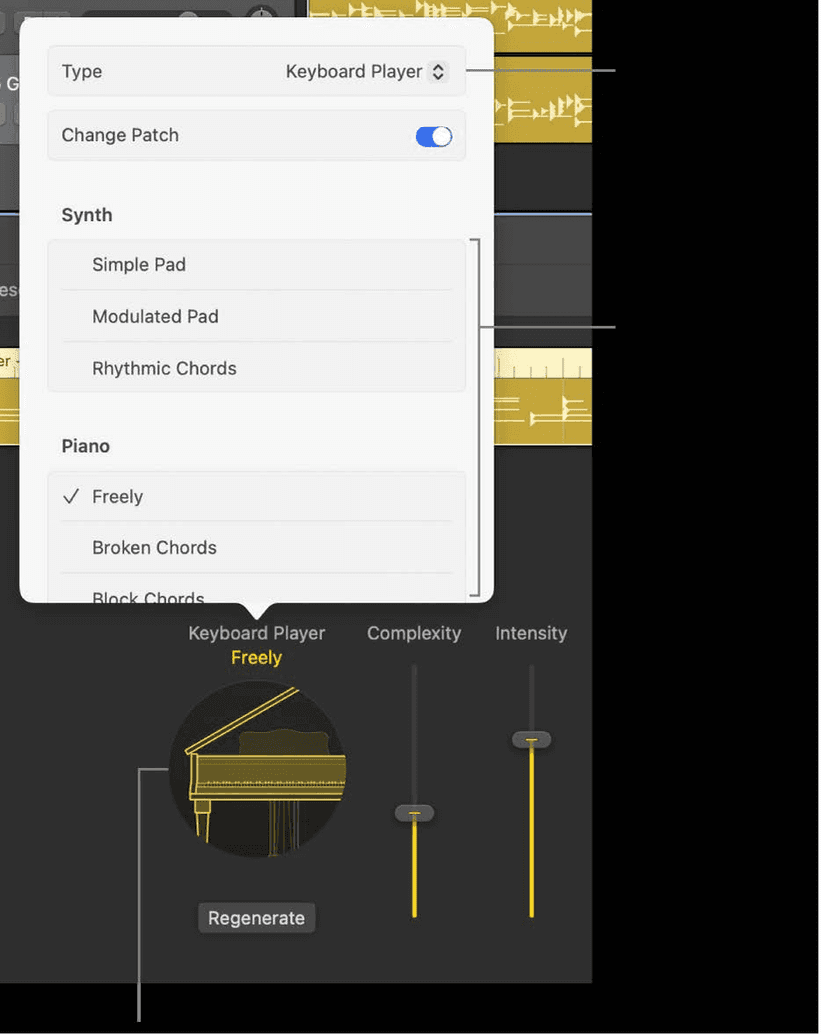
Bass Player and Keyboard Player play the harmony on the Chord track. Put your progression there and every player in the project locks to it - edit a chord and all of them re-voice around the change. Covered properly in The Chord Track.
A region can also carry its own chords and ignore the Chord track, which is how you get the keys playing extensions while the bass stays plain. You only see region chords when the region is set to follow them, and you edit them in the Session Player Editor. The full version of that is in the Production course.
Session Player loops
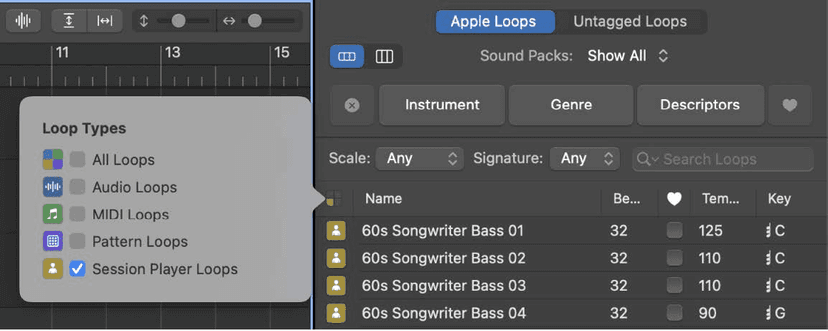
The Loop Browser has Session Player loops - click Loop Types and select Session Player. Bass and keyboard loops come annotated with their chords, and when you drag one in Logic offers to copy those chords onto the Chord track so everything else follows them. It is a quick way to start a song from a loop you like and have the band fall in behind it.
Presets, and the fastest way to audition them
Once you have a player and a style, the Preset menu at the top of the Session Player Editor browses whole editor states - pattern, fills, swing, the lot. Choosing one regenerates the region immediately.
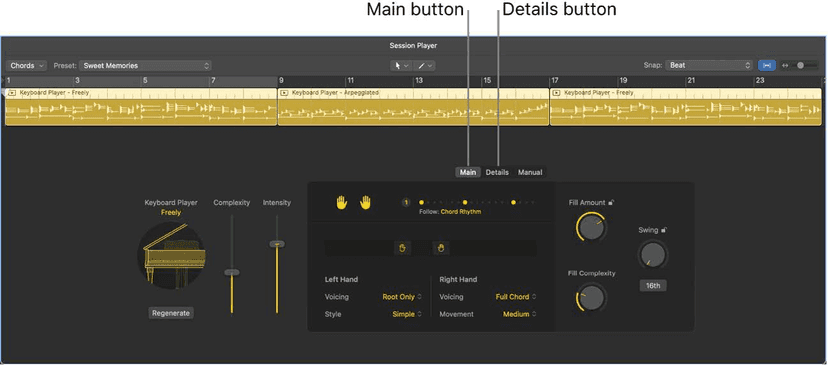
- Preview - click the Play button in the editor's ruler. Logic sets the cycle to the region and solos it, so you hear the part alone without touching your transport.
- Save your own from the Preset menu, and Delete it later. The ones Logic ships cannot be deleted.
- Recall Default puts you back to whatever the style loaded with, which is the escape hatch when you have fiddled a part into the ground.
The two controls that matter most
Everything else in the editor is detail. These two do most of the work:
- Complexity - how much the player puts in. Left is the bare bones of the part, right is everything they know.
- Intensity - how hard they hit it. Affects dynamics, and on drums which parts of the kit get used.
Both are per-region, which is the whole point. Dropping complexity for the verse and pushing it for the last chorus is the single fastest way to stop a Session Player track sounding generated.
Reading the pattern display
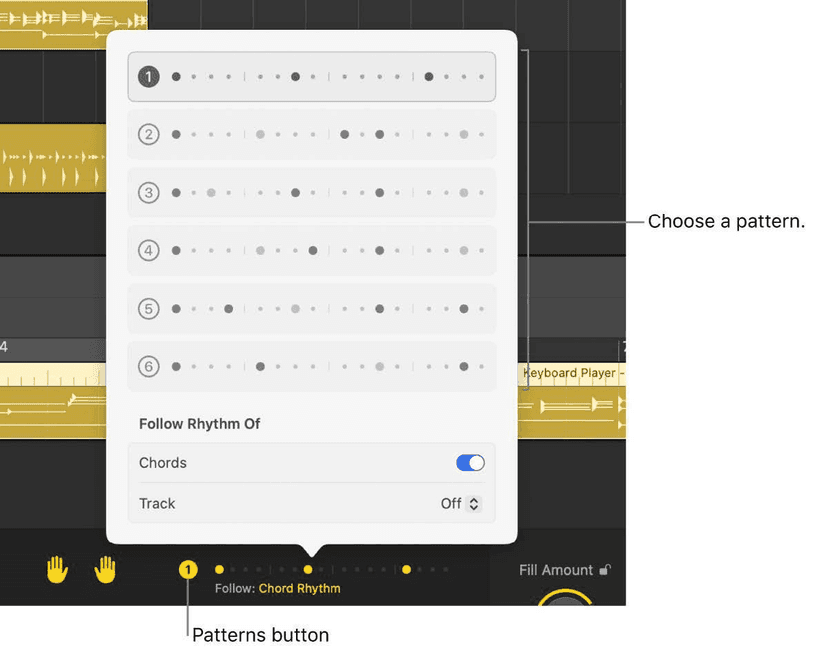
Click Patterns and you get a row of dots. Each pattern is one bar divided into sixteenth notes. Brighter dots are the main accents the player will hit; dimmer dots are accents it *might* add as you raise Complexity. So the display is not just decoration - it tells you what raising the slider is about to do.
Drummer gets several Patterns buttons, one per kit piece, so kick, snare and hats can each be on a different figure.
Regenerate
The Regenerate button rewrites the performance from the current settings. Same settings, different take. Use it when the part is nearly right but one phrase keeps annoying you - it is far quicker than hunting the parameter that caused it.
When you want to take over
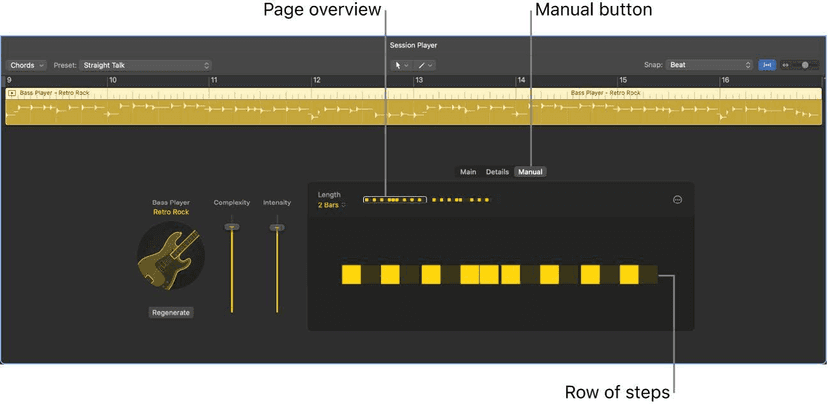
Control-click a Session Player region and convert it to a MIDI or pattern region. You lose the generator and get the notes, which you can then edit anywhere you would edit MIDI.
Do it last, once you are happy - there is no converting back. If you are not certain, duplicate the track first and convert the copy.
The deep version of the editor - hand positions, voicings, phrasing, fills, custom patterns, following another track's rhythm - is in the Production course.
Do this now
- Add a Keyboard, Bass and Drummer player to one project.
- Give them the same chord progression from the Chord track.
- Move the Complexity and Intensity controls on each while the loop plays.
Two controls, three players. That is a backing track in about four minutes.