Recording Audio
One thing you're probably going to have to get familiar with in Logic is recording audio. This is obvious if you're a singer or instrumentalist, but not so much if you're an electronic producer. Don't think that you won't have to do it if you're just a synth freak- there's many reasons why you might want to- perhaps you want add some live percussion to give your electronic track a more 'human' feel, or you want a vocalist to record a topline on your Pop EDM track, and it should be clear to you by now- you can record your own samples!
Before we dive in to look at how to record- which is as simple as pressing a button- we should take some time to look at how to setup to record.
Recording audio can take place in a number of ways, the most obvious being the use of a microphone, though you can also use guitars and plug the straight in to your audio interface, and then there's other things you might want to plug in too, like hardware synthesizers and turntables for instance. As you've probably gathered, you're going to need an audio interface in order to receive the signals from the devices you choose to record from. The audio interface does the job of converting the signal from an analog signal to a digital one- known as analog to digital conversion or A/D conversion. This digital signal is the one recorded into Logic in our Tracks area as a region, and to our computer hard disk.
One thing to note about your audio interface is that it will likely have one or two inputs- maybe more- and your input that you have plugged your instrument into will have to correspond with the input you have selected on your audio channel strip- but I'm getting ahead of myself here. Just make sure to take note of what you've plugged in to where!
To recap- here's how the signal flows from your microphone or instrument to Logic:
- The microphone transforms sound pressure waves into an analog electrical signal.
- The microphone preamp amplifies the analog electrical signal. A gain knob lets you set a proper recording level and avoid distortion.
- The analog-to-digital (A/D) converter transforms the analog electrical signal into a digital data stream.
- The audio interface sends the digital data stream from the converter to the computer.
- Logic Pro saves the incoming data as an audio file displayed on the screen by a waveform representing the sound pressure waves.
Understanding digital audio also requires a bit of knowledge about what comprises a digital audio file- Sample Rate and Bit Depth. You could you go on recording forever without having an understanding of this, though it's helpful to know- so here's a brief outline of how it works:
To convert the analog signal into a digital data stream, the digital converters sample the analog signal at a very fast time interval, or sample rate. The sample rate identifies how many times per second the audio is digitally sampled. The bit depth identifies the number of data bits used to encode the value of each sample. The sample rate and bit depth settings determine the quality of a digital audio recording. 44.1k Sample rate takes 44,100 'snapshots' of the audio per second, and is considered the lowest acceptable sample rate of high quality audio. You can get up to 192k on some interfaces, though your file size will also increase drastically. By default, Logic records with a bit depth of 24 bits, which is fine for most uses. However, you may need to use different sample rates for different projects, particularly if you're working with video. During recording, the only role for Logic is to save the digital data generated by the A/D converter to an audio file. Logic does not exert any influence over the quality of your recordings.
One other thing to have an understanding of before you record is audio latency and buffer sizes. Latency just refers to the delay (in time) that is caused by the audio being picked up by your computer and going into Logic and the buffer size is what determines it. Higher buffer sizes mean higher latency- and it's not that we don't like high buffer sizes, we do- they're just unhelpful when you're recording!
You can set the sample rate of your project and the I/O buffer size to minimize the amount of latency (delay) you experience while recording audio or playing software instruments.
When recording audio or playing a software instrument in Logic Pro X, you might experience a slight delay between playing or singing a note and when you hear the sound from your speakers or headphones. This delay is called input monitoring latency. A variety of factors contribute to input monitoring latency, including:
- The input and output (I/O) buffer size setting in Logic Pro
- The analog-to-digital (A/D) and digital-to-analog (D/A) conversion processes
- Any audio interface software that you're using
- The sample rate of your project
- Plug-ins inserted on tracks in your project
Though you can’t change the amount of input monitoring latency produced by the A/D and D/A conversion processes or by your audio interface’s software, you can set the sample rate of your project and adjust the I/O buffer size to minimize latency. You can also manage latency caused by plug-ins using Low Latency Mode while recording.

Set the samplerate for your project when you first create it. Higher sample rates result in less input monitoring latency. However, projects with higher sample rates create larger audio files, which can increase the load on the processor and the disk in your Mac. Plug-ins also require more processing power at higher sample rates.
You can't change the sample rate of a project after you've created it.
The I/O buffers temporarily store some of the incoming and outgoing audio data to protect against audible dropouts, clicks, or pops. You can change the I/O buffer size at any time to minimize latency.
In Logic Pro, smaller I/O buffer sizes reduce input monitoring latency. However, smaller buffer sizes require more processing power, which can cause system overload alerts. Larger I/O buffer sizes require less processing power, but increase latency.
When recording, set the I/O buffer to the lowest setting. If you encounter system overload alerts, increase the I/O buffer size to the next setting. Projects with many tracks or a lot of software instruments require higher I/O buffer sizes, depending on the amount or RAM and the speed of the processor in your Mac.
To change the I/O buffer size:
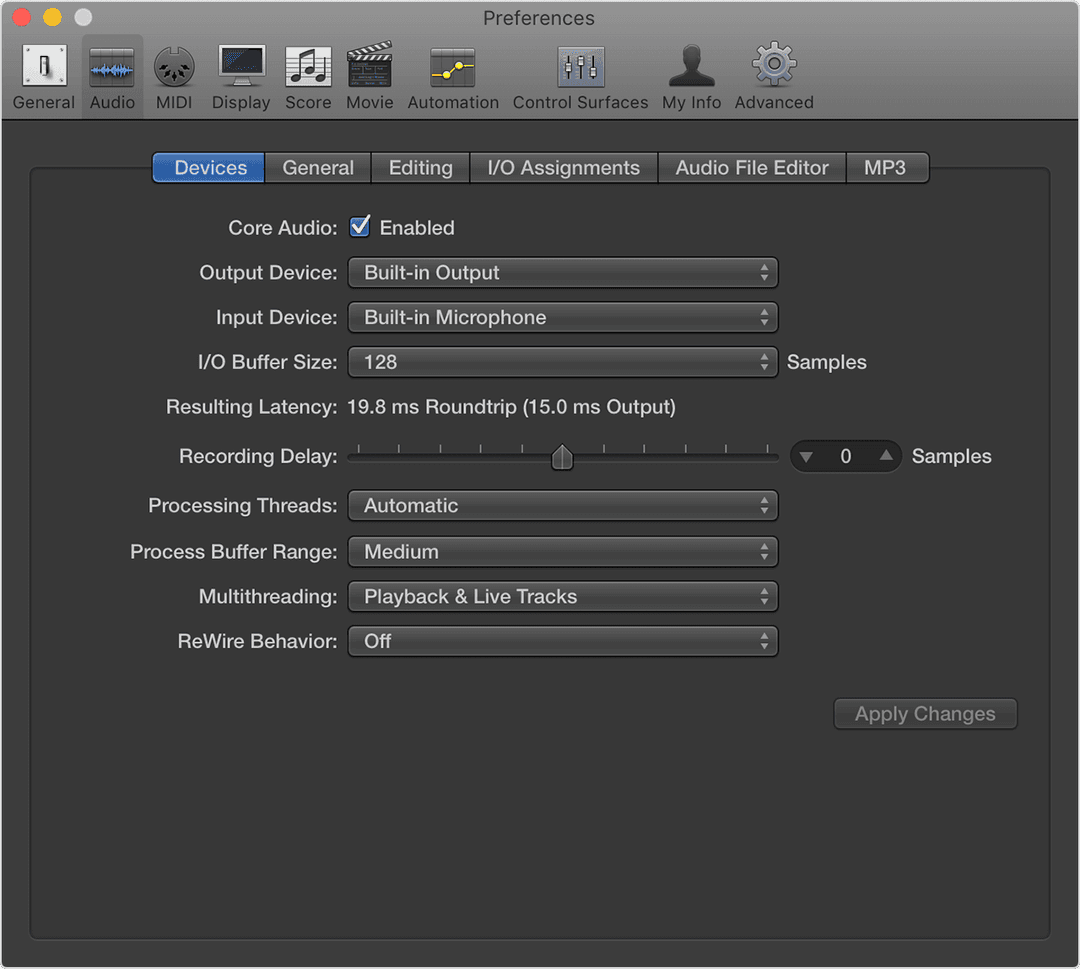
- Choose Logic Pro X > Preferences > Audio.
- Click Devices.
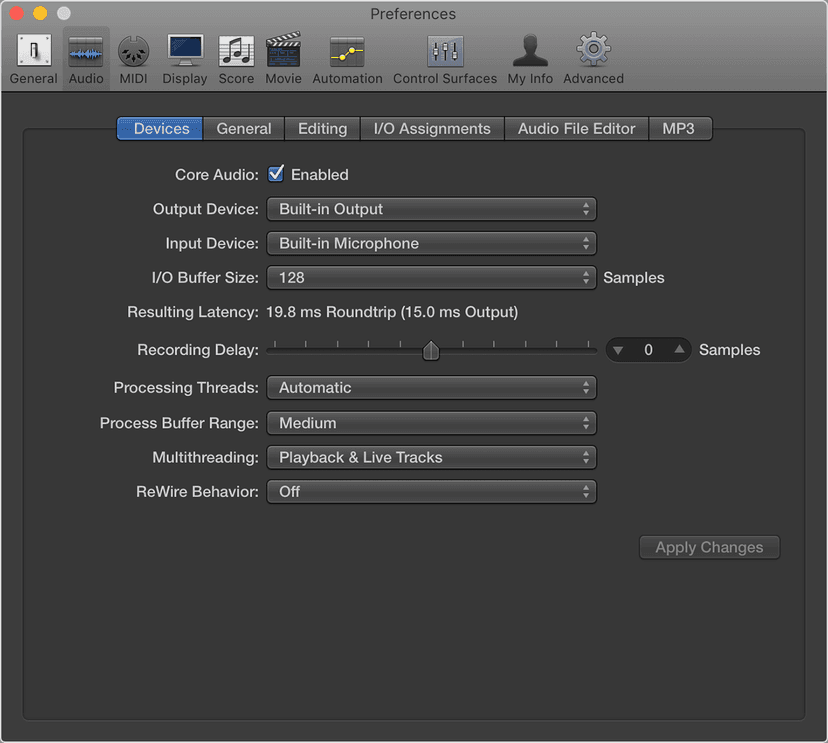
- Choose the buffer size from the I/O Buffer Size pop-up menu. If you're using a USB interface, set the I/O buffer size to no less than 128 samples. For Thunderbolt interfaces, you can set the I/O buffer size to the lowest setting.
Logic Pro shows the resulting latency under the I/O Buffer Size menu. Roundtrip latency is the total amount of input monitoring latency you'll experience from audio input to audio output.
Certain plug-ins can contribute to input monitoring latency, particularly dynamics plug-ins with look-ahead functions. If you're using these kinds of plug-ins in a project, you can minimize the latency they produce while recording using Low Latency Mode.
Low Latency Mode bypasses plug-ins as needed, so the amount of latency doesn't exceed the Limit setting in the Plug-in Latency section of the General Audio preferences of Logic Pro. Low latency mode is especially useful when you want to record a software instrument in a project that includes latency-inducing plug-ins.
To turn Low Latency Mode on, choose Record > Low Latency Mode.
Now that's all out of the way, let's look at how to record inside of Logic:
You can record sound from a microphone (voice or acoustic instrument, for example), or from an electric instrument (such as an electric guitar) connected to your computer, on an audio track.
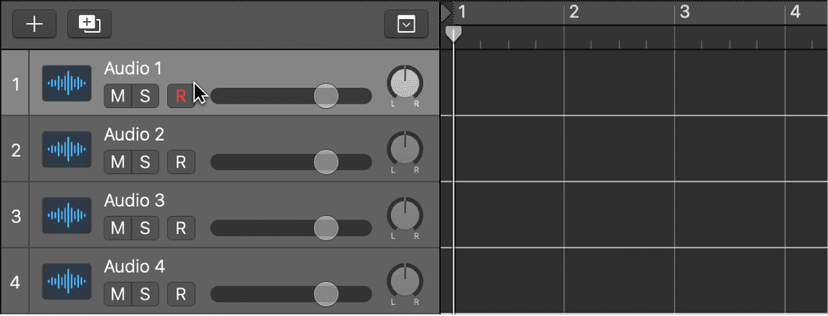
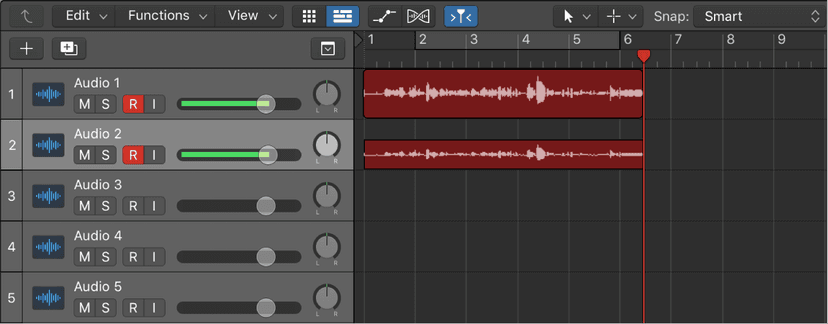
Select the header of the audio or guitar/bass track you want to record to. If the Record Enable button is present on the track header, the letter “R” will be red to indicate that the track is automatically enabled for recording.
Move the playhead to the point in the ruler where you want to start recording.
Set the metronome for recording if desired.
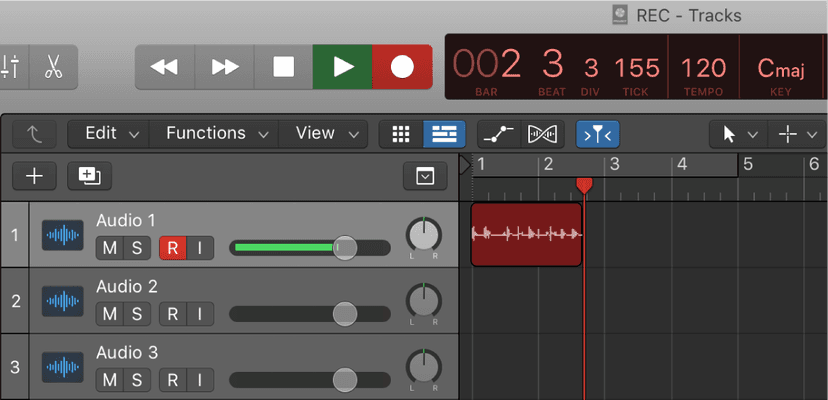
Click the Record button in the control bar (or press R) to start recording.
Start singing or play your instrument.
The recording appears as a new audio region on the track as you record
.Click the Stop button in the control bar (or press the Space bar) to stop recording.
I told you it was simple! OK, but what if we have more than audio source, like 2 microphones, or 1 guitar 1 microphone. If we want to record them simultaneously, here's how we should do that:
Do one of the following:
Choose Record > Overlapping Audio Recordings > Cycle > Create Tracks and Mute.
Choose Preferences > Recording then choose Create Tracks and Mute from the Overlapping Recordings Cycle On pop-up menu.
Control-click the Record button in the control bar, choose Recording Preferences from the shortcut menu, then choose Create Tracks and Mute from the Overlapping Recordings “Cycle On” pop-up menu.
Set the instrument or microphone input source for each track you want to record to.
Click the Record Enable button in the track header of each track you want to record to. Each clicked Record Enable button blinks red to indicate that the track is ready for recording.
Move the playhead to the point in the ruler where you want to start recording.
Set the metronome for recording, if desired.
Click the Record button in the control bar (or press R) to start recording.
Everyone being recorded can start singing or playing their instruments. A new audio region appears on each of the record-enabled tracks.
Click the Stop button in the control bar (or press the Space bar) to stop recording.
We've mentioned the metronome, or 'click' there a couple of times, so let's just focus on how that works for a minute:
Logic has a built in metronome, which plays a steady beat (like a “click track”) to help you play and record in time. You can turn the metronome on or off when you’re recording, or any time your project is playing. The metronome always plays at the project tempo. This means that if a tempo map has been created by Smart Tempo, the metronome automatically follows it. It also means that if Smart Tempo is automatically adapting the project tempo to the performance being recorded, the timing of the metronome adapts along with it. We'll talk a bit more about Smart Tempo later.
The included metronome uses a dedicated software instrument named Klopfgeist to generate clicks. You have the option of using any audio or MIDI instrument to generate metronome clicks. You can also access a pop-up menu to set if you want the metronome to play during playback, recording, or both.
You can also set the metronome to play a one-measure “count-in” before recording starts.
to turn the metronome on or off:
- Click the Metronome button in the control bar.
- Press the key command assigned (K) to toggle the metronome on and off.
To set conditions for the metronome, click-hold the Metronome button in the control bar.
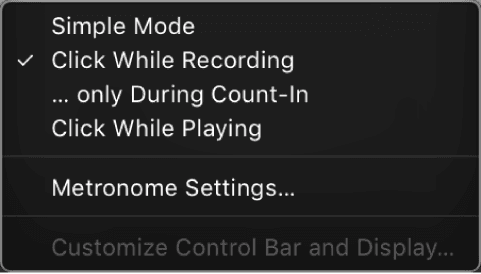
- To limit the metronome to only click when you toggle the metronome on, choose Simple Mode. With this mode selected, the other metronome settings in the pop-up menu are unavailable.If you want the metronome to click during recording whether or not the metronome is toggled on or off, choose Click While Recording.If you want the metronome to click only during recording count-in whether or not the metronome is toggled on or off, choose “only During Count-In.”Note: Click While Recording must also be chosen for “only During Count-In” to work.
If you want the metronome to click during playback, choose Click While Playing. This setting has the same effect as toggling the metronome on and off.
You can choose Metronome Settings from this menu to access the rest of the metronome settings available in Project Settings > Metronome.
To turn the count-in on or off, do one of the following:

- Click the Count-inbutton [] in the control bar to have the metronome play a predefined count-in before recording starts.
- Press the key command assigned to toggle the count-in on and off.
You can set the number of bars for the count-in by doing one of the following:
- Choose Record > Count-in, then choose the number of bars from the submenu.
- In Project Settings > Recording, choose the number of bars from the Count-in pop-up menu.
Another thing to get an understanding of before we move further is Input monitoring. You can turn on input monitoring to monitor audio tracks that are not enabled for recording. This is useful for setting audio levels or practicing parts before you commit to recording. It is the 'I' button next to the record button- which will light up orange if on and will be greyed out if off.
To turn on input monitoring for an audio track, click the Input Monitoring button (with the “I” icon) in the track header. Click the Input Monitoring button again to turn off input monitoring for the track. You can enable Input monitoring to be on always by:
- Choosing Record > Auto Input Monitoring.
- Control-click the Record button in the control bar, then choose Auto Input Monitoring from the shortcut menu.
You can leave input monitoring turned on before, after, and during recording. When input monitoring is on, the Record Enable button and the Auto Input Monitoring feature do not affect software monitoring—that is, you can always hear incoming audio signals. When you’re punch recording, however, you should use Auto Input Monitoring rather than the Input Monitoring buttons.
Speaking of Punch recording...
Punch recording is a technique you can use to overwrite a portion of a previously recorded track, during playback, without touching any of the recording before or after that portion. You punch in to interrupt playback and make the recording, then punch out to return to playback mode. Let's say you nailed the whole take except 2 lines, punch recording will let you 'punch in' for those lines only, instead of re-doing the whole take.
You can choose between two punch recording modes: Quick Punch-In mode and Autopunch mode.
Quick Punch-In mode
A useful and common recording practice is to switch in and out of recording mode while listening to the previously recorded material, sometimes referred to as “punching in on the fly.” This helps you fix mistakes or create alternate takes for a particular section. To ensure the transition between playing and recording occurs without any audible gaps, you must turn on Quick Punch-In mode.
When Quick Punch-In mode is on, recording occurs in the background from the moment you start playback. This means there needs to be twice the number of available channel strips than the number enabled for recording. A dialog appears if you exceed the number of channel strips needed.
Important: It is recommended that you leave Quick Punch-In mode turned on (which it is, by default). You only need to turn it off if you’re recording more than the number of channel strips available (in a new project that’s more than 128 tracks), or if your hard disk is unable to accommodate recording a large number of tracks. To turn it off, choose Record > Allow Quick Punch-In, or Control-click the Record button, then choose Allow Quick Punch-In from the shortcut menu.
Autopunch mode
Autopunch describes the use of predefined punch-in and punch-out points to start and stop recording. One advantage is that you can concentrate on your playing, rather than on controlling the software. Another advantage is that you can set the starting and stopping of recordings far more precisely than is possible if “punching in on the fly.”
Note: Only record-enabled tracks are affected by punch recording.
When it comes to judging punch-in and punch-out points during punch recording, you should turn on auto input monitoring (which it is, by default). This setting allows you to hear the input signal only during the actual recording; before and afterward you’ll hear the previously recorded audio on the track. If auto input monitoring is turned off, you can always hear the input signal.
To record on the fly, turn on Quick Punch-In mode by doing one of the following:
Choose Record > Allow Quick Punch-In.
Control-click the Record button in the control bar, then choose Allow Quick Punch-In from the shortcut menu.
Click the Play button in the control bar, then use the Record Toggle key command at the point where you want to start recording. Audio recording starts immediately.
Click the Stop button in the control bar, or use the Record Toggle key command a second time to stop recording. If you use the latter option, recording ends, but playback continues.
Note: You can also use the Record Toggle key command when not in Quick Punch-In mode. However, this causes a delay when you switch between playback and record modes, accompanied by a dropout of all audio tracks.
Recording in Autopunch mode
- Turn on Autopunch mode by doing one of the following:
- Click the Autopunch button in the control bar.Note: You can add the Autopunch button by customizing the control bar.
- Option-Command-click anywhere in the ruler.
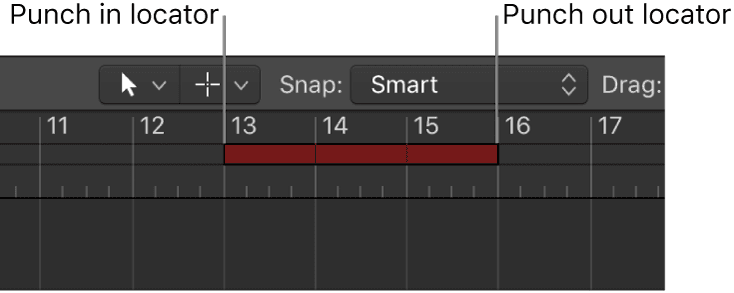
- The autopunch area is indicated by a red stripe in the middle third of the ruler, with the left and right autopunch locators serving as punch-in and punch-out points.
- Set the autopunch area by doing one of the following:
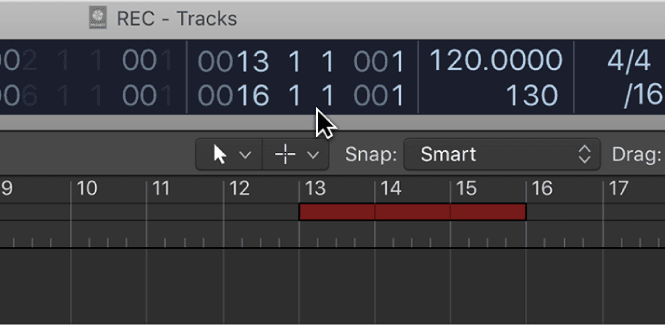
- Drag the Punch In and Punch Out locators in the ruler.
- Drag vertically in the autopunch locator fields in the control bar.
- Drag the cycle area into the autopunch area to quickly match the autopunch area to the cycle range.
- Place the playhead at any position before the punch-in point.
- Click the Record button in the control bar (or press R) to start recording.
- Click the Stop button in the control bar (or press the Space bar) to stop recording.A region that matches the length of the autopunch area is created. Any audio input received before the punch-in or after the punch-out point streams through Logic Pro as usual, but is not recorded.
If you want to improve a difficult part of a certain passage, you can use a combination of the Cycle and Autopunch functions. Cycle mode recording allows you to practice as many times as you like before performing the final take. On each cycle pass, only events or audio that falls within the area defined by the autopunch locators is recorded. This lets you make use of the preceding song section to “get into the groove.”
Replacing audio recordings
You can record over an existing audio recording, or a portion of it, replacing the original recording with the new recording. You do this by recording in Replace mode. In Replace mode, any audio regions from when you start recording until the end of recording will be erased, even if nothing is played.
You can access the Replace pop-up menu by long-clicking (or right-clicking) on the Replace button
in the control bar or in the Recording preferences window.
Note: You can also replace software instrument recordings.
To replace an audio recording, click the Replace button in the control bar.
Click the Record Enable button in the track header of the track you want to record to. The button blinks red to indicate that the track is ready for recording.
Move the playhead to the point in the ruler where you want to start recording.
Click the Record button (or press R)
After you stop recording new audio region is created on top of the existing one.
The original recording is replaced with the new recording.
Deleting audio recordings
You can delete an audio region that was recorded before or since the current project session was opened.
You can also delete an audio recording, and its related audio file in the Project Audio Browser.
To delete an audio recording from the Tracks area, select the audio region in the Tracks area, then press the Delete key.
The audio region is removed from the Tracks area but the audio file remains in the project.
To delete an audio recording and its related audio file from the project, choose Audio File > Delete File(s) from the Project Audio Browser menu bar.
The deleted audio files are sent to the System Trash where they remain until you empty the Trash.
Recording multiple audio takes in Logic Pro
When you’re recording, you can record multiple versions, or takes, of a phrase or section in quick succession. Take recording can be helpful especially when you’re improvising a lead or solo part and want to capture several versions while you’re feeling inspired.
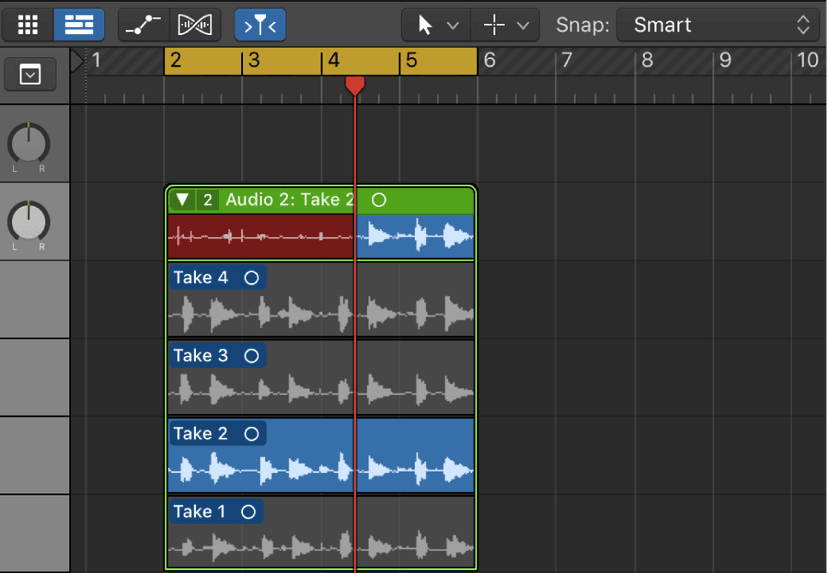
When you record multiple takes, a take folder is created on the track, containing the take recordings. After recording, you can preview take recordings and choose which one you want to use in the project. You can also create and edit comps, by selecting the best parts from several takes and combining these parts into one master comp.
An example would be if you record three different guitar solos, each one as its own take. All three takes would be available to you in the takes folder for you to choose between, or you could use the comp feature to edit all three guitar solo takes into one guitar solo that contains pieces of each of your three solos.
You can also record multiple audio takes into Live Loops cells.
To record multiple audio takes, do one of the following:
- Choose Record > Overlapping Audio Recordings > Cycle > Create Take Folder.
- Choose Logic Pro > Preferences > Recording, then choose Create Take Folder from the Overlapping Track Recordings > Audio > Cycle on pop-up menu.
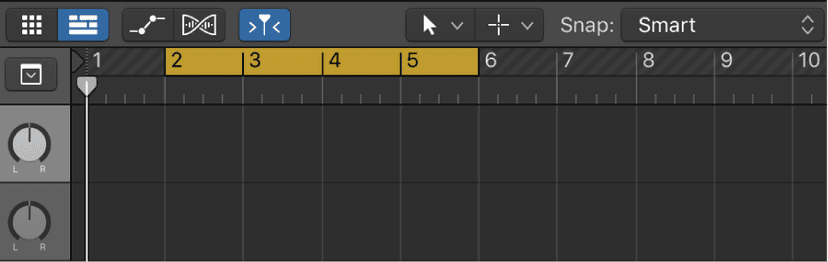
Drag left or right in the top part of the ruler. The cycle area appears as a yellow strip in the ruler, and Cycle mode is automatically turned on.
Click the Record button in the control bar (or press R) to start recording.
Recording starts automatically at the beginning of the defined cycle area. Record as many cycle passes as you wish. After the second cycle pass, a take folder is created on the track. Each subsequent cycle pass is added to the take folder.
Click the Stop button in the control bar (or press the Space bar) after you finish capturing cycle passes.
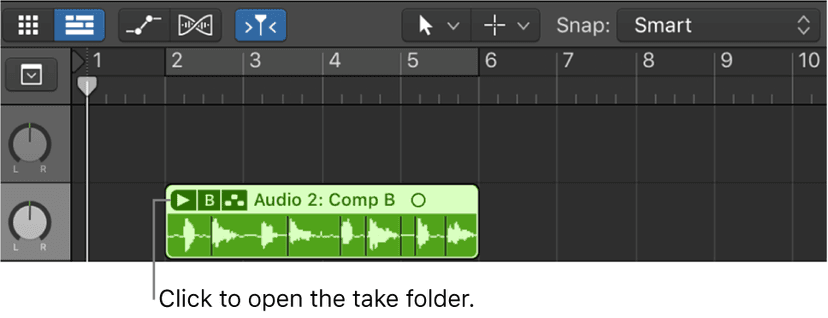
Open the take folder by doing one of the following:
Click the disclosure triangle in the upper-left corner of the take folder.
Double-click the take folder.
Select the take folder and press Control-F.
Coloring takes while recording
You can color take regions in an open or closed take folder, providing you with a visual reference while recording.
To color a take in an open or closed take folder, select a take. Open the Color palette by doing one of the following:
- Choose View > Show Colors (or press Option-C).
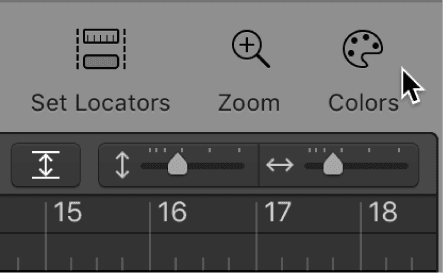
- Click the Toolbar button in the control bar to show the toolbar, then click the Colors button.
Choose a color.
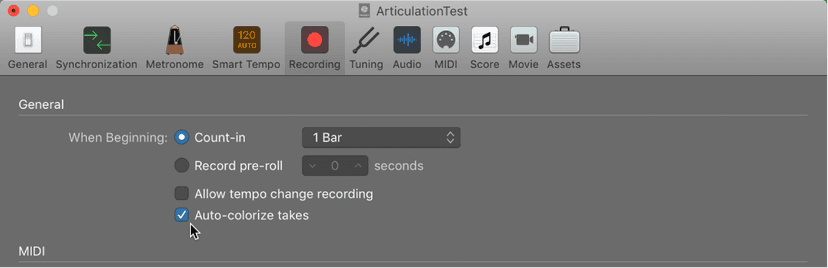
You can also color an audio take automatically while recording. Open the Recording project settings by doing one of the following:
- Choose File > Project Settings > Recording.
- Control-click the Record button in the control bar, then choose Recording Settings from the shortcut menu. Select the Auto-Colorize Takes checkbox.
When this setting is selected, audio take folders use the color selected in the Color palette for the first take, but different colors for each of the following takes in that take folder. All colors used in an audio take folder are selected from the same color row in the Color palette, advancing by a predefined number of columns after each take.
Mark takes while recording
If you know you’ve recorded a good take and want to mark it so that you can find it again later, you can do so while you’re still recording.
This command places a tag in the current take, at the position the key command was used. All audio that precedes the use of the key command is tagged as a good take, and is used in the final comp.
To mark a take while recording, use the Select Previous Section for Realtime Comping key command.
Now that you know how to record and are gathering up takes, it's a good idea to get to grips with a concept called 'comping'...
Do this now
- Set a cycle over eight bars and record three takes without stopping.
- Use Autopunch to re-record only bars 5 to 6.
- Check the take folder holds everything you played.
Punching in is how you fix one bad line without re-performing a good take.