Working with Video
Logic, being the all round DAW that it is, gives you the ability to work with video files in order to compose along to. The scope of all of the reasons why you might work with with moving image cannot be covered here, but if you’re looking to compose along to video, add sound effects, overdub dialog or just make some music for your cat video you want to upload to Youtube, Logic has you covered. You cannot edit the video file in Logic, that’s the job of Apple’s other Pro software title- Final Cut Pro, but you can do all the musical things you need to! Although you can’t record or edit video directly in Logic Pro, you can replace the soundtrack of a video file with music, Foley, and dialogue arranged in your project. You can view a QuickTime movie file synchronously with your project, making film and TV scoring quick and easy.
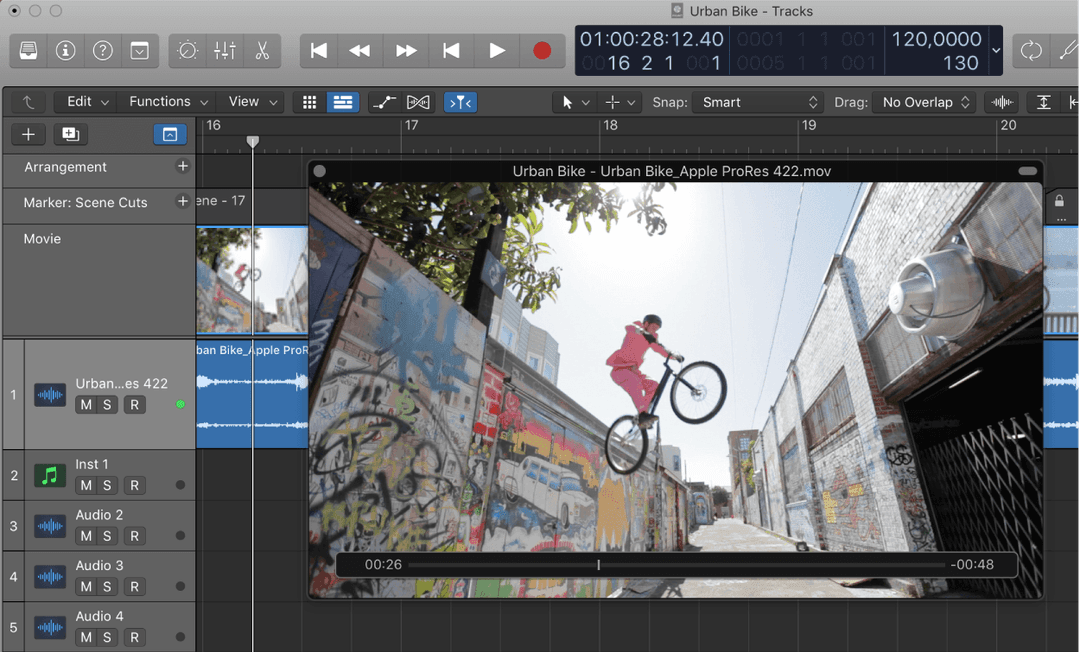
You can open a QuickTime movie in a separate Movie window and can also display the single frames of a QuickTime movie in the global Video track. When a movie is opened in a project, the upper part of the inspector shows a closed Movie area, which can be opened by clicking the disclosure triangle.
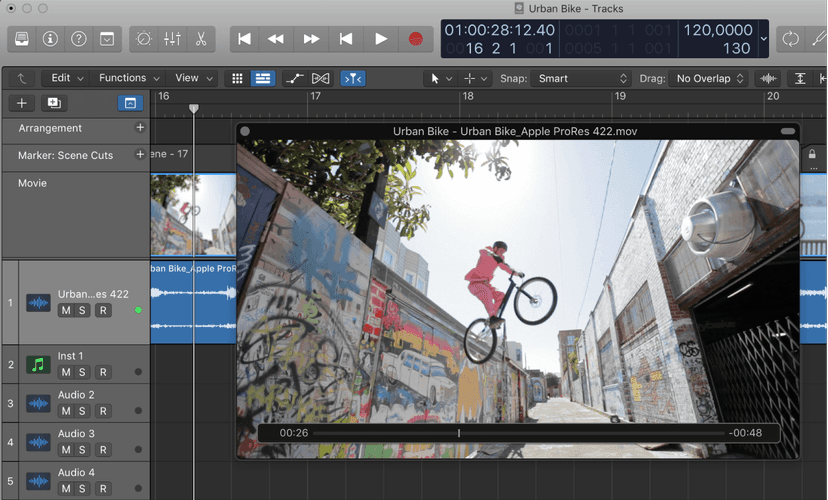
Movie playback follows the playhead position, and vice versa, in the Movie inspector area and in the Movie window. Audio playback for the movie is only audible if either the Movie inspector area or Movie window is open.
Note: You will need a fast processor to ensure smooth movie playback. If you want to record and edit your own QuickTime movie from a video recorder or digital camera, you may need specialized hardware.
To open a Movie window in Logic, do one of the following:
- Choose File > Movie > Open Movie (or use the corresponding key command, default assignment: Option-Command-O).
- Open the Movie pop-up menu in the global Movie track header, then choose Open Movie.
- Click any position on the Video track with the Pencil tool.
- Click the Media button in the control bar, then click the Movies button and choose the movie file.
The movie opens in the floating Movie window, in its correct aspect ratio.
Note: Only one QuickTime movie can be opened in a project. If you use the Open Movie command in a project that already contains a movie, a Movie window reopens with the same video clip. This is particularly useful if you want to open the video clip in a different screenset. If you choose the command while the Movie window is open, a dialog appears, allowing you to choose a new movie file.
To remove a movie from a project, do one of the following:
- Choose File > Movie > Remove Movie (or use the corresponding key command).
- Open the Movie pop-up menu in the global Movie track header, then choose Remove Movie.
All references to the movie are deleted from the project.
Using the Movie window
You can drag the slider at the bottom of the Movie window to navigate to any position in a video file. The playhead will then “chase” to the corresponding project position.
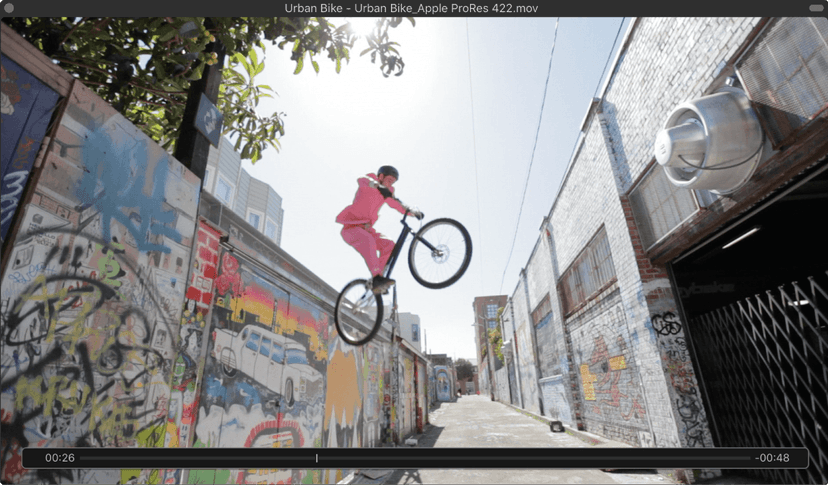
To resize the Movie window, do one of the following:
- Drag its lower-right corner.
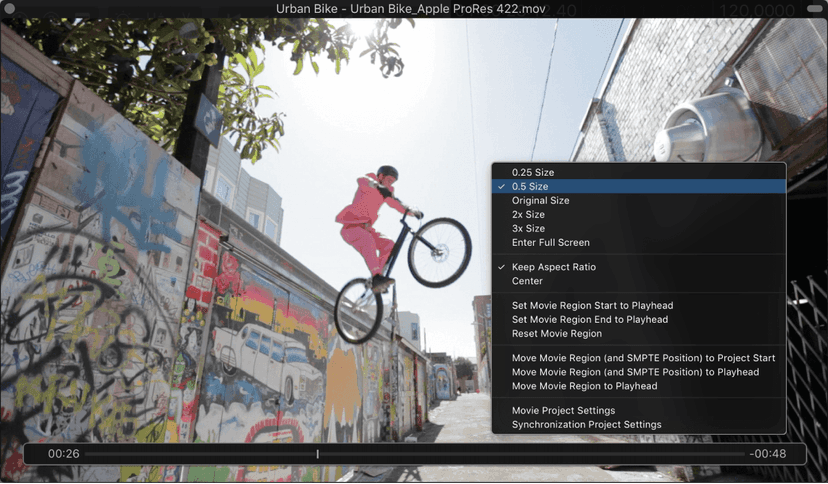
- Control-click the movie, then choose one of the following image formats from the shortcut menu.
- 0.25 Size: Reduces the movie to a quarter of its original size.
- 0.5 Size: Reduces the movie to half its original size.
- Original Size: Displays the movie at its original size.
- 2x Size: Expands the movie to twice its original size.
- 3x Size: Expands the movie to three times its original size.
- Enter Full Screen: Expands the Movie window to fill the full screen.
- Keep Aspect Ratio: If selected, the proportions of the image are retained when the Movie window is resized.
- Center: Places the video image in the center of your screen.
Using movie audio tracks
Your movie will likely contain an audio track that’s already on it- as in the audio that is already playing alongside the movie. Once a movie has been opened in a project, you can use the Import Audio from Movie or Export Audio to Movie command, found in the File menu. After the audio has been imported, you can change the video dialogue, Foley, and music with Logic Pro audio processing and editing features.
You can export audio from the part of your project that is encompassed by the movie to the movie file itself, effectively overwriting the original movie soundtrack. This is useful for sending a preliminary mix of your soundtrack to other members of the production team, for example. You can adjust the audio level and output device in the Video project settings.
Importing audio from a QuickTime movie into your project
Select the audio track or tracks you want to use. Do one of the following:
- Choose File > Movie > Import Audio from Movie (or use the corresponding key command).
- Control-click anywhere in the Movie track, then choose Import Audio from Movie from the shortcut menu.
Click the required checkboxes in the dialog, then click OK.
The selected audio tracks are bounced to one or more audio files, and placed in the Project Audio Browser. A new audio track is created for each movie audio track (when “On separate tracks” is chosen in the dialog), and the imported audio from the movie is added to the track (or tracks). The embedded audio is automatically muted and audio playback occurs from the Tracks area. The movie name is retained and used for the resulting audio file (or files).
Exporting your project audio to a QuickTime movie
Do one of the following:
- Choose File > Movie > Export Audio to Movie (or use the corresponding key command).
- Control-click anywhere in the Movie track, then choose Export Audio to Movie from the shortcut menu.
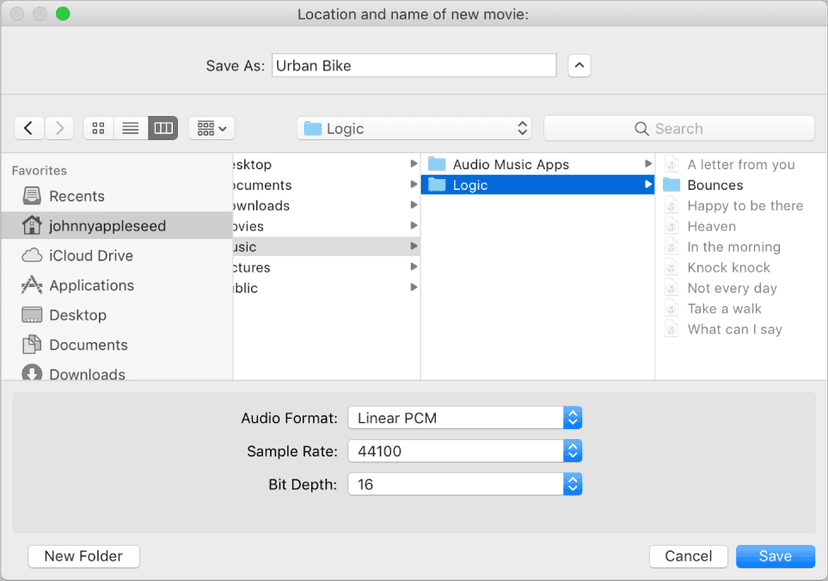
Choose the Audio Format, Sample Rate, and Bit Depth from the respective pop-up menus.
Enter a name and target folder for the movie, then click Save.
A bounce or write dialog appears. The movie is exported to the selected folder, and contains all selected audio tracks, as well as the part of your project that is encompassed by the start and end points of the movie.
Movie preferences Dialog
A good place to know about when working with movie files is the Movie preferences dialog. Access your preferences from the top menu and click on the Movie tab and you’ll see the below pop up:
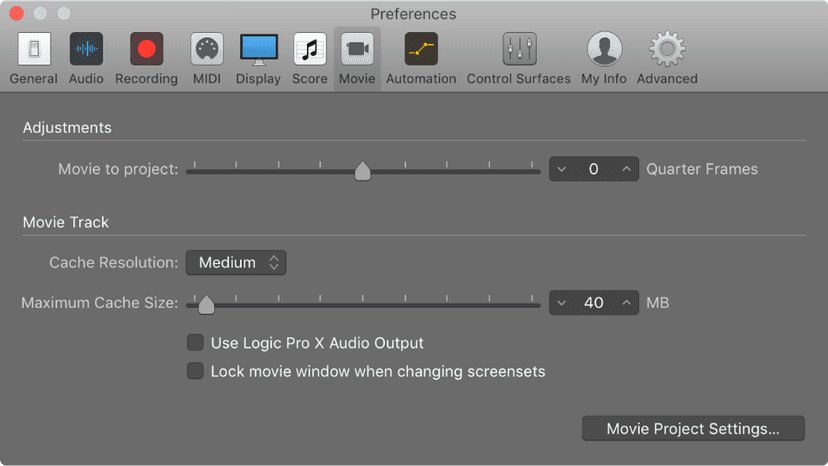
Here’s a rundown of what everything means:
- “Movie to project” slider: Fine-tunes the start point of a movie.
- Cache Resolution pop-up menu: Defines the resolution of the thumbnails kept in the temporary internal memory (cache). Higher resolutions display more detail, but take up more space in the cache.
- Maximum Cache Size slider: Defines the amount of memory reserved for the thumbnail cache. Forty megabytes is recommended for medium resolution. For higher resolutions choose a higher value. This section of reserved memory is only occupied when actual movie data is displayed.
- Use Logic Pro X Audio Output checkbox: When selected, Logic Pro uses the same output for the movie soundtrack as it does for all the rest of your audio.
- “Lock movie window when changing screensets” checkbox: When selected, the Movie window stays in its current user-defined position, and playback continues, when changing screensets.
- Movie Project Settings button: Opens the Movie Project Settings window.
Working with absolute time code
The production process for video, film, or TV commercials is different from music production. Synchronization is always used, unlike in music production, where it is not always required. You need to work in absolute time: hours, minutes, seconds, and frames, rather than in bars and beats. Edits to the video, including changes to scene length, additional cuts, the use of slow or fast motion, and dialogue changes (or “redos”) are among the many situations that you will encounter when creating or editing a soundtrack.
The Event List in Logic Pro is ideal for precise placement of timing-critical events such as footsteps or dialogue in a video soundtrack. It also allows you to change event lengths, which is useful if frames are removed during the video editing phase of production. In linear editing windows, the ruler can display absolute (SMPTE) time or bars and beats (or both).
When working with synchronized video, you will want music, sound effects, and dialogue to play at a specific time, rather than at a particular bar position.
If the tempo of your soundtrack needs to be altered at a later stage, the absolute time location of events that have already been positioned will change. The Lock SMPTE Position function prevents this from happening. You can SMPTE-lock individual events in the Event List or entire regions. All events inside locked regions are SMPTE-locked.
You can use the Pickup Clock (Move Event to Playhead Position) key command to move a selected event, such as a note, a tempo event, or a region, to the current playhead position.
If you want a particular bar in the project to coincide with a specific time position, you can change the tempo of the preceding passage.
Take a look at some of things you may want to do when working with SMPTE and regions below:
Changing the Event List display to time units
- Choose View > Show Event Position and Length as Time to display all event positions and lengths as absolute (SMPTE) times, rather than bar/beat values.
Locking a region or event to its current time position
- Select the region or event.
- Do one of the following:
- In the Main window, Event List, Step Editor, or Piano Roll Editor, choose Functions > Lock SMPTE Position.
- Use the Lock SMPTE Position key command.Regions or events locked to a (SMPTE) time position display a small padlock icon in front of their name.
Note: Copies of locked regions or events do not preserve their locked status, whether copied or pasted via the Clipboard, or by Option-dragging.
Unlocking the time position of a locked region or event
- Select the region or event.
- Do one of the following:
- In the Main window, Event List, Step Editor, or Piano Roll Editor, choose Functions > Unlock SMPTE Position.
- Use the Unlock SMPTE Position key command.
All selected regions or events that were locked to a (SMPTE) time position are now fixed to their current bar position. This means that tempo changes will affect their position. The padlock icon in front of the name disappears.
Moving a region or event to a frame
Set the playhead position to the desired time, such as a specific movie frame in the Video track, for example. Note: In addition to the usual position commands, you can use the Rewind One Frame and Forward One Frame key commands to move one frame backward or forward.
Select the region or event that you want to place at this time position.
Use the Pickup Clock (Move Event to Playhead Position) key command to align the start point of the region or event with this time position.
The Pickup Clock & Select Next Event key command selects the next region or event, after the first region or event is moved.
Note: When using Pickup Clock with audio regions, it is the region anchor—not the region start point—that is moved to the playhead position.
Positioning a bar to a specific time
Open the Tempo List.
Create a tempo event at the target bar position.
Set a time position for this tempo event in the (SMPTE) Position column.
The preceding tempo event is automatically adjusted, to generate the correct bar and time position for the inserted tempo event.
If you want to keep the same tempo for the following passage, delete the tempo event you inserted.
Using movie scene markers
Although we’ve discussed using markers a little and we can all agree that perhaps Arrangement markers are superior to the regular markers when making music, the regular markers are definitely more handy to use when working with movies in Logic.
Scene markers are SMPTE-locked markers: they remain at the same absolute time position, regardless of tempo changes, and are automatically deleted if the current movie is removed from the project. Scene markers are identified by a filmstrip icon.
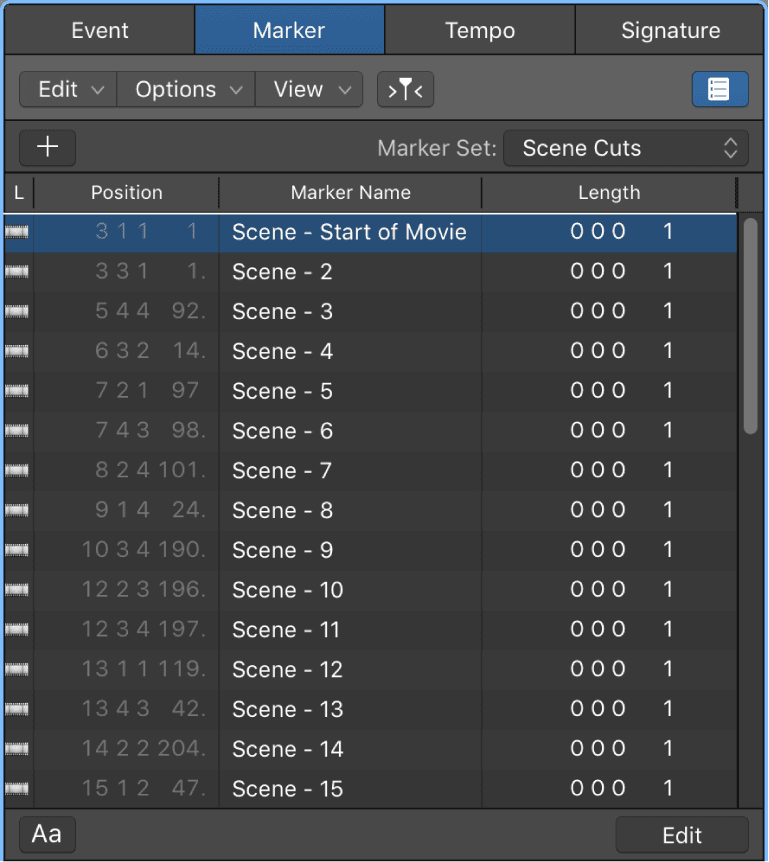
You can use the Create Movie Scene Markers function to search the movie for significant content changes (scene cuts), and automatically generate scene markers for each of them. The Create Movie Scene Markers function uses a fixed threshold value, which works well for most types of movies: cartoons, real life, CGI, and so on. It’s a super handy fearture to be able to see scene cuts as you are woking on a composition!
Searching a movie for scene cuts
- Choose a movie range from the Navigate > Other > Create Movie Scene Markers submenu.
Searching a movie for scene cuts using the Auto Range setting
The Auto Range setting in Logic Pro follows the decision path outlined below, when determining which part of the movie will be evaluated:
- Marquee selection
- Cycled project part
- Selected regions
- All—if none of the above criteria is met
- Do one of the following:
- Open the Movie pop-up menu in the global Movie track header, then choose Create Marker Set from Scene Cuts.
- Use the Create Scene Markers (Auto Range) key command.
Removing individual scene markers
- Do one of the following:
- Choose an option from the Navigate > Other > Remove Movie Scene Markers submenu.
- Use the Remove Scene Markers (Auto Range) key command.
- Open the Marker List, select the scene marker, then choose Edit > Cut or Edit > Delete from the Marker List Edit menu (or use the corresponding key commands).
Removing all scene markers or marker sets
- Do one of the following:
- Choose Remove All Scene Markers from the Navigate > Other > Remove Movie Scene Markers submenu.Note: This command does not remove the marker set; only the markers in the set.
- Open the Marker pop-up menu in the global Marker track header, then choose Marker Sets > Delete Set.
- Open the Marker List, then choose Marker Sets > Delete Set in the Marker Set pop-up menu.
To convert a scene marker to a normal marker, open the Marker List, select the scene marker, then choose Options > Convert to Standard Marker.
To convert a normal marker to a scene marker, select the marker in the Marker List, then choose Options > Convert to Scene Marker.
Do this now
- Import any video into a project.
- Drop locators on three hit points you would score to.
- Write four bars to one of them and export with the movie.
Scoring is mostly locators. The music is the easy part.