Logic Remote
A truly useful and underrated tool at your disposal if you have an iPhone or iPad handy is Logic’s remote. In my mind, this does not get talked about or used anywhere near enough and exploring how this can fit into your workflow will not only potentially save you money on other gear like control surfaces, but will also make your experience of making music a lot more fun. You can use Logic Remote to remotely control many common functions in Logic Pro—playing and navigating projects, recording, mixing, and automation.
The first time you open Logic Remote, you’re prompted to connect to a Mac that is running GarageBand or Logic Pro. You can connect via Wi-Fi or Bluetooth, with Wi-Fi being the most straightforward setup.
Connect via Wi-Fi
- Make sure the Mac and the iOS device are connected to the same Wi-Fi network.
- Open Logic Remote on the iOS device.A connection dialog appears on the iOS device, showing Mac computers that are on the same Wi-Fi network as the iOS device, and on which the Mac application (Logic Pro or GarageBand) is open.
- Choose the Mac you want to connect to.An alert appears in the application on the Mac, asking you to accept the connection.
- Click Allow to confirm and establish the connection.
Any subsequent connections with the same iOS device should happen automatically.
Connect via Bluetooth
- On the iOS device:
- Tap the Settings icon.
- Tap Bluetooth in the Settings column, then turn Bluetooth on.
- On the Mac:
- Choose System Preferences from the Apple () menu.
- Click the Bluetooth icon in the System Preferences window.
- Click the Turn Bluetooth On button.
- Click the Pair button for the iOS device.
- On the iOS device:
- Tap Pair in the Pairing Request dialog.
- Tap the Mac you want to connect to.
- Open Logic Remote on the iOS device.A connection dialog appears on the iOS device, showing Mac computers that are on the same Wi-Fi network as the iOS device, and on which the Mac application (Logic Pro, GarageBand, or MainStage) is open.
- Choose the Mac you want to connect to.An alert appears in the application on the Mac, asking you to accept the connection.
- Click Allow to confirm and establish the connection.
Any subsequent connections with the same iOS device should happen automatically.
Switch between applications controlled by Logic Remote
You can use Logic Remote to control Logic Pro or GarageBand.

- Tap the Settings button () in the control bar, then tap the name of the currently listed Mac.
- In the connection dialog that appears, tap the icon for Logic Pro or GarageBand to control that application using Logic Remote.
The first time you open Logic Remote, you see the default Mixer view, where you can perform some basic mixing tasks. You can change the Mixer view to access additional controls.
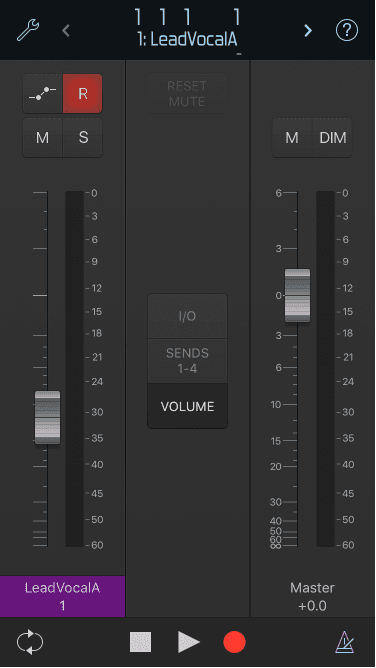
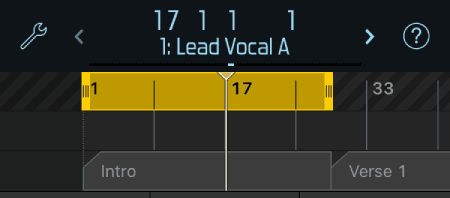
The controlbar is located at the top of each screen; it features navigation controls, a control bar display, and a Settings button. You can also show the ruler, which contains the playhead, a cycle area, and any markers existing in the project.
The transport controls for playback and recording are located at the bottom of each screen, except in landscape orientation when they are located at the top of the screen.
Control bar
The control bar is located at the top of the screen, with controls to navigate between channel strips, use the ruler, playhead, and markers, access coaching tips, and view different settings.

The controls for playback and recording are located at the bottom of each screen when the device is in portrait (vertical) orientation, and at the top of the screen in landscape (horizontal) orientation.


- The Go to Beginning button moves the playhead back to the beginning of the project, or to the beginning of an active cycle area. This button looks different when the playhead is to the left of the project start position, or to the left of the active cycle area.During playback, the Go to Beginning button changes to a Stop button.
- The Stop button stops playback or recording at the playhead position.
- The Play buttonstarts playback at the current playhead position, from the last playhead position, or from the left locator position when in Cycle mode.
- The Record buttonstarts recording at the current playhead position or from the previous record position. To stop recording and stop the playhead, tap the Stop button.
- The Cycle button turns on Cycle mode, with the cycle area appearing as a yellow strip in the ruler.
- The Metronome button turns on a click that plays at the project tempo during playback or recording.
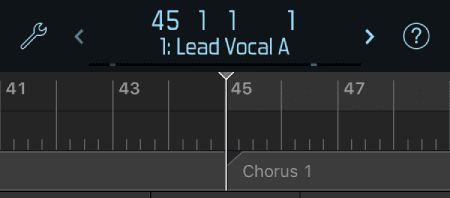
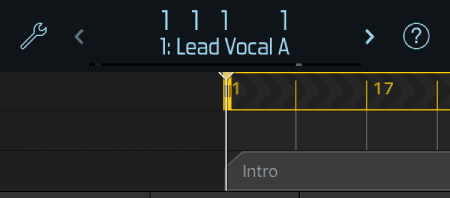
The upper line in the control bar display shows the playhead position in bars and beats, or in hours, minutes, and seconds (based on the musical grid setting in Logic Pro). The lower line shows the selected track or the current marker. You can use the control bar display to show or hide the ruler and playhead or to show a list of tracks and markers that exist in the project. You use the arrows on either side of the display to move between channel strips.

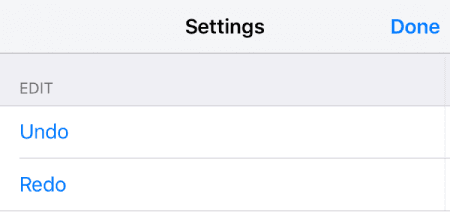
- The Settings buttonopens a menu where you can undo or redo edits, create or duplicate a track, and switch between host applications controlled by Logic Remote. You can also open Logic Remote Help here.
- The Info button displays coaching tips for the current view.
Playing and navigating projects
A basic function of Logic Remote is that you can remotely control playback of Logic Pro. You can access a set of buttons to play the project and move the playhead, as well as a ruler for navigation purposes. You can also use markers to navigate the project. This technique is useful when you want to quickly jump to, and edit, regions at a specific position in your project, for example.
To play the project, Tap the Play button .
To start playback from the last playhead position, touch and hold the Play button in the control bar, then tap Play From Last Locate Position. Tap the Play button .
To go to the beginning of the project, tap the Go to Beginning button. If the project is playing, it starts over from the beginning.
Moving between tracks
Do one of the following:
- Tap the left or right arrow in the control bar display to select the previous or next track.
- Touch and hold the left or right arrow in the control bar display to cycle quickly through tracks.
- Touch and hold the control bar display, tap the Tracks tab to show a list of existing tracks in the project, then tap a track.
- Moving the playhead
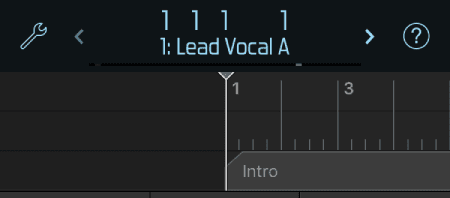
- Tap the control bar display to show the ruler and playhead.
- Do any of the following:
- Swipe left or right in the ruler.
- Tap to the left or right of the playhead in the ruler.
- Swipe left or right in the control bar display.
- The playhead moves to the point on the ruler where you want to start playback. If the project is playing, it continues from the new position.
Moving the playhead to a marker
Do one of the following:
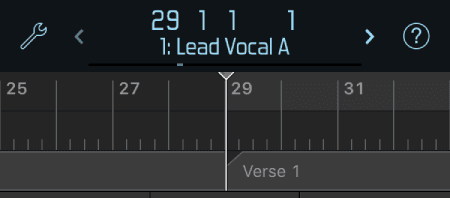

- Touch and hold the control bar display, tap the Markers tab to show a list of existing markers in the project, then tap a marker.
- Tap the control bar display to show existing markers below the ruler, swipe in the ruler to locate the relevant marker, then tap the marker.The playhead moves to the beginning of that marker.
Recording to a track
Using Logic Remote, you can remotely control some of the basic recording functions of Logic Pro. This is super handy of you want to record something and you’re away from your computer. I always seem to need to record my piano, which is in another room, and Logic Remote saves me from running between rooms! You can also control the metronome from Logic Remote.
To enable a track for recording, tap the Record Enable button for the track ()
To start recording, tap the Record button .
To start recording from the previous record position:
- Touch and hold the Record button in the control bar, then tap Record/Record Repeat.
- Tap the Record button .
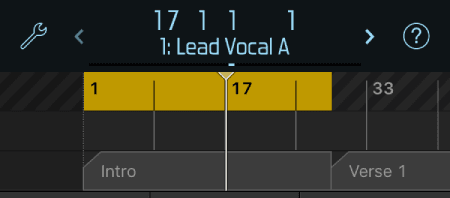
- This deletes the recording, moves the playhead back to the recording start position, and starts recording again.
To turn on the metronome, tap the Metronome button.
You can also tap the control bar display to show the ruler, then swipe in the ruler to set the playhead a few beats before the point where you want the recording to begin. This gives you time to start playing.
Using the cycle area
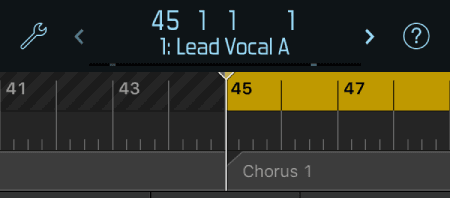
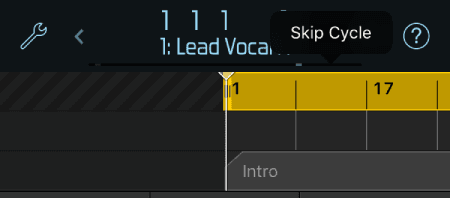
You can set up a cycle area to repeatedly play, or record over, a particular part of a project. The cycle area appears as a yellow strip in the upper part of the ruler. The left and right locators show the start and end points of the cycle area. You can create a cycle area that matches the length of an existing marker. You can also create a skip cycle to skip a passage during playback or when editing.
To move the cycle area, tap to select the cycle area, then drag to the left or right.
To turn the cycle area on or off, tap the Cycle button .
To resize the cycle area, tap to select the cycle area, then drag the left or right edge to move the start or end point.
Create a cycle area from a marker:
Tap the control bar display to show the ruler, playhead, and any existing markers.
Touch and hold the control bar display to show existing markers in the project, then tap a marker.
The playhead moves to the beginning of that marker.
If Cycle mode is turned off, tap the Cycle button in the control bar. The cycle area adjusts to match the position and length of the marker.
To create a skip cycle:
Tap to select the cycle area, then drag to the part of the project you want to skip.
Tap the cycle area, then tap Skip Cycle.
The cycle area changes color, indicating that it’s now a skip cycle.
Tap the cycle area again and tap Cycle to change it back.
- Undo or redo edits
You can change your mind about one or more edit operations. Just tap the Settings button in the control bar, then tap Undo or Redo.
Creating or duplicating tracks
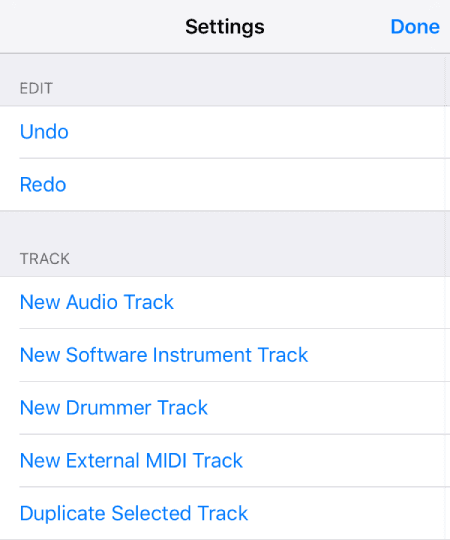
You can create audio, software instrument, Drummer, and external MIDI tracks. You can also duplicate an existing track, creating a new track below the original track with the same instrument and effects settings. The duplicate track does not contain any regions.
To create a track, tap the Settings button in the control bar, then tap one of the track types.
Tap Done to close the settings controls.
To duplicate the selected track, tap the Settings button in the control bar, then tap Duplicate Selected Track.
Tap Done to close the settings controls.
Mixer
In Logic Remote, you can remotely control some of the basic mixing functions of Logic Pro. Some of the Mixer controls are always visible, while others are available only when you change the Mixer view.
Each channel strip has controls you can use to:
- Mute or solo the channel strip
- Adjust the volume and send levels
- Assign inputs or outputs
- Choose the automation mode
To change the Mixer view, do one of the following:
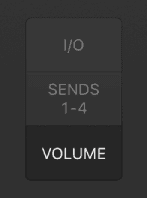
- To see the Volume faders: Tap Volume.
- To see Send Level controls 1 to 4: Tap Sends 1–4.
- To see Send Level controls 5 to 8: Tap Sends 5–8.Note: Sends 5-8 is only available if there are more than four sends on any track.
- To see Input/Output settings: Tap I/O.
Selecting the previous or next channel strip
- Tap the left or right arrow in the control bar display to select the previous or next channel strip.
- Touch and hold the left or right arrow in the control bar display to cycle quickly through channel strips.
Muting or soloing channel strips
In the Logic Remote Mixer, you can mute a channel strip to silence its signal or solo a channel strip to hear it by itself.


- Tap the Mute button in a channel strip to mute the channel strip.
- Tap the Solo button in a channel strip to solo the channel strip.
To unmute or unsolo the channel strip, tap the Mute or Solo button again.
To reset the mute or solo state of all channel strips:
- Tap the Reset Mute button to reset the mute state of all channel strips.
- Tap the Clear Solo button to reset the solo state of all channel strips.
- Tap the Recall Solo button to recall the solo state of all channel strips after being reset.
Adjusting volume and send levels
You use the Logic Remote Mixer controls to adjust a channel strip’s volume level and send levels. You can also control the overall project volume.
To adjust a channel strip’s volume, do one of the following:
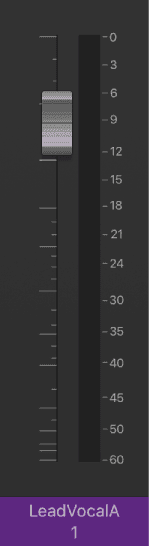
- Drag the Volume fader up or down to raise or lower the volume.
- Double-tap the Volume fader (or the area above or below the fader) to reset the volume to a neutral setting (0 dB).
Tip: To check the volume level at any point, tap the area above or below the Volume fader. The volume level momentarily replaces the channel strip number.
To adjust the overall volume of a project, do one of the following:
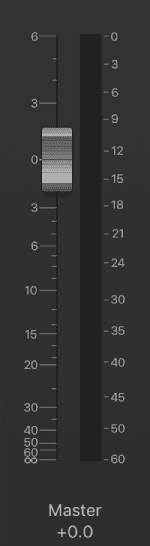

- Drag the Master Volume fader up or down to raise or lower the volume.Double-tap the Master Volume fader (or the area above or below the fader) to reset the volume to a neutral setting (0 dB).Note: This fader corresponds to the Master Volume slider in the Logic Pro control bar.
- Tap the Master Mute button to mute the entire project.
- Tap the Master Dim button to set the overall project volume to a level set in the Logic Pro > Preferences > Audio > General pane.
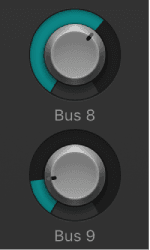
Adjust a channel strip’s send level position
Tap Sends 1-4 or Sends 5-8 to access the Send Level knobs. Note: Sends 5-8 is only available if there are more than four sends on any track.
Drag the Send Level knob up to increase the level, or down to decrease the level.
Assigning inputs and outputs
In the Logic Remote Mixer, you can choose audio inputs and outputs.
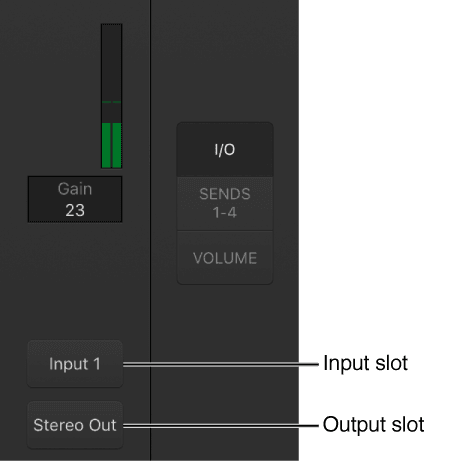
- Tap I/O to access the slots.
To choose an input, tap an Input slot, then choose an input.
To choose an output, tap an Output slot, then choose an output.
Automation modes
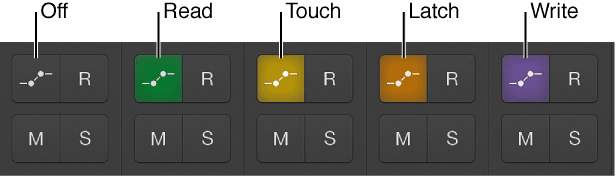
In the Logic Remote Mixer, you can set a channel strip’s automation mode:
- Off: Hides any automation that exists on the track, without deleting it.
- Read: Plays back all automation that exists on the track.
- Touch: Plays back automation in the same way as Read mode. You can modify the value of the chosen automation parameter by moving controls in Touch mode. After the fader or knob is released, the parameter follows existing automation on the track.
- Latch: Works like Touch mode, but after the fader or knob is released, the new parameter value replaces existing automation on the track.
- Write: Erases existing automation on the track as the playhead passes over it. Records the new control movement or deletes the existing data if you do nothing.

To choose the automation mode for a channel strip, tap the Automation Mode button , then tap Off, Read, Touch, Latch, or Write.
The color of the Automation Mode button indicates the chosen automation mode:
Key commands
As you’re well aware by now, you can perform nearly every function in Logic Pro with a key command, greatly accelerating your workflow.
In Logic Remote, you can use existing key commands, or search for key commands and assign the functions that you use most often to individual buttons. You do this in Key Commands view.
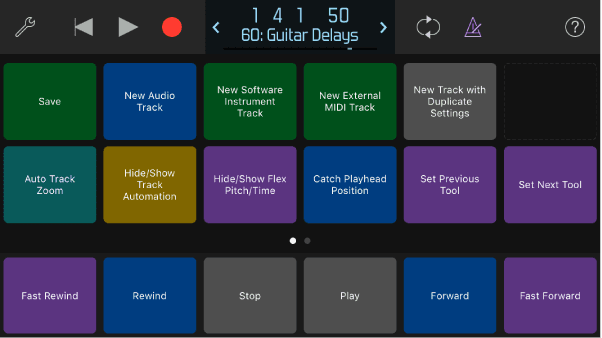
At the bottom of Key Commands view are default key commands that remain visible when you swipe between pages. You can replace these key commands with your own.
You can add, remove, and customize key commands to suit your own workflow needs. It’s also possible to share key command sets.
To open Key Commands view, rotate the iOS device to landscape orientation.
To use a key command, tap an existing key command with one finger, or with two fingers when in key command editing mode.
To use a key command repeatedly, touch and hold an existing key command. While this technique does not suit all key commands, you may find it useful for navigation and zoom commands, for example.
Customizing key commands
After you turn on key command editing, you can can add, remove, move, and customize key commands to suit your own workflow needs. You can also organize key commands by color.
The key command set you use in Logic Remote is independent of that in Logic Pro. While you can share a key command set (export or import) using Logic Remote, you can’t use it in Logic Pro. Any changes you make are specific to Logic Remote.
To turn on key command editing, tap the Settings button in the control bar, then tap Edit Key Commands.Tap anywhere in the main view to close the settings controls.
To add a new key command, tap an empty cell. Do either of the following:
Tap the search field, enter the name you want to search for, then tap Search.
Browse for key commands.
Tap an entry to add it as a new key command.
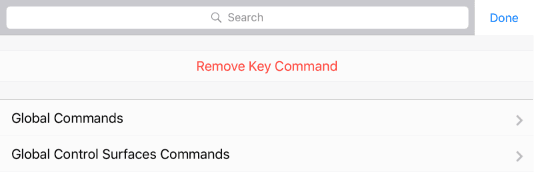
To replace an existing key command, tap an existing key command. Do either of the following:
Tap the search field, enter the name you want to search for, then tap Search.
Browse for key commands.
Tap an entry to replace the existing key command.
To move a key command, touch and hold a key command, then drag it to an empty cell. If you drag it to a cell that is not empty, the key commands are swapped.
To delete a key command, tap an existing key command, then tap Remove Key Command.
To organize key commands by color, tap an existing key command. Tap a different color.

Managing key command sets
You can import or export a key command set for Logic Remote via iTunes. This is useful when you want to share a key command set or use it on another iOS device, or if you need to restore a previously saved key command set.
As soon as you edit the original key command set for Logic Pro in Logic Remote, a LogicKeyCommands.plist file is saved to the iTunes File Sharing area. You can share, back up, or restore the key command set from the File Sharing area.
The key command set you use in Logic Remote is independent of that in Logic Pro. Any changes you make are specific to Logic Remote.
To share a key command set from Logic Remote:
- Connect your iOS device to your computer and open iTunes on your computer.
- Select the iOS device in the upper-right corner of the iTunes window.
- At the top of the iTunes window, click Apps.
- In the File Sharing area, select Logic Remote in the Apps list.
- Do one of the following:
- Drag LogicKeyCommands.plist out of the Logic Remote Documents list.
- Select LogicKeyCommands.plist, click Save to, navigate to the location where you want to save the file, then click Save To.
You can now share the key command set, or simply keep it as a backup.
To import a key command set to Logic Remote:
Connect your iOS device to your computer and open iTunes on your computer.
Select the iOS device in the upper-right corner of the iTunes window.
At the top of the iTunes window, click Apps.
In the File Sharing area, select Logic Remote in the Apps list. Do one of the following:
Drag LogicKeyCommands.plist to the Logic Remote Documents list.
Click Add, navigate to the location of the LogicKeyCommands.plist file you want to add, select it, then click Add.
Note: You can also share Logic Remote key commands between Logic Pro, GarageBand, and MainStage by renaming the LogicKeyCommands.plist, GarageBandKeyCommands.plist, or MainStageKeyCommands.plist file accordingly, then following the steps as described in the task to import a key command set into Logic Remote. Any unavailable key commands are dimmed.
Do this now
- Connect Logic Remote over Wi-Fi.
- Use it as a mixer and ride three faders at once with your fingers.
- Then use it as a keyboard with the scale set to your project key.
Riding three faders at once is something a mouse cannot do at all.