Flex Pitch, Quantizing Audio & Varispeed
Flex Pitch is a track-based setting that determines how the pitch of your audio material will be altered. The algorithm comes with two parameters, located in the Track inspector. It’s most obvious and most common use would be on sung vocals, though you can get creative with it and use it on other instruments you have recorded.
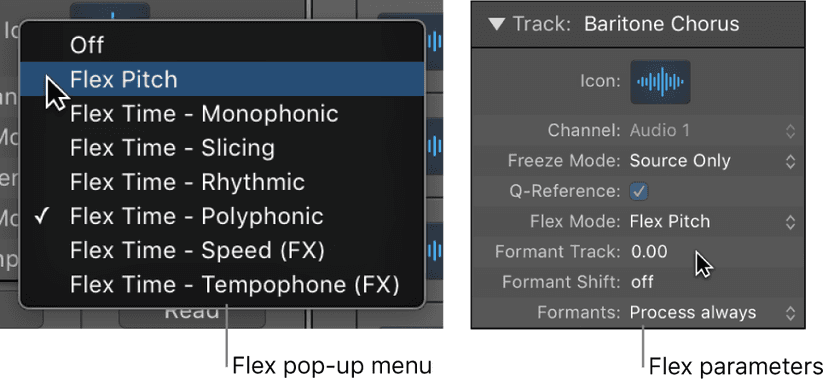
Note: When you choose a flex algorithm for a track, the Freeze Mode parameter in the Track inspector switches from Pre Fader to Source Only. This freezes the track signal without any effects plug-ins.
To use the Flex Pitch algorithm, choose Flex Pitch from the Flex pop-up menu.
Flex Pitch includes the following parameters:
- Formant Track: Determines the interval at which formants are tracked along the signal.
- Formant Shift: Determines how formants adjust to pitch shifts. When set to 0, formants are adjusted together with pitch shifts.
When you activate Flex Pitch, the destructive editing features in the Audio File Editor are disabled. If you plan on using Flex Pitch and making destructive edits to an audio file, you’ll either need to make the edits before activating Flex Pitch, or to bounce the region in place after using Flex Pitch but before making edits to the audio file.
Editing pitch using Flex Pitch
When you choose Flex Pitch for a track in the Audio Track Editor, or if you zoom into the track in the Tracks area, any sections of audio on that track that are identified as individual notes are displayed like notes in the Piano Roll Editor. When viewing Flex Pitch in this way, you can edit the pitch, time position, and length of notes in much the same way as you would in the Piano Roll Editor. You can also cut notes and merge multiple notes into one.
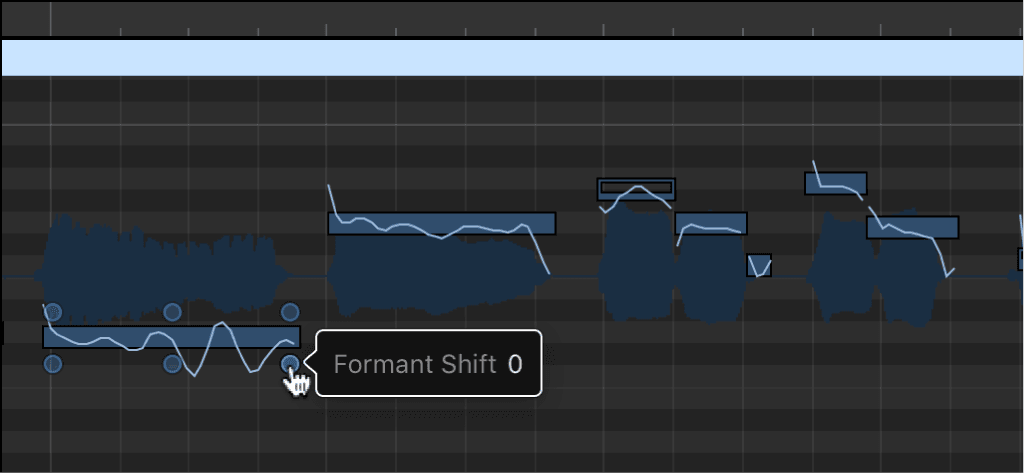
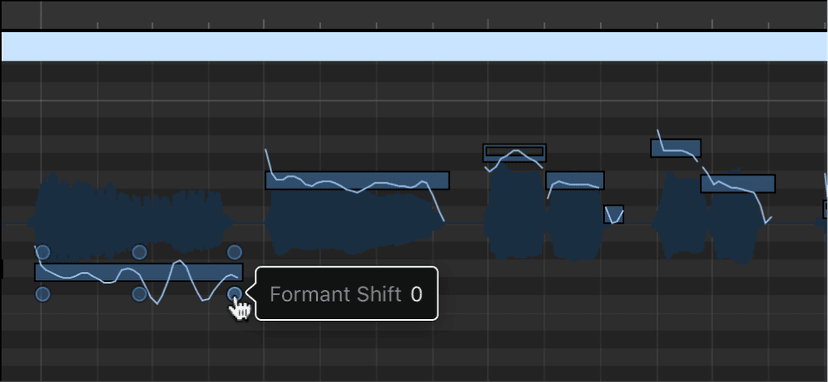
Each individual note contains “hotspots,” which you can use to edit pitch, vibrato, gain, and other parameters.
To change the pitch of a note, drag a note vertically.
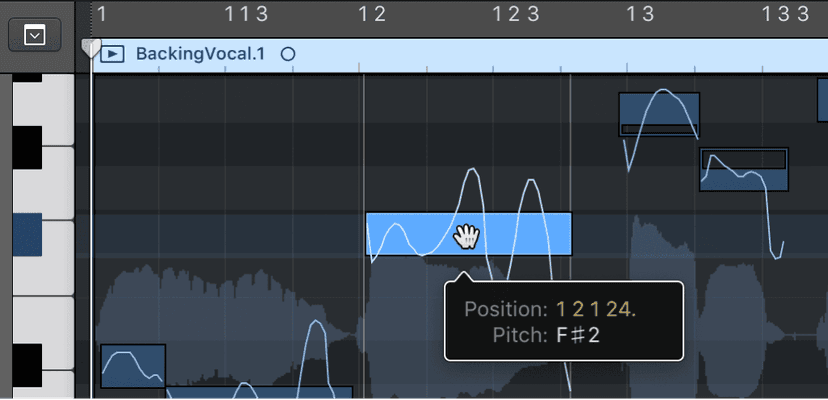
To move a note, drag a note horizontally.
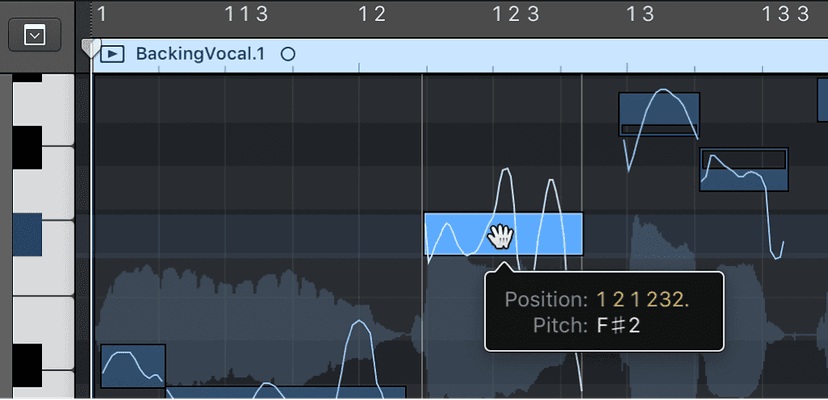
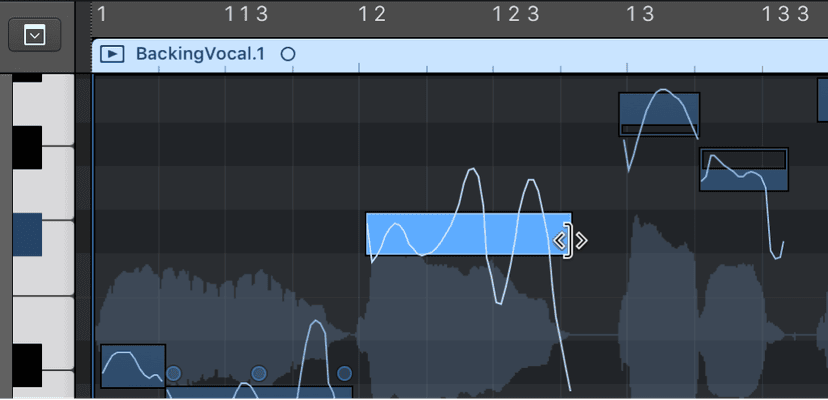
To resize a note, drag the left or right edge of a note.
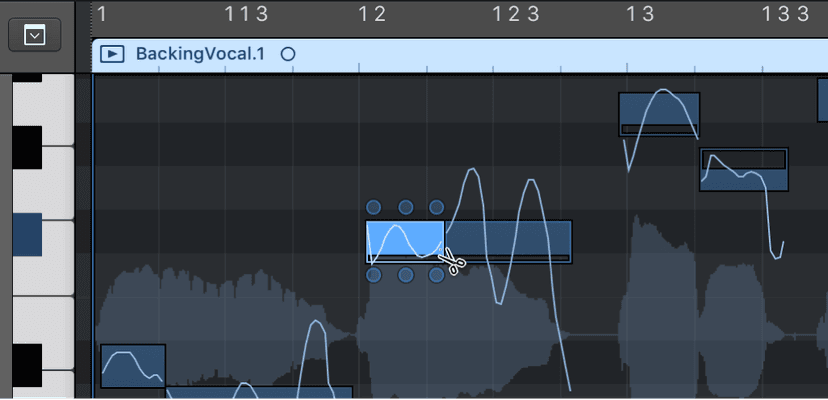
To split a note, click a note with the Scissors tool.
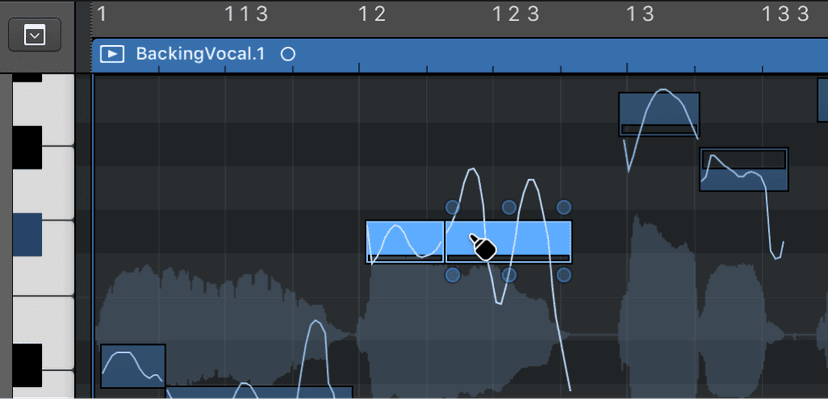
To merge two or more notes, select two or more notes, then click with the Glue tool.
Editing the parameters of a note using the “hotspots”
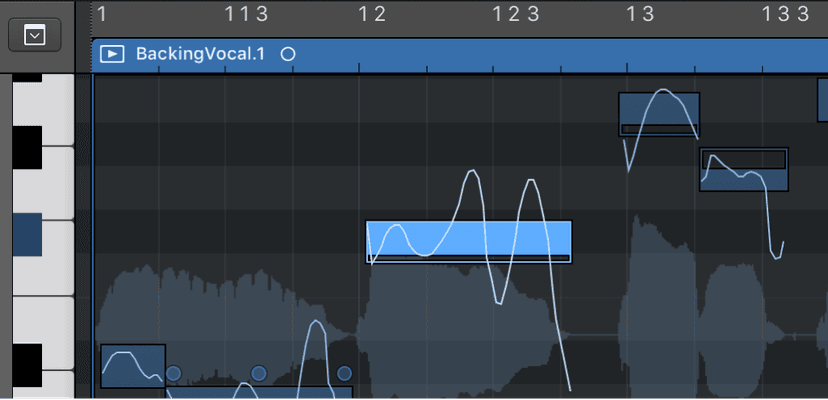
- Select a note, then do any of the following:
- To edit the pitch drift at the start of the note: Drag the upper-left hotspot vertically.
- To edit the vibrato: Drag the upper-mid hotspot vertically.
- To edit the pitch drift at the end of the note: Drag the upper-right hotspot vertically.
- To edit the gain: Drag the lower-left hotspot vertically.
- To edit the fine pitch: Drag the lower-mid hotspot vertically.
- To edit the formant shift: Drag the lower-right hotspot vertically.
Editing the vibrato of a note using the Vibrato tool
When working in the Audio Track Editor, the Vibrato tool allows you to edit the vibrato of a note without having to drag the hotspot.
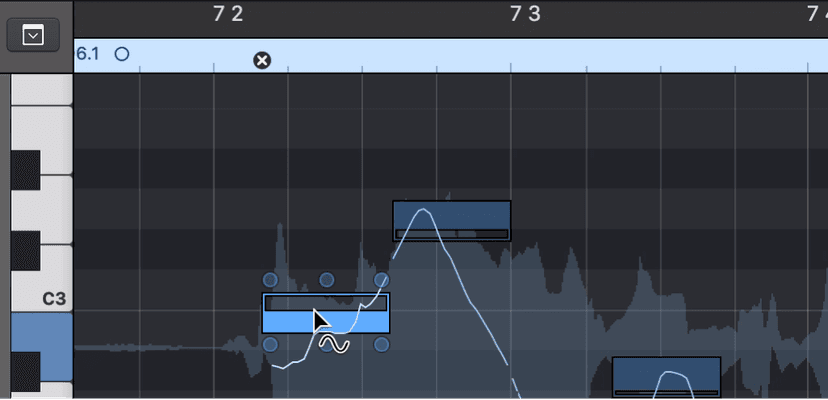
To adjust vibrato using the Vibrato tool:
- Select the Vibrato tool from the Tools pop-up menu in the Audio Track Editor menu bar.
- Drag up on the note to increase the vibrato, and down to decrease the vibrato.
Note: The Vibrato tool is only available in the Audio Track Editor, not the Tracks area.
Editing the gain of a note using the Volume tool
When working in the Audio Track Editor, the Volume tool allows you to edit the gain of a note without having to drag the hotspot.
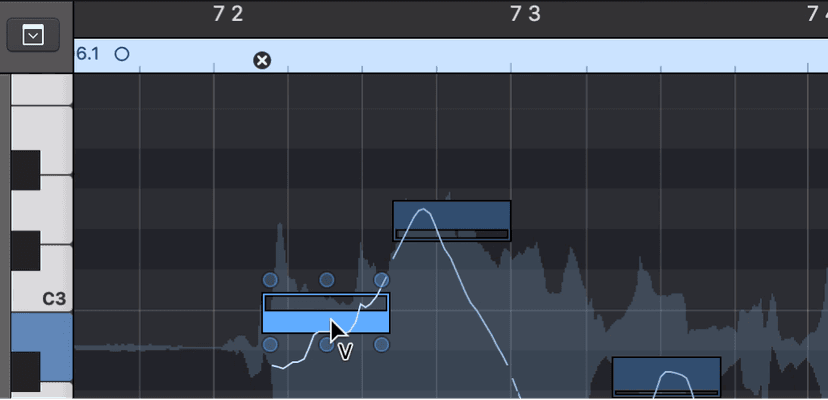
To adjust the gain using the Volume tool:
- Select the Volume tool from the Tools pop-up menu in the Audio Track Editor menu bar.
- Drag up on the note to raise the gain, and down to lower the gain.
Note: The Volume tool is only available in the Audio Track Editor, not the Tracks area.
Edit audio pitch in the Logic Pro Tracks area
When you choose Flex Pitch for a track in the Tracks area, but you haven’t zoomed into the track all the way, you don’t have access to all the Flex Pitch parameters you do when the track is zoomed. Instead, you are shown the pitch deviation of individual notes from their perfect semitone as bars overlaying the audio waveform in the background.
- The horizontal zero line represents the perfect pitch.
- Upward bars represent sharp notes.
- Downward bars represent flat notes.
- The horizontal size of bars represents the length of detected notes.
- The vertical display range is ±0.50 cents.If you want to move notes in time, you should use the Audio Track Editor.
MIDI from audio using Flex Pitch
You can create MIDI regions from audio regions in an audio track with Flex Pitch enabled. This “audio-to-MIDI” capability can be used to double the audio regions using a different instrument or different effects, to modify the sound of the original audio recording, to notate the music, and for other purposes. It’s a pretty darn nifty feature!
Creating MIDI regions from an audio recording works best with monophonic material; chords or polyphonic material may lead to errors in interpretation. Before creating the MIDI regions, its a good idea to make any needed corrections to the audio after enabling Flex. This could include timing corrections, missing or incorrectly pitched notes, and other corrections. After creating the MIDI regions, you can make further corrections and changes to the MIDI notes.
When you use the Create MIDI Track from Flex Pitch Data command, a MIDI region is created for each audio region on the audio track.
To create MIDI regions from audio regions using Flex Pitch:
- Double-click the audio region in the Tracks area to open the Audio Track Editor.
- Click the Show/Hide Flex button in the Audio Track Editor menu bar.
- Choose Flex Pitch from the Flex pop-up menu in the Audio Track Editor menu bar.
- After making any needed corrections, choose Edit > Create MIDI Track from Flex Pitch Data in the Audio Track Editor menu bar.
A new instrument track appears in the Tracks area below the audio track, containing MIDI regions created from the Flex Pitch data of the regions on the audio track.
- Choose a patch for the new track from the Library.
After creating a new MIDI region, you may want to play it together with the original audio recording to hear any inaccuracies, then make corrections to MIDI notes, adjust their velocity, quantize the region, or perform other edits in the Piano Roll Editor. You can also open the region in the Score Editor to view MIDI notes as music notation.
Quantizing the timing of audio tracks
We’ve seen how quantization works in general, but did you know you can quantize audio!?
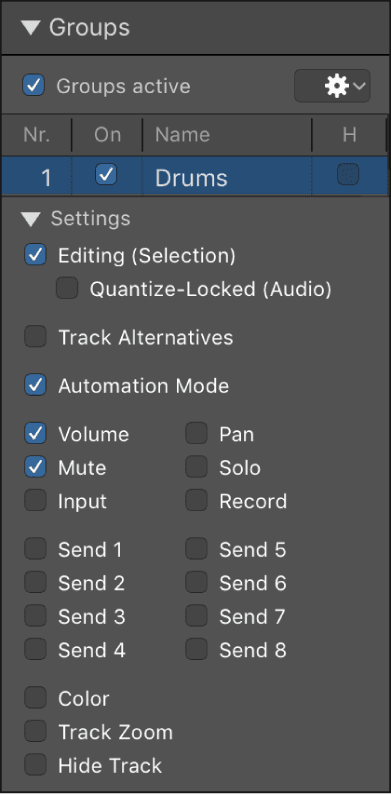
You can adjust the timing of an audio track, or a group of audio tracks, without adjusting any individual flex markers, using the quantize function available in the region parameter box. When quantizing multiple tracks in a group, you can select specific tracks to be the Q-Reference or quantize reference tracks. This is useful for drum groups where the kick and snare tracks (which typically keep the steadiest rhythm) can be used as reference tracks for quantizing the entire drum kit.
With Flex enabled on an audio track, you can adjust the timing of the audio so that it adheres to a specific timing grid.
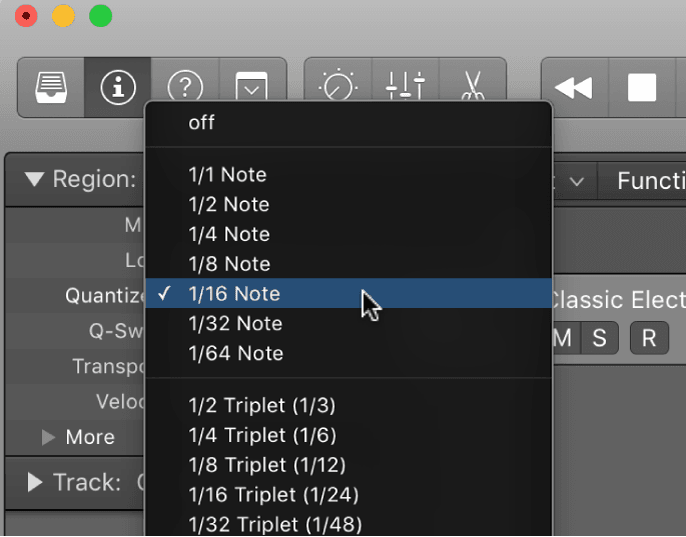
- Choose a value from the Quantize pop-up menu in the Region inspector.
To quantize the timing of multiple audio tracks, select all the audio tracks you wish to quantize and create a group. In the group settings window, select both Editing (Selection) and Quantize-Locked (Audio).
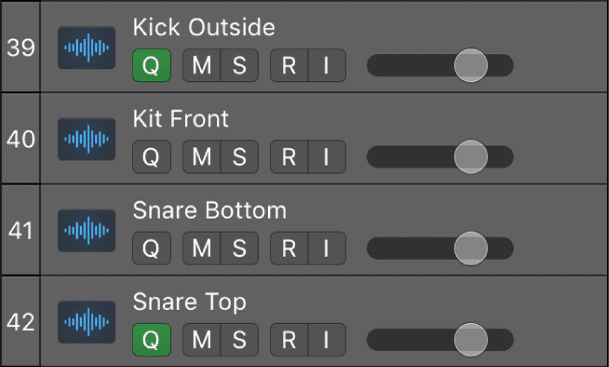
- Choose which tracks in your group you wish to be the Q-Reference by clicking their Q-Reference buttons.
- Choose a value from the Quantize pop-up menu in the Region inspector of one of the grouped tracks.
If after quantizing your group, you feel that the audio of one track, or section of a track, needs some additional timing correction, you can temporarily disable the group and use flex markers to adjust specific sections.
Quantizing pitch in the Audio Track Editor
When Flex Pitch is turned on in the Audio Track Editor, you can quantize, or automatically correct, the pitch of notes on an audio track. This is especially useful when you record audio regions that have the right “feel” and timing but are not perfectly in tune.
When you quantize the pitch, selected notes on the track are adjusted. Quantizing the pitch can produce accurate results only for single-note (monophonic) audio regions, so be sure the track does not include regions with chords or unpitched sounds.
By default, notes are adjusted to the closest note on the chromatic (12-note) scale. You can also quantize regions to the notes of a particular key or scale.
Quantize the pitch of notes on an audio track
- In Logic Pro, click the Show/Hide Flex button in the Audio Track Editor menu bar.
- Choose Flex Pitch from the Flex pop-up menu in the Audio Track Editor menu bar.
- Select the notes you want to quantize.
- Drag the Pitch Correction slider to the right to increase the amount of tuning adjustment, or drag it left to decrease the amount of adjustment.
- To quantize the pitch of notes to a particular scale, choose the scale and key (major or minor) from the Scale Quantize pop-up menus.
Varispeed
Varispeed provides a way to speed up or slow down the entire project, similar to the original varispeed feature of tape machines. The most practical use for this option is checking how a project might sound at a faster or slower tempo, and for practicing or recording a performance at a lower speed.
In Logic Pro, you can speed up or slow down a project between −50 percent and +100 percent, which is between 50 percent and 200 percent of the original tempo.
To Turn Varispeed on or off, Click the Varispeed button in the control bar.

Note: If you don’t see the Varispeed button in the control bar, Control-click the control bar, choose Customize Control Bar and Display from the shortcut menu, choose Custom from the LCD pop-up menu, then select the Varispeed checkbox.

Choose a Varispeed mode:

- Click the upper part of the Varispeed display in the control bar, then choose one of the following:
- Speed Only: Use to pitch shift the master output signal to balance the pitch change caused by varispeed. Only the speed changes, not the pitch.
- Varispeed (Speed and Pitch): Use to emulate classic tape varispeed, where the pitch changes to reflect the speed change.
- Varispeed and MIDI: Use to emulate classic tape varispeed (speed and pitch) and simultaneously transpose External MIDI tracks, quantized to semitones, so they sound at the same pitch as the project.
To change the unit of measurement and adjust the value, click the unit of measurement (%, bpm, st, Hz) in the lower part of the Varispeed display in the control bar, then choose one of the following:

Percentage (%): Displays the unit of measurement according to percentage.
Resulting Tempo (bpm): Displays the resulting tempo, dependent on the current tempo, which changes along with any tempo changes in the project. Note: The Tempo display in the control bar always shows the original tempo value.
Detune (st): Displays the unit of measurement according to pitch change.
Tuning Reference (Hz): Displays the unit of measurement according to tuning reference.
Drag vertically on the value to adjust it, or double-click and enter a new value.

Do this now
- Take a vocal take with one flat note.
- Fix only that note with Flex Pitch. Leave everything else alone.
- Now drag the vibrato flat on a held note and listen to how quickly it stops sounding human.
- Finally, pull the whole project down a tone with Varispeed and listen to what it does to the character of the voice.
The middle step is the lesson - a fix you can hear is a fix you went too far with.