Smart Tempo covers most of what you need. This is what you use when it does not: a live take that breathes, a rubato piano part, a band recording made without a click, a piece of library music that has to hit picture.
Two separate tools, and the difference matters. Beat mapping moves the grid to fit the music. Tempo Operations builds and reshapes tempo changes directly.
What beat mapping actually does
You connect notes in the performance to positions in the ruler. Logic inserts a tempo change at each connection, so the bar lines land where the music actually is. The audio does not move - its absolute time position is unchanged. The grid moves to meet it, and the project ends up carrying the same tempo variations as the original performance.
What that buys you:
- The metronome follows the performance, so overdubs line up with what is already there.
- Quantize works on anything you record afterwards.
- Loops follow the mapped tempo instead of fighting it.
- The part finally makes musical sense in the Score Editor rather than being a mess of ties.
- Step input lands musically rather than mechanically.
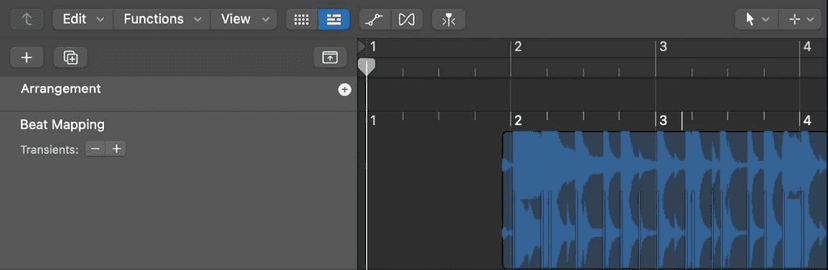
Show the Beat Mapping track
- Press G, or click the Global Tracks button above the track headers.
- Control-click the global tracks header area and select Beat Mapping.
It is available in the Piano Roll, Score Editor and Step Editor as well as the Tracks area - and working in an editor is usually easier, because you can see the notes you are mapping as you go.
Mapping MIDI
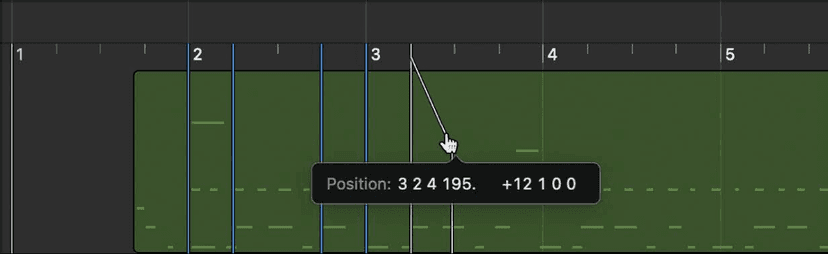
- Select the regions. A representation of them appears in the Beat Mapping track - zoom in, you will want the precision.
- Click the leftmost ruler position you want to tie to a note. A vertical line appears.
- Drag the bottom of that line onto the start of the note it belongs to. The line snaps to the note, and a tempo change appears in the Tempo track.
- Work left to right through the rest.
Two things that are not obvious:
- Control-drag to connect a ruler position to a place where there is no note at all - the line will then snap to any subdivision.
- To erase one mapping, double-click it with the Eraser or select it and press Delete. To erase all of them, click the Beat Mapping track header to select everything in the track, then Delete - carefully, since that key will take other selected events with it.
Mapping audio
Same process, with one step first: audio with no tempo information has to be analysed for transients before there is anything to map.
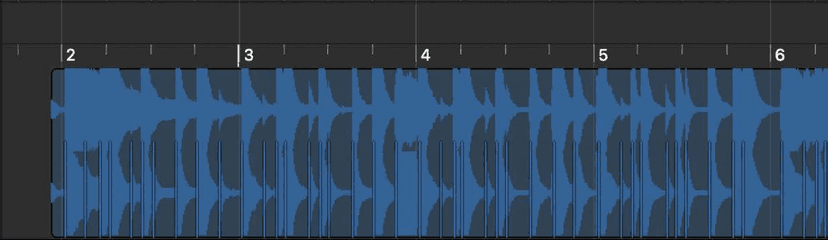
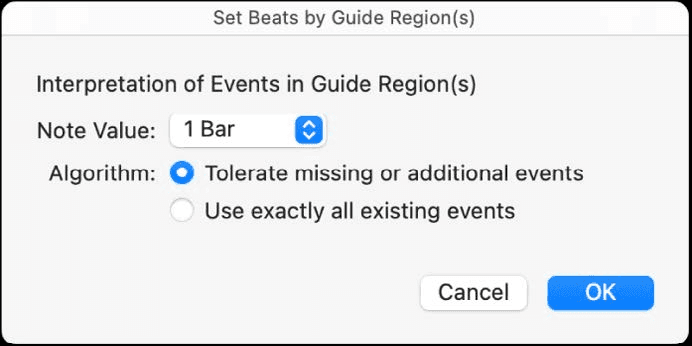
- Select the regions, click the "Beat Mapping" title in the track header, and choose Analyze Transients.
- Transients appear as blue vertical lines under the waveform.
- Map them to ruler positions exactly as with MIDI.
Accuracy is mostly about getting the transient detection right:
- The +/- buttons in the track header raise and lower the detection threshold. Start low and only go higher if obvious rhythmic events are missing - a high setting produces extraneous transients that mean nothing musically.
- If the transients are hard to see, use Waveform Zoom in the Tracks area menu bar to make the waveform bigger without changing the zoom level.
- Move Selection with First Transient to Nearest Beat (Control-click the header) shifts the regions so the first transient sits on a whole beat before you start, which saves fighting the first connection.
Protecting what is already right
Mapping one thing can drag other things out of place. Two options in the Beat Mapping header stop that:
- Protect MIDI - keeps MIDI events at their current ruler positions while you beat map audio.
- Protect Flex - keeps flex markers where they are while you beat map MIDI.
And one warning worth taking seriously: do not edit the Tempo track after beat mapping. Beat mapping works by writing tempo changes; editing them afterwards defeats the timing you just built.
The Tempo track and Tempo List
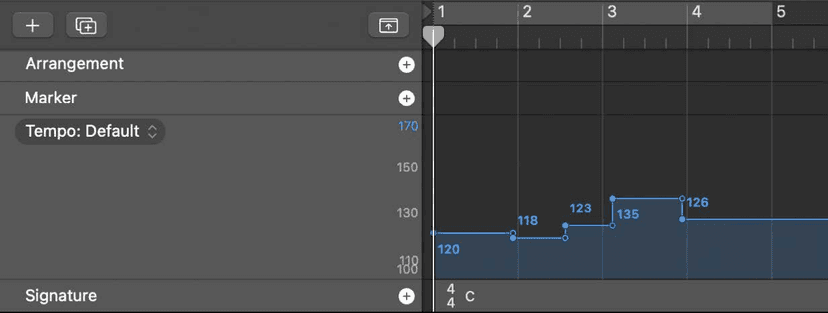
Tempo changes are tempo points in the Tempo track, available in the Tracks area, Piano Roll, Step Editor and Score Editor. You can expand the track and narrow its value range to work at finer resolution.
The Tempo List is the same data as an editable list. When a beat map has produced forty tempo changes and two of them are wrong, this is where you fix those two - dragging in the ruler at that density is hopeless.
Tempo Operations
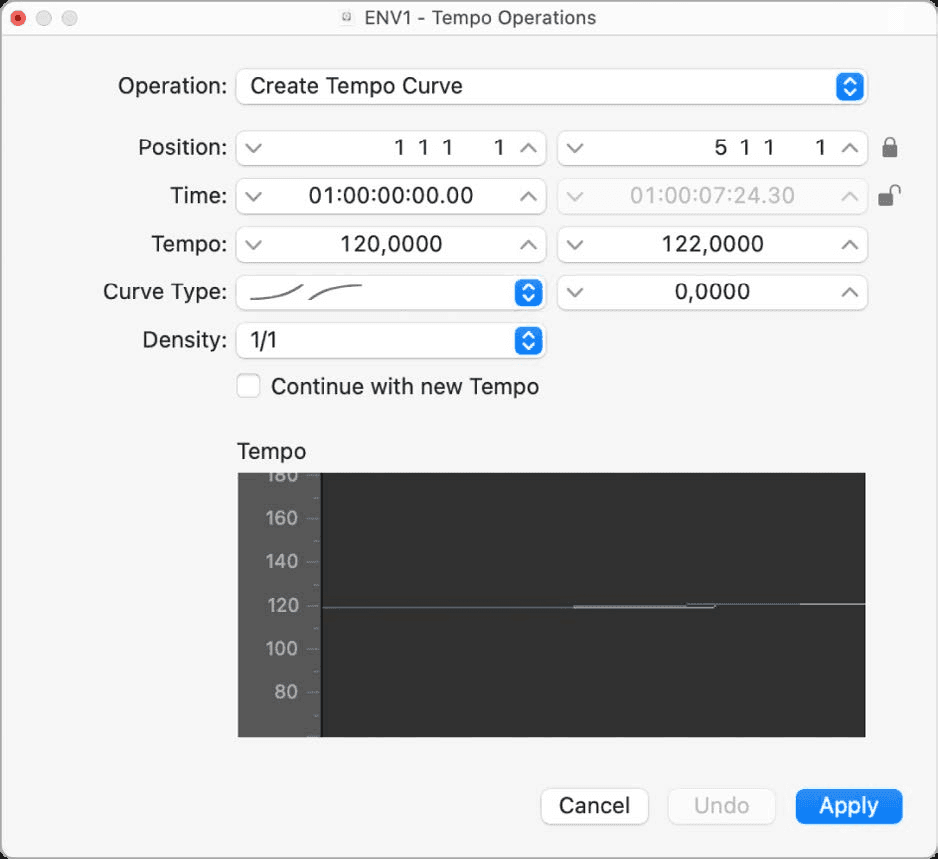
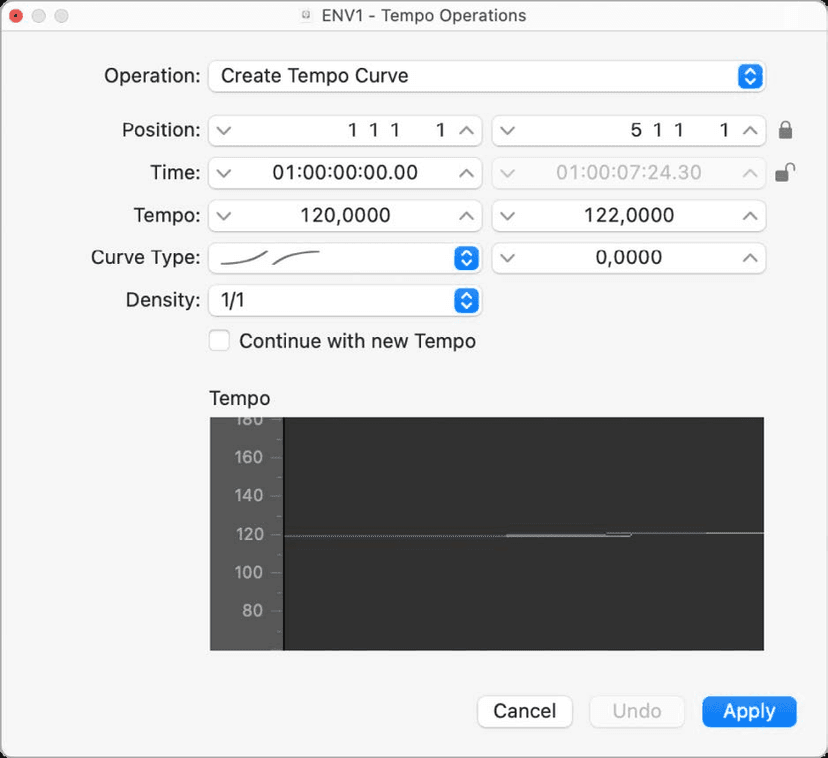
Edit > Tempo > Tempo Operations. The window shows whatever area you have selected and redraws the tempo curve in real time as you change parameters, so you see the result before applying it. Seven operations:
- Create Tempo Curve - many tempo events from a few parameters, giving a smooth overall change.
- Create Constant Tempo - flattens the selection to one tempo, defaulting to the average of what is already there.
- Scale Existing Tempo - speeds up or slows a section by a percentage while keeping the relationships between the tempo changes inside it.
- Stretch Existing Tempo Curve - stretches or compresses a curve to a new end point or by a percentage.
- Thin Out Existing Tempo Changes - reduces how many events there are, set by density per bar.
- Randomize Tempo - adds deviation in bpm at a density you set.
- Round Existing Tempo Changes - rounds to whole bpm or tenths.
Building a ritardando by hand
- Choose Operation > Create Tempo Curve.
- Set the area with the Position or Time fields - left is the start of the curve, right is the end.
- Enter the start and end tempos.
- Pick a curve type, then set Curvature - positive or negative decides whether it speeds into or out of the change.
- Set Density, which is how many tempo events get written.
- Click Apply.
On Density, Apple is blunt and they are right: do not go finer than 1/8 just to make the curve look smooth. It creates far more tempo events than the music needs and costs processing for nothing. Finer values are for genuinely very slow or very fast changes.
The Continue with new Tempo checkbox decides what happens when the curve ends - off, the original tempo resumes; on, the final tempo of the curve stays.
Tap tempo and the Tempo Interpreter
The Tap Tempo command generates tempo events from you tapping a key. The Tempo Interpreter window is where you set how Logic reads those taps - how much deviation it tolerates, how quickly it responds. Useful for getting a rough tempo map out of a performance you are listening to rather than one you have recorded.
If you want tempo changes captured while recording at all, turn on Allow tempo change recording in File > Project Settings > Recording.
The practical advice
Beat mapping an entire song by hand is slow, and mostly unnecessary. Map the places that matter - the intro, the ritardando, the bar where the drummer pushes - and leave the rest alone. You are making the grid usable, not transcribing a performance.