Making Beats using Apple Loops
Apple Loops are prerecorded musical patterns that you can use to quickly add drum beats, rhythm parts, and other musical phrases to a project. They contain musical patterns that can be repeated over and over, seamlessly. After you add a loop to the Tracks area, you can extend it to fill any amount of time. A handy feature of them is when you add an Apple Loop to a project, they automatically match the project tempo and key.
Note: If you haven't already set your key as the correct one, make sure you do, particularly if you're working with melodic or chordal parts.
They're perfect as a lauchpad for compositions, or when you're looking for that extra sprinkle to add to your productions.
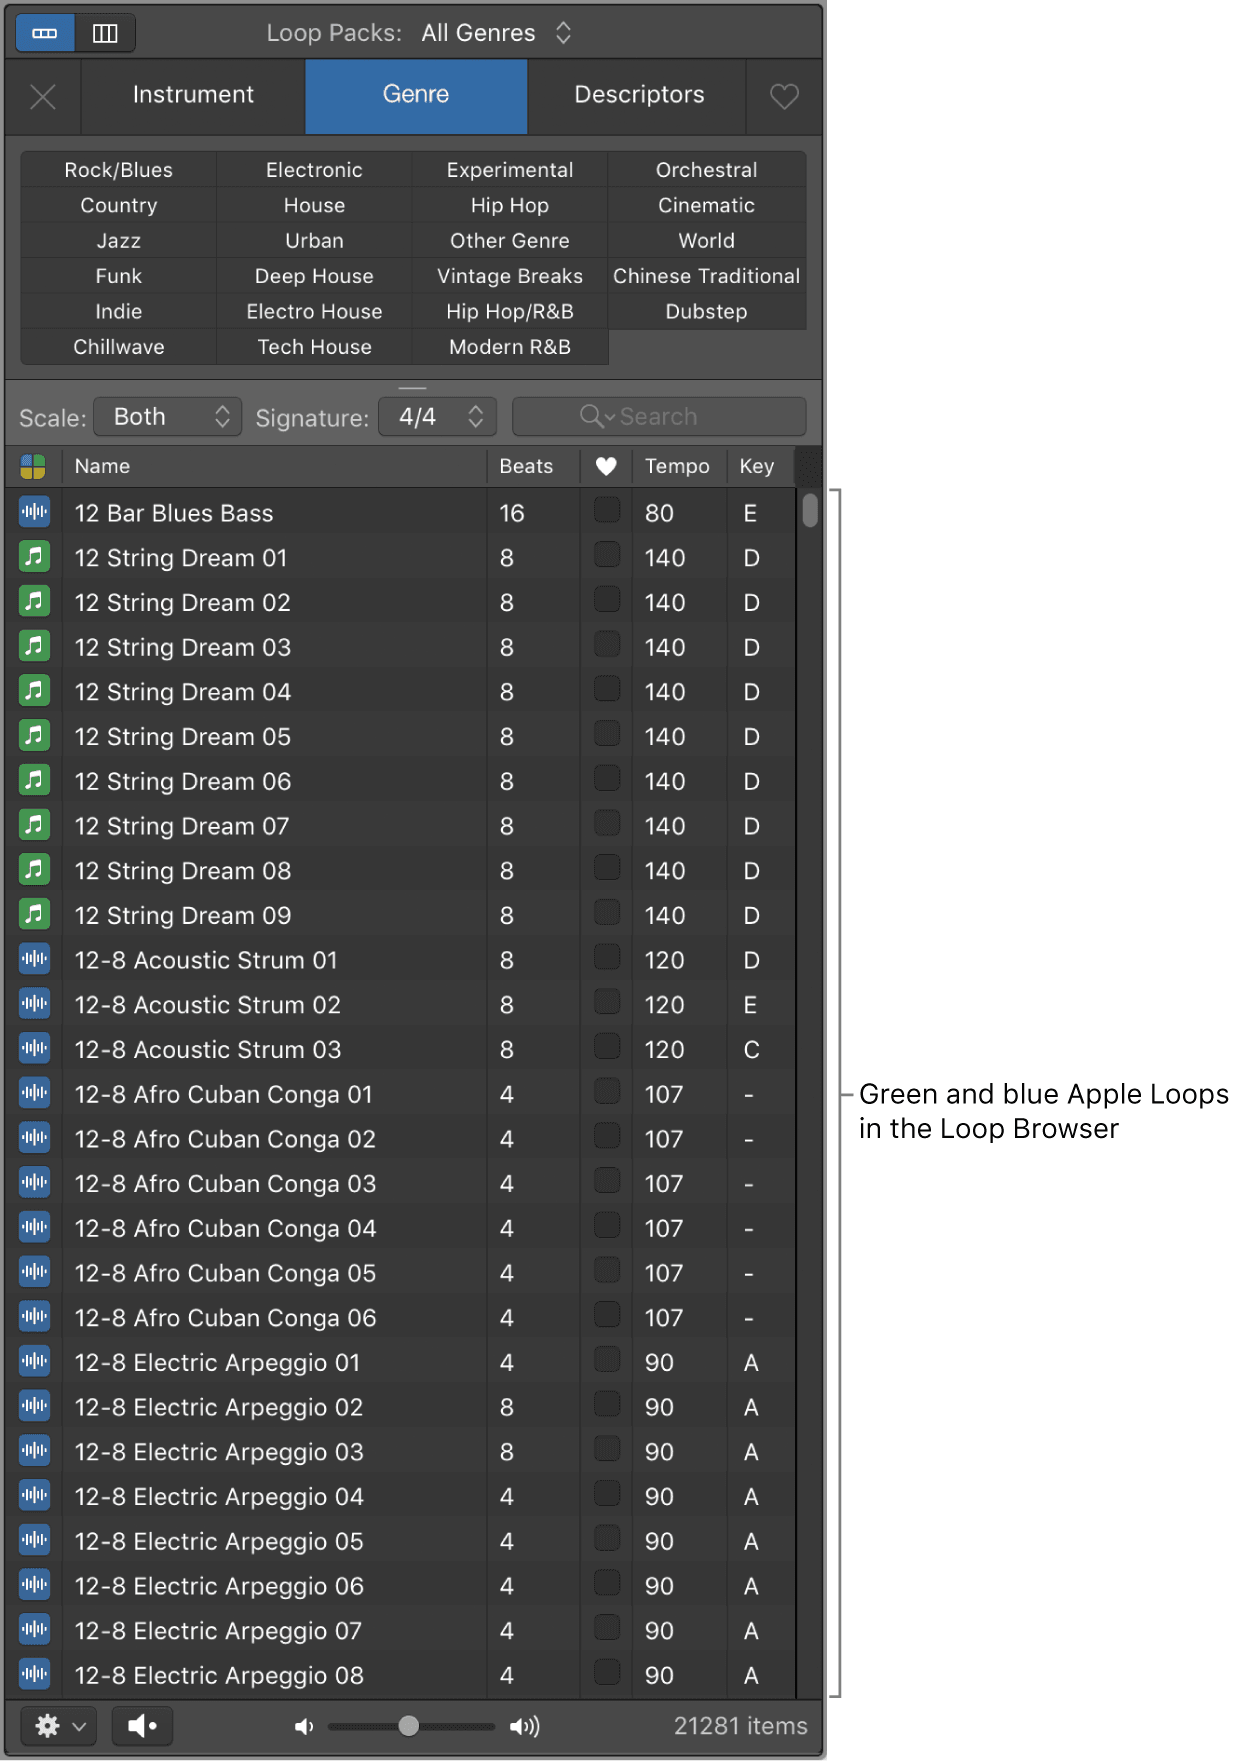
Apple Loops are available in a variety of instruments, genres, and moods in the Loop Browser.
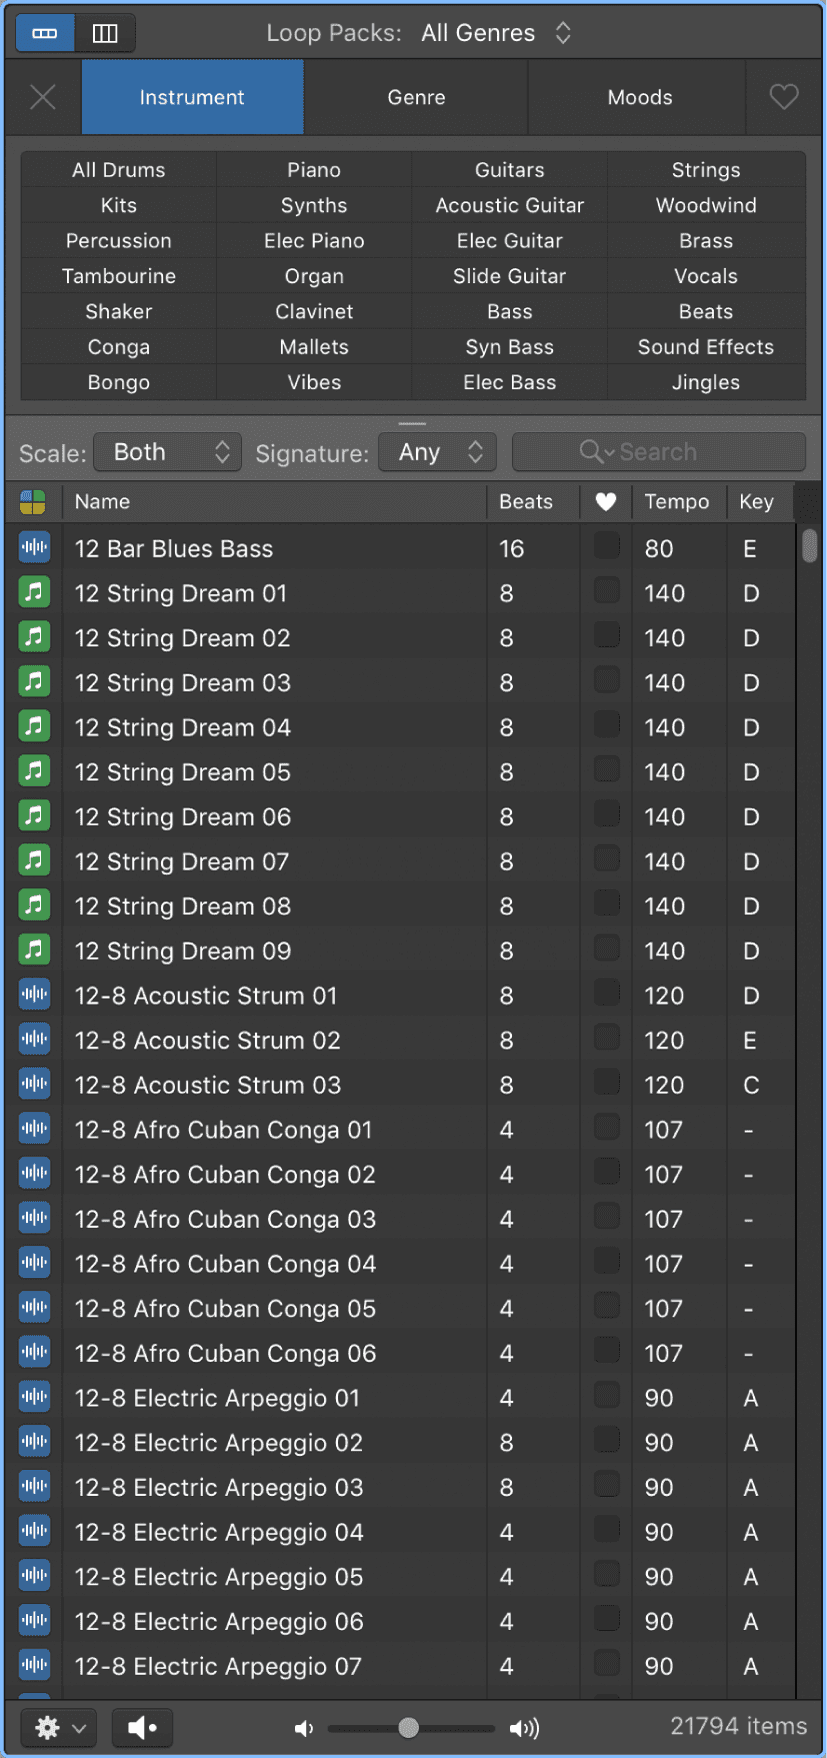
There are four types of Apple Loops:
- Audio loops (blue) are audio recordings. You can add them to audio tracks, and edit them just like other audio regions in the Tracks area and Audio Editor.
- Software instrument loops (green) can be edited just like other MIDI regions, including editing individual notes, and can be viewed in the Piano Roll Editor and Score Editor. You can change the sound of the instrument used to play the loop. You can add software instrument loops to software instrument tracks and also convert them to audio loops by adding them to audio tracks.
- Drummer loops (yellow) contain all the performance information necessary for generative instruments such as Drummer. You can change the artist and parameters in the Drummer Editor to change the sound of the loop. You can convert them to software instrument loops by adding them to software instrument tracks, and also convert them to audio loops by adding them to audio tracks.
- Pattern loops (yellow) contain all the notes and pattern information from a pattern created using the Step Sequencer. Pattern loops can be edited just like other regions in the Tracks area, but the notes themselves can only be edited in the Step Sequencer. You can add pattern loops to software instrument tracks and also convert them to audio loops by adding them to audio tracks.
In order to access Apple Loops, you must open the Loop Browser by clicking the Loop Browser button in the control bar (or press O).
Browsing and previewing Apple Loops
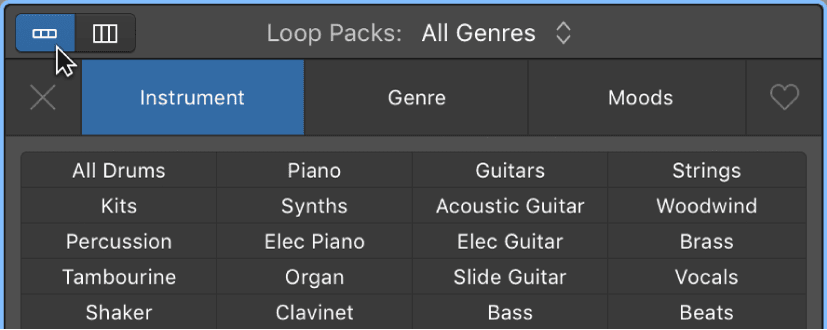
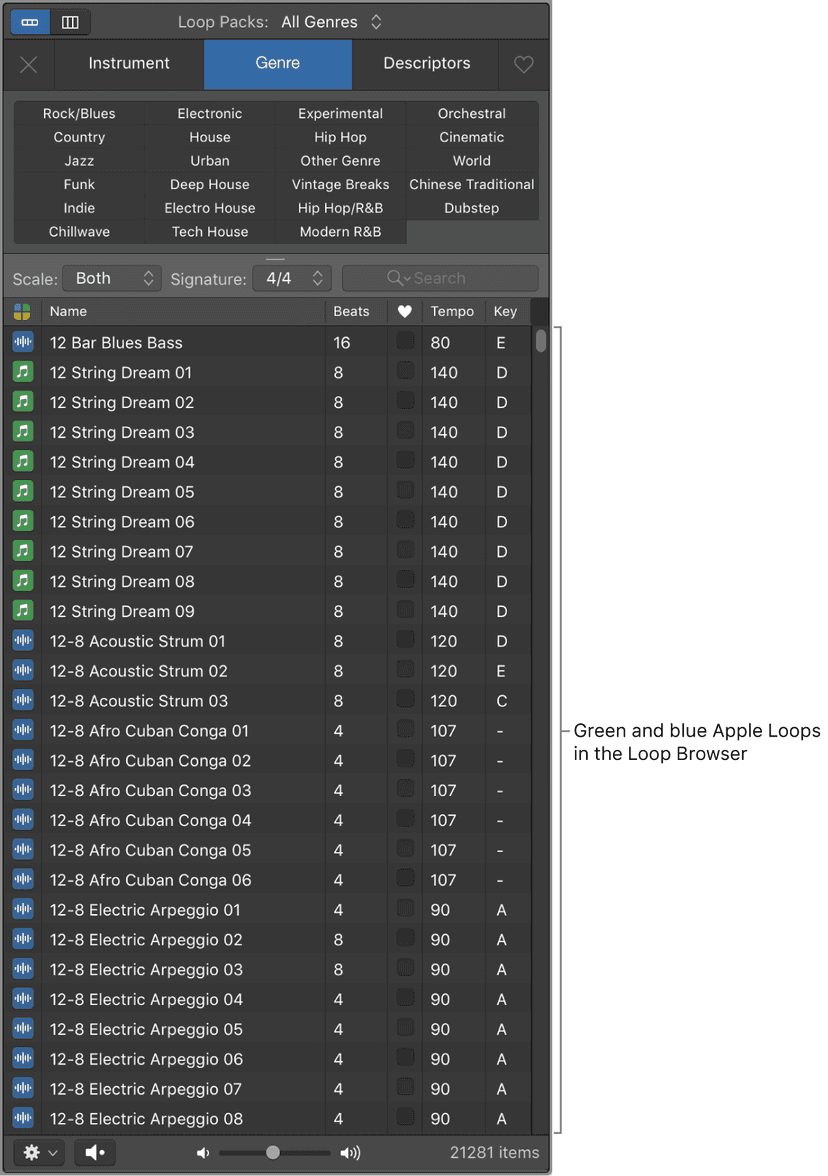
- To browse Loops, click the Button View button, then click keyword buttons to see matching loops in the results list. Keywords with no matching loops are dimmed.
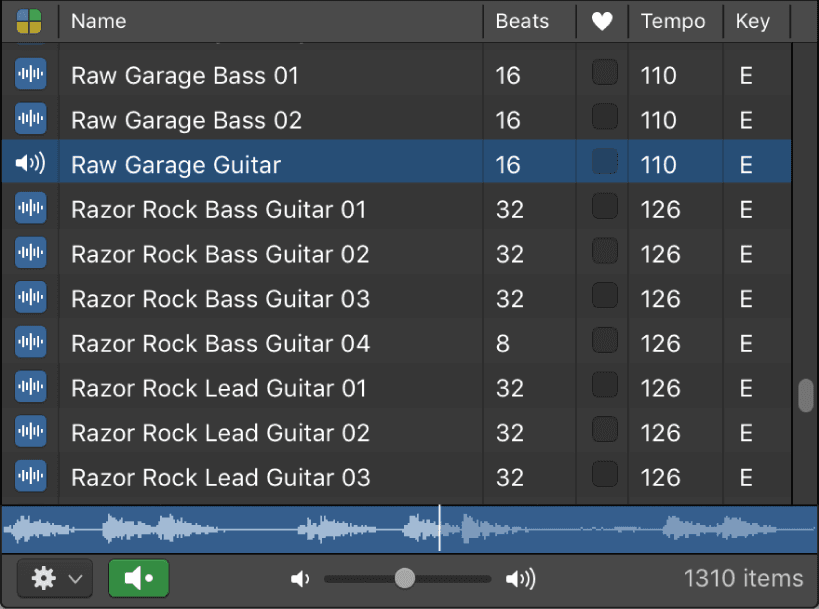
- To preview Loops in the Loop Browser, simply click a loop in the results list, and it will begin playback.You can adjust the preview volume, and choose a different key for the loop.
To stop preview playback, click the loop again.
Adding a loop to the Tracks area
You can add Loops to your track by doing one of the following:
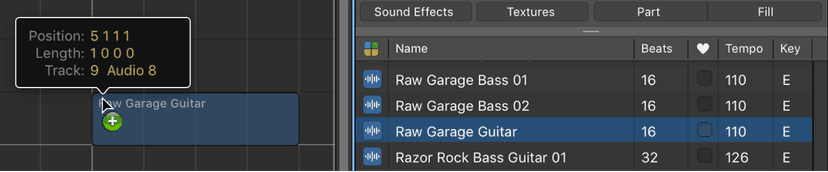
- Drag the loop to a track of the same type to add it to that track.
- Drag the loop to an empty part of the Tracks area to create a new track with the loop.
After you add the loop to the Tracks area, you can drag it left or right to adjust the point where it starts playing.
Whenever you add an Apple Loop to a project, a region is created for the loop. When the project plays, the region plays at the project tempo and key. This lets you use several loops together, even if the loops were recorded at different speeds and in different keys.
Searching for Apple Loops
You can search for loops using keywords, by name, instrument, genre, and other descriptors. Apple Loops use a tag based browsing system, so if you're looking for some "dark electric guitar," you'll be able to find it! You can also refine your searches.
In the Loops Browser, do one of the following:


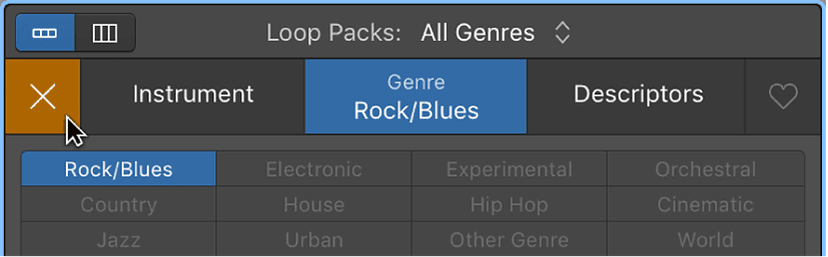
- Click the Button View button to see the category buttons. Click the category buttons to access the keyword buttons for that category. You can also Shift-click multiple categories for more keyword buttons. Then click the keyword buttons to see the matching files in the results list. If a keyword is dimmed, there are no loops that match that category. Your current selection appears under the name of the category button.
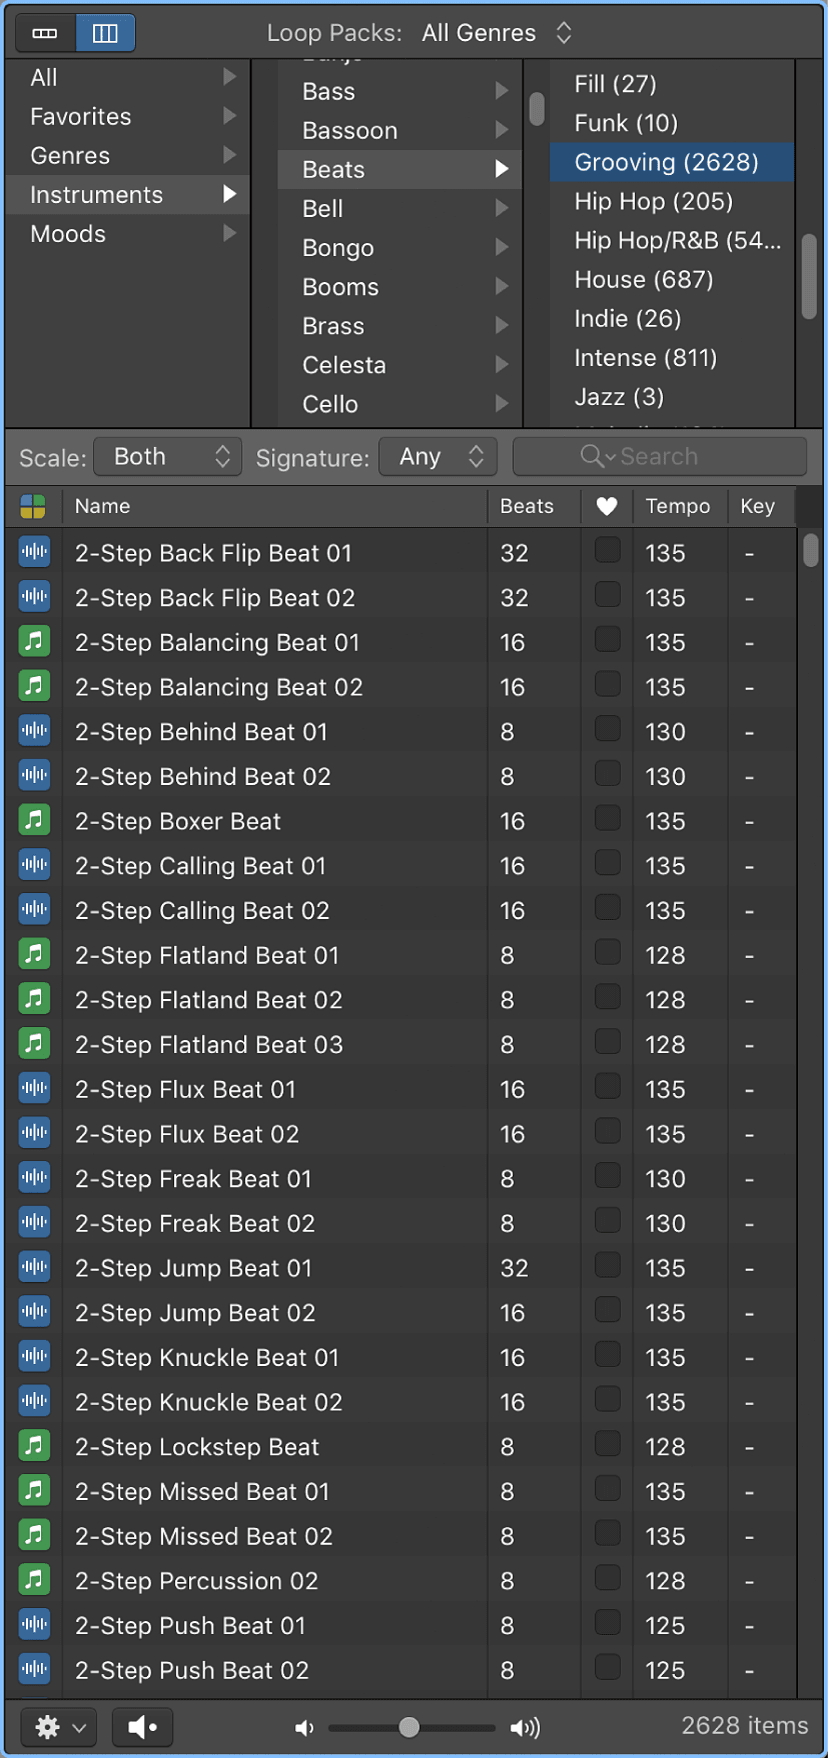
- Click the Column View button to see a standard OS X column file directory that is hierarchically separated into All, Favorites, Genres, Instruments, and Moods search criteria. Select a keyword type in the left column, select a category in the middle column, then select a keyword in the right column to see the matching files in the results list below.
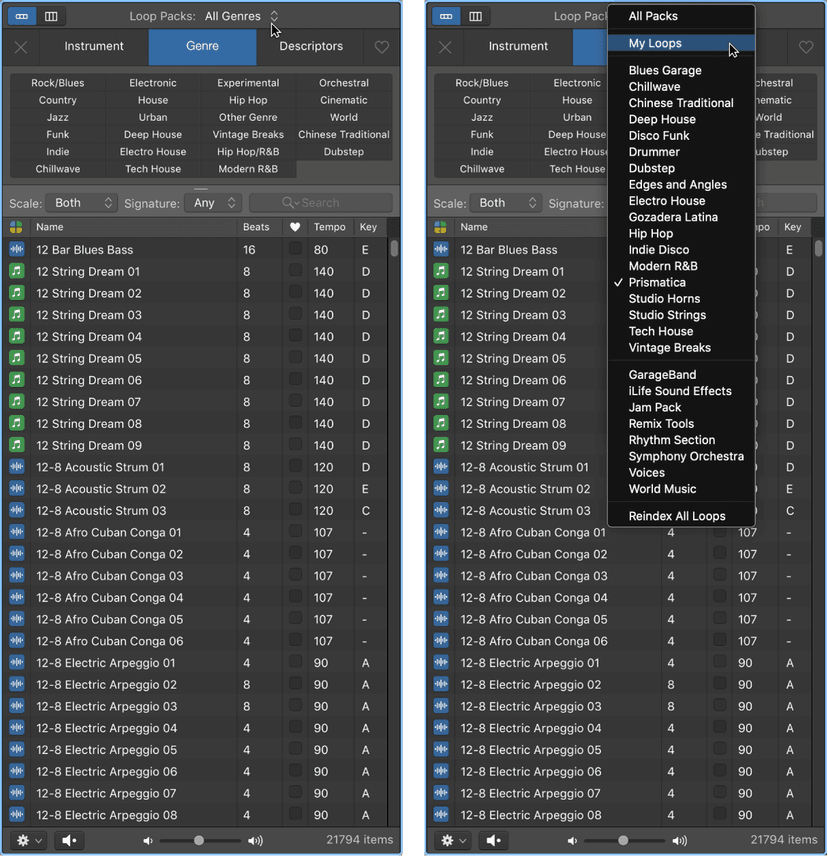
- Click Loop Pack at the top of the Loop Browser, then from the pop-up menu that appears, choose the Loop Pack or folder with the loops you want to view.
When thousands of loops are installed on your hard disks, finding a particular Apple Loop can be a daunting prospect. Fortunately, you can use a number of key criteria—location, scale, time signature—to restrict your search or browsing results. You can also sort the search results.
To search for loops by name, enter a search term in the search field, then press Return.
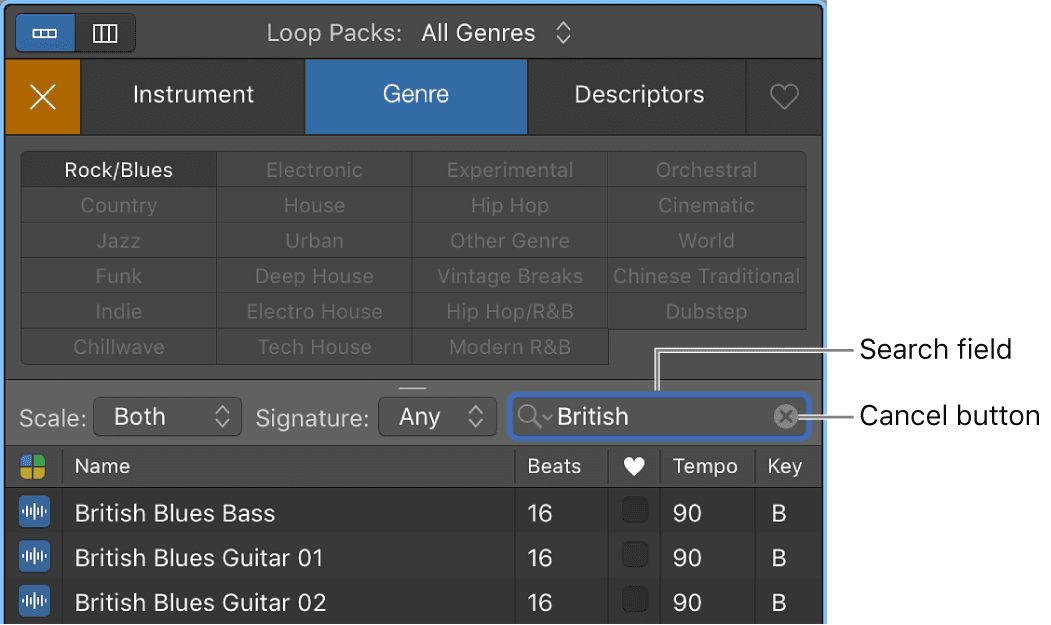
The search term can be alphabetical or numerical. Any files that match your search term are displayed in the results list.
You can limit search results in the Apple Loops Browser to one or more of the four types of Apple Loop.
To filter searches by loop type:
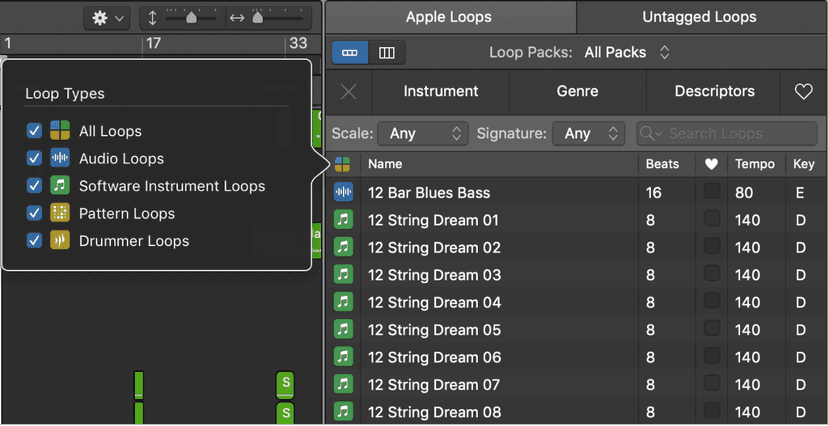
- Click the Loop Types button.
- Select one or more loop types to limit the results in the Apple Loops Browser to just those types, or select All Loops to view all loop types.
To view or clear recent search terms, do one of the following:
- To view a recent search term: Click the magnifying glass icon at the left side of the search field, then choose a search term from the pop-up menu to display the results.
- To clear a search term: Click the small “x” at the right side of the search field.
- To clear all search terms: Click the magnifying glass icon at the left side of the search field, then choose Clear Search History from the pop-up menu.
To restrict loops by location, click Loops at the top of the Loop Browser then, from the pop-up menu that appears, choose the Jam Pack or folder with the loops you want to view.
If you have one or more Loop Packs installed on your computer, you can display only the loops from a particular Loop Pack or only the loops included with GarageBand.
If you have Apple Loops from third-party manufacturers installed on your computer, you can choose to display third-party loops only.
If you have created your own Apple Loops, you can display the loops for your user account or display loops shared by all users on your computer.
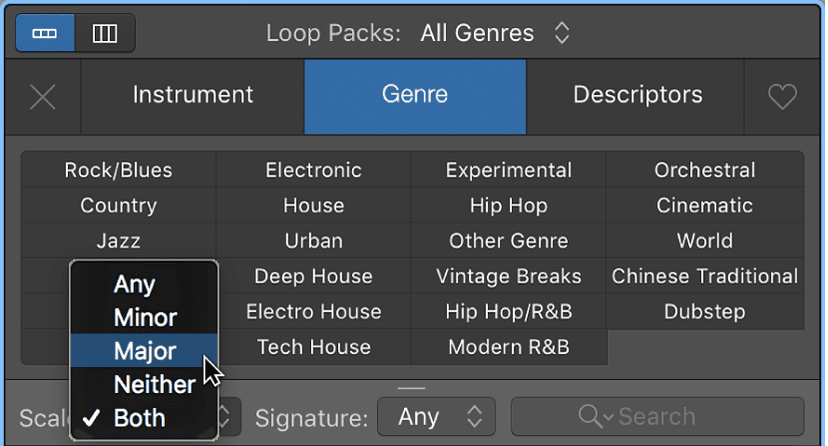
To restrict loops by scale, choose Any, Minor, Major, Neither, or Both from the Scale pop-up menu.
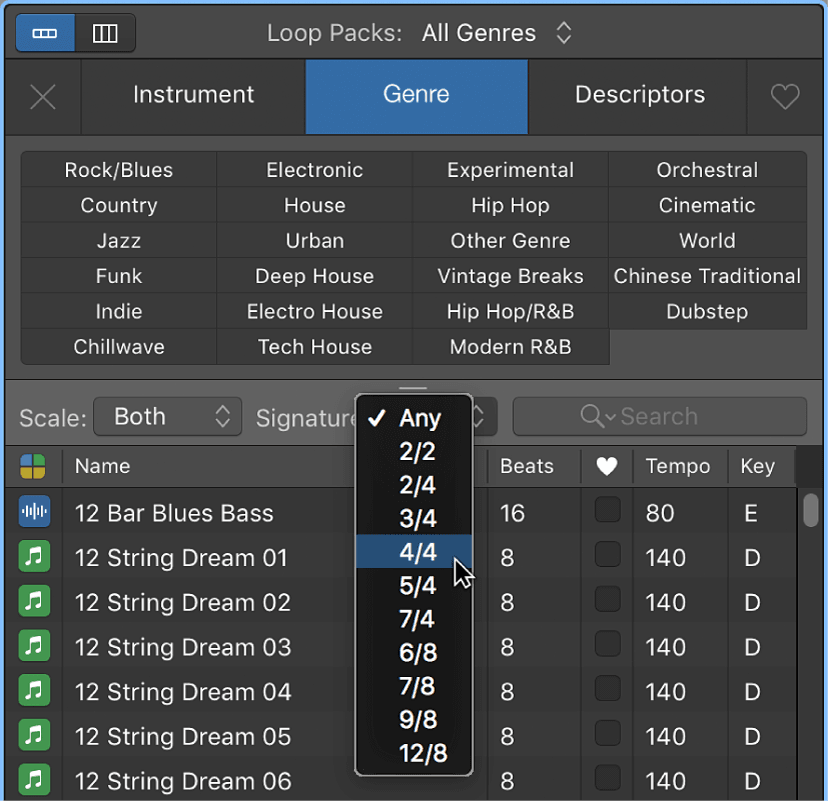
To restrict loops by time signature, choose a time signature from the Signature pop-up menu.
To restrict loops by loop type, choose All Loops, Audio Loops, MIDI Loops, Pattern Loops, or Drummer Loops from the Loop Types pop-up menu.
To sort Loop Browser results, click any of the column headers to sort the results by that column type, in ascending or descending order.
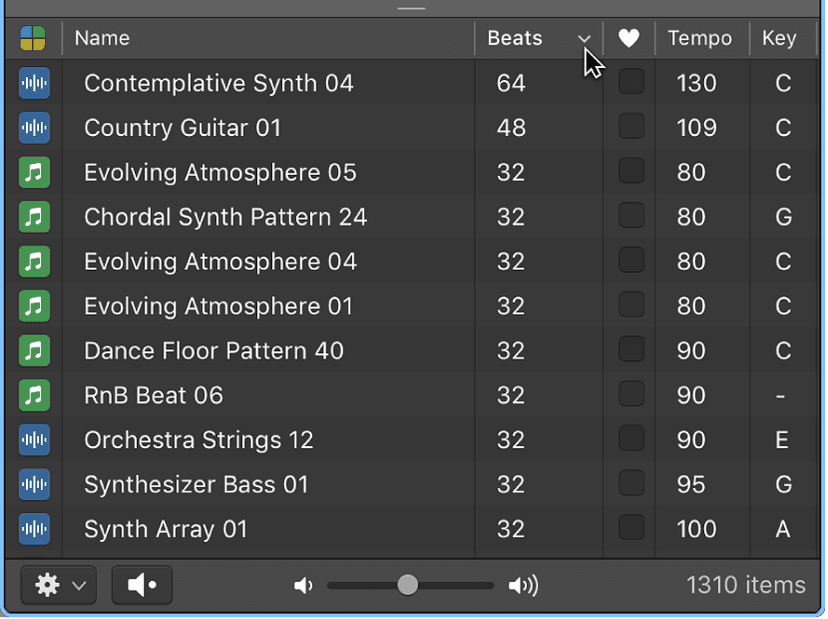
- Name column: Sorts Apple Loops by name.
- Beats column: Sorts Apple Loops by beats.
- Favorites column: Sorts Apple Loops by Favorites checkbox selection.
- Tempo column: Sorts Apple Loops by tempo.
- Key column: Sorts Apple Loops by key.
You can swap column positions by dragging the column header left or right, and resize column widths by dragging the vertical line that separates the column headers.
You can clear all keyword selections, by clicking the Reset button.
Adding Favorite Apple Loops
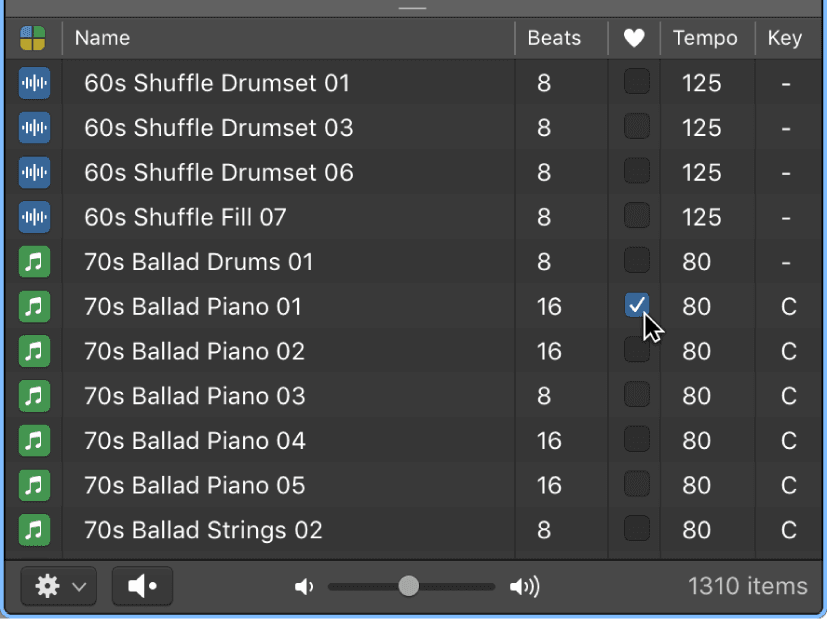
You can specify loops you use frequently as “favorites,” so you can quickly access them in the Loop Browser. This feature is ideal for compiling a collection of Apple Loops that you use regularly. The loops you choose can be replaced or added to easily as your project advances, but the use of favorites may form a great starting point for many of your songs.
To specify a loop as a favorite in Logic Pro, select the Favorite checkbox for the loop in the results list.To access your favorites, click the Favorites button in Button view, or select Favorites in Column view.
Create your own Apple Loops
You can create Apple Loops from your own audio and software instrument recordings. When you create an Apple Loop from a region, it’s added to the loop library and appears in the Loop Browser, so that you can use it in other projects.
You may also find that when you move loops from their location on your hard disk to another folder or hard disk you need to reindex your Apple Loops library (We'll show you how to do this!).
- Select one or more audio or software instrument regions in the Tracks area.
- Do one of the following:
- Choose File > Export > Region/Cell to Loop Library.
- Control-click the regions, then choose Export > Add to Loop Library from the shortcut menu.
- Drag the regions into the Loop Browser.
- Press Control-Shift-O.
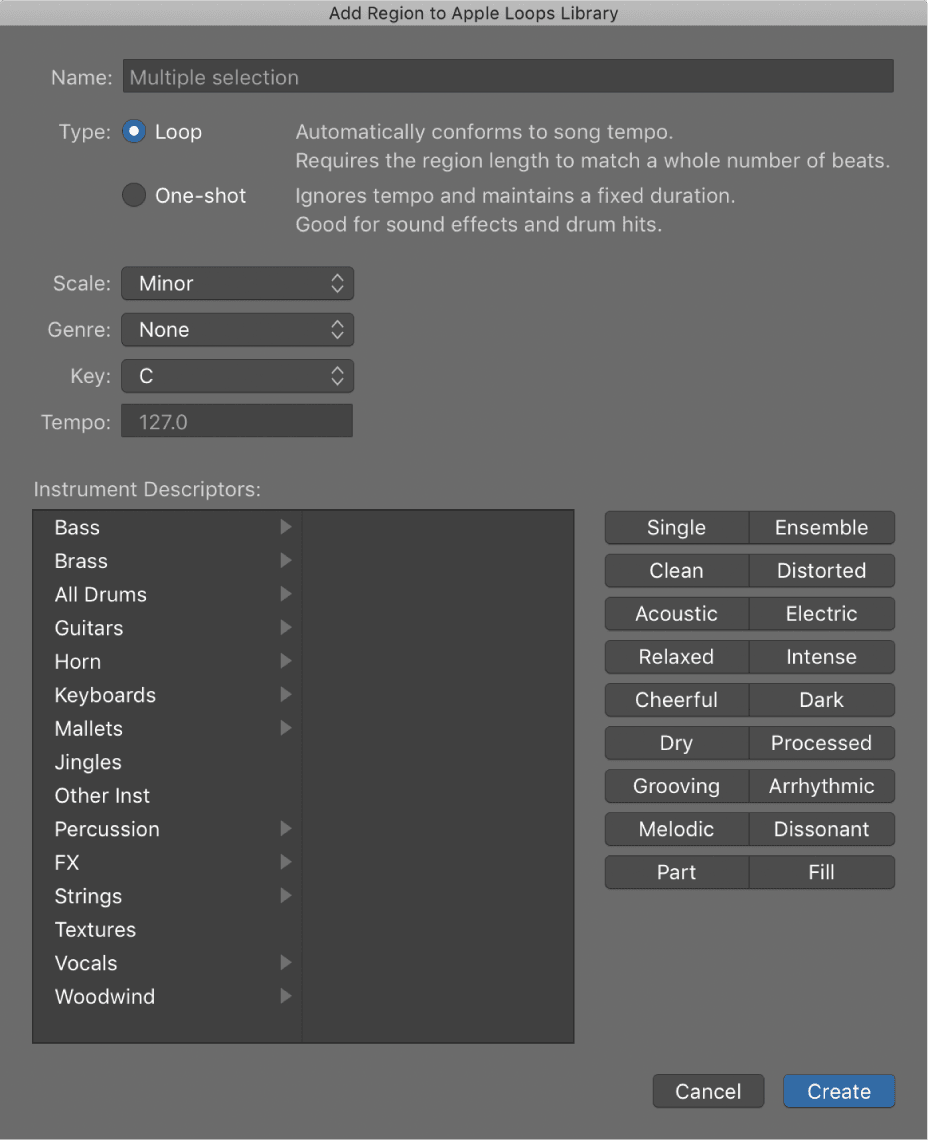
- In the Add Region to Apple Loops Library dialog, select the text in the Name field and enter a new name. If you are adding multiple regions to the loop library at once, the Apple Loops retain the names of the original regions.If you want the loop you are creating to be part of an existing loop family, give your loop the same name as the rest of the loop family and append the next consecutive number to the end of the name. For example, if you have a loop family consisting of two Apple Loops, Mod Beat 01 and Mod Beat 02, and you want to create your loop as part of that loop family, name the new loop Mod Beat 03.
- Select the Type of Apple Loops to create by clicking one of the two radio buttons:Loop: These Apple Loops conform to project tempo, scale, and key. In order to ensure that the loops conform properly, the region lengths must match a whole number of beats. Choose Loop for loops of musical material.One-shot: These Apple Loops ignore tempo, scale, and key information, and have a fixed duration. Choose One-shot when creating Apple Loops of sound effects, dialog, and other sounds that are not necessarily musical in nature.
Note: If your region lengths do not fall exactly on a beat, One-shot is the only option available. If you want to create Apple Loops but the option isn’t available, check to make sure your regions begin and end exactly on a beat, and if they don’t, adjust the length of your regions accordingly. - Choose the scale type for the loops from the Scale pop-up menu. If you do not choose a scale type, the scale type of the project is used.
- Choose the musical genre for the loops from the Genre pop-up menu.
- Choose the key for the loops from the Key pop-up menu. If the project has key changes that affect the regions being exported, those key changes will be written into the Apple Loops. If you do not choose a key, the project key is used.
- The Tempo field shows the tempo of the Apple Loops to be created. The tempo for the loops is determined by the project tempo and includes any tempo changes that affect the regions being exported. If you wish to change the tempo for the loops, click Cancel and then change the project tempo at the desired position in the timeline.
- Select an instrument category from the left column of the Instrument Descriptors list, then select an instrument from the right column.
- Click the mood buttons to the right of the Instrument Descriptors list that fit the loops to add mood descriptors for easy searching. The mood buttons you click will be applied to all the loops you are exporting.
- When you’re finished, click Create.
The loops are added to the Loop Browser and to the loop index, and saved as User Loops in the User Library. You can find your new loops by choosing My Loops in the Loop Packs pop-up menu, using the keyword buttons or menus, or by entering text in the search field at the bottom of the Loop Browser and pressing Return.
Reindexing the Apple Loops library
You may find on the odd occasion that you don't have access to all of the loops you previously did, or you get some sort of file error dialog when you press on a loop. these little gremlins sometimes find their way in to your system, and if they do, a simple re-index of your library should do the trick for you. It's a very simple process to do:
Click Loop Packs at the top of the Loop Browser, then choose Reindex All Loops from the pop-up menu. And voila, you're back to making music with Loops again!
Do this now
- Filter the loop browser to your genre and preview loops against the project tempo, not in isolation.
- Build eight bars from three loops: drums, bass, one melodic.
- Favourite the two you would use again.
The point is not to use loops in the finished track. It is to have something playing in under five minutes.