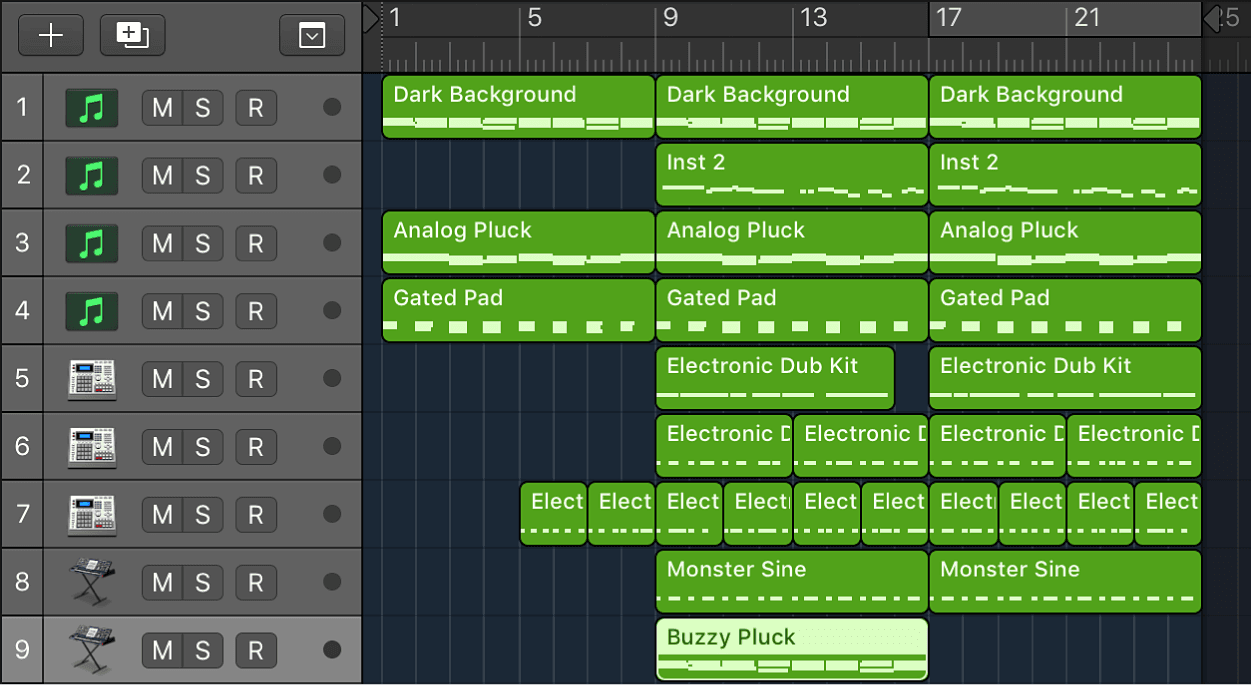
Folders and Track Stacks
As you start to gather more and more tracks and regions, organization becomes a consideration in order for you to easy navigate your session and make the relevant changes you will want to make a little further down the line. You don't want to be in a position where you have to infinitely scroll down your main window in order to access tracks and you want to be able to affect your tracks, especially groups of tracks i.e. all your drums, instantly and with minimal fuss. This is where you can use some of the features that Logic has baked in to create folders and track stacks.
Folders
A folder is a region that can contain other regions, similar to a folder in the Finder that can contain different files. You can edit a folder in many of the same ways you edit a MIDI region.
A folder can be thought of as an arrangement within an arrangement. A folder can contain as many tracks (with their regions) as needed. When a folder is closed, it looks like a MIDI region in the Tracks area:

When open, a folder looks just like the Tracks area for a project:
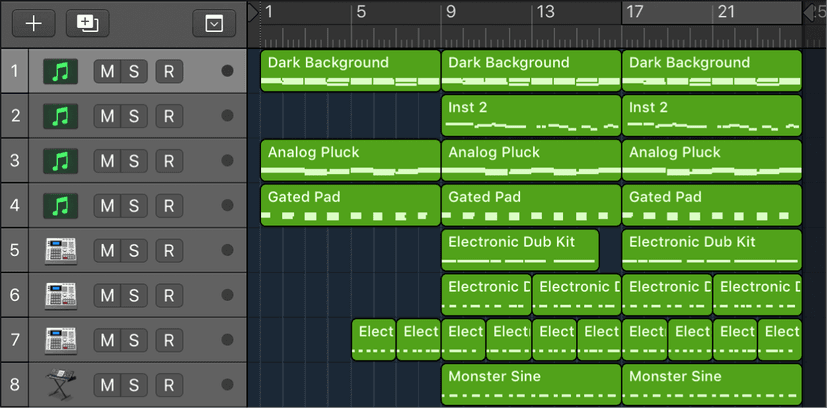
The track containing the folder doesn’t have a channel strip. Its track header shows a folder icon in place of an instrument icon.
If you drag a folder to a software instrument track, all MIDI regions in the folder are played by that instrument. This can be useful if the folder contains tracks for a given instrument or instrument type, such as a drum kit, string sound, or brass section, for example. This provides a quick way of listening to a string arrangement if some of the intended sound sources are unavailable.
Similarly, an entire project could itself be a folder, appearing as a gray beam in the Tracks area. In this way, you could arrange several projects for a concert. Another possible use might be to store different arrangements of a project in different folders, allowing you to switch between them rapidly.
You can also use folders to represent song sections such as verses and choruses, for example. You can nest folders within other folders, with no limit to the number of levels you can create.
You can add and remove regions from a folder. This is useful as you experiment with your arrangement, and find that you need to add or remove parts.
To add regions to a folder, at the top level of the Tracks area hierarchy, drag the regions onto the folder, at the desired position.
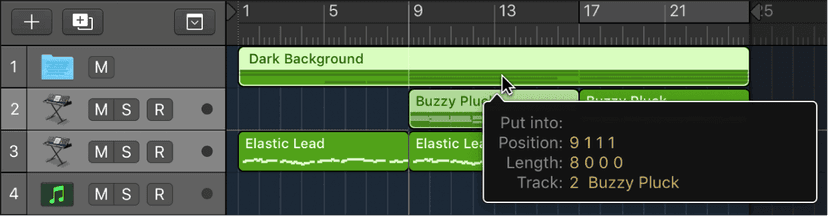
If the folder doesn’t already contain a track that uses the same channel as the source region, Logic Pro creates one. If it does contain a track using the same channel, the track uses this channel. When you enter the folder, you see the dragged regions at the drop position.
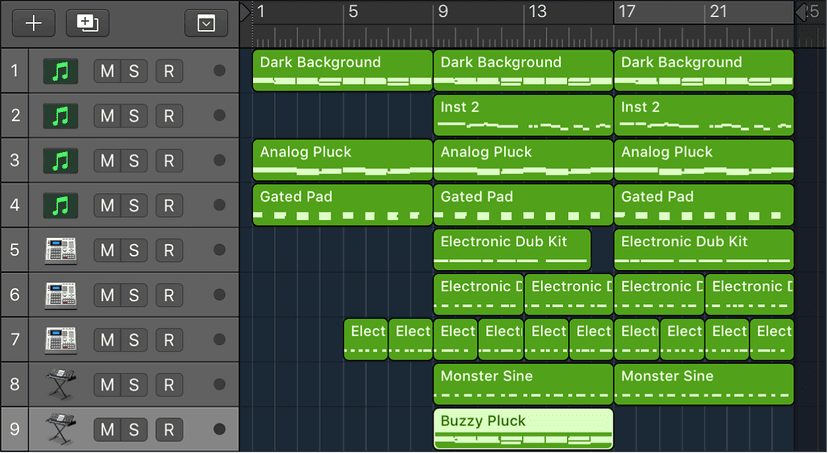
To remove regions from a folder
- Open a second Tracks area window by choosing Window > Open Tracks, or use the Open Tracks key command (Command-1).
- In one of the two windows, open the folder containing the regions you want to remove.
- Drag the regions into the Tracks area in the other window.
You can also cut a region from a folder, using the Edit > Cut command to transfer the region to the Clipboard. You can then copy the region to the position where you want it to appear in the Tracks area using the Edit > Paste command.
After you have packed a folder, you can open it to make changes.
There are several ways to distinguish whether you are inside a folder, or viewing the entire project in the Tracks area:

- In the Tracks area, the folder itself is visible on a track, the main window title bar shows the project name, and the Display Level button () is dimmed.
- When inside a folder, the folder track can’t be seen, the main window title bar shows the project name followed by the folder name (for example; Untitled: Chorus Folder), and the Display Level button is available.
To open a folder, do one of the following:
- Double-click the folder.
- Select the folder you want to open, then use the Go Into Folder or Region key command.If a MIDI region, rather than a folder, is selected when you use the key command, the Piano Roll Editor opens.
Double-clicking the header of a folder track opens the Mixer.
To close a folder, do one of the following:
- Double-click the background of the Tracks area (or use the Go Out of Folder or Region key command).
- Click the Display Level button in the Tracks area menu bar. The help tag shows Leave Folder.
You move up one display level, and the contents of the Tracks area (showing the closed folder) are visible.
View channel strips linked to folder tracks
A folder track in the Tracks area is represented by a channel strip in the Mixer.
Note: Make sure that View > Folder Tracks is chosen from the Mixer menu bar.
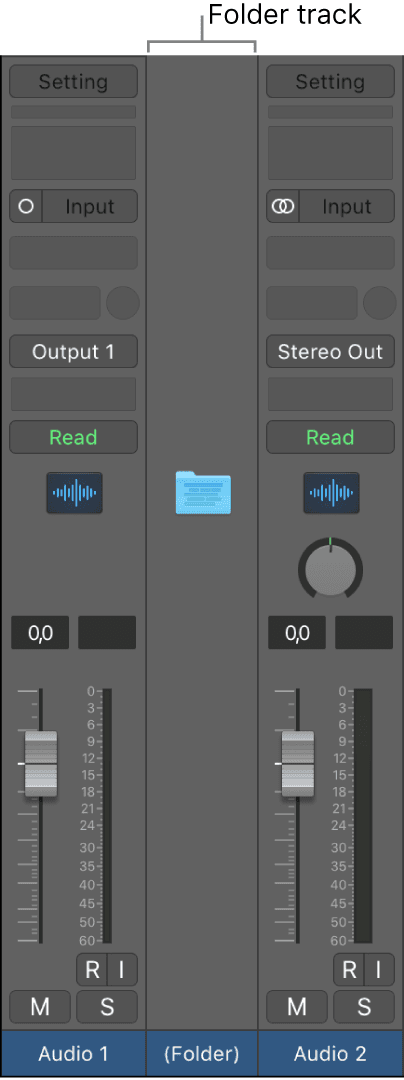
To enter a folder, do one of the following:
- Double-click the folder track in the Mixer.
- Double-click the folder region in the Tracks area.
- Select the folder, then use the Go Into Folder or Region key command.
The Mixer now displays only those channel strips that are in the folder track.
To exit the folder, do one of the following:
- Click the Display Level button at the left side of the Mixer or Tracks area.
- Double-click the Tracks area background.
- Use the Go Out of Folder or Region key command.
The Mixer now displays all channel strips, including the folder channel strip.
Track Stacks
Track Stacks provide a convenient way to organize and control tracks, to manage projects with high track counts, and to create and manage audio subgroups. You can create a Track Stack from a group of existing tracks, and use the controls on the master track to control all the subtracks in the Track Stack.
There are two types of Track Stacks: folder stacks and summing stacks. Both types have a main track and one or more subtracks. The track header for the main track features a disclosure triangle that lets you show or hide the subtracks. When you close the stack, only the main track appears in the Tracks area.
Subtracks can include any track type: audio, software instrument (including layered and multi-output software instruments), external MIDI instrument, or aux tracks. Folder stacks can also include summing stacks as subtracks.
Folder stacks
Folder stacks let you combine multiple tracks and control them as one unit, without changing the audio routing of the individual subtracks. When you create a folder stack, the channel strip assigned to the main track is called the stack master. Using the main track or the stack master channel strip, you can mute, solo, and adjust the volume level for the folder stack. This is similar to the way a VCA master fader functions on a hardware mixing console.
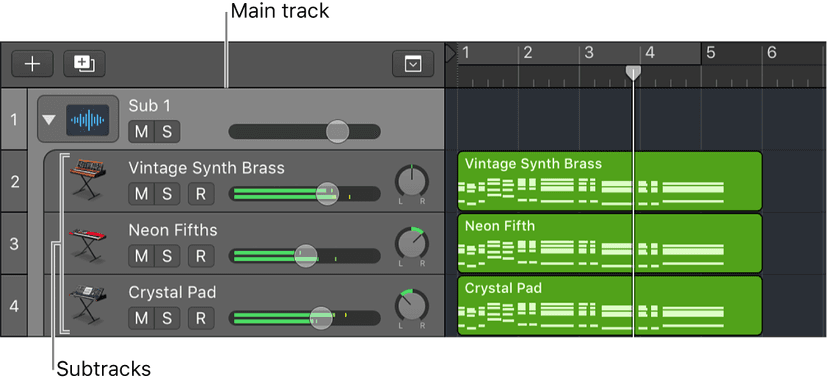
Individual subtracks in a folder stack can have Smart Controls, but the main track has no Smart Controls. There are no patches for the main track of a folder stack, and no patch can be saved when the main track is selected.
There are no regions on the main track of a folder stack, only on its subtracks. When the folder stack is closed, the main track displays an overview of the combined contents of all subtracks.
When you mute a folder stack using the Mute button on the main track (or stack master channel strip), the mute or solo state of individual subtracks is preserved, and becomes active again when the main track is unmuted.
Summing stacks
Summing stacks let you combine multiple tracks and route their output to an audio subgroup. When you create a summing stack, the outputs from the subtracks are routed to a bus. The destination aux of the bus is assigned to the main track. When the main track is selected, you can mute, solo, and adjust volume and send levels for the summing stack, and add and edit plug-ins, affecting the sound of all the subtracks in the summing stack. This is similar to the way an audio groupworks.
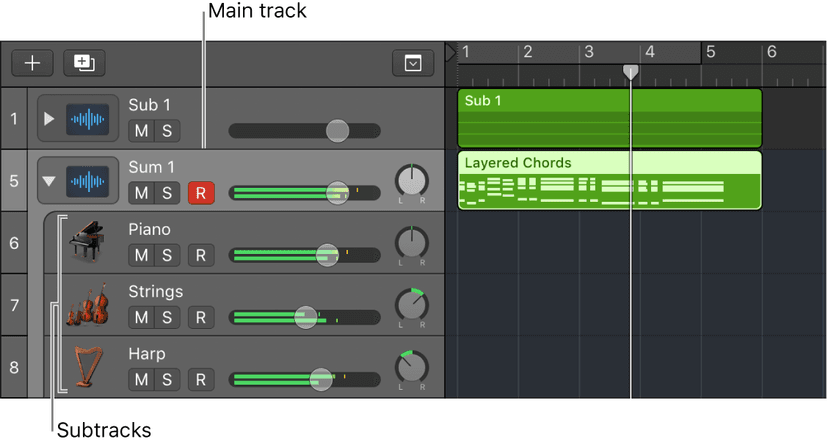
If a summing stack contains software instrument tracks as subtracks, you can record and play MIDI regions on the main track. MIDI events on the main track are played by all the software instrument subtracks in the summing stack, allowing you to create multi-layered sounds with ease! You can also record and play MIDI regions on individual (software instrument) subtracks. When the summing stack is closed, the main track displays an overview of the combined contents of all subtracks.
When the main track of a summing stack is selected, you can choose a different patch for the summing stack, and create your own patches. Patches for a summing stack can include the main track and all subtracks, along with their channel strip and plug-in settings. Logic Pro includes a set of factory patches designed for use with summing stacks.
The main track of a summing stack, as well as its subtracks, can have Smart Controls. Screen controls for the Smart Control on the main track can be mapped to channel strip or plug-in parameters on any of the subtracks as well as the main track.
For summing stack patches included with Logic Pro, only the main track has a Smart Control layout, which remains visible in the Smart Controls pane when a subtrack is selected. However, summing stack patches you create keep their individual Smart Control layouts for subtracks.
Summing stacks provide a convenient way to work with a multi-output software instrument (MOSI) and its individual outputs as a single unit. This can be used, for example, for programmed drum kits. You can create a summing stack for a MOSI with the MOSI channel strip on the first subtrack, with additional subtracks for the output aux channel strips of the MOSI stack. When you record and edit MIDI regions on the main track, the MIDI events are sent to the subtrack containing the MOSI for playback.
After you create a summing stack, you can route individual subtracks to different destinations. In the Bus submenu of the Send pop-up menu on subtracks, local busses are sorted into stack submenus. Note that if you route subtracks to a destination “outside” of the stack, those subtracks are no longer affected by the controls on the main track. Audio subgroups you create are saved as part of the summing stack, and their auxes appear as the last (bottom) subtracks in the summing stack.
When a Track Stack contains a single software instrument subtrack, that subtrack appears in the left inspector channel strip, and its routing destination (usually the main track aux) appears in the right inspector channel strip when the main track is selected. Similarly, when a Track Stack contains a single audio subtrack (and no software instrument subtracks), that subtrack appears in the left inspector channel strip, and its routing destination (usually the main track aux) appears in the right inspector channel strip when the main track is selected.
Creating and editing Track Stacks
You create a Track Stack by selecting (adjacent or nonadjacent) tracks in the Tracks area. Nonadjacent tracks move so that all tracks are grouped together in the Track Stack. Both types of Track Stacks can contain any combination of track types as subtracks. A folder stack can also include summing stacks as subtracks.
You can hide the subtracks of a Track Stack to save space in the Tracks area, or show them in order to record or edit. You can add or remove tracks from a Track Stack, and reorder tracks in a Track Stack (reordering tracks doesn’t affect the sound).
After creating the summing stack, you can route individual subtracks to a different destination. If you do so, however, the rerouted subtracks are no longer controlled by the main track’s channel strip.
To create a Track Stack, select the tracks you want to include in the Track Stack. The selected tracks can be adjacent or nonadjacent. Do one of the following:
Choose Track > Create Track Stack.
Control-click the header of one of the selected tracks, then choose Create Track Stack from the shortcut menu.
In the Track Stack dialog, do one of the following:
To create a folder stack: Select Folder Stack, then click OK.
To create a summing stack: Select Summing Stack, then click OK.
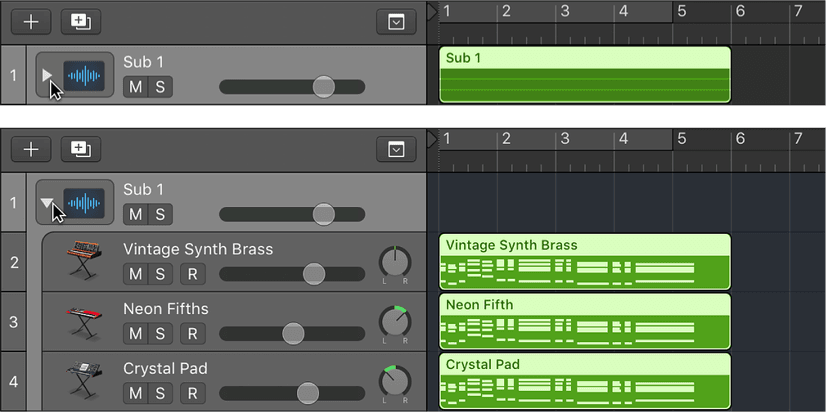
To show or hide the subtracks for a Track Stack, click the disclosure triangle to the left of the track icon in the main track.
To show or hide the subtracks for all track stacks in a project, Option-click the disclosure triangle for any track stack in the project.
To add a track to a Track Stack, drag the header of the track you want to add between two of the subtracks in the Track Stack.
Note: When you add a track to a summing stack, its routing changes to the aux assigned to the main track.
To reorder subtracks, drag a subtrack by its header up or down inside the Track Stack.
To remove a subtrack from a Track Stack, drag the subtrack outside of the Track Stack (below the last subtrack, or above the main track).
When you remove a subtrack from a summing stack, the track’s output routing changes from the aux used by the main track to the main outputs.
Flattening a Track Stack
You can flatten a Track Stack, in which case the subtracks again become normal tracks.
- When you flatten a folder stack, the main track is deleted if its volume fader is set at 0 dB (unity gain) and it contains no automation data.
- When you flatten a summing stack, the audio subgrouping is retained, unless there is no audio processing on the main track aux (no plug-ins, volume fader set at 0 dB, Pan/Balance set to neutral, and no automation data). In this case, all subtracks (or their audio subgroups) are routed to the Stereo (or Surround) Main output, and the main track Aux is deleted.
Do one of the following:
- Select either the main track or a subtrack, then choose Track > Flatten Track Stack from the Tracks area menu bar.
- Control-click the track header of the main track or a subtrack, then choose Flatten Track Stack from the shortcut menu.
Track Stacks and the Library
The patches available in the Library vary depending on the Track Stack type, and which track in the Track Stack is selected:
- When the main track of a folder stack is selected, no patches are available in the Library, and patches can’t be saved.
- When the main track of a summing stack is selected, summing stack patches of a similar type are available in the Library.
- For both types of stacks, when a subtrack is selected, patches for the appropriate track type are available.
- If you choose a Track Stack patch when a subtrack of a folder stack is selected, the channel strip setting of the first subtrack of the same type in the Track Stack is loaded.
The obvious use for track stacks is the organizational functionality, but when you track stack a few different synth patches, you start to get an idea of just how powerful this feature is for your creativity also!
Do this now
- Select every drum track and make a Summing Stack.
- Put one compressor on the stack's main channel and hear it glue.
- Now make a Folder Stack from your guitars and notice that it does not do that.
Summing gives you a bus to process. Folders only tidy up. Choosing wrong is a common and invisible mistake.