Comping
Imagine a scenario in which you have recorded multiple performances of a vocal solo over the same section of a project. You can select the best parts from the different performances and piece them together into a single master take. This is the process of “making a composite take”—commonly referred to as comping—and is achieved by using the Quick Swipe Comping feature. You can also drag or cut the contents of take folders.
You can switch individual take folders between the following two editing modes, with the active mode determining the types of edits that you can make:
- Quick Swipe Comping: Allows quick swipe behaviors in the take folder, allowing you to create and edit comps.
- Quick Swipe Comping off: Turns off quick swipe behaviors in the take folder, allowing you to cut, drag, and move takes or take folders.
To turn Quick Swipe Comping mode on or off, do one of the following:
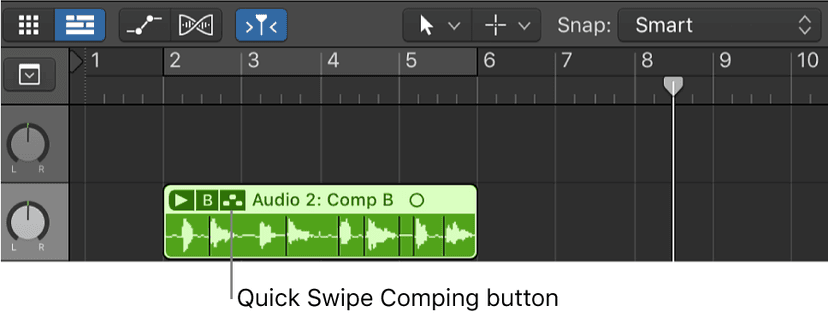
- Click the Quick Swipe Comping button in the upper-left corner of the take folder.
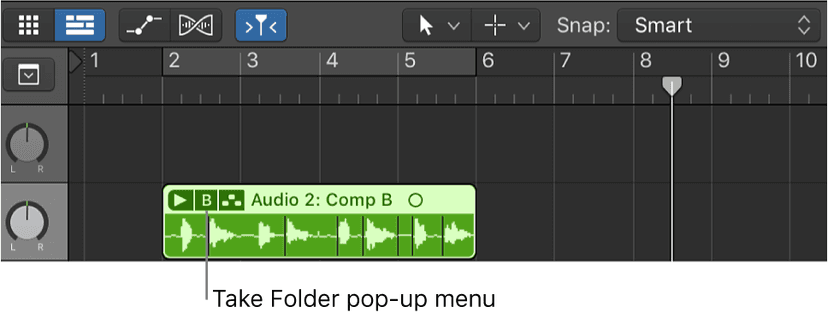
- Choose Quick Swipe Comping from the Take Folder pop-up menu.
Previewing take recordings
In order to create and edit comps, you first need to preview the take recordings in a take folder. The simplest way to preview take recordings is to open the take folder. You can then select the individual takes for playback. You can also select and preview takes in a closed take folder.
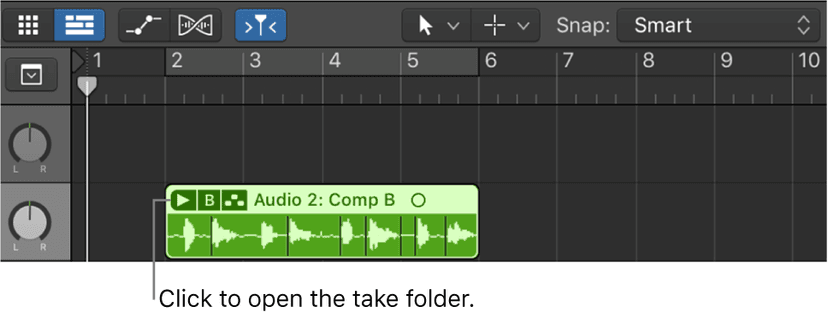
To open a take folder and preview the takes, click the disclosure triangle in the upper-left corner of the take folder.
Double-click the take folder.
Select the take folder and press Control-F.
During playback, do one of the following:
If the take folder is in Quick Swipe Comping mode: Click the relevant take.
If the take folder is not in Quick Swipe Comping mode: Option-click the header area of the relevant take.
To open multiple take folders:
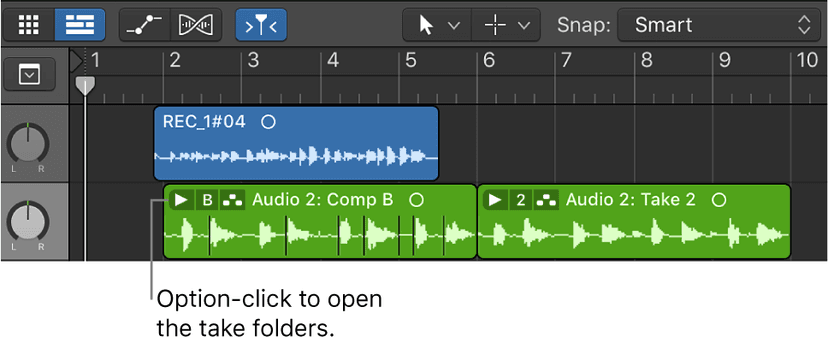
- Select multiple take folders.
- Option-click the disclosure triangle in the upper-left corner of one of the selected take folders.
- Note: If all regions in a track are selected, clicking on the disclosure triangle in the upper left corner of any of the take folders on the track opens all the take folders.
You can also use the following key commands to step through take recordings in an open or closed take folder:
- Select Previous Take or Comp: Moves back through the takes or comps as listed in the take folder’s pop-up menu.
- Select Next Take or Comp: Moves forward through the takes or comps as listed in the take folder’s pop-up menu.
- Creating and saving comps
You can use quick swipe comping techniques to select the best parts from several takes, combining these parts into one master comp. After creating a comp, it’s a good idea to save it so that you can easily return to it at a later point. Any subsequent changes automatically create a new comp.
To combine sections of different takes into a comp, do one of the following:
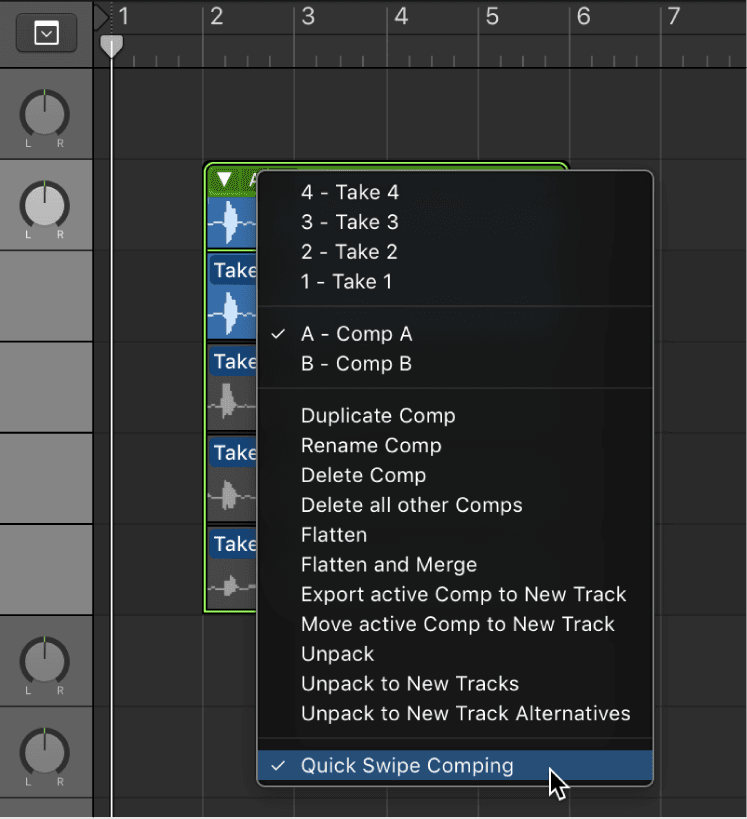
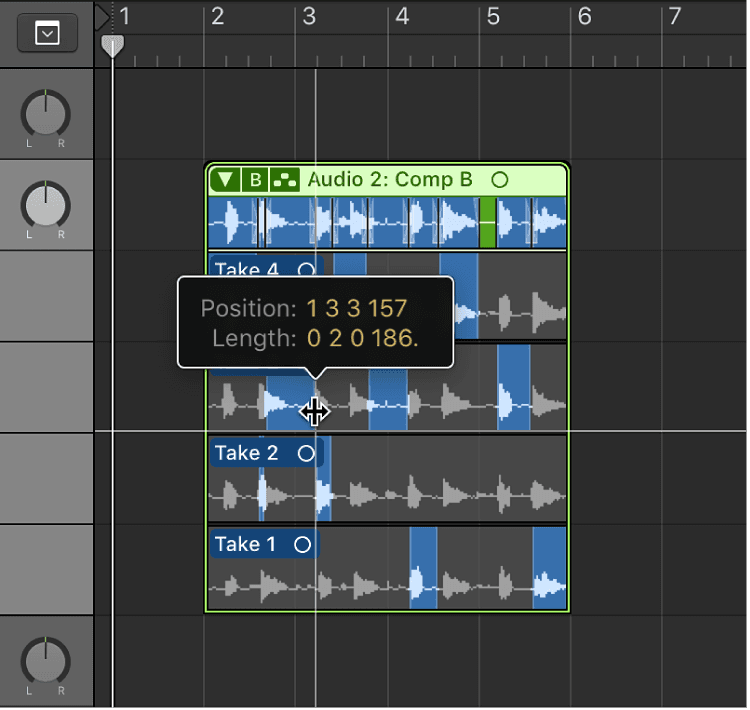
- Click the Quick Swipe Comping button in the upper-left corner of the take folder, making sure it’s turned on.
- Click the Take Folder pop-up menu in the upper-left corner of the take folder, and make sure Quick Swipe Comping is chosen.
- Drag across take sections with the Pointer or Pencil tool.Selecting a section in one take automatically deselects the same section in another take.
- The comp sections, located in the top lane of the take folder, reflect the combined selections from all takes. The vertical lines in the comp overview indicate the transitions between the different take sections.
Saving the current comp
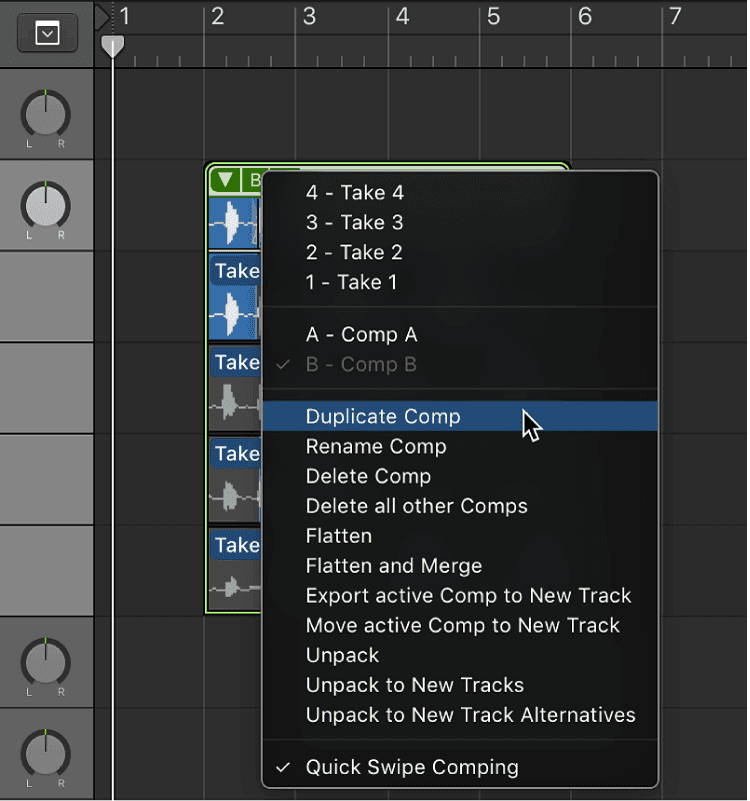
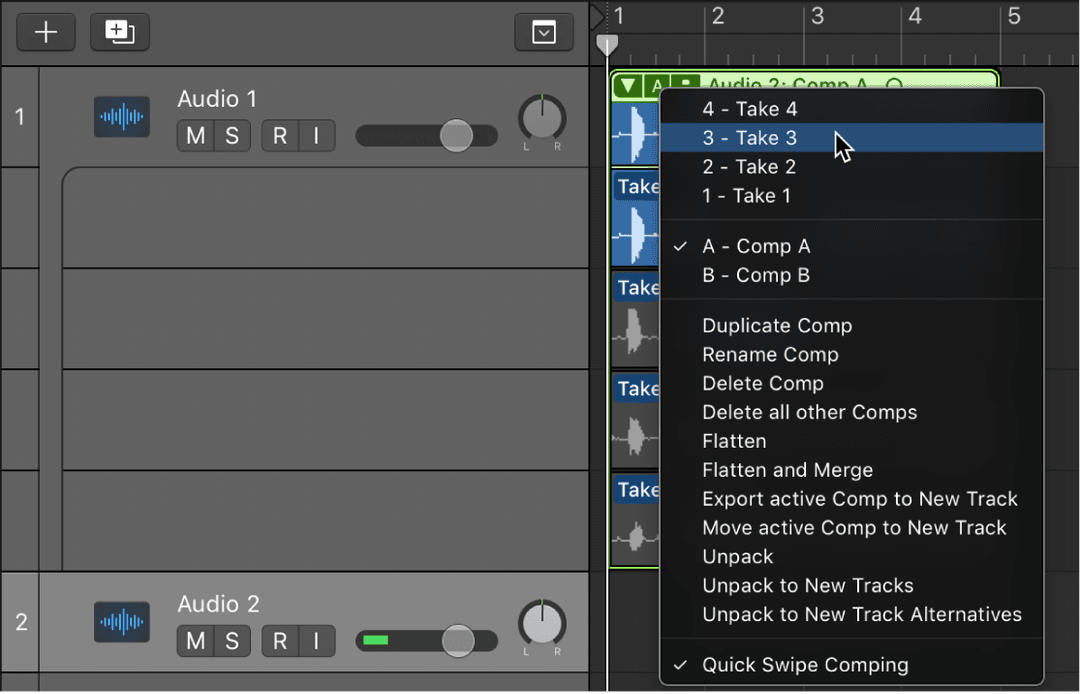
- Choose Duplicate Comp from the Take Folder pop-up menu in the upper-left corner of the take folder.
- The current comp is saved, and added to the list of comps in the pop-up menu.
Create a comp from the current take
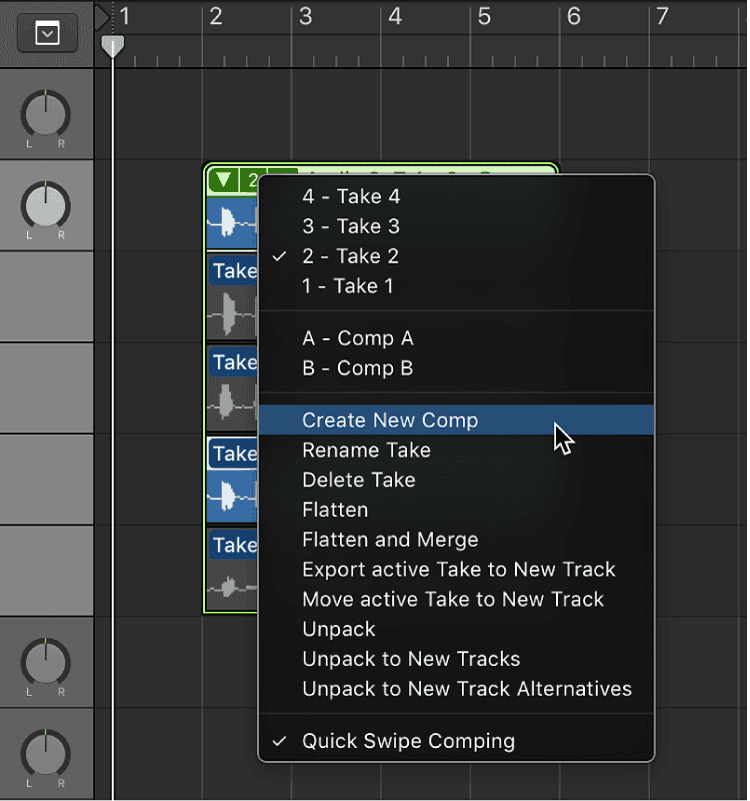
- Choose Create New Comp from the Take Folder pop-up menu in the upper-left corner of the take folder.
- The current take is saved as a new comp named Comp X: Comp X, and is added to the list of comps in the pop-up menu. By default, new comps are saved as Comp X: Comp X, but you can also rename comps.
Editing comps
You can edit comps by changing the start or end point of take sections, by moving a selected comp area to the left or right, or by alternating selected comp areas between takes. You should save a comp before editing it. Any subsequent changes automatically create a new comp.
To edit sections of different take regions, do one of the following:
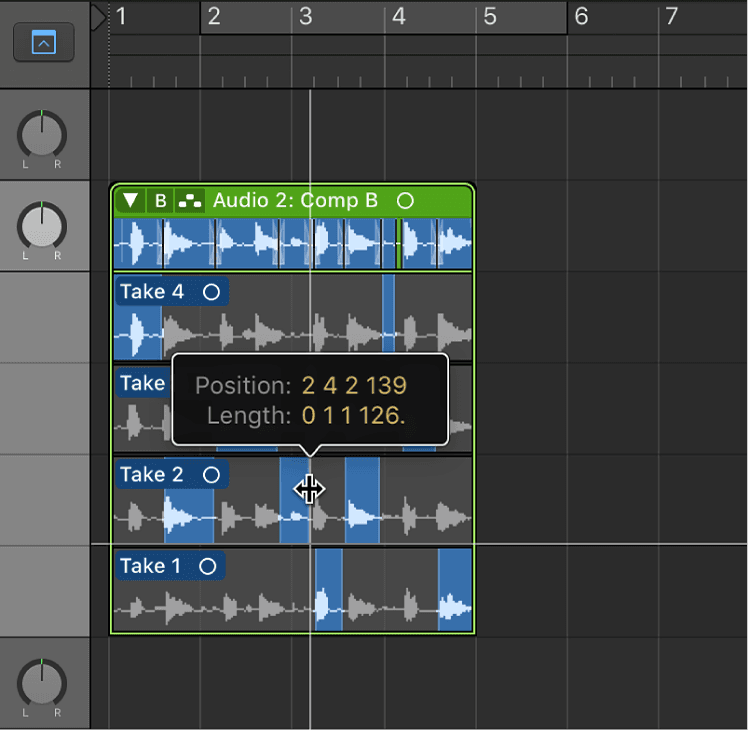
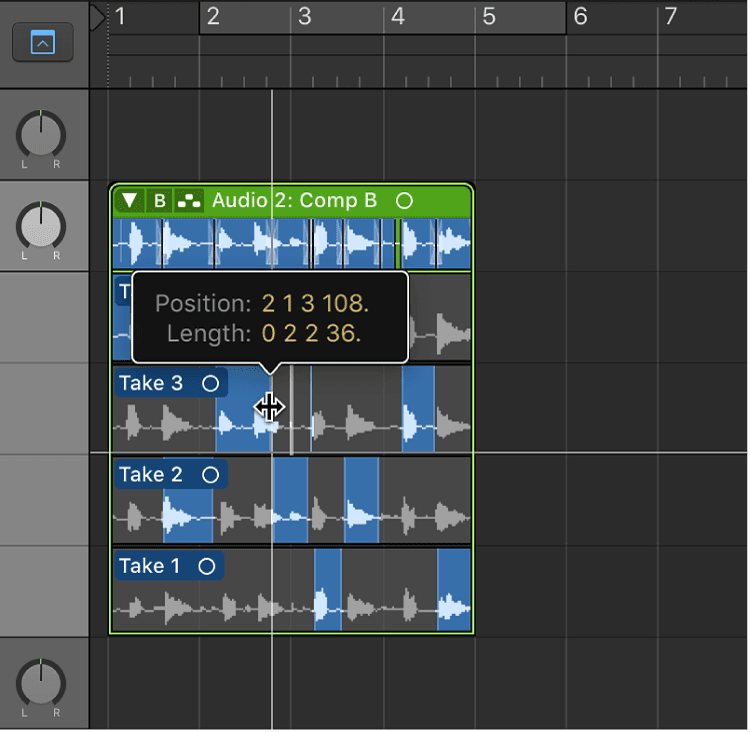
- To extend a take section: Place the pointer over the start or end point of a take selection, then drag.Extending a take selection (dragging the start point to the left or the end point to the right) shortens adjacent selections on other takes. Shortening a take selection (dragging the start point to the right or the end point to the left) extends adjacent selections on other takes. This ensures that you don’t create silence between take selections.
- To shorten a take section: Place the pointer over the start or end point of a take selection, then Shift-drag.Shortening a take selection (dragging the start point to the right or the end point to the left) does notextend adjacent selections on other takes. This allows you to create silence between take selections.
- Note: If you have enabled Quick Swipe / Take Edit click zones in Preferences > General > Editing, make sure you place the pointer over the bottom half of the take region.
Moving a selected area to the left or right:
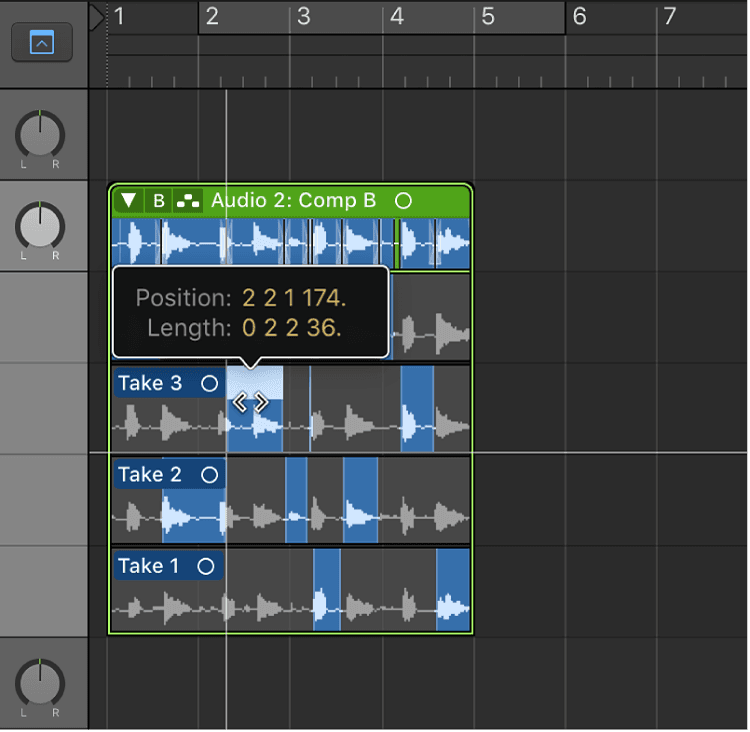
- Place the pointer over the center area of a take selection, then drag when the pointer changes to a two-headed arrow.
- This action moves the selection, while at the same time extending or shortening any adjacent take selections.
Note: If you have enabled Quick Swipe / Take Edit click zones in Preferences > General > Editing, make sure you place the pointer over the bottom half of the take region.
Alternating selected areas between take lanes:
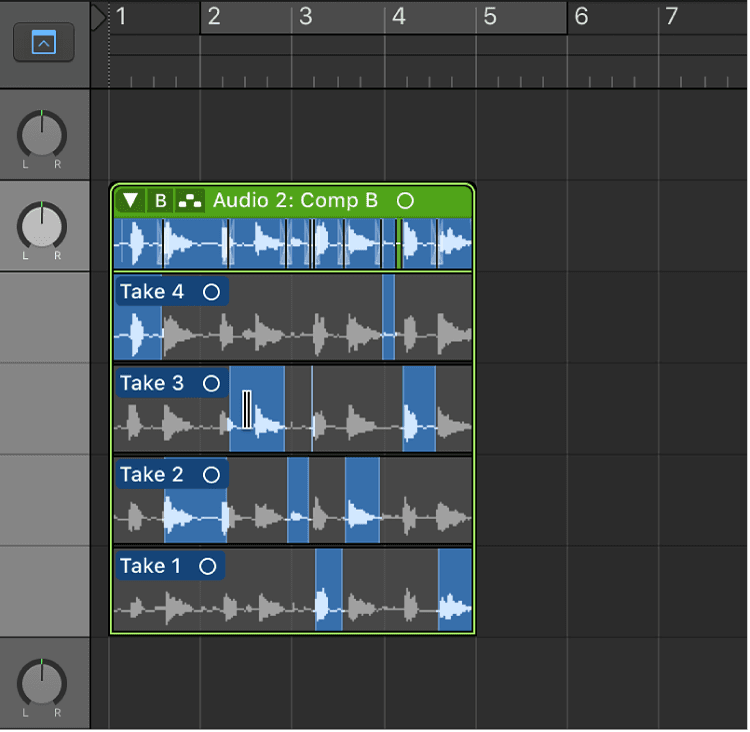
- Click an unselected area of a take to make that particular area active and part of the comp.
- The same area is automatically deselected in another take. This is a quick way to compare a section of two different takes.
Note: If you have enabled Quick Swipe / Take Edit click zones in Preferences > General > Editing, make sure you place the pointer over the bottom half of the take region.
Removing a take selection from the comp
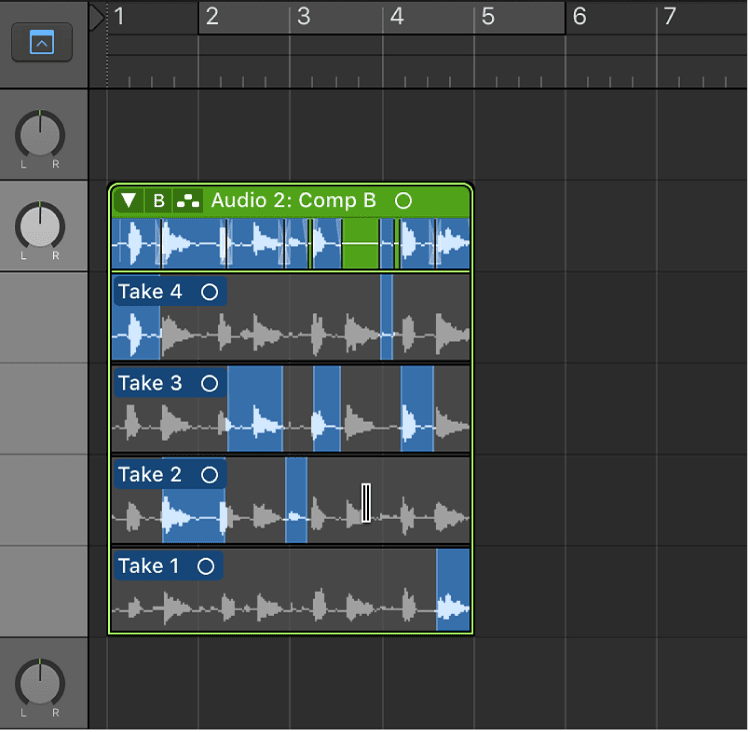
- Shift-click the take selection.
- Removing an entire take from the comp:
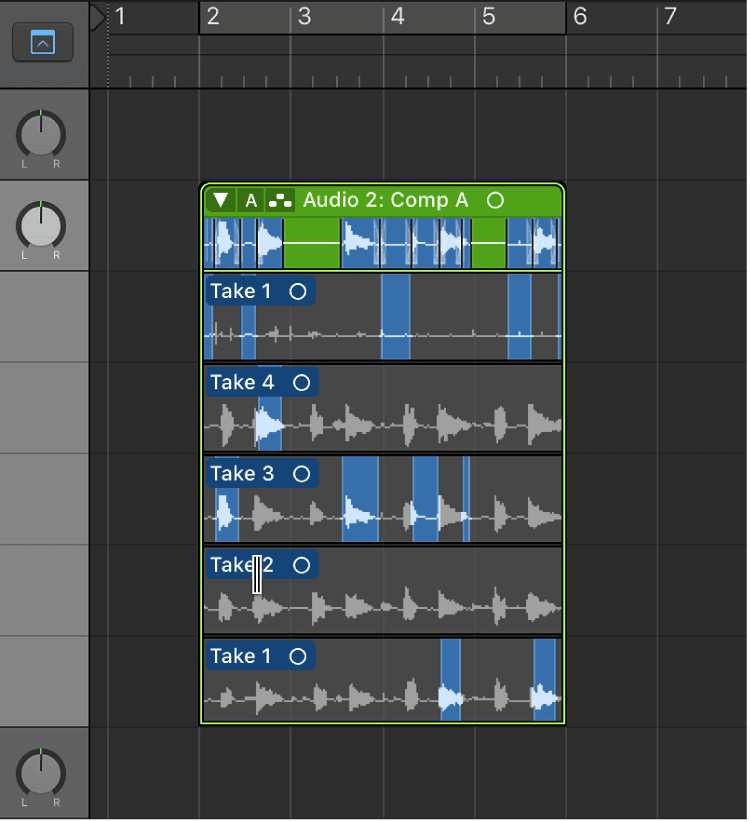
- Shift-click the take’s header area.
- If the take doesn’t contain any selections, all unselected areas in other takes are selected in the take you click.
Renaming takes and comps
Renaming a take
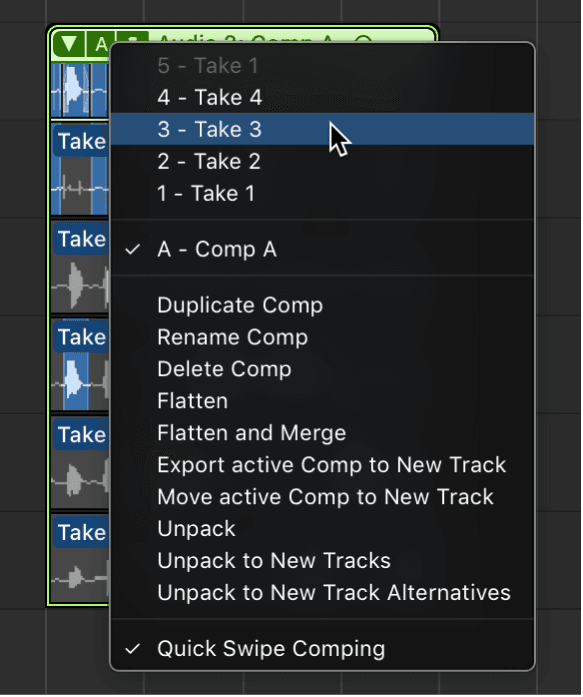
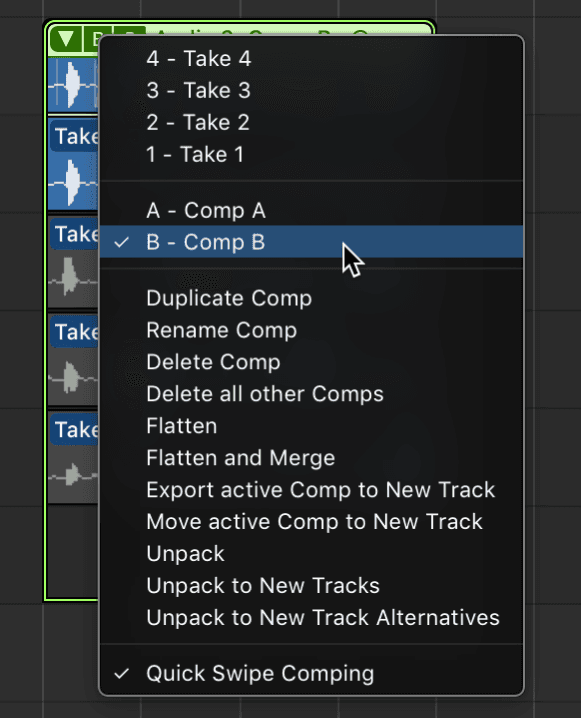
- To rename a take , choose the take you want to rename from the Take Folder pop-up menu in the upper-left corner of the take folder.
- Choose Rename Take from the same pop-up menu.
- Enter the new name in the dialog that appears, then click OK.
- You can also click a take with the Text tool, then enter a new name in the text field that appears.
Renaming a comp
Choose the comp you want to rename from the Take Folder pop-up menu in the upper-left corner of the take folder.
Choose Rename Comp from the same pop-up menu.
Enter the new name in the dialog that appears, then click OK.
Deleting takes and comps
You can delete takes and comps from take folders at any time. When deleted, they no longer appear in the take folder’s list of takes and comps. Any comp selections using deleted takes are also removed.
Deleting a take
Choose the take you want to delete from the Take Folder pop-up menu in the upper-left corner of the take folder.
Delete the take by doing one of the following:
Choose Delete Take from the Take Folder pop-up menu.
Click the take with the Eraser tool.
Press the Delete key.
Deleting a comp
Choose the comp you want to delete from the Take Folder pop-up menu in the upper-left corner of the take folder.
Choose Delete Comp from the Take Folder pop-up menu.
Deleting all but the currently active comp
- Choose the comp you want to keep from the Take Folder pop-up menu in the upper-left corner of the take folder.
- Choose Delete all other Comps from the Take Folder pop-up menu.
- All comps, with the exception of the currently active comp, are deleted. (This command is available only when a take folder contains more than one comp and when a comp is active.)
Editing take region start and end points
You can edit the start and end points of take regions, which allows you to remove the bad part of an otherwise good take.
Also, after cutting a take region, you might want to resize one of the two adjacent regions. Resizing one of them might impact the length of the other.
Note: To perform the following tasks, you must turn off Quick Swipe Comping mode for the selected take folder, or enable Quick Swipe and Take Edit click zones in Preferences > General > Editing and click in the top half of the take region.
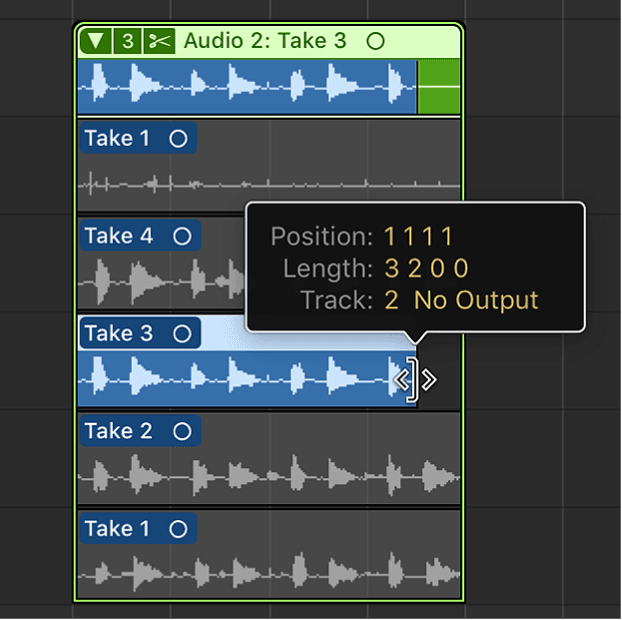
To edit a take region’s start or end point, place the pointer over the lower-left or lower-right edge of the take region, then drag when you see the Resize pointer.
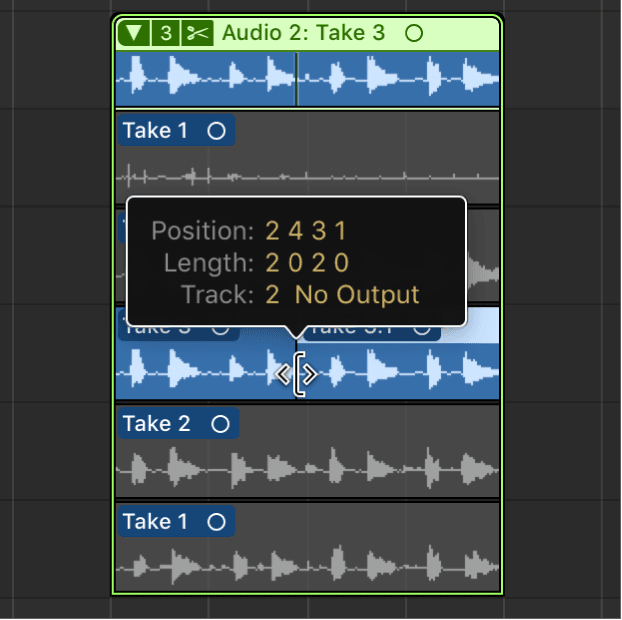
To edit a take region’s start or end point when bordered by another take region, place the pointer over the top-left or top-right edge of the take region, then drag when you see the Junction pointer.
Extending a take region (dragging the start point to the left or the end point to the right) automatically shortens the adjacent take region. Shortening a take region (dragging the start point to the right or the end point to the left) automatically extends the adjacent take regions. This behavior ensures that you do not create silence between different take region sections.
Cutting take folders and take regions
You can cut take folders and take regions, creating multiple take folders or multiple take regions on the same take lane.
Cutting a take folder
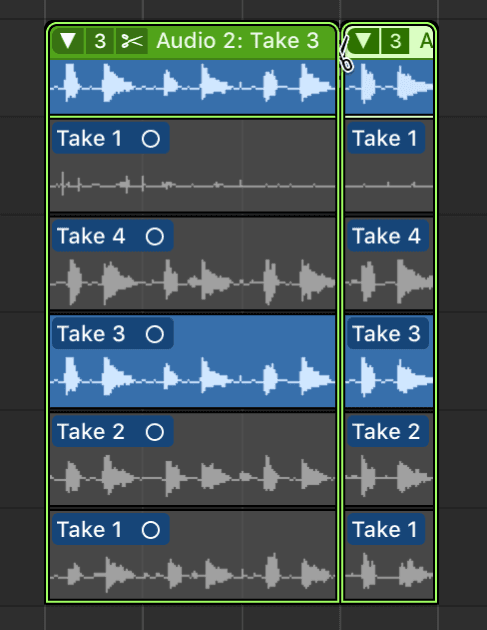
Click the take folder with the Scissors tool.
The take folder is cut at the clicked position and all takes inside the take folder are also cut at the same position. As a result, your track lane contains multiple take folders and your take lanes contain multiple take regions, all of which can be edited independently.
Cutting multiple take folders
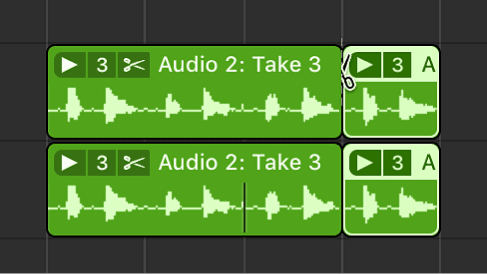
- Select multiple take folders, then click any one of them with the Scissors tool.
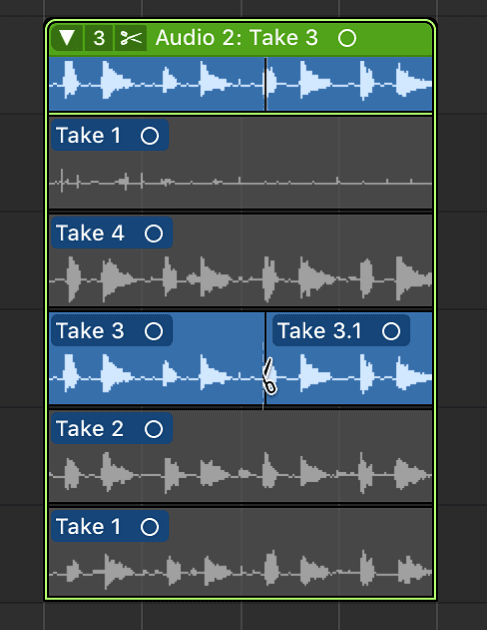
- The take folders are cut at the clicked position and all takes inside the take folders are also cut at the same position. As a result, your track lanes contain multiple take folders and your take lanes contain multiple take regions, all of which can be edited independently.
Cutting take regions
Click the take region using the Scissors tool.
Multiple take regions now appear on the same take lane.
Making multiple cuts across a take region
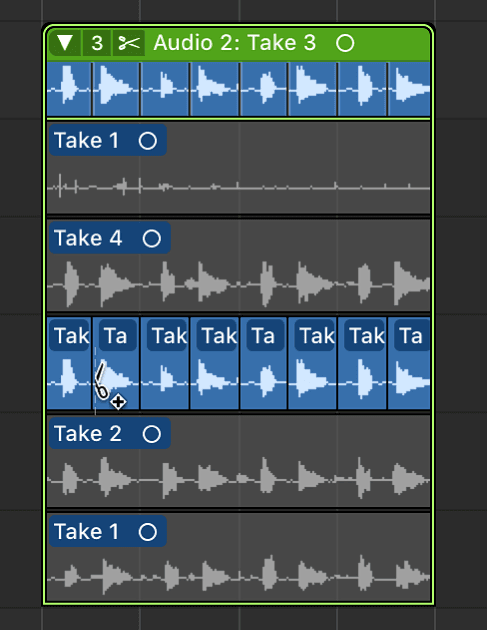
Option-click the take region with the Scissors tool.
The first cut occurs at the clicked position, and all additional cuts occur at equal intervals up to the take region end point.
Slicing a take region at comp section borders
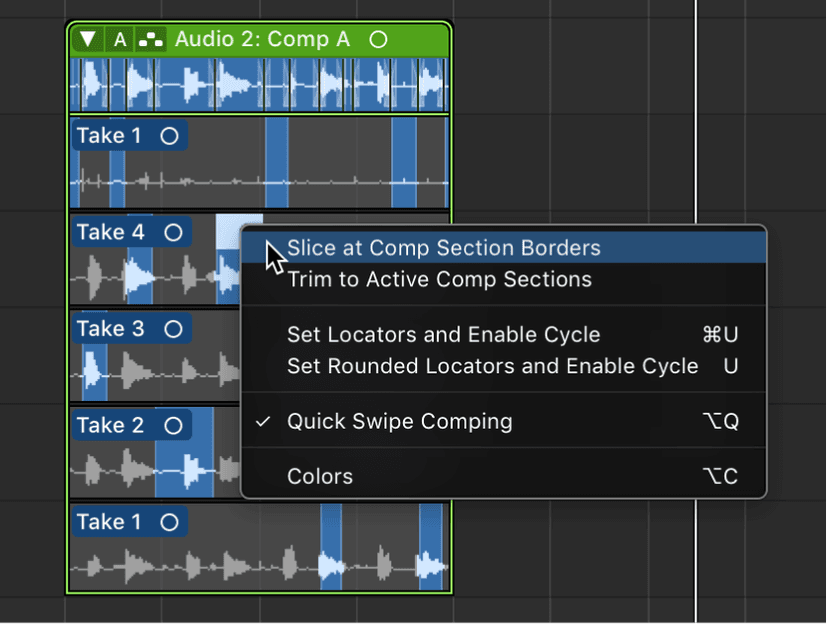
- Control-click the take region, then choose Slice at Comp Section Borders from the shortcut menu.
- Trimming a take region to active comp sections
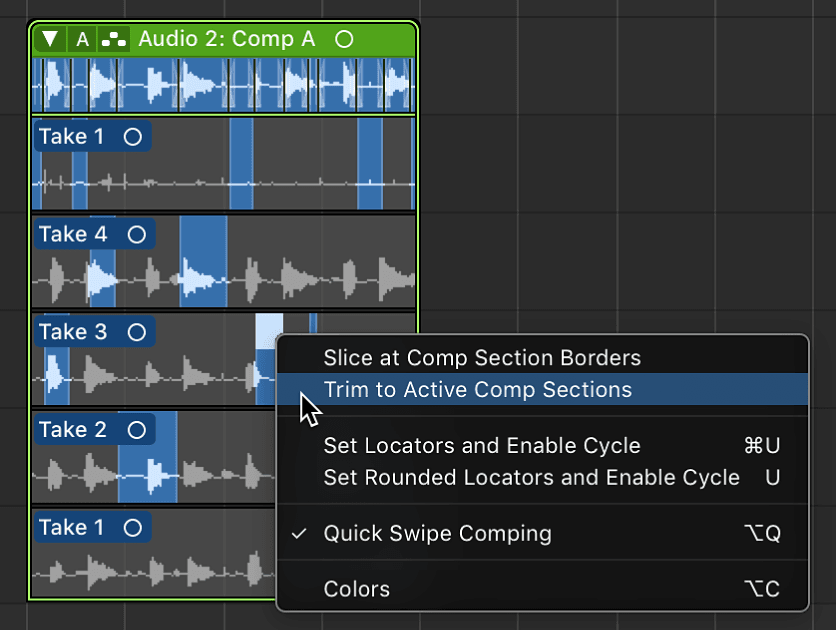
- Control-click the take region, then choose Trim to Active Comp Sections from the shortcut menu.
Moving take folders and take regions
You can move take folders and take regions—within the same take lane, between take lanes, and to other tracks. Whether or not you have chosen Overlap or No Overlap in the Drag pop-up menu, take regions inside take folders always behave as if No Overlap is selected.
Note: To perform all the following tasks except Moving a take folder or take region within its own lane, you must either turn off Quick Swipe Comping mode for the selected take folder, or click in the upper half of the take regions if you have enabled Quick Swipe and Take Edit click zones in Preferences > General > Editing.
To move a take folder or take region within its own lane, drag the take folder or take region to the new postion.
To move take regions between take lanes, drag the take region to another take lane. Empty take lanes are automatically removed.
To create a new take lane for a take region, drag the take region onto the take folder, at a position where it overlaps with a take region in the currently active take.
If the dragged take region does not overlap with a take region in the currently active take, it is added to the take lane of the active take. A new take lane is created directly under the take folder, and the take region is added as a new take.
Exporting takes and comps
You can export an active take or comp from a take folder to a new track, leaving the original take folder content intact.
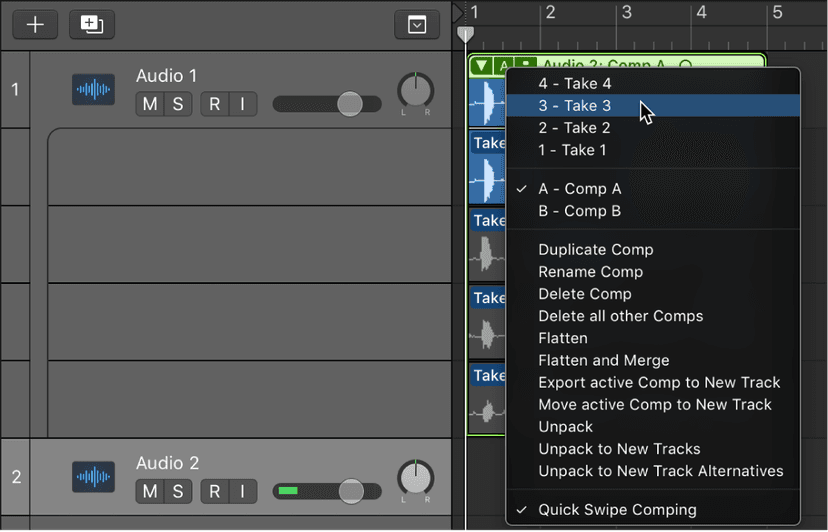
- To export an active take to a new track, choose the take you want to export from the Take Folder pop-up menu in the upper-left corner of the take folder.
- Choose Export active Take to New Track from the Take Folder pop-up menu.
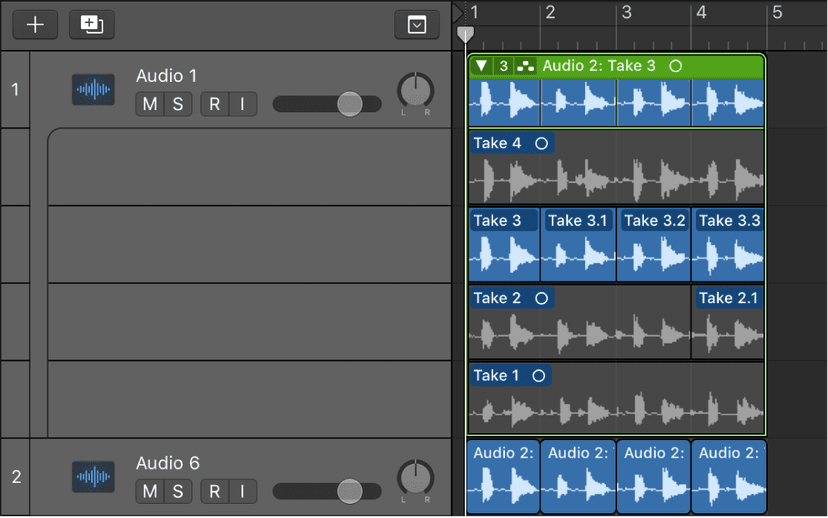
- The active take is copied to a new track, which is created below the take folder track. The exported take can be made up of one or more take regions. The content of the original take folder remains intact.
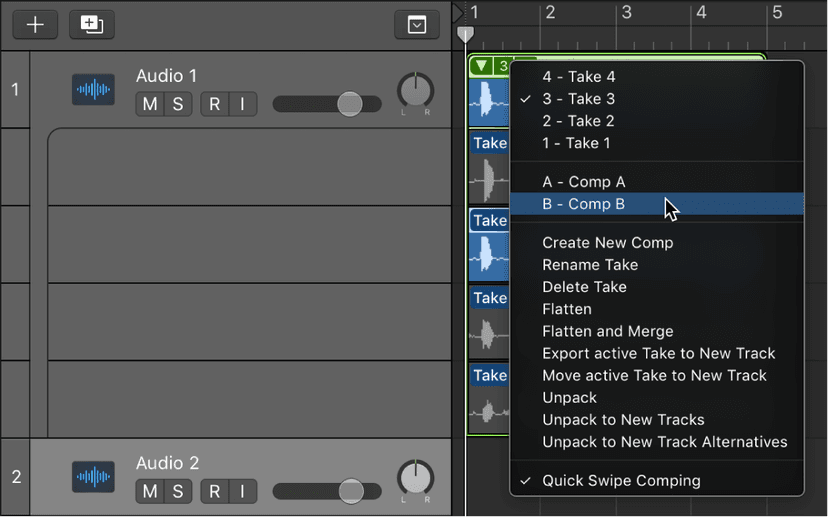
- To export an active comp to a new track, choose the comp you want to export from the Take Folder pop-up menu in the upper-left corner of the take folder.
- Choose “Export active Comp to New Track” from the Take Folder pop-up menu.
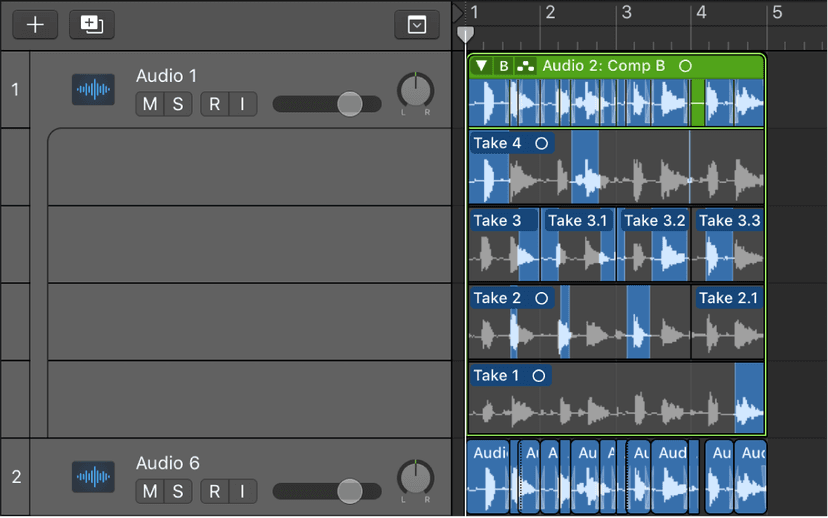
- The active comp is copied to a new track, which is created below the take folder track. The content of the original take folder remains intact.
Moving takes and comps
You can move an active take or comp from a take folder to a new track, which removes the take or comp from the original take folder.
- To move an active take to a new track, choose the take you want to move from the Take Folder pop-up menu in the upper-left corner of the take folder.
- Choose Move active Take to New Track from the Take Folder pop-up menu.
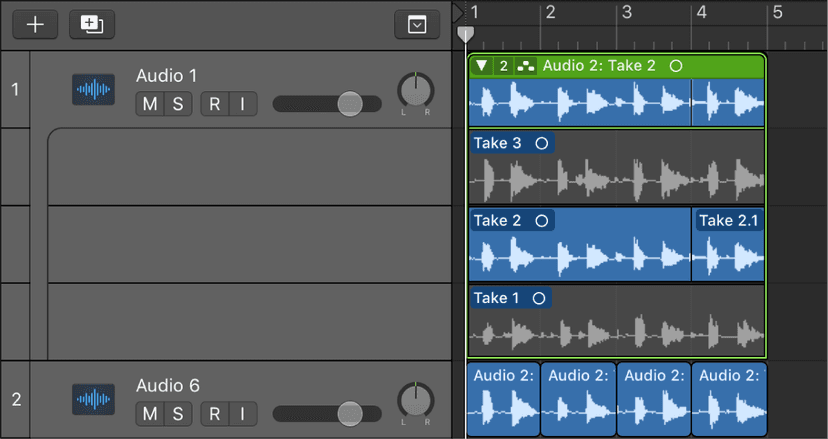
- The active take is moved to a new track, which is created below the take folder track. This take is no longer available in the original take folder.
- To move an active comp to a new track, choose the comp you want to move from the Take Folder pop-up menu in the upper-left corner of the take folder.
- Choose Move active Comp to New Track from the Take Folder pop-up menu.
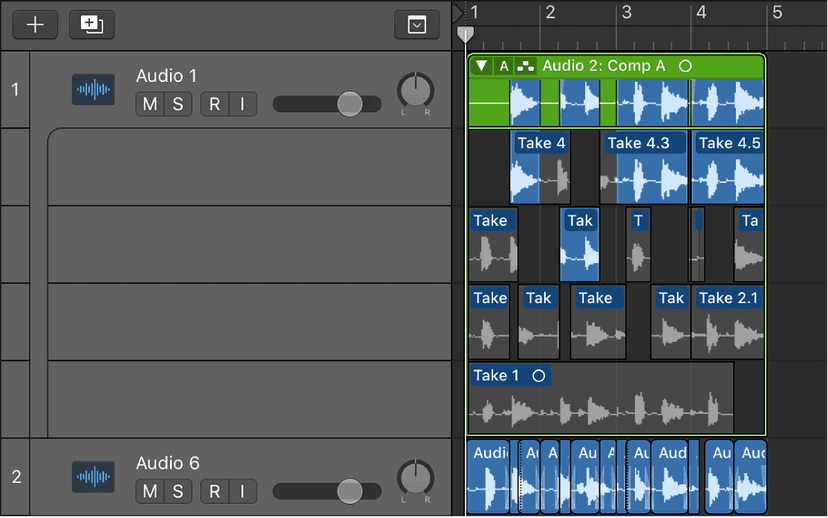
- The active comp is moved to a new track, which is created below the take folder track. This comp is no longer available in the original take folder.
Flattening and merging take folders
You can flatten a take folder, which replaces the take folder with multiple regions that represent the current comp selections. All take region sections not used in the current comp are deleted.
You can also flatten a take folder and merge the results. The take folder is replaced with a single region that represents the current comp selections. All take region sections not used in the current comp are deleted.
- To flatten a take folder, choose the comp you want to keep from the Take Folder pop-up menu in the upper-left corner of the take folder.
- Choose Flatten from the Take Folder pop-up menu.
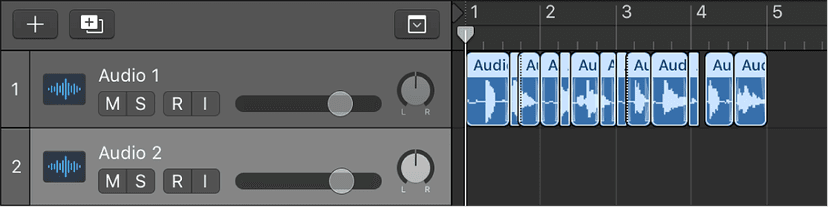
- The take folder is replaced with multiple regions that represent the current comp selections.
- To flatten a take folder and merge the results, choose the comp you want to keep from the Take Folder pop-up menu in the upper-left corner of the take folder.
- Choose Flatten and Merge from the Take Folder pop-up menu.
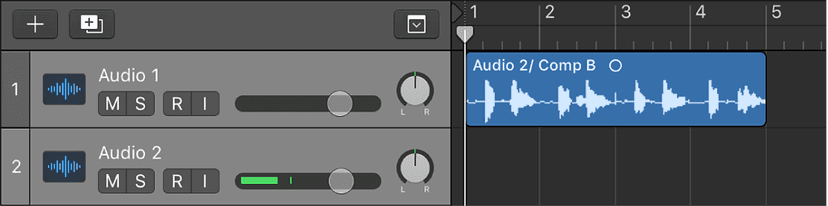
- The take folder is replaced with multiple regions that represent the current comp selections. The new regions are then merged to create a new audio file in the Tracks area.
Unpacking take folders
You can unpack take folders using the original channel strip for all new tracks, or you can unpack take folders using different channel strips for each new track. Both methods replace the selected take folder—or take folders—with new audio tracks for each take and each comp. You can also unpack take folders to new track alternatives, which keeps all the takes on the same track, but as separate track alternatives. The first audio track or track alternative reflects the active comp, followed by the takes and remaining comps in the order they appear in the take folder’s pop-up menu.
To unpack a take folder, do one of the following:
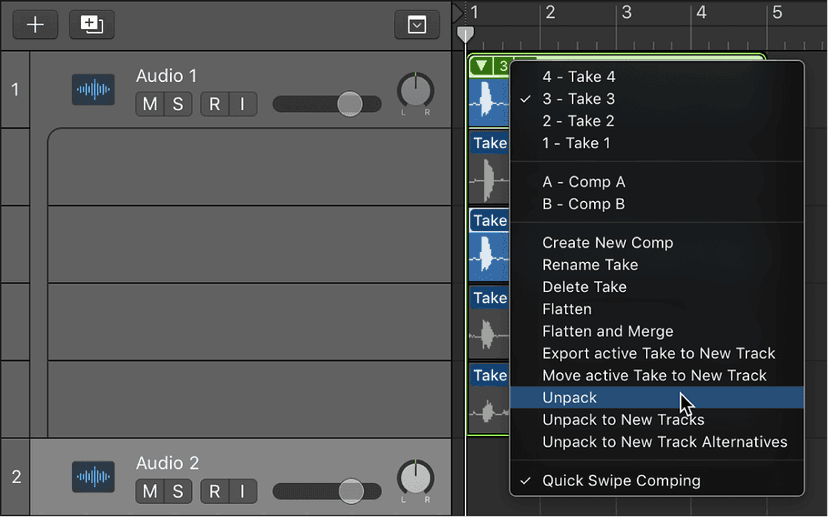
- Control-click the take folder header area, then choose Folder > Unpack Take Folder to Existing Tracks from the shortcut menu.
- Choose Unpack from the Take Folder pop-up menu in the upper-left corner of the take folder.The latter option affects only the selected take folder, not all selected take folders.
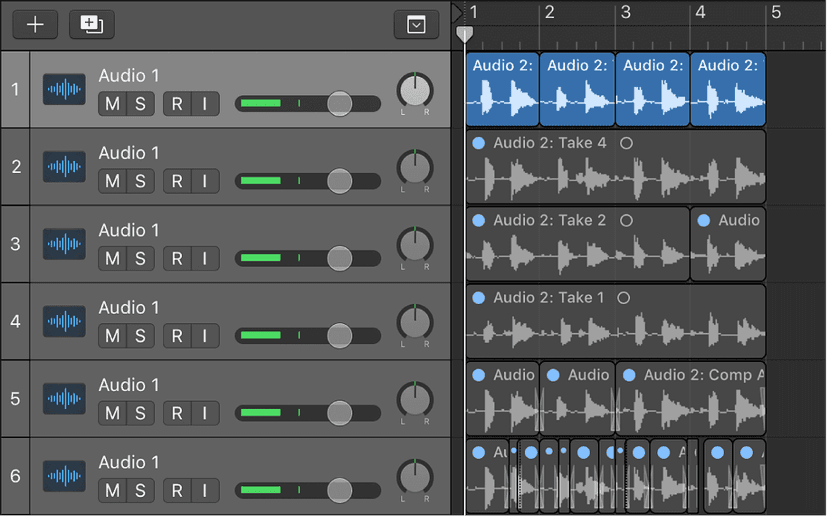
- These commands use the original channel strip for all new tracks. All takes and comps, with the exception of the currently active comp, are muted. This ensures that the playback result remains unchanged. Any edits made to one of these tracks are reflected in all others.
To unpack a take folder to new tracks, do one of the following:
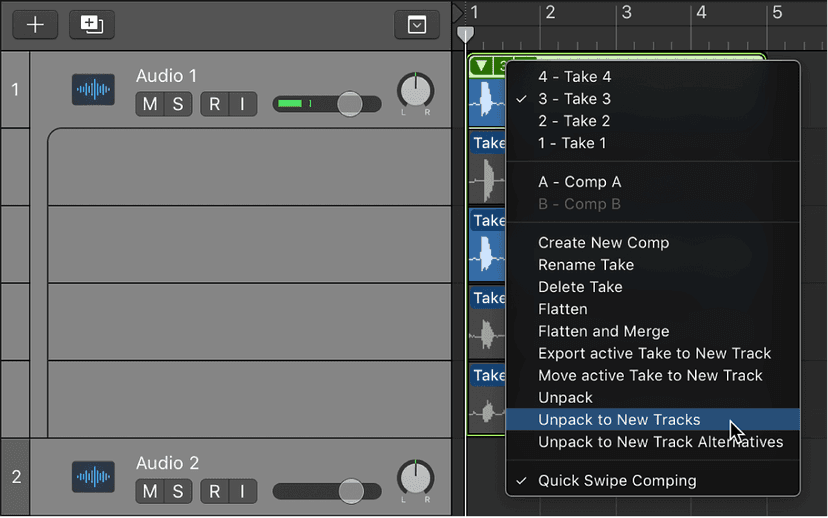
- Control-click the take folder header area, then choose Folder > Unpack Take Folder to New Tracks from the shortcut menu.
- Choose Unpack to New Tracks from the Take Folder pop-up menu in the upper-left corner of the take folder.The latter option affects only the selected take folder, not all selected take folders.
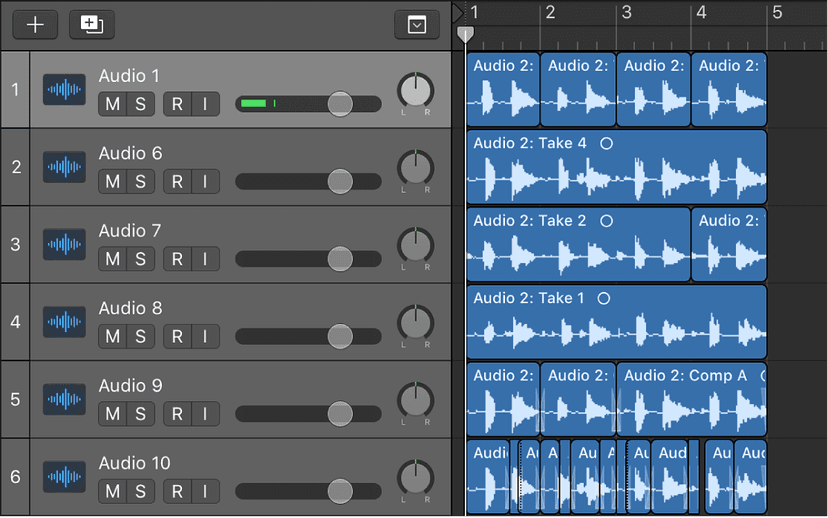
- These commands use different channel strips for each new track, but automatically assigns the original channel strip setting to all of them. None of the takes or comps is muted. Edits can be made to each of the tracks independently.
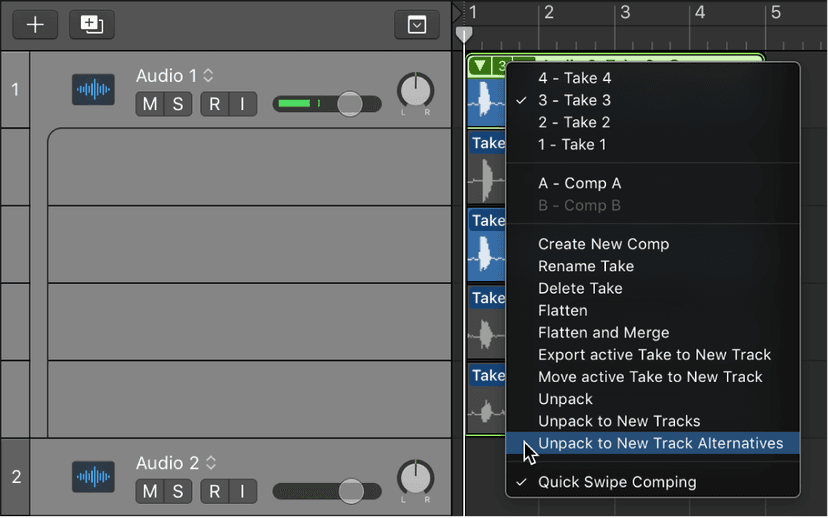
- To unpack a take folder to new track alternatives, choose Unpack to New Track Alternatives from the Take Folder pop-up menu in the upper-left corner of the take folder.
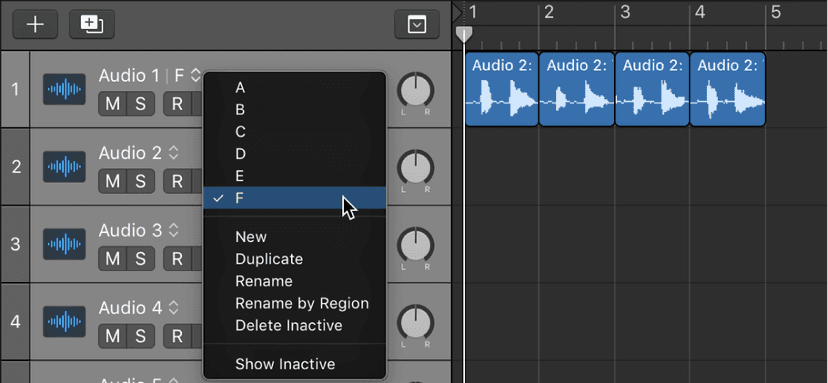
- All the takes from the folder can be accessed as separate alternatives from the take alternatives menu on the track header.
Note: In order to access take alternatives, you must have enabled track alternatives in the track headers.
Packing regions into take folders
You can select multiple regions and pack them all into a single take folder. Each region appears as an individual take in the resulting take folder.
Note the following when packing regions into a take folder:
- If the selected regions are located on different tracks, the newly created take folder is placed on the topmost track. This may change the playback result, because the take folder uses a single channel strip, whereas previously the tracks may have used different channel strips.
- If the selected regions are placed one after the other on a single track, the newly created take folder defaults to one automatically created comp.
- If only one region is packed into a take folder, it is selected as the take and no comp is created.
- To pack selected regions into a take folder, control-click the selected regions, then choose Folder > Pack Take Folder from the shortcut menu.
Do this now
- Loop-record a part six times.
- Open the take folder and build one comp by dragging across the takes.
- Use the arrow keys rather than the mouse for the second half.
- Flatten it when you are happy, and keep the folder.
Comp with the keyboard and it takes a minute. Comp with the mouse and it takes ten.