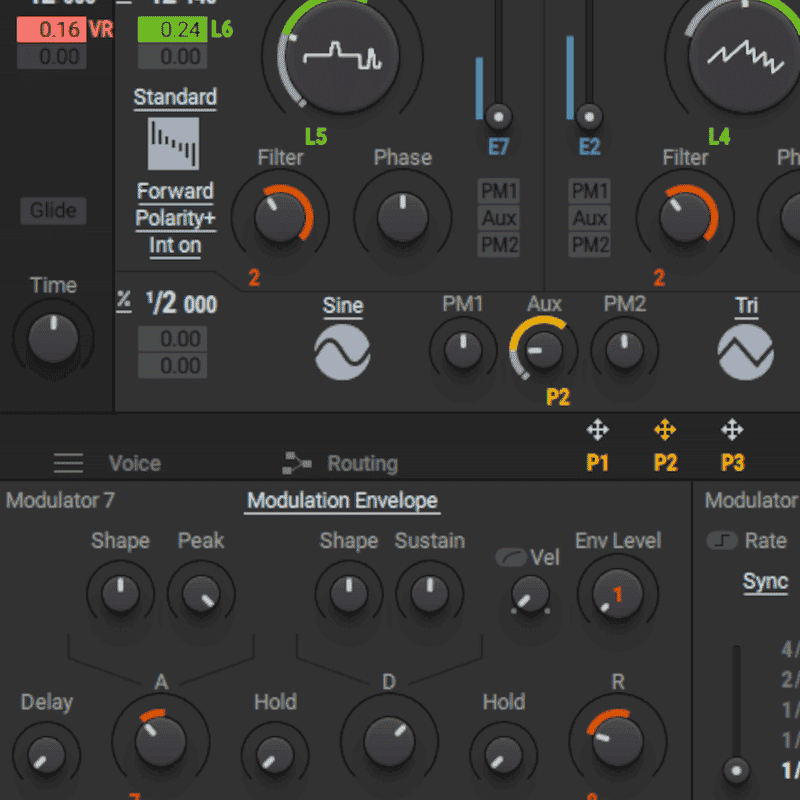
Native Instrument's Massive synthesiser is a monster of a synth that has gained popularity in a variety of different musical genres for its sound, versatility and programmability. It is a 3 oscillator (plus noise) dual filter semi modular synthesizers that has 8 main modulators, additional modulation sources and effects. Each oscillator has over 28 different waveforms that can be selected.
The Oscillator Section
There are 3 oscillators for sound generation in Massive plus a fourth that is used purely for modulation. These wavetable oscillators are much more sophisticated than the standard waveform generators you would find in a normal analogue subtractive synthesiser.
As well as the standard sine, saw, square & triangle waveforms, each oscillator can access a wide range of digital waveforms (selected from the drop down menu to the right of the OSC on/ off switch) that enable you to create a fantastically wide range of sounds. Not only that but each oscillator has two waveforms at once that are morphable using the WT-position control (Fully left is one waveform, fully right is the other).
It's worth spending time learning how the individual waveforms sound as this is the key to effective sound creation.
The fourth oscillator (Modulation Osc) is used as a modulation source for the other three oscillators. The different modes enable you to create extremely aggressive sounds and are a great source of experimentation.
The Center Window
The center window gives you access to 6 pages of global settings. Clicking on the relevant tab can access each page. The 6 pages are as follows: OSC: This is the global page for Oscillator settings such as glide, vibrato and pitch bend. One cool thing is an internal envelope that can be used to modulate any of the parameters found here.
KTR OSC: This page is concerned with how the pitch tracks across the keyboard. For our purposes this is best left as it is.
KTR FILT: This page is concerned with how the filter tracks across the keyboard. If you had a low pass filter setup then the cutoff increases, as you play higher up the keyboard. This can be used to 'brighten' up a sound for soloing for example.
VOICING: This page is concerned with the general polyphony of the sound. The maximum number of voices the patch can play and whether the sound is triggered monophonically (useful for bass sounds) or polyphonically can be set here. Unisono sets the number of voices that are 'stacked' with this set high it is possible to create very large sounds but at the expense of polyphony.
ROUTING: Massive has a semi modular design that allows you to route the signal in a variety of ways. On the left hand side, to the right of each oscillator is a small 'B" that can be clicked. This routes the signal to the bypass section towards the end of the signal chain. This can be very useful if, for example, you want to create sub bass with one oscillator that you want to mix cleanly without processing. Other things to note are that the insert effects and feedback can be placed in several different locations, which can drastically alter the sound.
GLOBAL: On this page you will find parameters for global tuning, BPM and the like. You can also randomise the patch here.
Modulation Control
Massive follows the same convention of modulation that you find in most synthesisers, that of source to target modulation. What makes it interesting is the way that it achieves that. Anything that can be used as a modulation source has a small cross symbol by it and anything that can be modulated has at least one clear box underneath it.
In the example above, you can see that the cutoff of filter 1 is being modulated by modulator 5 (An LFO) and by velocity. The green and yellow lines around the control are the amount of each modulation.
To assign a modulator: Click on the cross next to the source you want to use & drag it to an empty box under the parameter you wish to modulate.
To set the modulation amount click and hold on the modulator number and drag the mouse up and down.
Right clicking on the modulated parameter brings up a pop up menu where you can delete the assignation amongst other options The Modulators As mentioned before Massive has 8 dedicated modulators (4 envelopes and 4 LFOs) and these can be accessed via the tab header at the top of the centre section. The cross to the right of each box is the modulation handle and this is used to assign the particular modulator to parameters elsewhere in the synth.
Envelopes
There are four envelopes (1-4) that can be used for modulation. Each can be freely assigned but envelope 4 is assigned to the Amp by default.
The envelope modulation page The envelope appears to be of an ADSR type design, but it has far more versatility then it would first appear.
The top bar of the envelope modulation page deals with preset selection, saving, loading, deleting and general behaviour.
- Trg Zero Reset: If selected this option retriggers the envelope from the beginning every time a MIDI note is pressed.
- Linear transition switch: Switches the Decay shape from logarithmic to linear. The Attack shape is set to linear and the Decay and Release shapes are logarithmic by default.
- Gate / One Shot / Hold: These govern how the envelope will be triggered when a MIDI note is received. Gate the envelope will play for as long as a key is pressed. When the key is releases the envelope will stop. One Shot The envelope will play to the end even if the key is releases. Any sustain loops that are set will be played too. Hold. The envelope is played until the sustain end point (including sustain loops) and it stays there even if the key is released. The release stage of the envelope is only triggered when a second key is pressed (or the same key is pressed again). If a second key is pressed whilst the first is still held down then the notes are stacked building a chord. When all the keys are released and an additional key pressed all notes jump to the release stage.
The two faders on the left hand side of the envelope control the sensitivity to velocity and keyboard tracking respectively.
The attack and decay stages each have two controls that set the time and level respectively and release has one control that adjusts the time to fade to zero.
The sustain section has extra functionality that elevates it from the norm. It has a loop section that enables you to repeatedly play this part of the envelope, from no loop to infinitely looping. It can be thought of as a mini LFO that is part of the envelope.
The controls in this section are as follows.
- S Loop: Adjusts the time between the sustain start and end points. As the control increases the sustain duration increases which slows the speed of the envelope at this stage.
- Level: Sets the amplitude of the sustain end point.
- Morph: Adjusts the sustain shape between the two reference shapes (see diagram below). Basically this allows you to 'blend' the two shapes together
- Sustain morph pop menus 1 & 2: These each contain 22 pre-defined reference sustain shapes. Menu 1 sets the first boundary and Menu 2 the second.
- Loop: Sets the number of times the sustain stage will loop from 0 (sustain stage is ignored) to inf.
- Delay: sets a delay time before the envelope kicks in.
Sustain morphing in action. The white line represents the average of the two morph envelopes 7 & 16 Assignable Pages This is the name that Massive gives to the final four available modulators (5-8 in green). Four different modulation sources are available that can be chosen from three different modes: LFO, Stepper and Performer.
There are several controls that are shared between the different modes so I want to take a look at these first.
As with the envelopes, LFO presets can be selected and user presets can be saved, loaded and deleted.
The mono switch forces the modulator to output a monophonic signal. Basically this applies the same modulation no matter how many voices are played, effectively synchronising it.
The mode pops up menu (set to LFO above) switches between the LFO, Stepper & Performer modes.
The two rotary dials on the far left are also shared between the 3 modes.
- Rate controls the speed of the oscillation of the modulator that can be synced to an external tempo with the Sync button.
- Restart: With this selected the modulator is re-triggered every time a key is pressed.
- Amp: Sets the modulation amplitude amount. With the rotary set full left this control has no effect.
Now we have looked at the global settings for the assignable pages, let's look at the 3 different modes in more detail.
The LFO in Massive is actually two LFOs that can be blended together in a similar way that the sustain morph we saw earlier works. The XFade Curve fader sets the amount of morphing between these two LFOs.
The two waveform displays shown above represent the two different LFOs and it is possible to left click in the window and drag the waveform from left to right to change the start point.
To the right of the displays is the Curve selector where you can choose from classic waveforms (sine, saw, square and triangle) or more wild and wacky ones from the drop down list. There really is something for everyone here!
Finally, on the right hand side we have an extra internal envelope that can be used for modulating any of the LFO parameters. For example, if we wanted to simulate vibrato and have the LFO come in after a certain time we could apply the internal envelope to the Amp and set a longer attack time.
Stepper
The stepper is a basic step sequencer that can be used to modulate sources in a defined rhythmical pattern. Between 1 and 16 steps can be programmed to set up a looped sequence that can be used as a modulation source.
The main part of the window is taken up with 16 bars that can be adjusted up and down by dragging with the mouse (shift click for finer adjustments). Underneath each bar are two buttons that are used to select glide modulation (top button) and amplitude modulation (bottom button) The small yellow arrow can be moved left to right to select which bar the loop will start on.
The loop length is shown as highlighted numbers above the bar display, for example the loop length above is 6. To change the loop length click the rightmost highlighted number and drag left or right.
The two vertical faders to the left of the display control the amount of glide and amplitude applied to each bar. Both of these can be modulated which increases the versatility of this modulator.
Performer
Welcome to the sound of dubstep! The performance modulator has been a staple part of that genre for as long as Massive has been around it is an incredibly expressive and versatile modulator that can be used in a multitude of ways.
The performer is basically a step sequencer that uses waveform to generate each step in the sequence rather than the bars used in the Stepper. In fact, the performer is TWO step sequencers that you can morph between as with the LFO and the sustain loop. The XFade seq fader to the left of the main display controls the amount of morphing.
To program the sequence select Load Curve which brings up a palette of waveforms (see below). Click a curve shape and you can 'paint' that shape into the main display by clicking and dragging left to right. Dragging up and down controls the amplitude of each step.
The two sequences can be individually randomised by selecting the Rndm drop down menu, very useful if inspiration is not quite there!