C2 Warping Loops, Using the Browser,
Creating Markers, Adjusting Waveform Position and Quantising.
For this Warping exercise load from Samples/Loops e.g from: Core/Samples/Acoustic or LoopmastersMixtape>Samples>Organic Loops/Drum Drops
Pinning to Grid
If a single event in a percussive audio loop comes late, just pin a Warp Marker to it and drag the marker to the correct beat position.
Double-clicking or dragging a Transient’s Pseudo Warp Marker creates an actual Warp Marker.
You may want to pin the adjacent events as well, to avoid affecting neighboring regions in the sample: Holding the [CTRL](PC) / [CMD](Mac) modifier while creating a Warp Marker on a transient also creates Warp Markers at the adjacent transients.
Once a Warp Marker has been created, holding [Shift] while dragging the Warp Marker will move the waveform beneath the marker, rather than the marker itself.
You can also select a range of time and create Warp Markers at all of the transients within the range via the Create menu’s “Insert Warp Markers“ command. (cmd i)
Your Warp Markers will automatically be saved with the Live Set, but you may also want to save them with the sample file itself, so that they are reconstructed anytime you drag the file into Live. To do this, click the Clip View’s Save button
Auto Warping Range to Loop:
You can also direct Auto-Warp to work on a selected portion of a sample. This is useful if, for example, you’d like to warp and loop an isolated breakbeat from a full song. To do this, first drag in the background of the sample editor to select the part of the sample you’d like to warp. Then use the Warp Selection As …-Bar/Beat Loop command. Live will make its best guess about the correct loop length, set the loop markers to match, and then warp the selection so that it fits in this time.
Moving Multiple Markers
You might also find it helpful to select multiple Warp Markers for moving by selecting them with the [Shift] or [CTRL](PC) / [CMD](Mac) modifiers held down. Alternately you can select a range and press Delete.
Importing new Loops
Use ‘Auto’ in Settings/Warp/Loop/Warp Short Samples!
When you import an unwarped sample that represents a well-cut musical loop of 1,2,4 or 8 bars in length, Live usually makes the correct assumptions to play the loop in sync with the chosen tempo. It creates two Warp Markers, one at the sample’s beginning and one at the end.
Half/double time
Sometimes Live’s guess of the original tempo is wrong by half or
double. If so, correct this by clicking on the buttons labeled *2 and:2, respectively
Setting downbeat to 1:
It might happen that Auto-Warp guesses the tempo correctly but gets the downbeat wrong. To remedy this, you can do one of the following:
Zoom in and create a Warp Marker on the downbeat and drag it to 1.1.1 or use ctrl/right click to set it to 1.
Example
Tighten the timing, then save the warped clip.
One of the features included in Ableton Live is the ability to quantize audio. This means if you use a drum or melodic part that’s slightly out of time, you can tighten them up and get everything in sync.
If your audio is badly out of time, you’ll have to go through it and manually snap each transient into place – time consuming, but well worth it.
Even if your audio stays pretty well in time, quantizing it can give it that extra edge by making it perfectly in time – this is especially true in the case of drums or another percussion instrument, where timing is everything. Alternately you can achieve instant Quantization for all Transients using cmd/U or with non-destructive Quantization in the Groove Pool.
Starting with a drum loop that has conformed to timing metronome and repeats almost flawlessly. Before we crop the loop and save it, lets tighten the timing a bit more.
Lets start by locating all of our major snare hits in this loop — kicks work just as well.
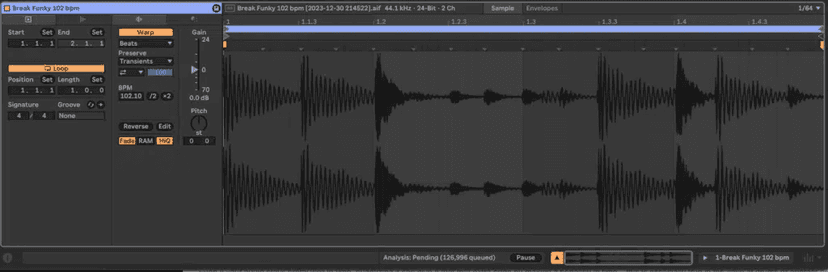
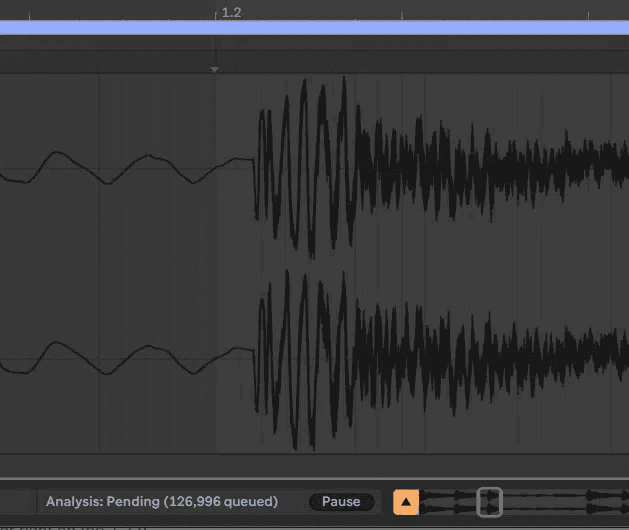
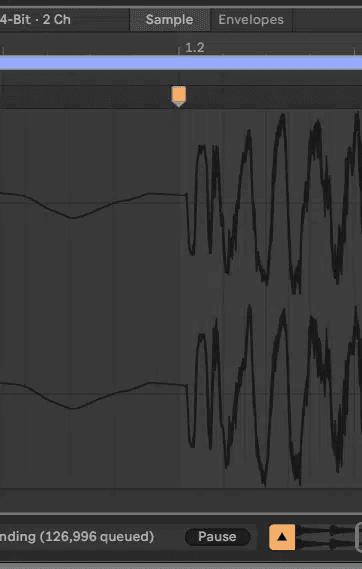
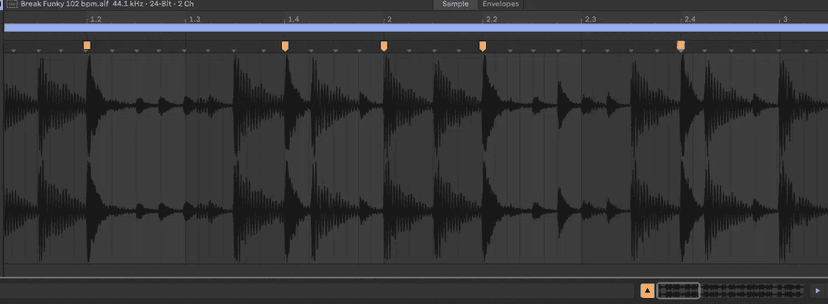
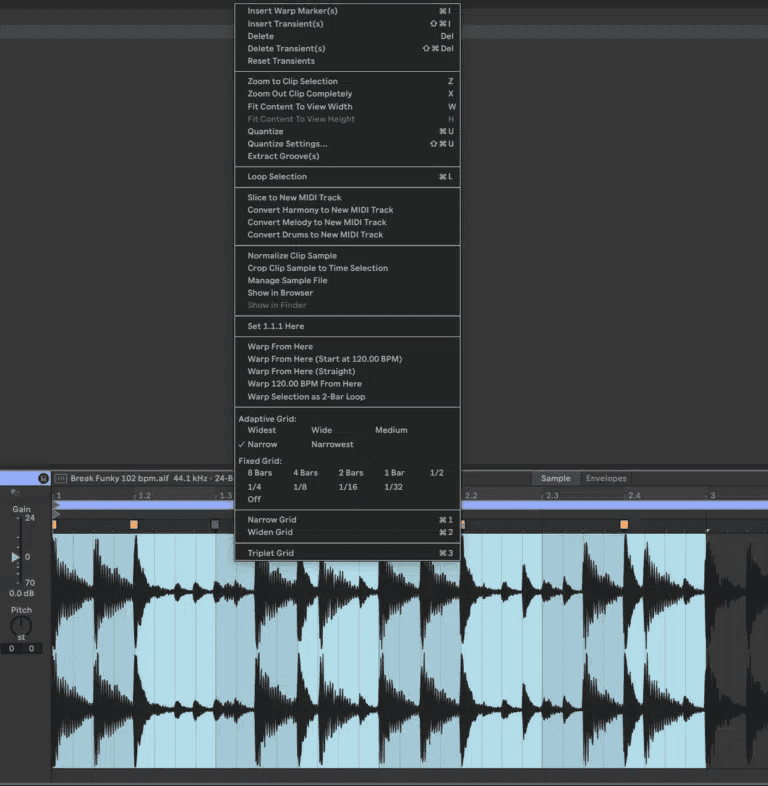
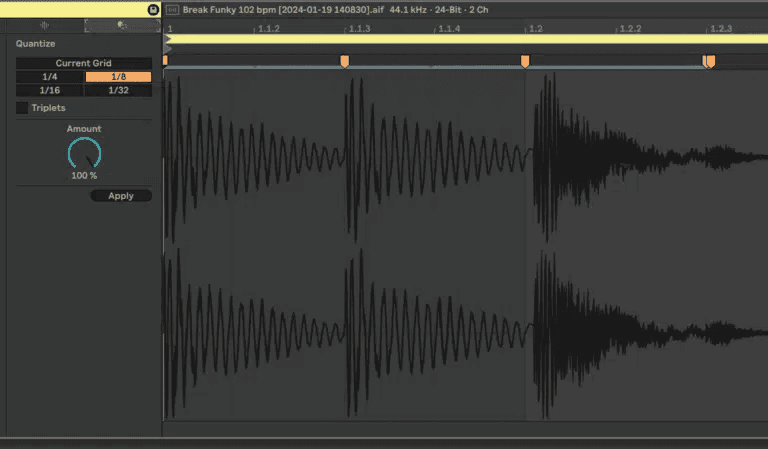
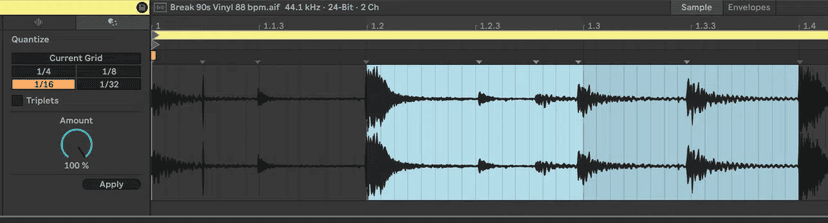
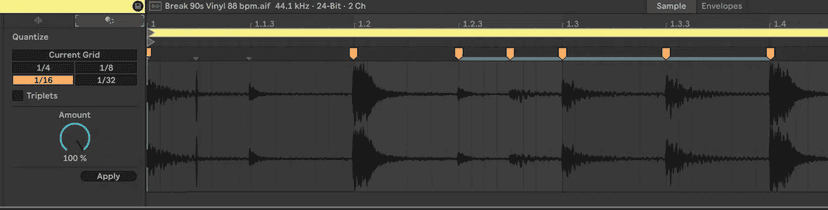
If you zoom in on the first snare hit, you will notice it doesn’t exactly line up with the 1.2 on the beat ruler.
This is a representation of the particular groove of this drum beat that was played by real drummer. There is “push and pull” i.e some hit are bit late and others a bit early”pushed”.
By correcting these hits to exact positions we make the beat more robotic and lose this particular groove, however this might make it work better with other clips that had a different groove.
The good news is that we can always add that groove back later and even make all our other clips follow the same timing. More about this later!
To line the first snare hit to the 1.2 on the beat ruler, double click to add a warp marker right on the 1.2.9
Hold your mouse over the warp marker and while holding the Shift key, drag the snare hit, until the first transient lines up with the warp marker on 1.2..
Repeat for snare the snare hits on 1.4, 2.2, and 2.4/ Also make sure that the 2nd “downbeat” (the 2.1) is warped.
If you decide that you only need 1 bar of this loop you can make it physically shorter. Select the time by sliding across the sample, right click on the wave form and select “Crop Sample” from the context menu to discard the unused portion of the loop. This will create a new file on your drive!
Quantizing Audio
Quantization may be robotic at times, but it is definitely useful. Quantizing moves notes so that they fall precisely on beat (or sub-divisions of beats). You could think of it as Autotune ™ for rhythm.
Using the Quantize Tool
You can easily quantize multiple events at the same time and also control the quantization amount.
Just select a time span by sliding over the waveform and Apply. To quickly select the entire loop, click on the loop brace.
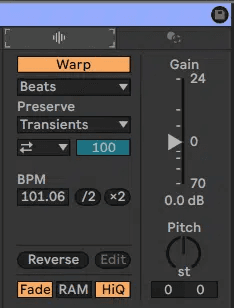
Audio file sample properties
Edit
This button opens up a third party sample editor to edit the current clip.
Rev
This button will reverse the audio clip.
Fade
The full reference for the Sample Box controls — Edit, Rev, Fade, RAM, Hi-Q, Save, Transpose, Detune, Gain, Warp and Seg BPM — is in the Session and Arrangement View chapter. Everything below assumes you have those to hand.
RAM
High quality mode
Save
Transpose
This is used to pitch shift a clips playback by semitones.
Detune
Gain slider
Warp
Seq BPM
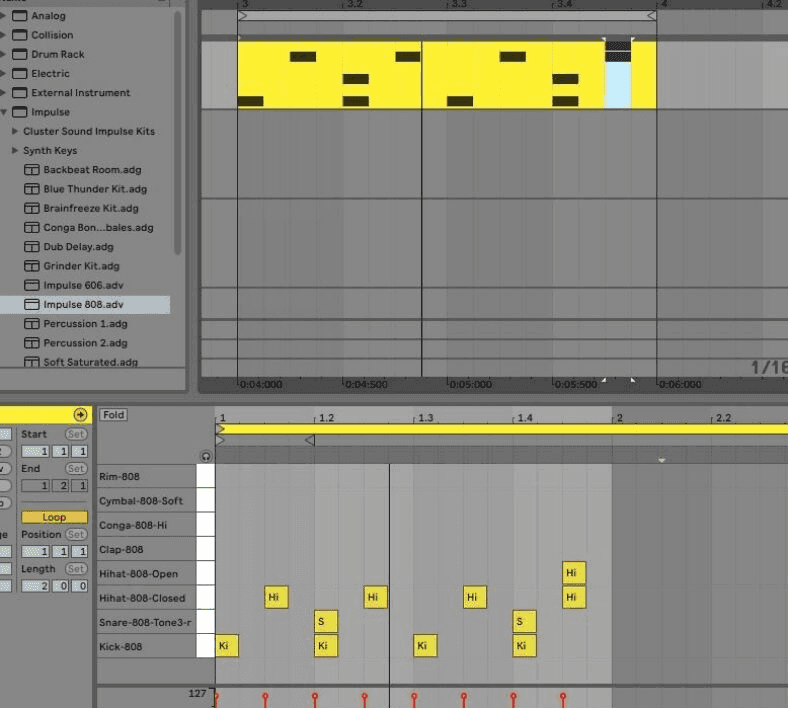
Using the Browser
Creating a Drum Kit with Impulse
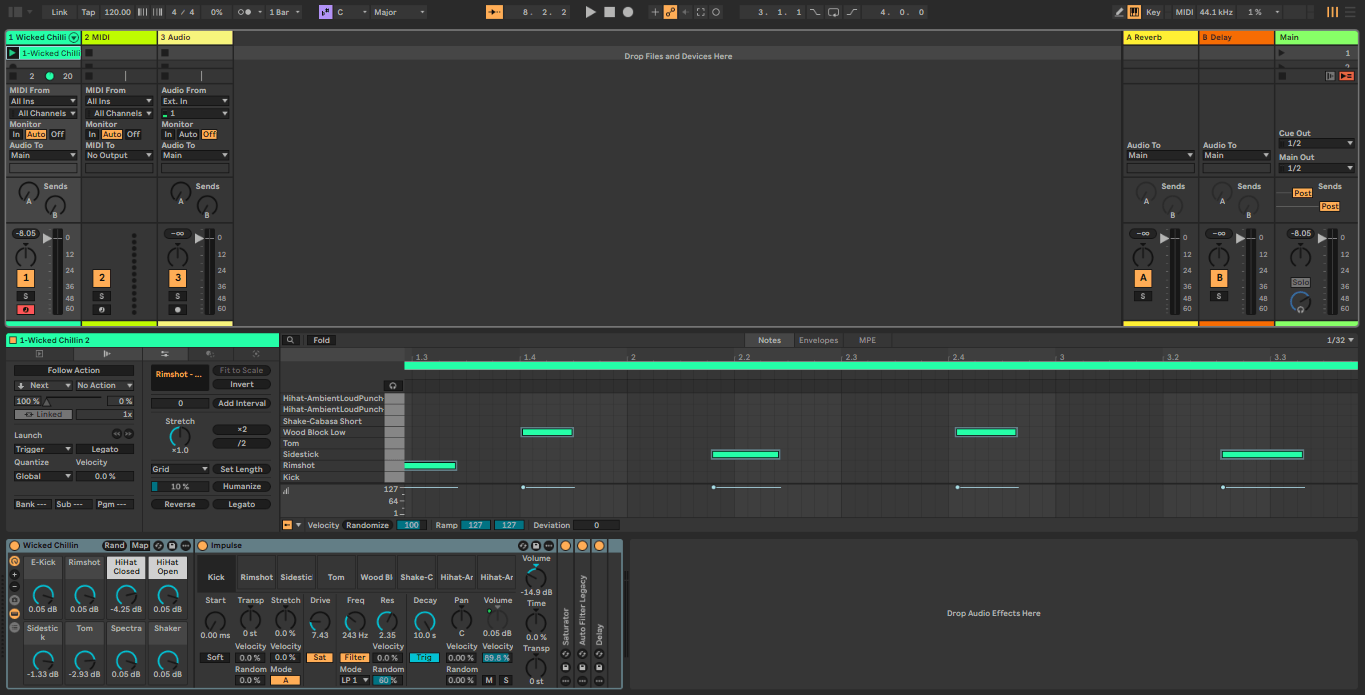
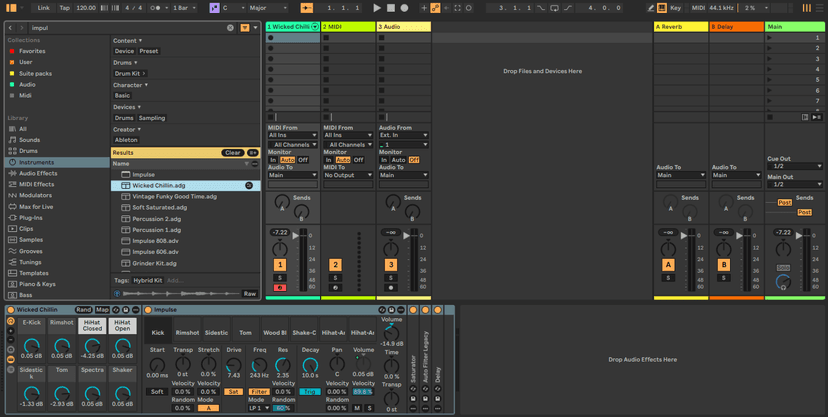
From the Browser’s instrument section drag an Impulse instrument onto a track or empty space in Session.
A Midi track containing the Impulse drum modules will be created. This is one of the first legacy Live Midi instruments designed for drums and percussion featuring 8 sound slots with individual controls for sound design and a master section.
Alternately we will be mostly using Drumracks in the future as it offers 127 sound slots and much more extensive sound control.
Searching with Filters
The browser includes a set of filters which can be used to search and find specific content using descriptive tags.
Relevant filters are displayed based on which category of the browser is selected. To search with all available filters, use the All label in the browser’s Library.
You can search for content and tags in the following ways:
Select filters and tags in a browser category.
Use the browser’s search bar (corresponding filter results will also be displayed).
Search for specific tags in the search bar using the format: #[tag]. For example, if you are looking for samples tagged as “punchy” type “#punchy.” Autocomplete suggestions for tags will be shown as you type.
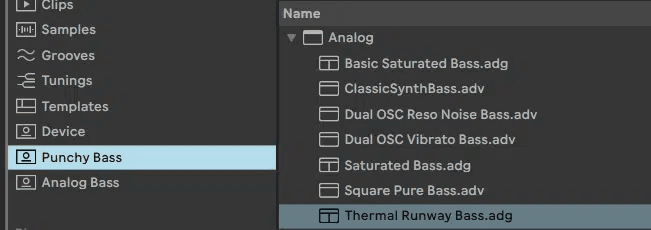
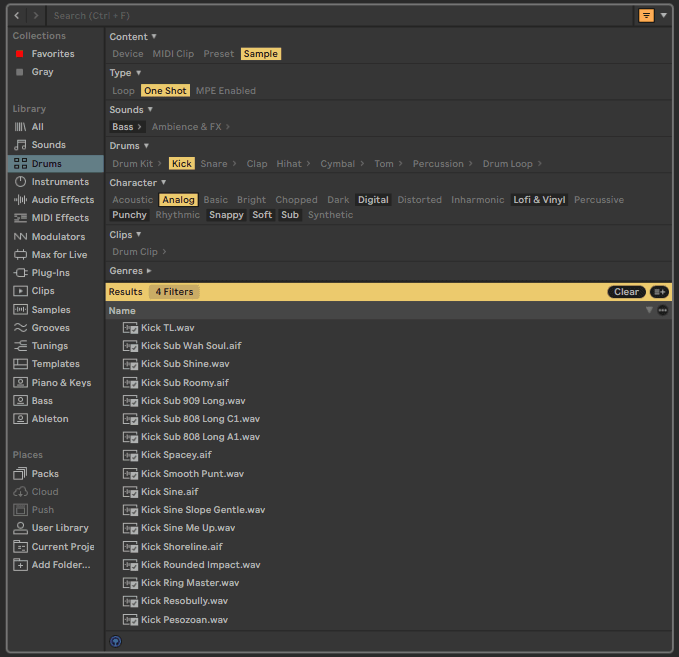
When viewing populated filter results, you can save the current search using the + button to the right of the Results header in the browser content pane.
Once saved, a custom category label is created in the browser’s sidebar that contains the filter results. As new items are tagged, the content will also be updated in any relevant saved custom labels.
Load from Samples using the Filters to narrow search results for kick, snare, hat etc. Make sure to also check One Shot or else you will also list loops. In addition you can also decide which drum Character you’re looking for.
Alternatively you could also load samples from Drums. There you could also load premade Impulse presets.
To audition samples before loading make sure the blue headphone button at the button is enabled.
From Instruments>Impulse you can also load premade Impulse kits however only.adv files will give you Impulse alone!

Browser History
Using the arrow tools you can always access the browser history and go back and listen to previous search results.
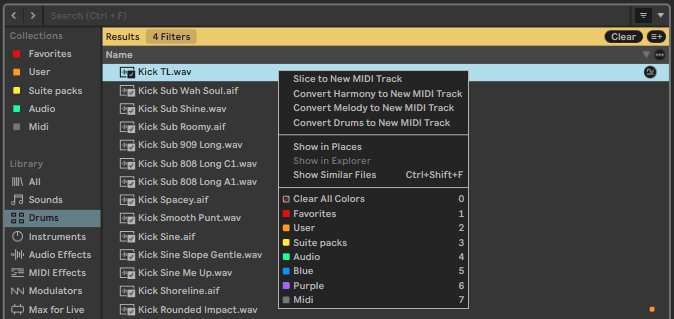
Using Collections
By right clicking on a sound we can create up to 7 customizable color coded collections in the side bar. We can also add items by choosing the number associated with a collection (1-7)
We can show or hide collections using the edit button and name them using cmd R.
Collections are a great organizational tool to quickly load your favorite devices or sounds.
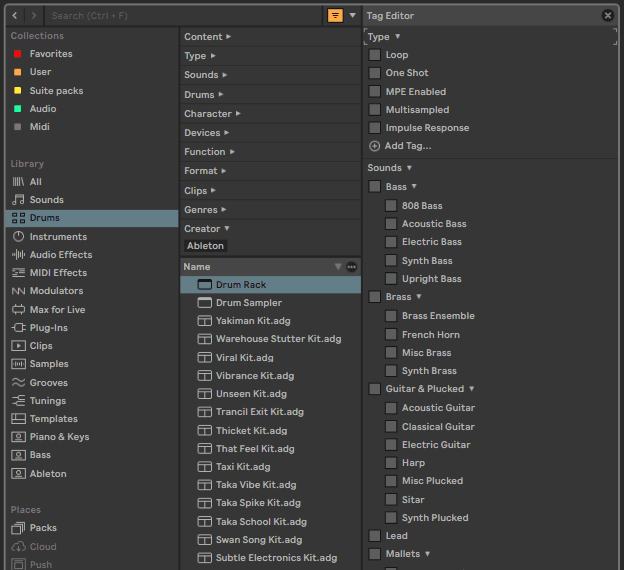
Tagging Content
Use the toggle to the right of the filters to show or hide the Tags Editor. A set of default tags is included for all of Live's built-in content, and the Tags Editor lists every tag in each filter alphabetically. Add your own with Add Tag… at the bottom, or a whole new group with Add Group…. Tags and groups you create can be renamed or deleted from their right-click menus. To tag the selected item, tick the checkbox next to a tag name. Tags have replaced the old folder groups inside the browser's category labels.
Sound Similarity Searching
If you like a sample, Ableton Live can also list similar-sounding samples for you
It can be used to find similar sounds based on a reference file for audio samples, instrument presets, and drum presets. This makes it quick and easy to find a specific sound you’re looking for out of the many possible options in your collection.
In the browser, you can right-click on an item and select Show Similar Files or click the button to the right of a selected browser item to run a sound similarity analysis.
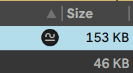
The results will then be populated in a list with the source item at the top and all relevant similar sounding items below in order from most to least similar. To the right of each result is a visual representation of how similar an item is compared to the reference sound.
MIDI Recording and Editing: Drums with Impulse
Arm your Track (Red) so you can play the drum kit with your keyboard!
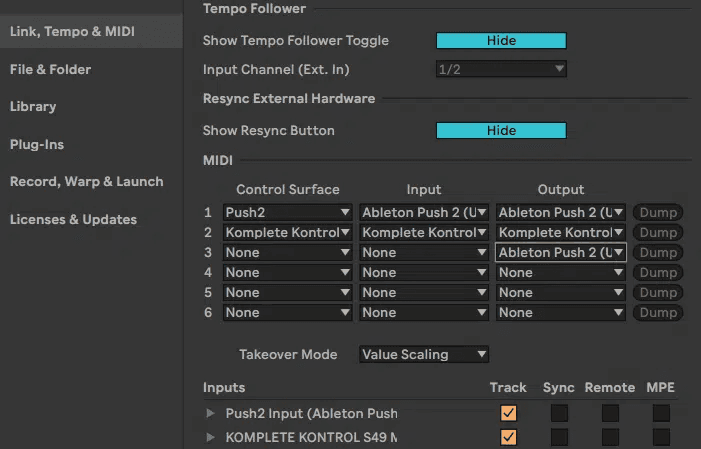
Make sure your keyboard or other controller shows up in the MIDI Settings
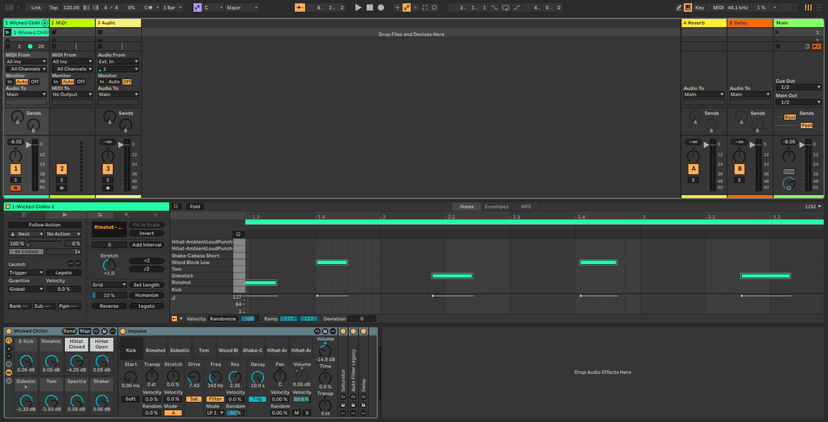
Double click on an empty Clip slot to create a new Midi Clip.
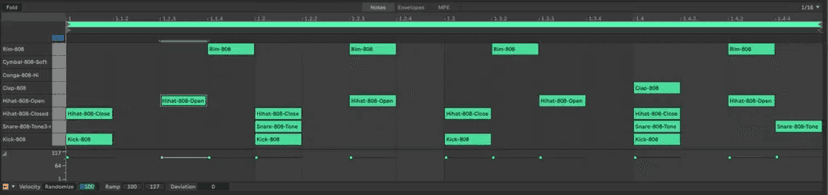
Notes can be drawn with the Pencil (B) directly into the Piano Roll Editor or by using the keyboard. Use the arrow keys to move selected notes earlier or later as well as up/down to another sound. For drawing or moving notes adjust the quantization grid by using cmd +1, 2 or 3 for triplets. 4 will switch the grid off for unquantized penciling.
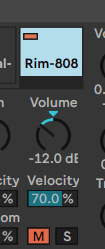
Each sound of Impulse can be adjusted individually in several ways after it is selected using the various controls at the bottom.
Individual sounds can also be muted or soloed.
Using Capture and Overdub
Once your have selected your keyboard as a Track Input in the MIDI Settings you can play the drums in real time.
Live is always listening: once you feel you have an idea going you can turn it into a recording even if record was not on, thanks to the Capture function!
When it comes to MIDI, Live is always recording. Even when it isn’t playing! Should you happen to be playing with a MIDI track armed, and come up with an idea that you wish you had recorded, give the Capture button on the control bar a try! Capture will make a good guess about how to fit the part into a vacant clip slot. Not only that, but in a new Set, Live will even adapt the tempo to match your playing.
To capture hit the square icon to the left of the round session record button. Your playing will be recorded un-quantized and if this was your first recording in the Set, the global Tempo will be changed to match your playing tempo.

In the clip detail view you will see your entire performance and can then select and crop out the best parts by using the command from the context menu.
Note that captured recordings are always unquantized, you can quantize them later using the functions described below.
Alternatively you can also record with the session record button (red) on, but If you have nothing to play along with already you must use the Metronome (yellow) to make the quantization work properly for you!
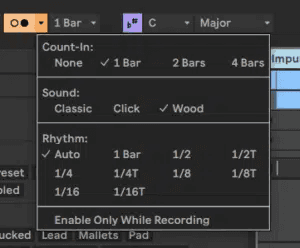
Turn on the Metronome and add a count-in from the pull-down menu.
Here you can set up a count in and determine the note resolution and sound of the metronome.
For most purposes auto will be the most functional.

Recording into a Clip (Session View)
Recording in Session always takes place in Overdub mode so nothing gets erased as you loop the clip. This is ideal to incrementally create a drum loop.
For starters you can create a new empty MIDI clip by double-clicking on any empty clip slot. The newly created clip will be one bar in length.
Now our new (empty) MIDI clip is missing a record button. It has a only play button.
As soon as you click on the Session record Button your play button becomes record enabled.
I recommend to map the Record Button to a key command!
Once you have recorded your part, deactivate it and Live Live will keep playing and you can go in and out of recording on the fly using the session record button.

Recording for an indefinite length:
If you don’t want a preset loop length when recording you can record directly into an empty clip slot without creating a clip first. On an armed track, empty clip slots will have record buttons instead of play buttons.
The session record button on the control bar allows you to record into any selected clip (or currently playing clip) on any/all armed tracks. This is also how you might record onto more than one clip at once.
With the session record button enabled, click on the round record button on the track to begin recording.
In this case the clip will be recording as long as you want and go into playback mode as soon as you deactivate the record button. This will also happen in accordance with your global quantization settings. I recommend 1 bar there for starters.
Click on the Session record button and launch the clip!
You can also stop recording and pause by pressing spacebar or with the track’s square stop button, which will also stop the playing. You won’t get stop buttons back on your armed track until you disarm it.
Quantizing Midi
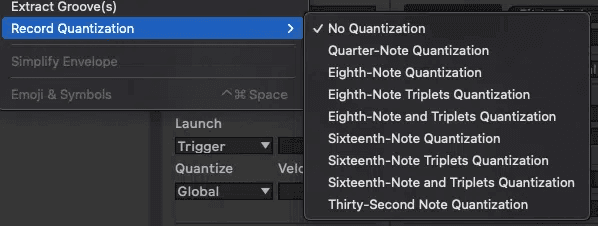
When using Record Quantization your playing will be auto corrected to an exact note value immediately.
You can customize the Settings from the Edit menu situated in the top menu bar.
If the quantization value is set too coarsely, the notes will be lumped together and essential rhythmic detail will be lost and notes superimposed on top of one another. If it’s set to finely, notes risk being misinterpreted; rather than ending up precisely where intended, they’ll be moved halfway between where they started and where they should go.
Playing to a metronome or existing part is essential but it’s equally important to choose the right quantization grid setting.
When not using record quantization, a selected note or group of notes can be nudged so that they land on beats by invoking the quantize function from the Edit menu, by right-clicking the notes or easiest by using the Quantize function of the Transform tools.
Alternately you could also record and apply Quantization later to selected Notes using cmd U.
Using Quantization from the Transform Tools we can pre-hear and adjust the quantization amount.
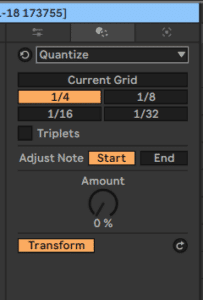
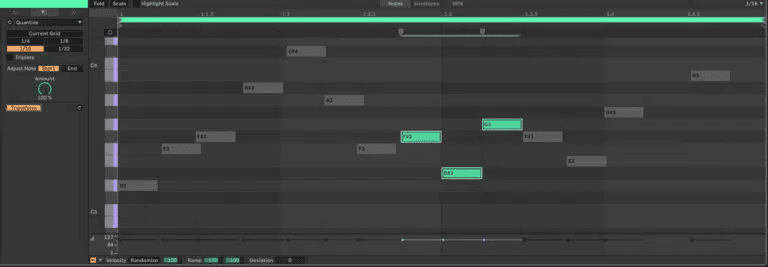
With Transform on, select a quantization value and you will see all the notes getting time corrected.
You can also just quantize some selected notes:
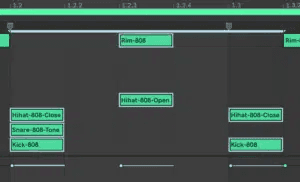
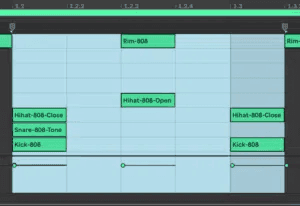
Midi Editing
The MIDI Editor has both vertical and horizontal navigation. Along the horizontal axis lies a time ruler, which shows note position along a musical timeline. The vertical axis contains the note ruler, displaying octaves C-2–C8, and a representation of a piano keyboard (the piano roll).
Note that if the Preview switch at the top of the piano roll is activated, you can listen to the results of your piano roll playing.
Zooming:
Point to the time ruler (magnifying glass) and move and down or select a range/notes and zoom in with Z or out with X
Rubber band select and deselect multiple events with Escape
Toggle notes vs timespan with Enter
Navigate the Insert marker by grid value with the arrow keys
Use option to navigate between note boundaries
Use shift +arrow keys for timespan
Using the Grid
- Use the arrow keys to move notes according to the grid selected.
- Change grid resolution with cmd1/2, use 3 for triplets 4 to switch quantization off.
- Notes will snap to grid, using click+cmd you can disable the ‘magnet’
- Navigate the Insert marker by grid value with the arrow keys
- Use option to navigate between note boundaries
- Click+cmd will disable the magnet snap to offset
- Use cmd to drag Note Length by smallest increments
- Use shift +left/right arrow keys to change note length, go smallest and back to adjust to grid
- Move notes vertically to another sound with arrow keys.
- Click on piano roll to select all notes on a key, use 0 to mute all
- To select next note in time or transposition use option+arrow keys
- Use cmd to drag Note Length by smallest increments
- Use shift +left/right arrow keys to change not length, go smallest and back to adjust to grid.
Editing Velocity
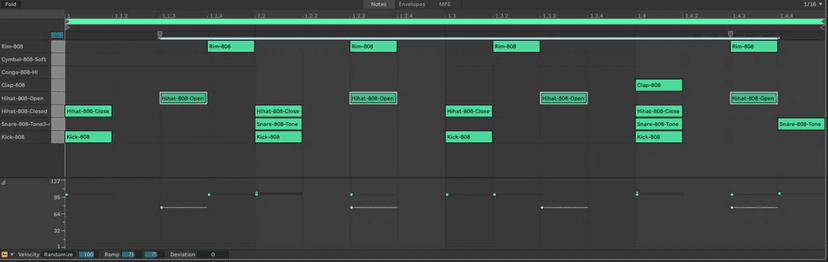
Select note(s) and use cmd to decrease/increase velocity or drag all notes to top value to make even.
Select all notes of a sound by clicking on the corresponding key in the piano roll editor.
In the image above I selected all the hats and lowered their velocity to the same level.
By using the Pencil (B)and holding option you can draw a velocity ramp for selected notes in the velocity editor.
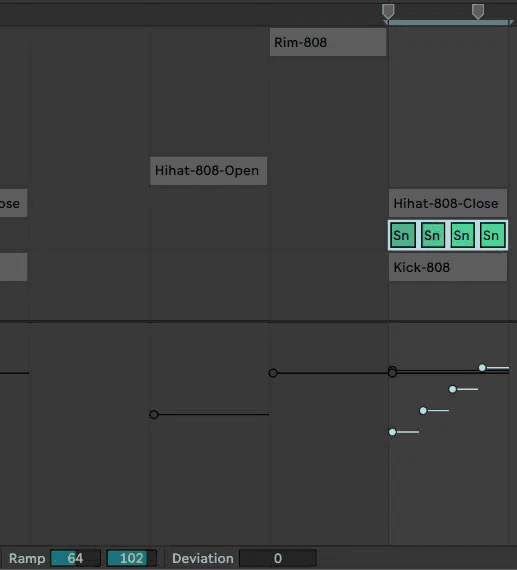
Splitting Notes
By holding a note and using E we can split notes and in combination with option key E will create quantized multiples of the note.
With Ramp controls, we can define a velocity ramp for selected notes (for snare roll in this example)
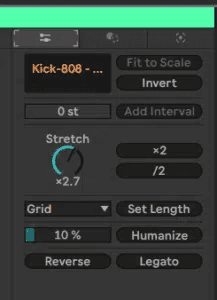
Time Utilities
- Double stretches notes by a factor of 2.
- Halve compresses notes by a factor of 2.
- Stretch Factor compresses or stretches notes by a factor that can be set in the range from ÷10 to x10.
- Set Length determines the note length of notes.
- Humanize adds slight random variation to note start times.
- Humanize Amount sets the amount of randomized variation that is applied to note start times in a range from 0% to 100%.
- Reverse reverses notes horizontally around the center of the time selection. If no time is selected, all notes in the clip will be reversed.
- Legato lengthens or shortens each note so that it is just long enough to reach the beginning of the next note.
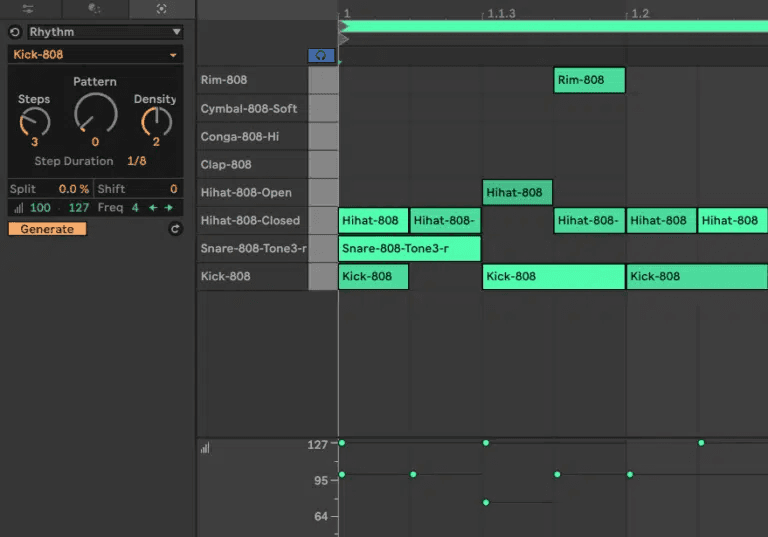
Generative Midi Tools
You can also experiment with your compositional process by using Rhythm, one of the generative midi tools
Rhythm will generate interesting new variations of beats in no time according to your instructions.
Adding Swing, Groove and Groove Extraction
Grooves open up a infinitely more nuanced range of rhythmic adjustment. This is primarily because grooves are generated from pre-existing musical content that has been analyzed for both its subtle timing fingerprint as well as the velocity emphasis of each and every beat.
You can create your own grooves from anything you have imported or recorded, or you can use Live’s impressive range of grooves, found in the Browser under the Packs/Core Library/Swing and Groove category.
In addition to vanilla Quantize flavors such as 4, 8, 16, and T (triplet) variations, Live’s grooves include drum loops, imbued with musical mojo as well as grooves imported from all sorts of classic drum machines and even from other DAWs. This is also where you will go to apply swing and shuffle feels if needed.
Using a groove is as simple as dragging it into the Groove Pool where it becomes available to any clip in your Set.
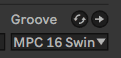
Grooves can be applied to clips by dragging them from the groove pool on to the clip itself. But once loaded into the groove pool, they can also be selected (or hot-swapped) from the groove menu in the clip detail.
What is a groove and why use it?
Before we dive into the ins and outs of Live’s new groove engine, let’s take a quick look at what a ‘groove’ actually is.
When a musician performs a piece of music a natural groove is created. Depending on the style of music, mood (or ability!) of the musician and timing of the other performers, the groove will vary infinitely. Of course sometimes we don’t intend to introduce a groove into our music and we may just think what we have played is out of time—but even a phrase played with sloppy timing contains its own individual groove.
A lot of people’s initial way of dealing with any sort of sloppy playing or overly swung parts is to quantize them to a rigid 16th grid so everything falls into place. This can work in some situations but often the result feels artificial and a little robotic.
The answer is to apply grooves to your performance, this way things will feel a little more human and match other parts in your project. Live’s introduction of the groove engine is a welcome change as previous versions were limited in this area.
There are many ways to apply grooves from presets to creating your own custom patterns. You can also extract grooves from existing audio or MIDI but we will look at each of these methods as we go.
Ableton’s Groove Library
Live supplies not only the ability to create your own grooves but also a pre-made library of existing grooves. Some of these grooves are musical in nature and some are taken from other software and machines that are famous for their preset grooves and swing timing.
Opening the groove library is really straightforward and just involves hitting the dedicated groove button to the left of Live’s existing browser interface.
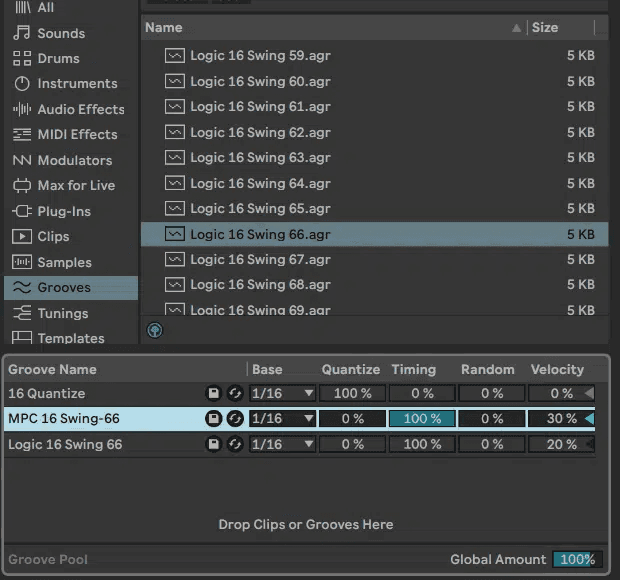
This action should bring up an area called the ‘groove pool’, which shows you which grooves you currently have loaded and the groove library above it.
You can drag any number of grooves from the library into the groove pool. Don’t worry at this point—they have no effect on your project but they can be edited, previewed and applied in real time once they are in the pool.
Previewing and applying grooves from the library
Once loaded in the pool a groove can be dragged onto any audio or midi clip in your project and the effects can be previewed in a totally non-destructive manner. This means that no permanent changes will be made to your parts until you apply them yourself.
To the left of the clip parameter area there is now a small groove area, with a drop down menu and ‘commit’ button. This shows you the current groove associated with your clip and also allows you to imprint the effects of the groove onto your MIDI or audio.
At this point I should point out that if you are auditioning a new groove, you will only hear and not see the effects of the groove data on your clip.
Use this for non destructive quantization and timing that can always be undone because it’s not rendered in the clip. The MIDI notes or warp markers will not actually move until you commit the groove in question.
This system makes it really easy to switch between various grooves in real time and hear the effect they have on your clips and if you don’t like the result you can easily reverse it
However once you press the arrow to commit the groove you will see how certain notes get shifted, later in time in the case of swing but in the case of a groove they could go earlier and later for a”push and pull” feel
The Groove Pool parameters.
When a groove is loaded into the groove pool you will notice that there are several parameters after the groove’s name. These are various values you can edit and will really help you shape the amount of groove that is applied to your part.
Base – This simply chooses the resolution that the groove works with. Everything from a 1/4 to 1/32 of a bar can be used here. Most people will be happy using 1/16, and this setting works best with drum patterns. Saying that, every situation is different so experiment with them all.
Quantize – Regardless of which groove you are using this value will apply quantization to your part based on the resolution you are using. So if you are set to 1/16th this will apply quantization to this value. Using this is a great way to tidy up your part before you apply any groove.
Timing – This is the parameter that actually applies the groove specific data and will have a different effect depending on which groove template you have loaded.
Random – This will introduce some random movements to the notes in your sequence, this is really useful for humanizing very static or rigid performances.
Velocity – Turning this value up will introduce alterations to the velocities of your notes and this will be synced with the specific groove. So pushed or pulled notes will either be louder or quieter.
Extracting Grooves from an Audio Clip
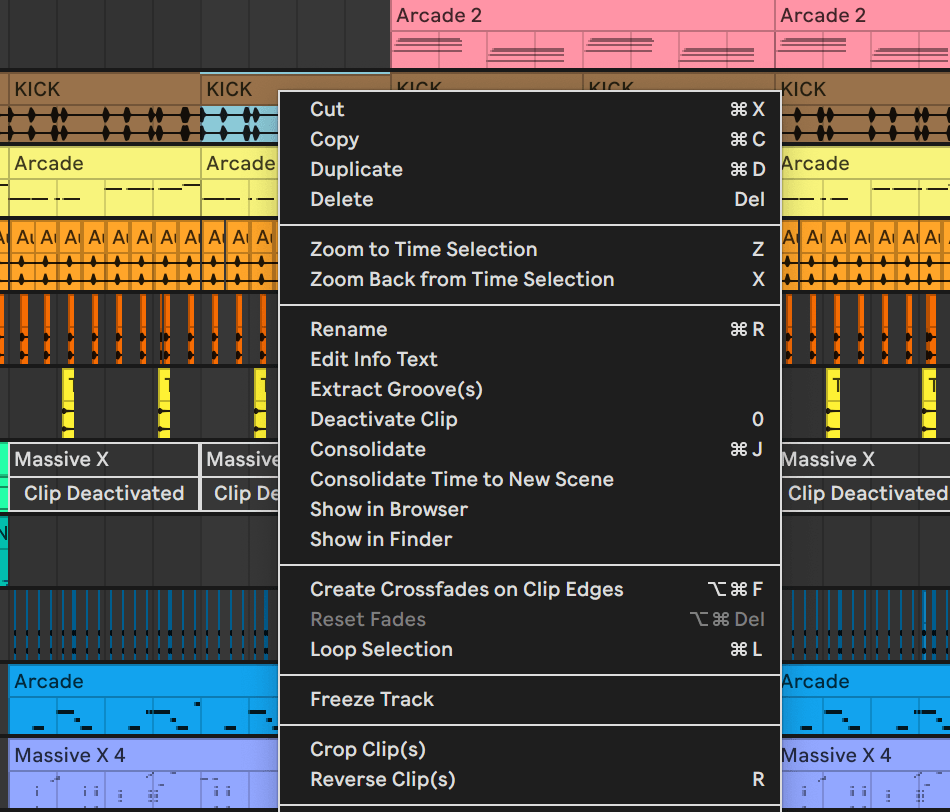
Extracting and saving your own grooves is straightforward. It’s really just a case of right-clicking on the Clip in question and choosing ‘extract groove’ from the contextual menu that pops up.
The Groove template can then be applied to all other clips in the Set. This is a very powerful feature for layering drums and other musical parts
Extracting a groove from an existing part.
Once extracted this new groove will be immediately available in the groove pool and can also be moved to a new folder in the groove library for later use on other projects. This extraction process can be used on audio or MIDI and can be really useful when trying to match the feel of a sample or pre-recorded performance.
Do this now
- Drag in a badly cut loop and let Auto-Warp guess.
- Fix the downbeat by hand, then pin the adjacent transients with Cmd held.
- Save the warp markers into the file itself with the Save button.
Save the markers and you never warp that file again, in any project.