C8 Recording Audio, Warping Full Tracks...
- If you want to use an external microphone you will also need an audio interface.
- For recording with a microphone you will always need to use headphones in order to avoid feedback
Unless you are only using your computer’s built-in microphone (where you don’t really have much in the way of options), you need to be able to tell Live which input to record. Take the example of a well-equipped, professional studio. Here, it wouldn’t be uncommon to encounter upwards of twenty-four microphones plugged in at a time. So imagine if you have a designated track for snare drum and another for kick drum, you are definitely going to want to get the right signal onto the right track. This is where we do that. Assign the appropriate input to your audio track to ensure you are recording the right thing onto the right track.
If your audio inputs do not appear in the input list, configure them from the preferences window (⌘ +,) or choose configure from the drop-down input menu. Make sure any inputs you need are enabled (orange). You can even name them here! Now you can be sure that you won’t end up with didgeridoo recorded on your xylophone track.
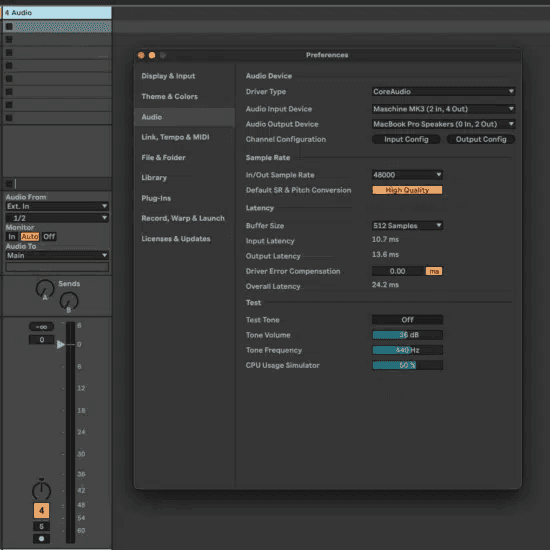
Recording, Buffer and Latency
To record with the internal or an external mike select an input in the Audio prefs.
Use your headphones to avoid feedback when speakers are on!
By reducing the Buffer size we can minimize the delay that occurs when the input signal gets played back via the computer. This delay is referred to as Latency.
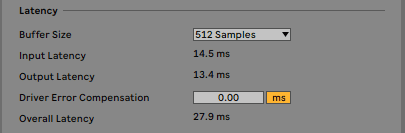
There could be a higher CPU load introduced with lower buffer sizes and therefore you might want to increase it later on again for mixing.
When you hit that record button (the one on the empty clip slot of an armed track, or the one on the control bar), there are two things you are going to want to know. First, the metronome:
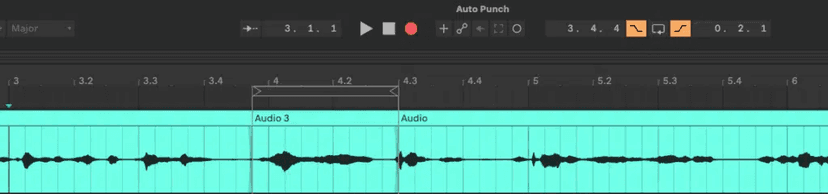
Using Auto Punch and Overdub Recording in Arrange View
Punch in and punch out, arrangement overdub and locators all work exactly as they do for MIDI, and are covered in the MIDI Recording chapter. The rest of this chapter is what is different about audio.
This works both with Audio and Midi!
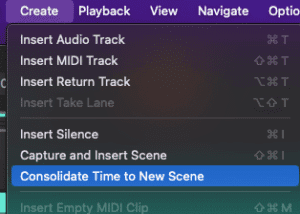
Consolidate Time to New Scene
With this command from the Create menu we can render the midi or audio of all tracks within a selected time span into a new scene in session view.
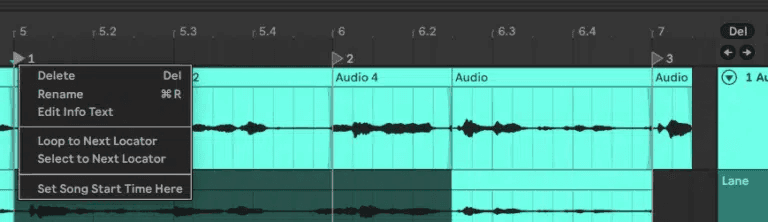
Using Locators for Navigation and Performance
Take Recording and Comping
(same as with Midi in C4)
- Live organizes multiple passes of an audio or MIDI performance into individual takes.
- Pick the best moments of each performance and combine them to create your perfect take.
- Or approach sound design in a new way by splicing together random samples
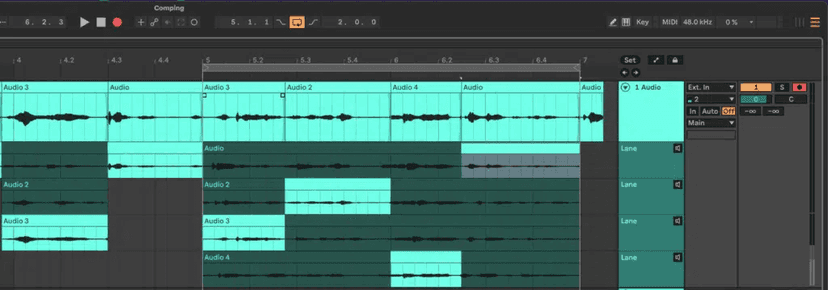
Take Lanes and Comping (arrangement view only)
- Mac Shift + Option +T
- Windows Shift + Alt + T
Editing Take Lanes
- Mac CMD + Arrow Up/Down
- Windows Ctrl + Arrow Up/Down
To display the take lanes/hide them, use the keyboard shortcut:
- Mac CMD + Option + U
- Windows Ctrl + Alt + U
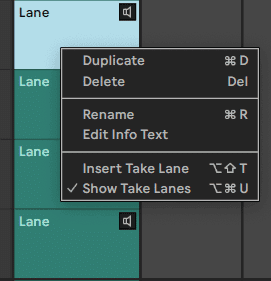
Working with take lanes
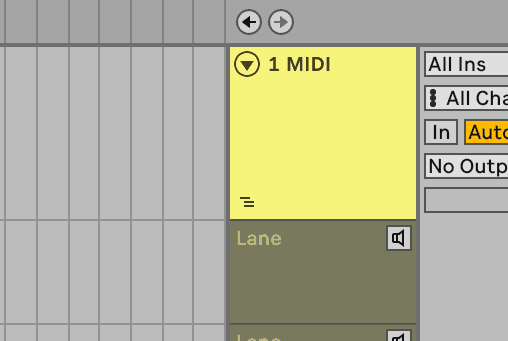
Every take you record goes onto its own take lane underneath the track. Once a track has more than one, a Show/Hide Take Lanes button appears in its header — open it and you can see, audition and drag between every pass you played.
Right-click a track or take lane header to clear them out when you are done:
- Delete All Take Lanes
- Delete Unused Take Lanes (i.e., take lanes containing clips that are not audible on the track’s main lane)
Vocoder
A vocoder is an effect that combines the frequency information of one audio signal (called the carrier ) with the amplitude contour of another audio signal (called the modulator ).The modulator source is generally something with a clear rhythmic character such as speech or drums, while the carrier is typically a harmonically-rich synthesizer sound such as a string or pad.
The Unvoiced knob adjusts the volume of an additional noise generator, which is used to re-synthesize portions of the modulator signal that are pitchless, such as ”f” and ”s” sounds.
In class we used an audio clip drum loop as a Modulator and an Analog synth with a saw tooth as Carrier (carrier setup in the picture below)
Place Analog on a midi track that is rec. armed or set to input. In class we also added a Chord midi effect to Analog with shifts set to 3/5/7/10 for a minor 7th.
Play the audio clip and then play some notes. You should be hearing the effect now! Record your playing in a midi clip so you start focusing on the vocoder settings.
Setup:
Try this also with your voice as an input to become an instant pure pitched vocalist or robot.
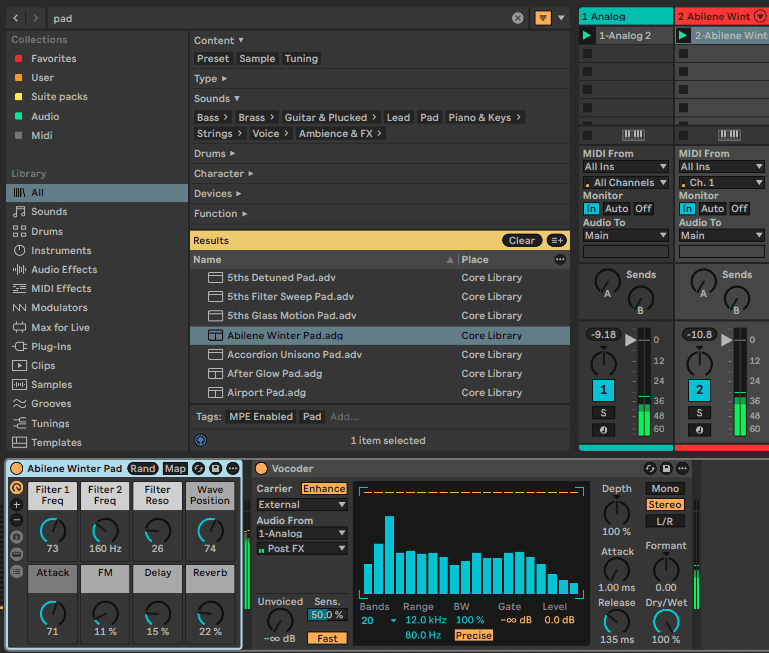
Formant sounds a bit like a filter..use Release to tighten or wash-out effect.
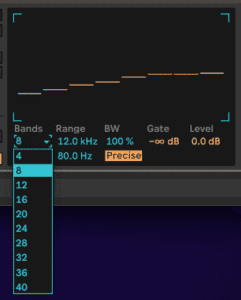
Reducing or increasing Bands gives you more or less modulator detail, but sometimes decreasing sounds better..depending on your source.
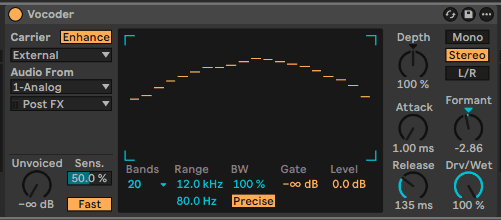
Use the pencil to modify the levels of individual bands.
Play around with BandWidth and Gate for interesting variations. Range defines highest/lowest frequency limits. Increase theoverall Level of the effect.
Alternately you can also use the internal Noise as a carrier source for interesting drum or voice effects.
Resample or save some of the best sounding settings!
Warping whole Tracks
Importing Tracks
You can drop track directly from the finder or add a folder with you tracks to the Browser’s User section
If you don’t have any audio track yet Ableton Live will automatically create an audio track for each file you import.
Drag the first file Browser to the centre of the Arrangement View. Do the same with the second file.
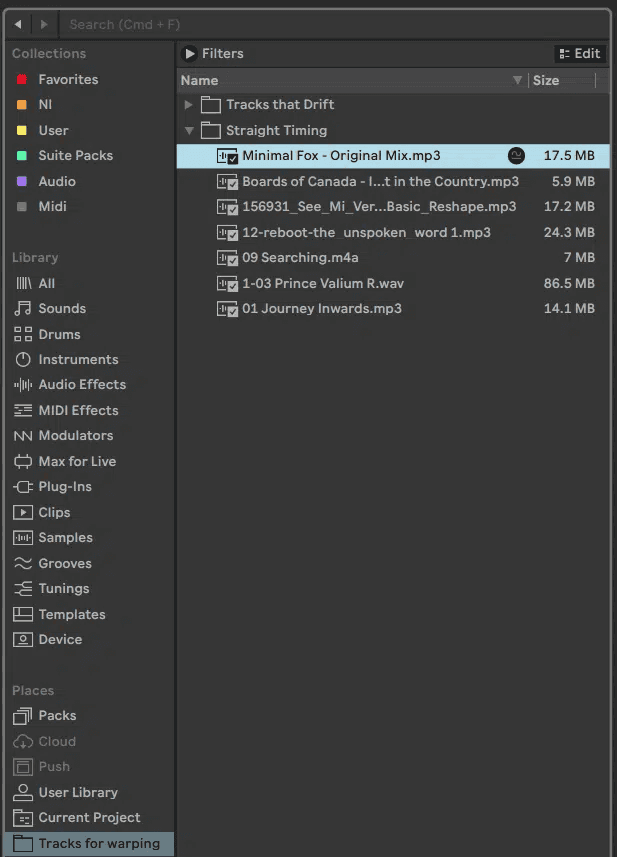
Open the Clip View
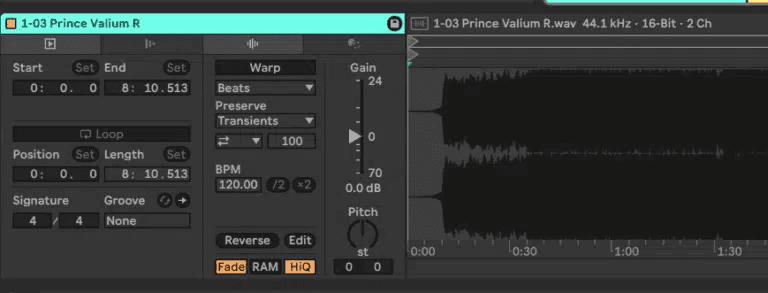
The files you’ve imported are now represented by a colored horizontal line. We call this a clip. Double click on the first clip to open the Clip View (at the bottom). When you imported the track Ableton Live analyzed the file to determine its BPM. This is part of the “Auto Warp” function which will help sync your song to the project’s tempo. Live did its best to guess the BPM – it says it’s 120.01 but it’s actually 120.00 BPM. To correct it input “120” in the Seg. BPM field.
Set the Initial Downbeat of the Track
Next to the clip view we have the Sample Display section. This is where we can see a graphical representation of our audio clip. Ableton Live did a great job in guessing what the tempo of our audio clip is but it got the downbeat wrong.
Make sure Auto-Warp long Samples in the Warp Settings is checked. This will work well for most EDM tracks that have a recognizable beat but sometime Live gets the downbeat wrong or gives us double or half time.

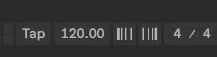
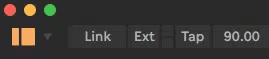
If that does not help it is good practice to switch Warp off in the clip view and start out by tapping the tempo while playing the unwrapped clip to give Live an approximate starting BPM.
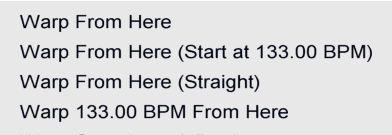
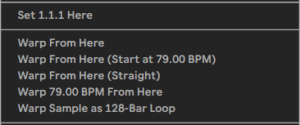
Then use the command ‘Start from here at…BPM’ from the context menu (ctrl click). For live music use ‘Warp From Here’ and gradually warp from left to right. Choose ‘Straight’ for machine generated, quantized music Choose‘Warp… BPM’ command if you know the exact BPM.
When you have a track with an ambient intro go to the first kick and make it your 1:1:1 using the corresponding context menu’s command. To properly beat-match your track you always need to set the correct starting point. Our audio file may have a silence at the beginning. This is not the downbeat—this is where our file starts, but not where any actual sound starts. We need to tell Ableton Live where we would like to really start our clip.
To accurately do so, we must zoom into the first bar of our file, go to the Sample Display section, click-hold and drag down and you will see the zoom in actio. Notice the yellow rectangle with the 1 in it. That’s an Auto Warp marker, and it marks the downbeat or starting point our audio clip. You can drag it until it meets the beginning of the sound transient.
If the BPM setting on the clip is correct you will see how the grid aligns with the transients along the audio clip. This is an indication that our clip is beat-matched.
Warping Tracks that Drift
With live music Ableton often gets the tempo wrong and also can not account for the tempo changes. Turn off Warp and first listen to the Track in Session view and Tap along to establish an approximate bpm.
Find the first clearly visible downbeat(often a kick) and make this you1:1 by picking the command from the context menu.

As you can see the tempos seems to drift off and we can fix this by setting another warp marker on 2:1.
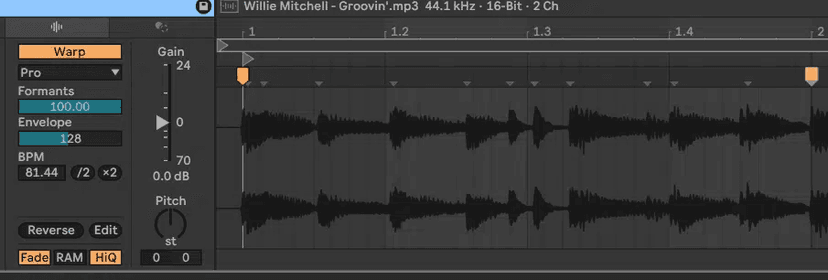
Then place also markers on the 1:2 and 1:4 back beats. You can quantize more transients with markers depending how much you want to abandon the original groove.
With live music you really have to go through the whole track in this way if you would like to sequence along with it when remixing.
More likely you will just pick a catchy loop, break, musical or vocal hook and start working with that as a basis for your own version aka remix.
Remixing with Acapellas
Multi Clip Warping
If you have to sync up live production parts such as an acapella in Ableton Live, use multi-clip warping by lining up the acapella with the original or vocal version or instrumental first and then set the warp markers there to the drums. Warping acapellas by themselves is much harder since you can’t get any accurate timing information and that will leave up much to your interpretation and decision making. Whereas in the original vocal version, you can always warp to the drums, and then you won’t have any problems with the vocalist later regarding vocal phrases not sitting in the intended rhythmic pocket.
1) In Live’s Browser, navigate to the folder that has your acapella and instrumental (or the original mix). Hold shift to multi-select the instrumental and acapella and drag them into Live’s arrangement view.
Note that holding command/apple when you drag the files in brings the files in parallel on different tracks.
2) Select both files and turn warping off.
Make sure the Start Marker flag in the clip waveform of both files is set at the very beginning. Press the space bar to listen.
If your acapella and instrumental don’t sync up unwarped, you have little chance of making them sync up warped. If they are out of sync, you can try moving the Start Marker flag of the acapella around to sync them up.
3) Once they are playing in sync unwarped, you need to make sure both files are exactly the same length. You may need to consolidate the files to make them exactly the same length. To do this, drag around both tracks in the arrangement view, with a length longer than the longest of the two tracks and Consolidate (Command-J).
4. Now select both files (select one and hold shift to select the second) and turn warping on again.
5. Mute the Acapella track and warp the Instrumental/Mix file as you normally would. See here for more info on how to do this.
6. Now we need to duplicate the instrumental track. Click on the Track Name:
And press Command-D to duplicate the track:
7. Drag the acapella back into your browser to create a Live Clip and press enter:
8. Double click on the duplicated instrumental file to bring it up in the Clip Waveform below:
9. Now drag the Live Clip into the clip waveform of the instrumental track. You can delete the original acapella track.
10. Your acapella should be warped like the instrumental/original.
DJing and Performance
Use a USB interface that has at least 4 separate outputs.
Using 2 of the outs you can pre-listen to your samples in your headphones: this is perhaps the most important advantage of using an audio interface.
Let’s say you have a sample collection from which you’d like to use some samples and you don’t want anyone else pre-listening to the samples while the mix is playing. Not to worry. Ableton Live will route the audio from these samples exclusively to your headphones.
If you decide not to use an audio interface you will not be able to pre-listen to your samples. All audio will be routed to your laptop’s line out (which is usually your headphone output). In this case it’s better to select your samples beforehand and program your playlist.
Crossfader
Click on the down arrow in the bottom right corner:

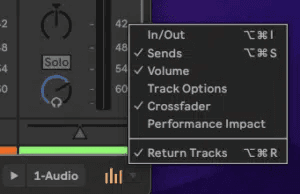
This will reveal the CrossFader.. Notice underneath each channel that A and B buttons also appear.
Have your warped tracks ready in an added folder in your Browser and load them on audio tracks 1 and 2.
Assign track 1 to A and 2 to B
Press play on a clip in each channel and now use the crossfader slider to mix between them, just like a dj mixer.
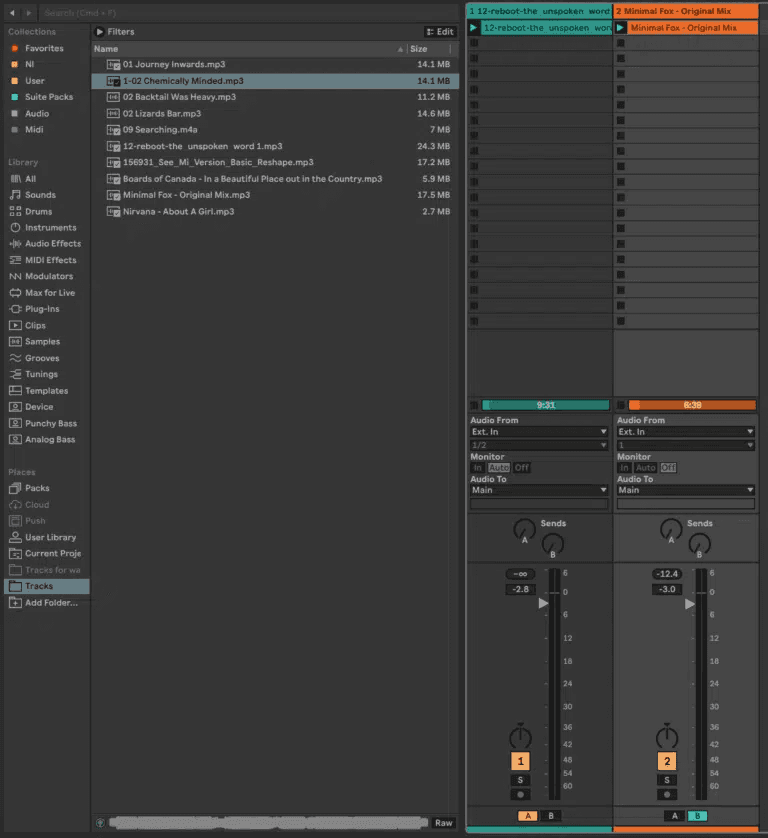
“Deck” A and B
You can obviously assign the crossfader to a slider on your MIDI controller. Hit the MIDI learn button, click on the crossfader then move whatever slider you wish to assign it to CUE: headphone volume
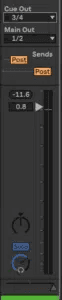
If the Solo/Cue switch is set to ‘Cue, enabling this switch will send this track’s output to the channels selected in the Session mixer’s Cue Out chooser. This is useful for preparing clips in private, using headphones.
Assign your Cue Out (located in Master channel above volume slider) to a spare stereo output on your soundcard or into the headphone jack output if it has one.
Click the solo button on the Master Channel… It will change to ‘Cue’… Notice the solo buttons on all the channels have now turned to headphone icons.
Press the Headphone icon in the Browser or in the relevant channel you want to cue and you will hear it coming out of the output you assigned the Cue to
This also means that you can now use the browser to preview songs in your headphones instead of through the master out – obviously vital if you’re djing out!
More notes on DJing Live
DJing live is quite a different ball game to programming and crafting a mix in non-real time. However, the preparation is exactly the same. As before, warp your samples, set loop points, and prepare the tracks and / or loops in order in a set folder where you can easily access them and drag them into your live set on the session view page. One good way to set up a performance is to have a whole bunch of loops and tracks ready in respective channels and save the whole thing as a set so that you only have to take the time to drag in a new track if something unprepared happens, or you simply decide to play a track you didn’t think you’d want.
Tip: One good way to organize your tracks in the folder is to name them with their bpm as the first line. For example: “13508 – House Track – House DJ”. This way, you should never be too far from an appropriate track to mix. This saves you time which in the middle of a performance, which can be very precious! When all your music is setup and ready to go, just play the clips and control the effects you have on the channels with the controller of your choosing.
Use the Transpose function in the sample display window to change the key of a track or a sample.
DJ effects
Huge filter sweeps, stuttering beat hiccups and low end drops. Used tastefully, DJ effects can provide improvisational wonders for the dance floor. Ableton Live comes with plenty of effects devices. Here are 5 of my favorites that can turn a dull DJ set into a real time performance with different results every time.
Limiter
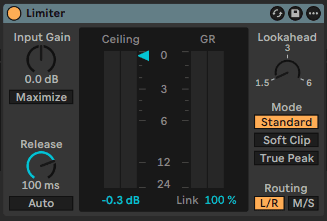
Ableton’s Limiter is simple in design making it very easy to use.
Why DJs Love It
Slap this on your master track to prevent any clipping that can happen during a DJ set. Even though you’re usually using only 2 songs at a time when mixing, the low end of 2 tracks at once can sometimes create major clippage in Ableton.
- As mentioned earlier, you can really just “set it and forget it”, but if you’d like to tweak it a bit, here are a couple of pointers.
- If you need your mix to be louder, you can use the gain knob, however, use it in moderation. A limiter is essentially a compressor with a ratio of infinity, so by cranking the gain you’re noticeably squashing the sound.
- Always keep the ceiling below 0, anything higher will cause the master track to clip, which is why we put the limiter on in the first place!
EQ Three
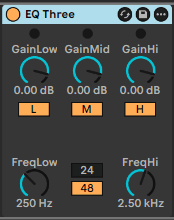
Why DJs Love It:
It doesn’t get more classic than this. The 3 band EQ has been a favorite among DJs for decades. Found on almost every DJ mixer, Ableton has emulated a perfect DJ EQ, right down to the kill switches. EQ Three – Arguably Ableton’s most powerful DJ effect.
Some Practical Settings:
- Load this to your “A” and “B” decks. This way you have individual control when it comes to killing certain frequencies. Using EQ Three to boost frequencies is generally is not recommended.
- Try mapping your computer keyboard to the kill switches. This way, with the press of a button you can kill the lows of a song, to make room for another.
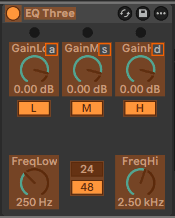
Mapping the “A” button on my keyboard to kill EQ Three’s low end.
Beat Repeat
Use some predictable key Parameters to get started:
Grid: Repeat time,
Gate: Nr. of Repetitions,
Offset: Set R target by 16th,
Decay: volume fade,
Pitch Decay for gradual transposition, Volume control overall effect level,
Ins mutes original material when repetitions occur and Gate plays only the repetition effect.
Use Chance and Variation for randomization
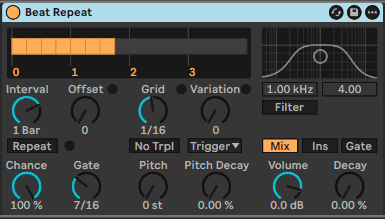
Why DJs Love It:
Create interesting rhythmic stutters and shifts with this effect. You can hear extensive use of this on Daft Punk’s “Alive 2007′′ Album. DJs have to be careful though, too much can cause chaos on the dance floor. Use sparingly!
- You really have to keep your eye on this or things can really get out of hand. Practice with it before you take it out. I like to set my “Chance” knob to around 50% and my intervals to 4 bars.
- Activate and Deactivate the device by clicking on the green dot (top left of device) to use it. You don’t want to leave it on during the whole song, use it only a few times in your set (unless you’re Squarepusher or Aphex Twin).
Auto Filter
Why DJs Love It
Great for the famous “the sound is coming from another room” effect (cutting all the highs out), the auto filter is great for creating tension.
The Auto Filter is great for building tension and builds..
Some Practical Settings:
- With the default low pass setting on, grab the green ball in the middle of the filter and start to slowly pull your mouse to the left. This will cut out all the high frequencies. Once the dance floor is brimming with anticipation, slowly (or quickly, your call) bring back in the highs (move the mouse to the right).
- Bring the auto filter’s Q up (move the mouse up) to create even more exciting “wooshing” sounds. Ping Pong, Simple and Filter Delay
Delays
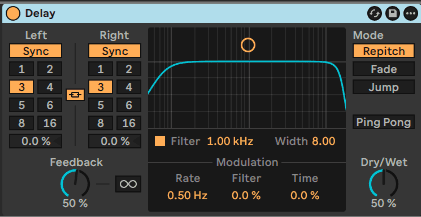
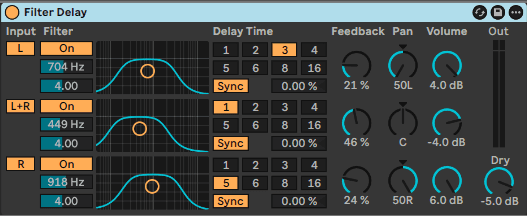
Why DJs Love Delays:
It’s getting more common to find DJ mixers with built in effects. The mostcommon (besides EQ) is usually a form of delay. The simplicity of Ableton’s Delay can create interesting and chaotic effects with the push of a button. Simple delay let’s us
Delay can create interesting and chaotic effects with the push of a button.
Delay let’s us define two separate delay times, either in Sync for rhythmic effects or off sync e.g.with very short delay times to create stereo width and doubling effects.
The Filter Delay is a combination of the two and even features a 3rd stereo delay time option, besides the hard L/R channels.
Some Practical Settings – Simply putting the delay on a track and activating then quicklydeactivating it can get some really interesting sounds. Remember, just like Ableton’s Beat Repeat; keep it simple and subtle.
Create a crazy repeat effect by starting with both the “Feedback” and “Dry/Wet” knobs at 0. Slowly bring the two knobs “Feedback” and “Dry/Wet” knobs to 100%, then, just like with the Auto Filter, deactivate the delay at the moment that feels right.
Looper (Audio Effect)
Layering of multiple audio recordings requires multiple clips; and that requires multiple tracks
When it comes to layering and overdubbing audioclips, you may want to investigate the Looper plugin.
Use Looper for an improvisational way to record and layer audio on the fly.
Unlike on regular audio tracks, here we can actually do overdub recording i.e. gradually building complex audio recording on the fly.
No quantization here, everything real time. However we can export the recording to an audio clip later for quantization. Try this by loading Looper to a midi track along with Analog. Start out with the settings in the picture. Load a drum loop for timing (or just use the metronome) and hit play either in Live or the Looper. Practice a 2 bar loop with a bass sound and when ready hit the big + button before the next downbeat.. and keep playing.
Make sure to hit the big button again to exit record after the first loop or else you’ll be overdubbing with the bass sound! You can clear/undo your take. Once your happy, load a different sound (key/pad) and play along first before you go into record again..by hitting the big button. (it can be also controlled by a footswitch, as people use Looper to perform live). You get the idea: add more sounds until you have a loop you like and then you can either save Looper or also drag drop the recording to an audio track.
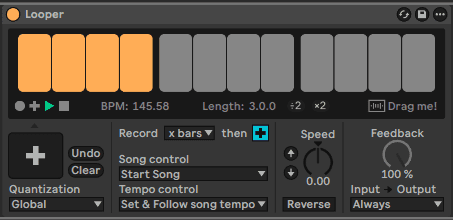
For more on the fly fun, check out the Speed and Reverse functions as well!
Do this now
- Loop-record a vocal or instrument six times into take lanes.
- Comp one pass out of them using the arrow keys.
- Then import a finished track, set its downbeat, and warp it to the project tempo.
Comping and warping are the two audio jobs you will do on every project.