C4 Midi Recording of Melodic Instruments in...
Recording in Session View
All the recording and techniques we used when recording Drums in Impulse also apply here, however now we’re also dealing with notes and note duration
We will be using the different keys or pads to record and edit different pitches of the same instrument on the vertical axis, i.e we can move notes up and down with the arrow keys.
Trigger vs Gate Time
In Simpler we learned the difference between the Classic and one Shot mode.
Now we also record note lengths for sustained sounds and using volume the ADSR envelope settings in Classic mode, whereas with drums we were mostly just
“triggering” samples in one shot mode.
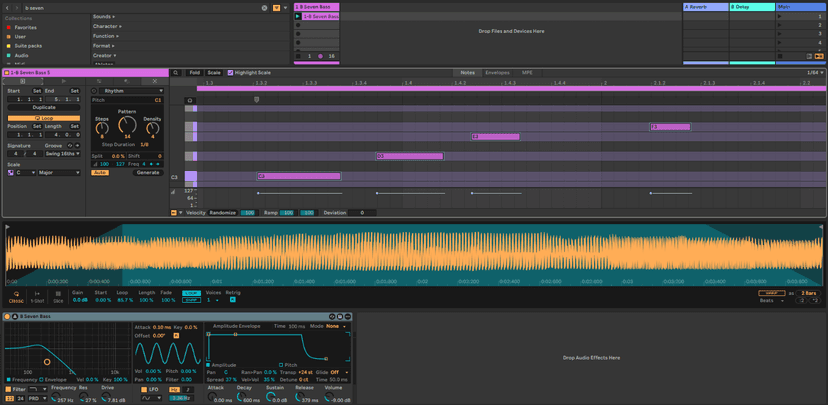
A fresh Live Set will open with two MIDI tracks and two audio tracks ready. You may use these or create new ones.
Use ⇧ + ⌘ + T (MIDI), or by dropping a Simpler instance (found in the Instruments category in the Browser) on to an existing MIDI track or either of the mixer drop areas.
Let’s load a Bass Simpler.adv preset from Packs>Core Library>Devices>Simpler>Bass.
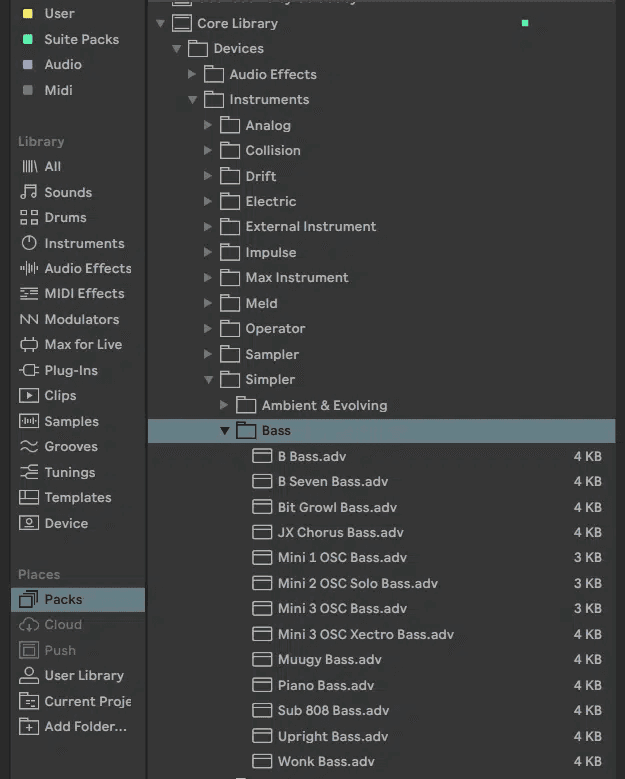
Alternately we can also drop a bass sample in an empty instance of Simpler from Samples using the Filters.
Remember you can also preview the Simpler presets while the blue headset preview button is illuminated.
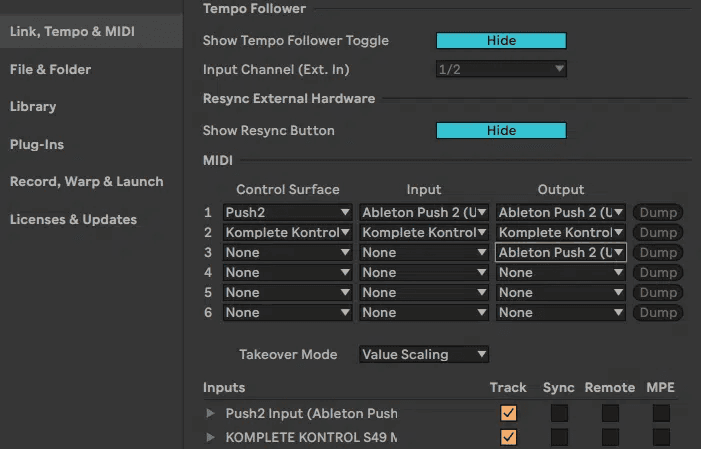
Make sure your keyboard is connected in the Midi preferences.
Make sure you have the right flavor of a bass sound loaded and armed the track, so you can hear the bass when playing the keyboard.
To start, we recommend you choose an empty clip slot on an armed Session View track. But you may also work in Arrangement View. If so, take a moment to make sure your insert marker is placed meaningful somewhere along the timeline. It can be moved by clicking anywhere in the clip area of the

Metronome
Here is the metronome button:
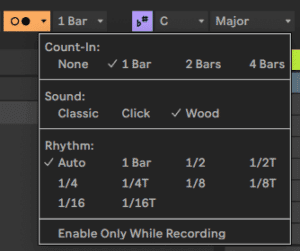
Same as with Drum recording. It’s settings, including the count-in, are accessed directly from here.
Playing to the metronome is important for making sure you that your record or other quantization will work as expected for you. Alternately you could also play to a drum or any other rhythmic part.
Recording into a Clip (same as shown in C2)
Create a new empty MIDI clip by double-clicking on any empty clip slot. The newly created clip will be one bar in length.

Then activate the Session Record Button:
When you deactivate it, Live will keep playing and you can go in and out of recording on the fly.
Recording for an indefinite length:
If you don’t want a preset loop length when recording you can record directly into an empty clip slot without creating a clip first.
In this case just enable the Session Record Button and click on the round record button on the track to begin recording.
The small round session record button on the control bar allows you to record into any selected clip (or currently playing clip) on any/all armed tracks.
In this case the clip will be recording as long as you want and go into playback mode as soon as you deactivate the record button. This will also happen in accordance to your global quantization settings. I recommend 1 bar there for starters.

Scale Awareness
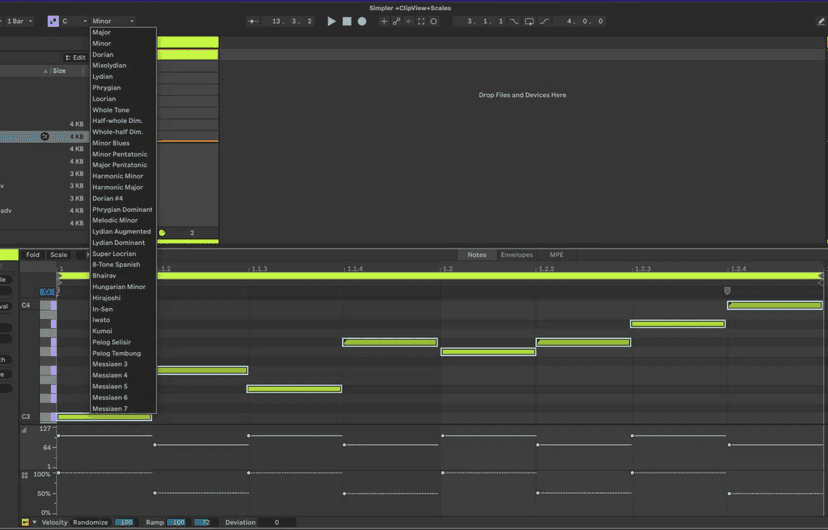
Ableton Live has a tool to help you get all your musical parts play in the same key.
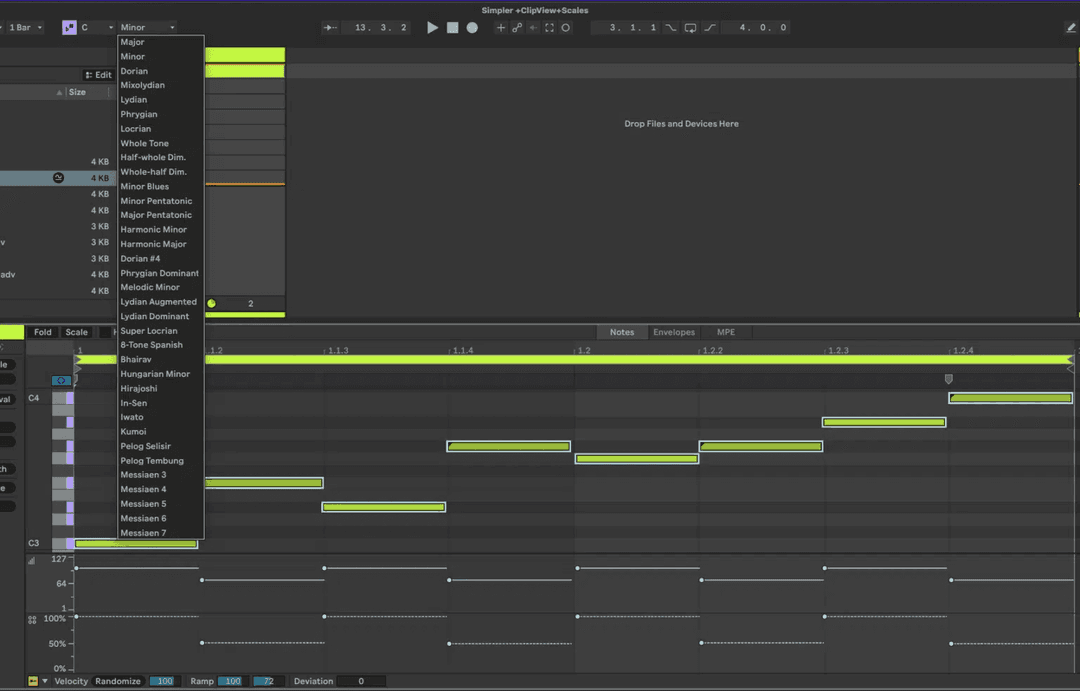
Besides choosing the key root note can pick from many Scales that will be represented on the piano roll editor.
This amounts to something like quantization for notes and is particularly helpful to make bass lines, leads and other musical parts instantly work together by eliminating the “bad” notes that might clash.
The keys belonging to chosen scale will be purple and you can correct your notes to match the scale when clicking on Fit to Scale.
This will adjust the pitches of selected notes to fit the clip’s key and scale. If no notes are selected, all notes in the clip will be affected.
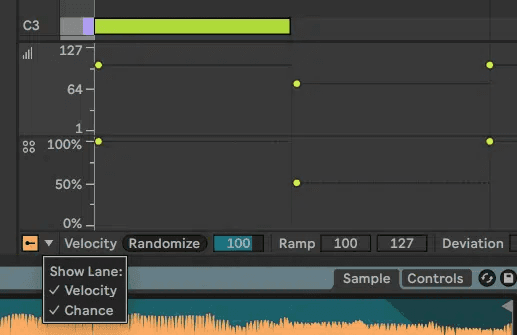
Chance
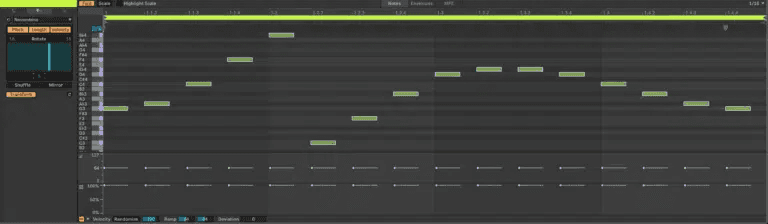
Using Pitch Tools
In Clip View, the Notes panel has been renamed to Pitch and Times Utilities and has been divided into two sections: Pitch and Time, which contain controls for adjusting note pitch and timing, respectively.
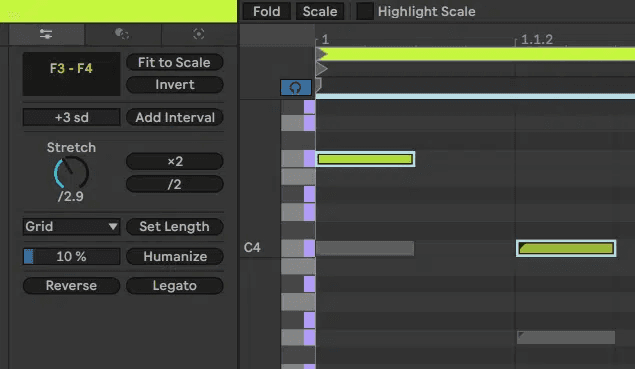
- Fit to Scale moves notes to fit within the current clip scale.
- Invert flips the notes “upside-down” so that the highest note is swapped with the lowest note.
- Transpose adjusts the pitch transposition for notes in either semitones or scale degrees, if the clip has an active scale.
- Add Interval creates new notes at the given number of semitones or scale degrees as specified in the Interval Size parameter.
- You can Create Chords by adding multiple intervals.
Midi Tools
You can now experiment with your compositional process using MIDI Tools, a set of MIDI note transformations and generators which can be used to automatically shape and create MIDI notes in creative and surprising ways.
In Clip View, there are two Tools tabs, one containing transformation tools and the other generative tools.
Transformation Tools
- Arpeggiate splits up chords into smaller arpeggiated notes based on the chosen pattern settings.
- Articulate adjusts the length of note end times using legato, tenuto, or staccato timing.
- Connect fills empty gaps between successive notes or chords by adding connecting notes with specified density, length, rate, and pitch settings.
- Ornament adds short strokes (flam) or grace notes at the beginning of existing notes.
- Quantize applies quantization based on the chosen grid options.
- Recombine rearranges the properties of a series of notes so that the pitch, length, or velocity settings of one note in the series are applied to a different note.
- Strum applies an offset to note start times for all successive notes in a chord, starting at either the highest or lowest note.
- Time Warp stretches or compresses notes based on the speed curve as determined by two adjustable breakpoints.
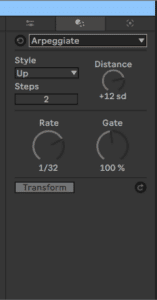
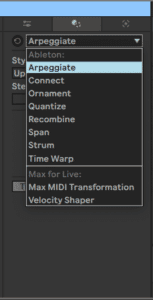
:
Generative Tools
We’ve already used Rhythm for generating drum patterns with Impulse!
- Seed randomly generates notes using adjustable pitch, duration, and velocity ranges.
- Shape generates a sequence of notes with varying pitches based on drawn shapes or selected shape presets.
- Stacks generates between one and four chords based on various chord rules that can be further tweaked and inverted.
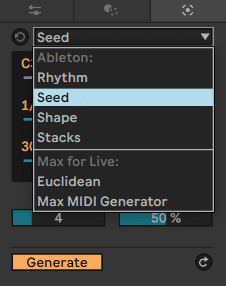
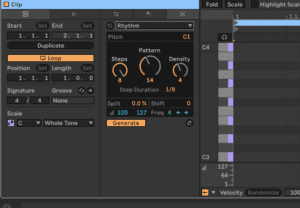
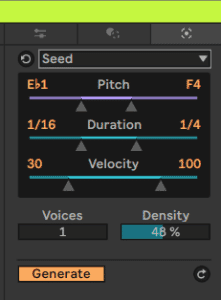
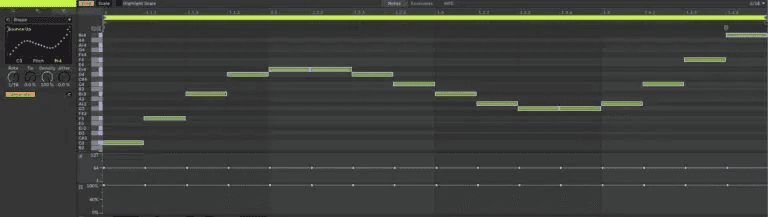
Transform Tools
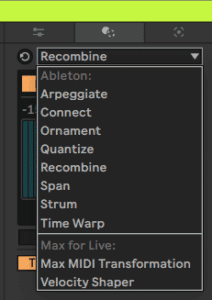
Recording in Arrangement View
Punching
Punching is the term describing the process of fixing repairing replacing one section of recorded material with another. In the era of analog tape, this would have been a destructive process. Recording over any previous segment of magnetic tape would have been irreversible. Today, this is no longer the case. To the modern recordist, the very idea may be somewhat barbaric.
This is not to say that we would never replace an incorrect lyric, a flat note, a wrong chord, or a take ruined by a noisy neighbor. But we needn’t discard the objectionable bit for all of eternity.
Overdubbing
There are also times when we don’t want to discard anything at all. When you want to hear an older recording along side a new one, the term is overdubbing. This could mean recording yourself singing a harmony accompaniment to your melody. It could mean layering violins in the choruses of your piano song or creating a drum beat, layer by layer.
As it turns out, any time you record one sound layered on top of another, you are overdubbing. As you can imagine, this becomes standard practice when working with any DAW. For our purposes, the question isn’t really a matter of when or why do we overdub. It’s more a question of how? What is the workflow surrounding overdubs? How are they handled in the DAW?
Loop Recording
One of the first places this tends to come up is with loop recording. That’s why we have chosen to address it here. When you loop a segment of your song and press record, you are faced with an immediate decision: overdub or punch (replace)?
Do you want to record every iteration as playback loops?
Do you want to hear every iteration you have recorded in loop mode?
Do you want to hear all recorded iterations at the same time?
To help us with these decisions, it’s important that we understand something basic about the way DAW recording works. Let’s take the example of an audio recording. When you record a loop, you are really just recording one long audio file. It’s up to you (and your DAW) to determine which portion of that audio file you want to hear.

In Live, the clip that you see in either Session or Arrangement view is like a window into the full audio recording. The recorded areas that are out of the boundaries of the loop brace can be revealed (or obscured) by extending one or both edges of the clip.
Erase vs overdub recording:
While session view clip recording is always overdubbing to existing midi recordings, Midi recording in arrangement by default erases existing recordings comparable to a tape recorder..
To disable the erase mode and add to an existing take, click on the + next to the record button.

Now you can also loop record in similar ways like in Session view except you will see your recording “history” when you enable “ Take lanes” using the context menu in the track header:Use the loop brace to select your loop length.

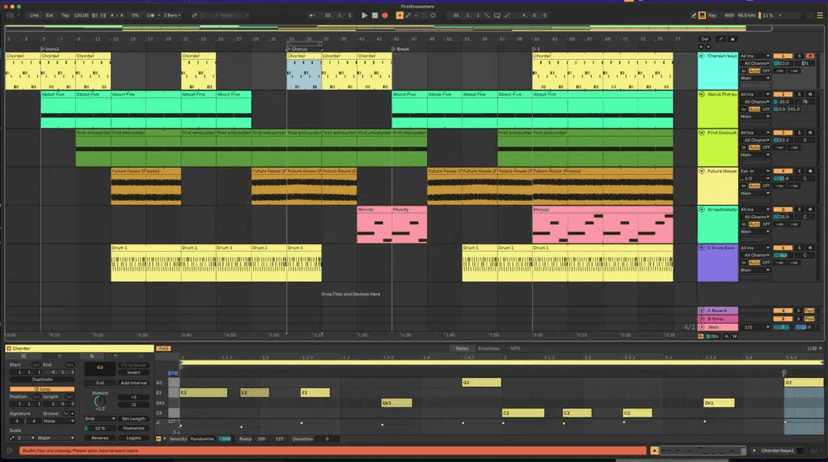
As with SessionView, recording begins after a count-in (where applicable) and clips are created in the Arrangement View at the insert marker’s position (bar 33 in the example below)
Erase vs overdub recording:
While session view clip recording is always overdubbing to existing midi recordings, Midi recording in arrangement by default erases existing recordings comparable to a tape recorder. To disable the erase mode and add to an existing take, click on the + next to the record button.
Now you can also loop record in similar ways like in Session view except you can also see your recording “history” when you enable “ loop length.” using the context menu in the track header: Use the loop brace to select your loop length!
Punching In and Punching Out
Live provides an easy, hands-free way of punching. In the Arrangement View, make sure your window is sufficiently wide to show the punch in/out buttons on either side of the loop button.

With the punch-in and punch-out buttons activated in the control bar, Live will engage and/or disengage recording automatically. The in and out points are shared with the setting for the loop brace. Bear in mind that loop recording does not need to be enabled for this to work. Also note loop playback does not necessarily begin at the left loop brace. While playback with a selection in the Arrangement View begins at the selection start, loop mode allows for independent placement of the insert marker.
Overdubbing
Overdubbing in Arrangement View
It is the intersection of loop recording and overdubbing that creates some of the most exciting possibilities when recording in Live. In this segment we will illustrate methods for building parts while looping, layer by layer, in both Session and ArrangementViews.

Particularly when recording a MIDI instrument, activating loop mode and overdub mode in the Arrangement View is extremely handy. Each pass of the loop creates a new MIDI recording that is added to the previous one. In the example above, you are watching the creation of a drum pattern. In the first pass, a kick drum is recorded. In the second pass, a snare drum is layered on top of the kick drum. On the third and final pass, a hi-hat is added. At the conclusion, all three are heard together. Yet notice that when the clip is selected (and displayed in the clip detail), each of the three passes can be revealed by extending (or in this case — zooming out) the left clipboundary.
In this way, one can create complex patterns, one layer at a time. And don’t worry: if you mess up while recording, you can always undo (⌘ + Z [Mac] or ⌃ + Z [PC])!

As you might expect, the behavior with the overdub button deactivated works differently.
Take Recording and Comping
What is Comping? Comping allows you to record audio and or midi into multiple ‘take lanes’ in order to edit the best ‘takes’.
- Live organizes multiple passes of a MIDI or Audio performance into individual takes.
- Pick the best moments of each performance and combine them to create your perfect take using Return/Enter
- Approach sound design in a new way by splicing together random samples
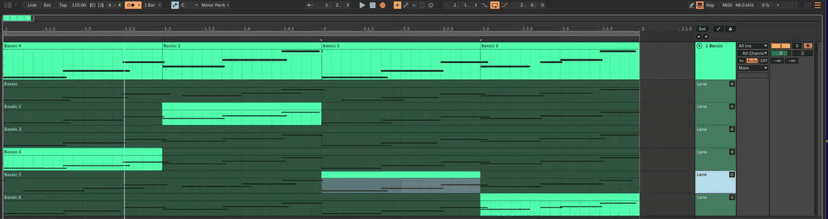
Midi Take Lanes and Comping (arrangement view only)
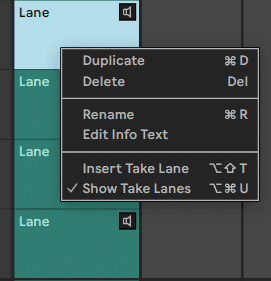
To view the take lanes, right-click on a track header and choose Show Take Lanes. Alternatively, select a clip and use the keyboard short cut:
- Mac Shift + Option +T
- Windows Shift + Alt + T
Editing Take Lanes
In order to swap out/edit takes, use Draw Mode [shortcut key: B] to select/add the best takes. Alternatively, use the following keyboard short cuts:
- Mac CMD + Arrow Up/Down
- Windows Ctrl + Arrow Up/Down
To display the take lanes/hide them, use the keyboard shortcut:
- Mac CMD + Option + U
- Windows Ctrl + Alt + U
Track lanes can be deleted, solo’d with the little speaker icon, renamed, reordered, or added.
Using Auto Punch and Overdub Recording
Recording in Arrangement has several advantages over recording session, because we can automatically punch in/out of a recording and easily just replace a word or a few notes.
Unlike in Session recording in Arrange View will erase what’s already there. With Midi however we can also add to an existing recording by check the overdub option +.
Use this to merge your new playing with what’s already there in the clip. This function makes the Arrange view a great place to do recording considering that you can always drag drop clips later on to the Session view as well.
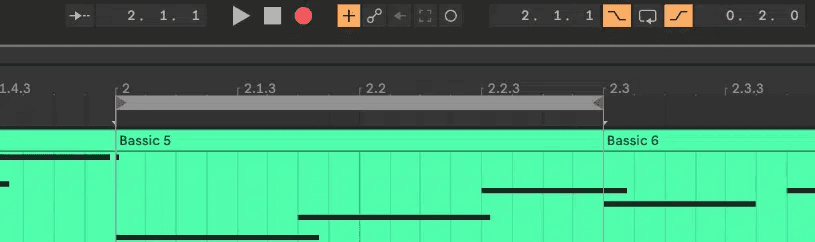
Record arm the track and use global record to automatically punch in/out at the location set with your loop brace.
As you might expect, the behavior with the overdub button deactivated works differently. However we still have the ability to delve into the clip and retrieve its earlier contents as well as the ability to undo.
Using Locators for Navigation and Performance
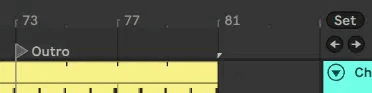
The use of Locators makes the Arrange view a great performance place as well. Locators allow us to launch different track sections in accordance with our global quantization settings.
Use Set by the song position marker. Locators can also be key/midi mapped and set on the fly.
This is a great way to quickly move to the different sections of your arrangement while mixing the song.

Arrangement and Clip Editing using Time Commands
With the time commands we can edit the time line both in arrangement and the clips itself.
Combining the standard editing commands with shift will make changes across all tracks in the Arrangement to extend, shorten or insert a section in the song.
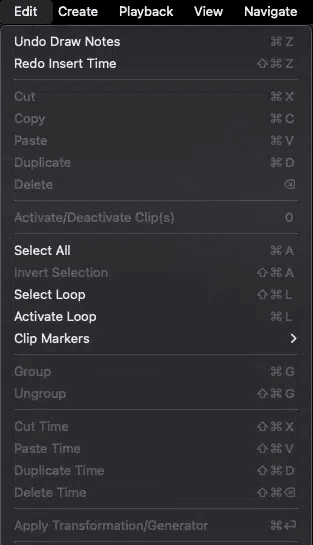
Click the Edit menu to view all the editing commands and their keyboard shortcuts!
Cut Time cuts a selection of time from the Arrangement, thereby moving any audio or MIDI on either side of the cut area closer together in the timeline. This command reduces the length of your Arrangement by whatever amount of time you have cut. Note that the Cut Time command affects all tracks, not only the selected ones.
Paste Time places copied time into the Arrangement, thereby increasing its overall duration by the length of time you have copied.
Duplicate Time places a copy of the selected timespan into the Arrangement, thereby increasing its overall duration by the length of the selection.
Delete Time deletes a selection of time from the Arrangement, thereby moving any audio or MIDI on either side of the deleted area closer together in the timeline. This command reduces the length of your Arrangement by the amount of time you have deleted.
Insert Silence inserts as much empty time as is currently selected into the Arrangement, before the selection.
The Split command can divide a clip or isolate part of it.
Consolidate will merge selected time span into a new clip and render it as a new file on drive
Consolidate Time to New Scene will render the midi or audio of all tracks within a selected arrangement time span into a scene in session
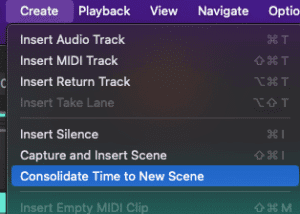
Using ‘Consolidate Time to New Scene’ from the Create menu we can even copy clips on multiple tracks simultaneously over to the Session View into a new scene!
Editing multiple Midi Clips
We can view and edit events of clips in context with others. Up to 7 clips can be edited at the same time. Clicking on a note or the loop brace makes that clip available for editing. This functionality was also requested, and can be useful to edit instruments on different tracks that interact as a pattern.
This works both in Session and Arrangement View!
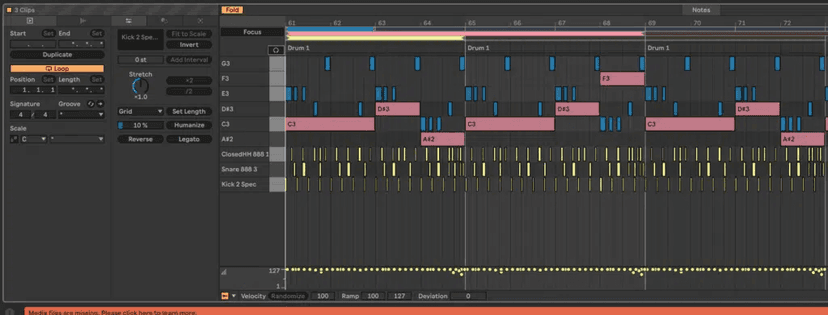
Focus Mode
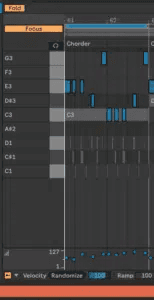
When activated, only the current focused clip can be edited. Clicking on a clip’s loop bar switches to that clip for editing.
[N] Focus Mode
A Quick Tour of Live’s Synthesizers
This is just a short description and we will study these powerful instruments in detail during the Synthesis and Sound Design classes.
The main difference between Synths and Simpler is the Oscillator section: here we mostly do not have to rely on audio samples as a starting point for sound design.
Analog: Subtractive Synthesis
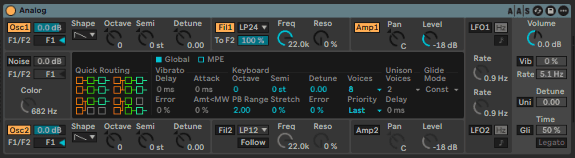
Having used Simpler we already have an understanding of some of Analog’s main building blocks: Filters, Envelopes and Lfo behave in very similar ways and are used for shaping the sound source or modulating certain key parameters over time and in rhythmic ways.
A polyphonic subtractive synthesizer. A classic take on analog synthesizers. This synthesis method is called subtractive because we’re creating specific timbres by subtracting certain harmonics with the filter.
We are shaping of timbre and overtones happens in a subtractive way using several different filter types.
The primary sound sources of this synthesizer are two oscillators and a noise generator. These sources can be independently routed to two different multi-mode filters, which are each connected to an amplifier. Furthermore, the signal flow can be run through the filters in series or in parallel.
Start out with a Square or Square Shape to have enough high harmonics to work with when using the filters. Since the Sine Wave actually has no overtones and therefore it will only offer very little potential for filtering.
Each of the filters has also its owns envelope to shape how the timbre evolves over time.
Analog also features two low-frequency oscillators (LFOs) which can modulate the oscillators,filters and amplifiers. Additionally, each filter and amplifier has its own envelope generator.
Operator
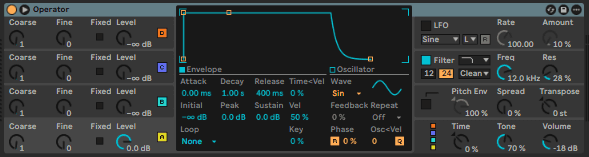
Designed for synthesizing sounds via a wide range of controls; it can be bought separately
in addition to Ableton Live. Operator implements FM (frequency modulation) synthesis string variation of four FM operators.
Wavetable
I think this type of synthesis is a great place to start for a synthesizer novice as proven by the success of Massive and Serum and Pigments.
It offers a very inspiring oscillator section due to its many great sounding wavetables along with some deep modulation capabilities to create evolving and rhythmic sounds.
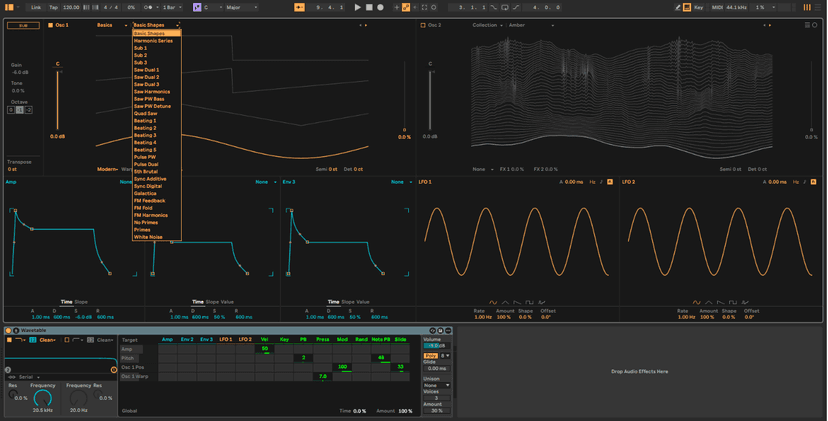
Intro to Wavetable
Scrolling the many wavetables and combining them in two different oscillators is a great start before adding filters and applying modulation and movement via the matrix.
The lfos and loopable envelopes can be used to modulate the wavetables both vertically byscrolling through the waveforms but also at the same time by modulating the waveforms with FM, changing their pulse width or applying Phase distortion.
The morphable multimode filters can be configured in parallel, series or split mode and also offer a great selection of vintage filter models with built in drive functionality for hotter or dirtier timbres.
Click on a control and it will be added to the Matrix as a modulation destination! ADSR times can be modulated separately.
There is also a Sub oscillator that can create additional harmonics and a Unison section that will allocate additional voices in various ways e.g. also by wavetable position and phase sync.
Meld
This is the latest addition Ableton’s Instruments and it features a novel design featuring two Macro Oscillators and lots of modulation possibilities with great visual feedback.
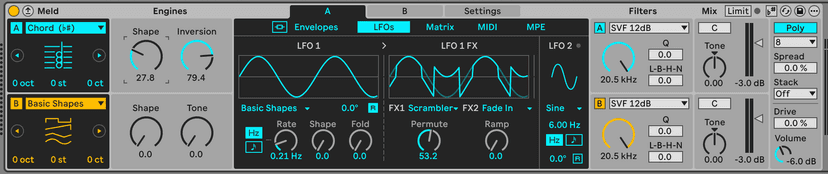
Meld’s deep sound-shaping capabilities can be used to create evolving textural sounds, rhythmic drones, harmonic effects, atonal sounds and more..
Meld features two oscillator engines which can be layered to create a wide variety of sounds. Each engine offers unique shaping and tonal variations depending on the oscillator type.
A diverse set of modulation routings are accessible in a fully mappable and expandable matrix. Meld also contains two LFOs: the first is an LFO waveform that is fed into a series of LFO Effects that can be used to finely tune the resulting modulation, and the second is an LFO that can be used for traditional LFO modulation.
Filters are available for each oscillator engine, as well as individual panning, tone, and volume controls, which can be used to further refine each engine’s sound independently.
There are Glissando and Portamento options for each engine, polyphonic or monophonic voicing, and a Drive control which can be used to add some saturation to the overall output.
Updates in Ableton 12.2
Added a new Chord oscillator type, which is comprised of four sawtooth oscillators that play a variety of chords. When the Use Current Scale toggle is enabled in the device title bar, generated chords use the notes of the set scale. If no scale is set, a major scale is used with the incoming MIDI note as the root.
Added a new Scrambler LFO 1 FX, which permutes four different amplitude ranges of the input modulator.
Physical Modeling Instruments
The following three instruments use what we call physical modeling technology to reproduce the acoustic behavior of a physical object, modeling physics to virtually emulate the way instruments produce sound in nature.
Collision
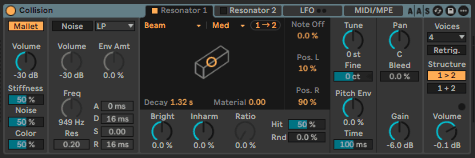
This synthesizer is designed to simulate the characteristics of mallet percussion instruments.
Collision’s interface is divided into tabs, which are further divided into sections. The Excitator tab contains the controls for the Mallet and Noise oscillators. The Excitatorsound source features a pair of oscillators called Mallet and Noise, which feed into a pair of independent (or linked) stereo resonators.
Electric:
The mechanism of the electric piano is actually quite simple. A note played on the keyboard activates a mallet that hits a fork assembly consisting of a tine and a tone-bar. The sound of the tine resonates the tone-bar which is, in turn, amplified by a magnetic coil pickup like the kind found on an electric guitar.
Once activated, the tone bar will continue to resonate on its own for a long time. But releasing the key applies a damper, muting the sound more quickly.
The Electric interface is divided into five main sections.
The first four main sections (Mallet, Fork, Damper and Pickup ) correspond to the sound producing components mentioned above. The global section parameters affect overall behavior and performance settings such as pitch bend and polyphony.
Tension:
is a synthesizer dedicated to the emulation of string instruments, it produces sound by solving mathematical equations that model the different components in string instruments and how they interact.
Intro to Instrument Racks

Instrument Racks are a great tool for layering or combining different instruments in one place.
Instrument Racks are Ableton’s primary sound design tool for layering multiple instruments and combining them with audio and midi effects.
Layering by itself is a great way of creating new sounds short of starting to program individual synths.
When looking to load Instrument presets from the Browser we see.adv and.adg files: adv stands for Ableton device and will load just that instrument with a saved preset.
adg stands for Ableton device group and will load several devices grouped in an instrument rack.
They usually come also with Macro controls pre-assigned to certain key parameters of the devices in the group. The green dots mark the parameters that are mapped to a Macro.
You can drag drop any instrument into the Chain section for layering or add effects to the entire Rack or just one individual chain.
Racks can be rather complex structures combining many devices, we will dedicate more time to them in the following classes when using them with Live’s Synths, effects and 3rd party plugins.
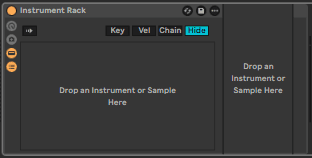
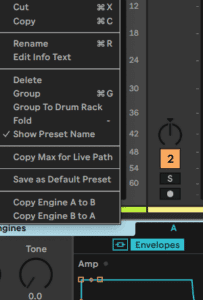
You can pick an empty Instrument Rackfrom Instruments or create an Instrument rack by choosing the Group (cmd G) command from context menu accessed by clicking on the header of an already loaded instrument. Now you can drop additional instruments and create new chains in the rack.
Do this now
- Set the project scale and turn on Fold and Scale in the note editor.
- Record four bars badly, one finger.
- Fix them with Transform > Connect, then add Chance to one note so it does not fire every time.
Recording badly and fixing it is faster than playing it right, and it sounds less programmed.