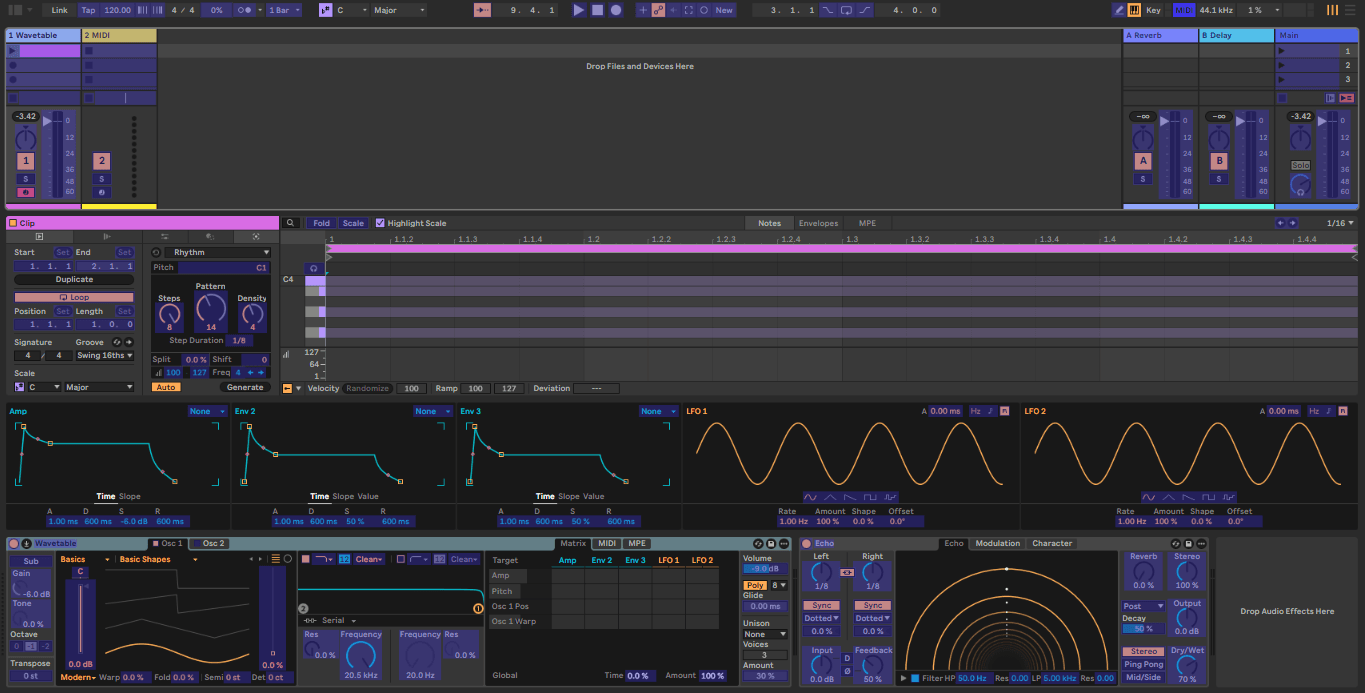
Midi Control: remote control / map mode
Clips can be launched using MIDI notes, either from a keyboard or trigger pads, or from computer keystrokes. Most of the Clip launch modes (all but Trigger) make more sense when you take this option. Assigning MIDI keys/pads or computer keys is very straightforward. First, choose Edit MIDI Map, or Edit Key Map from the Options menu. All assignable objects in Live will turn blue (in the case of MIDImapping), or an odd pinkish color (in the case of Key mapping). Click on the Clip you wish to assign, then play the MIDI note or press the computer key you wish to map to it. When you’ve finished assigning Clips to keys, exit the mapping mode by unchecking it in the Options menu. In addition to its other advantages, using a MIDI keyboard or pads to trigger Clips allows you to use the Velocity (Vel)percentage setting in the Launch Settings box. This alters the volume of the loop based on the velocity of the Note On message that triggers it.
What is midi mapping?
Midi mapping is a feature in Ableton Live that allows the user to assign a midi controller to certain parameters and functions in the live window. Midi mapping adds much more control and interactivity to a set, allowing the user to interact with the crowd and perform better. You can control the whole of Ableton live via a midi controller, launching clips, starting sessions and using effects. In other words it allows you to spend more time performing and less time clicking a mouse, staring at a screen.
Starting midi mapping mode
To start midi mapping mode click on the midi button, next to the cpu meter, at the top right hand corner of Live. The shortcut for starting midi mapping mode is Ctrl + m (pc) and apple + m (mac).
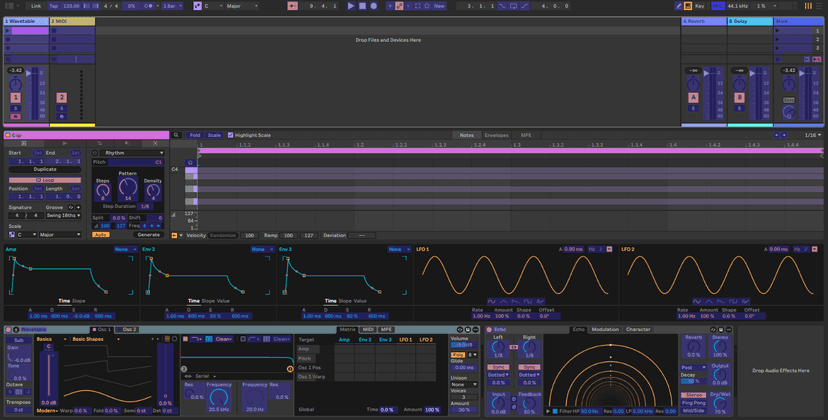
Once the midi mapping button is clicked then everything that can be midi mapped will be highlighted in blue. As you can see there are lots of things that can be assigned, much more than key mapping modes.
Assigning Midi Controllers
It’s very easy and quick to assign a midi controller to a parameter in Live. All you have to do is click on the parameter you want to assign, then move the knob, button, key or fader on the midi controller. Repeat this for each parameter you want assign. Once you’ve left midi mapping mode, by clicking on the midi mode button again, the parameter will be active and the midi controller will control it. In the screen shots below i have assigned the keys on my midi controller to launch each scene in the project, in order. I’ve done this so i don’t have to use the mouse to launch them. I’ve also assigned the pitch of a clip, the aux sends, crossfader positions and channel mute button to knobs, keys and a fader. Close up of scene launch area and the crossfader Close up of clip launch, aux sends and channel mute controlled by midi controllerClose up of clip pitch controlled by midi controller.
Key map mode
Key mapping is a feature in Ableton Live that allows the user to assign keyboard keys to certain parameters and functions in the live window. Key mapping adds much more control and interactivity to a set, allowing the user to interact with the crowd and perform better. In other words it allows you to spend more time performing and less time clicking a mouse, staring at a screen.
Starting key mapping mode
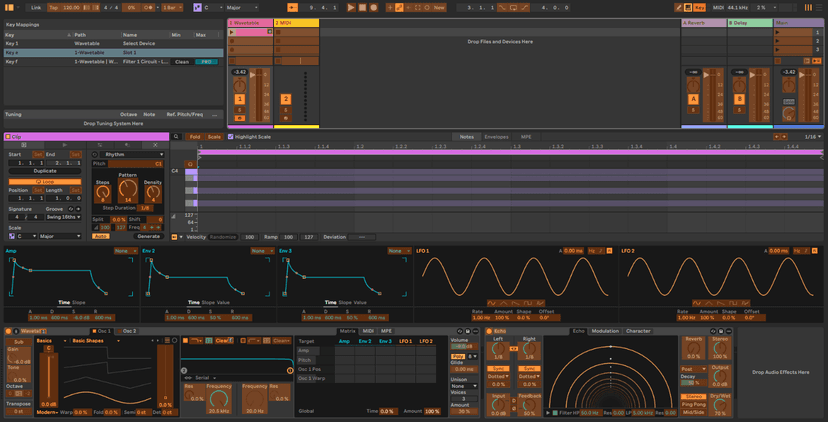
To start key mapping mode click on the key button, next to the cpu meter, at the top right hand corner of Live. The shortcut for starting key mapping mode is Ctrl + k (pc) and apple + k (Mac). Once the key mapping button is clicked then everything that can be key mapped will be highlighted in orange. Live has preset parameters already key mapped. The F1 through to F8 control the mute/on/off buttons for channels 1 to 8. Have a play with them to get a feel of what you can do with key mapping Tip – If you hold down the any of the F keys they toggle on and off creating a stuttering sound, a bit like tremolo on a guitar amp.
Assigning keys
Once you have key mode activated any parameters that can be assigned will be highlighted in orange. There are lots of parameters you can assign, like the crossfader, launch clips and scenes and turn effects on and off. It’s very easy and quick to assign keys. Once selected, press the key on the computer keyboard. Close the key mapping mode and the key then controls that parameter. Below
I’ve assigned some keys (letters and numbers) to several destinations, e.g. a and b will launch the midi clips, 1 and 2 will deactivate tracks.
When open the browser we see a list of all mappings and there we can also edit to remove them. The same same applies to the midi mappings.
Recording and Editing Automation in Session and Arrangement
Session View/Clip Automation
1. Enable the Automation Arm button to prepare for automation recording.

2. Activate the Armbutton for the tracks onto which you want to record. Clip Record buttons
will appear in the empty slots of the armed tracks.
3. Click the Session Record button to begin recording automation.
It is also possible to record automation into all playing Session clips, regardless of whether or not they are in armed tracks. This is done via the Session Automation Recording switch in the Record/Warp/Launch Settings.
Recording with mouse: Touch behavior
Recording with knob or fader: Latch behavior
To delete ctrl. click on automated control.
If you change an automated control’s value while not recording, the parameter’s the automation LED goes off to indicate the control’s automation is inactive > A red Re-Enable Automation button lights up..uncheck to re-enable all automation.

.
Just click on a parameter on the tracks header and a corresponding automation lane will pop up.. provided Automation mode is on.
You can also view all automation lines at the same time in context.
Automation vs Modulation
To create Modulation Envelopes, only drawing, editing and using shapes is possible!
Modulation is relative to the Automation setting. The modulation will adjust itself relative to the current Automation position.
Most effect or instrument parameters can be modulated but also be automated:
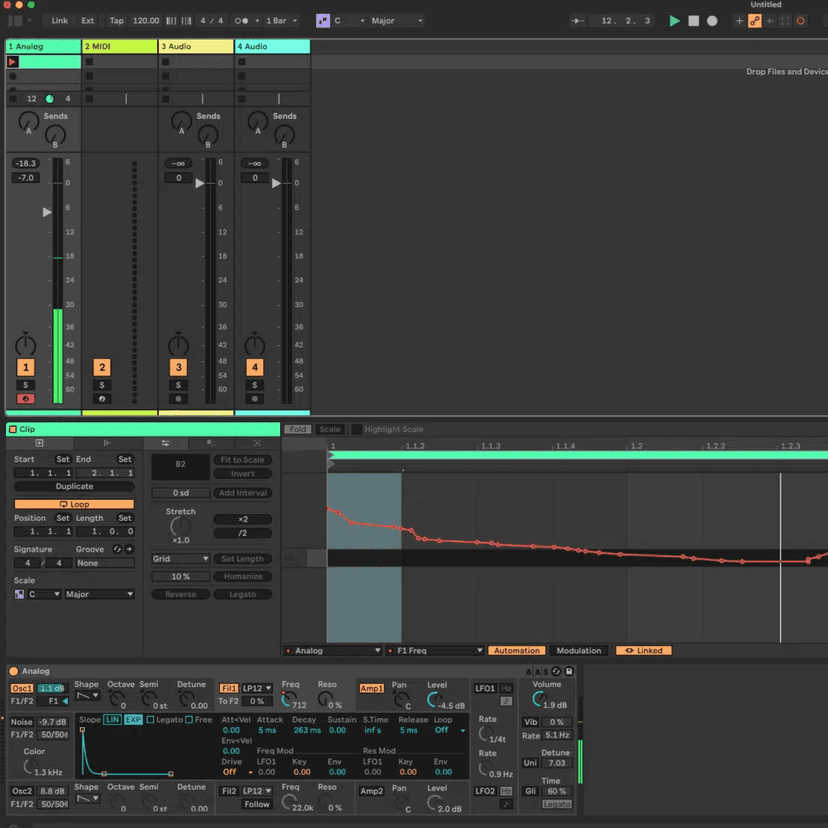
In the example below we see a gradual filter opening created with Automation (red) and cyclical modulation movement on top of it.
There is a red dot on Analogs cutoff and purple ring showing the progress of the cyclical movement added to the cutoff as the filter is opening
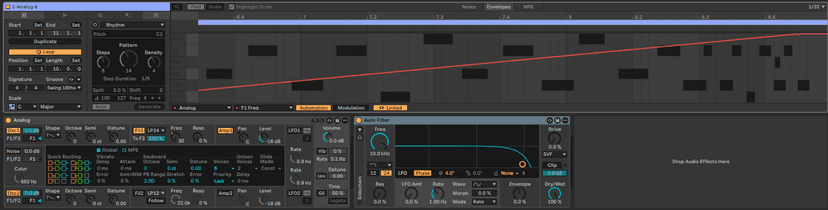
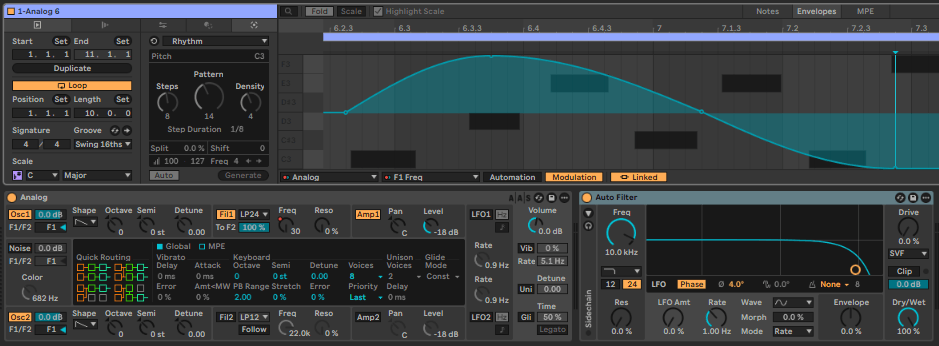
Clip envelopes can also be used to automate or modulate mixer and device controls:
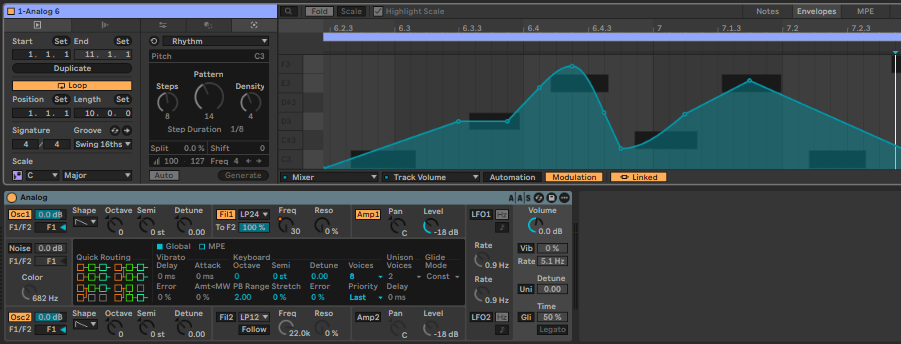
Whereas automation envelopes define the value of a control at any given point in time, modulation envelopes can only influence this defined value. This difference allows the two types of envelopes to work together in harmony when controlling the same parameter.
Creative Uses of Clip Envelope Modulation
Clip Envelopes make perfect modulators for effects and synth parameters, especially as they can have their own loop length, independent of the Clip’s length. For example, try adding a filter to a track on which you have an audio loop running. Now create a Clip Envelope assigned to the filter device’s frequency control, and draw a nice LFO-style curve.
This eight-bar envelope in a MIDI Clip is modulating the filter of a synth plug-in.
Clip Envelopes make perfect modulators for effects and synth parameters, especially as they can have their own loop length, independent of the Clip’s length (see main text). For example, try adding a filter to a track on which you have an audio loop running. Now create a Clip Envelope assigned to the filter device’s frequency control, and draw a nice LFO-style curve.
Clip Envelopes are especially powerful on MIDI Clips, where the envelope can modulate parameters on the same instrument that the Clip is playing. In the screen below, a Clip Envelope is generating a slow LFO sweep of the filter on the same instance of Live’s Analog synth that the notes are playing. This is also a good example of an envelope with an independent, ‘unlinked’, loop length. Although the actual MIDI note sequence is only one bar long, I’ve create a modulation graph which is eight bars long.
A couple of extra tips: firstly, when using Live’s instruments, whenever you click on a control on the instrument’s panel, that parameter automatically becomes selected for Clip Envelope editing when you switch back to the Clip View. Secondly, to draw freehand with the pencil (i.e to stop it creating steps at grid lines) hold down the Alt key (Mac or PC).
Automation in Arrangement View
Clip automationenvelopes recorded from session will also show in Automation lanes and vice versa: an automation lane created in Arrange is a available as a modulation envelope after the arrange clip is brought over to Session.
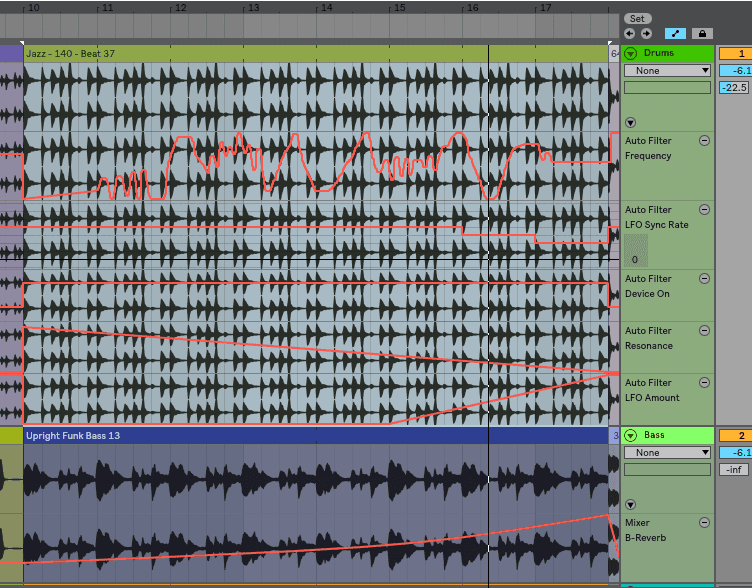
Automation and Content Mode
You can chose to hide or show the Automation lanes by clicking on the the blue icon or typing the letter A. This is a great way to un-clutter the arrangement view when you just want to focus on the audio or midi content.
Same section as above with automation lanes hidden.
There are 3 basic ways of adding automation to Live:
Record the automation

If you play back your song but with the record button switched on, any volumes or settings you adjust while playing will be recorded/automated next time. Just set the record bar as shown below, click play, and adjust anything you want during playing. Next time you play it back, you will see any changes you previously made happen magically without you doing anything!
Draw in automation by hand
This method provides a lot more control and precision over your automation. By drawing in the automation, you can make smooth level changes or precisely timed cuts. You can also use this method as a way of perfecting any automation that you recorded!
A Combined Approach
Many times a combined approached between recording and editing yields the best results. When recording in real time it’s of course best to use your hands with midi mapped controllers, writing even two related parameters at a time e.g. filter cutoff and resonance make for a great.

Go to the arrangement view, and select the parameter that you want to edit from the track mixer or device.
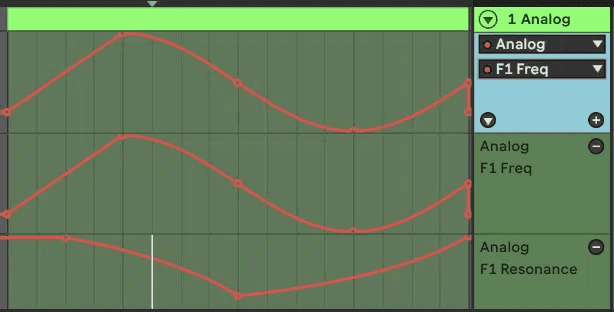
Now right click in the arrange window and select the option ‘draw mode’ (or just use the shortcut, cmd+B). Your mouse icon becomes a pencil, and you can draw on the track to create automation. It should look something like the picture below, where your drawing is the pink automation line.
In the image above the height of the line represents the filter frequency and resonance etc (or whatever parameter you chose). If you’re drawing manually and it is very ‘pixelated’ or comes in blocks, car +click to turn grid off or also cmd 4.
Of course you can also use different grid values to draw quantized or stepped automation by adjusting the grid using cmd 1, 2 or 3 (for triplets).
Creating Breakpoints
Alternately, by turning off the pencil we can add breakpoint to create straight lines: Double click anywhere on the clip to create quantized breakpoints (they will snap to the grid). This is great for rhythmic movements that are in tempo sync.. and when combining that with using the pencil tool we can now create tempo quantized steps and slides much quicker.
Using Curves
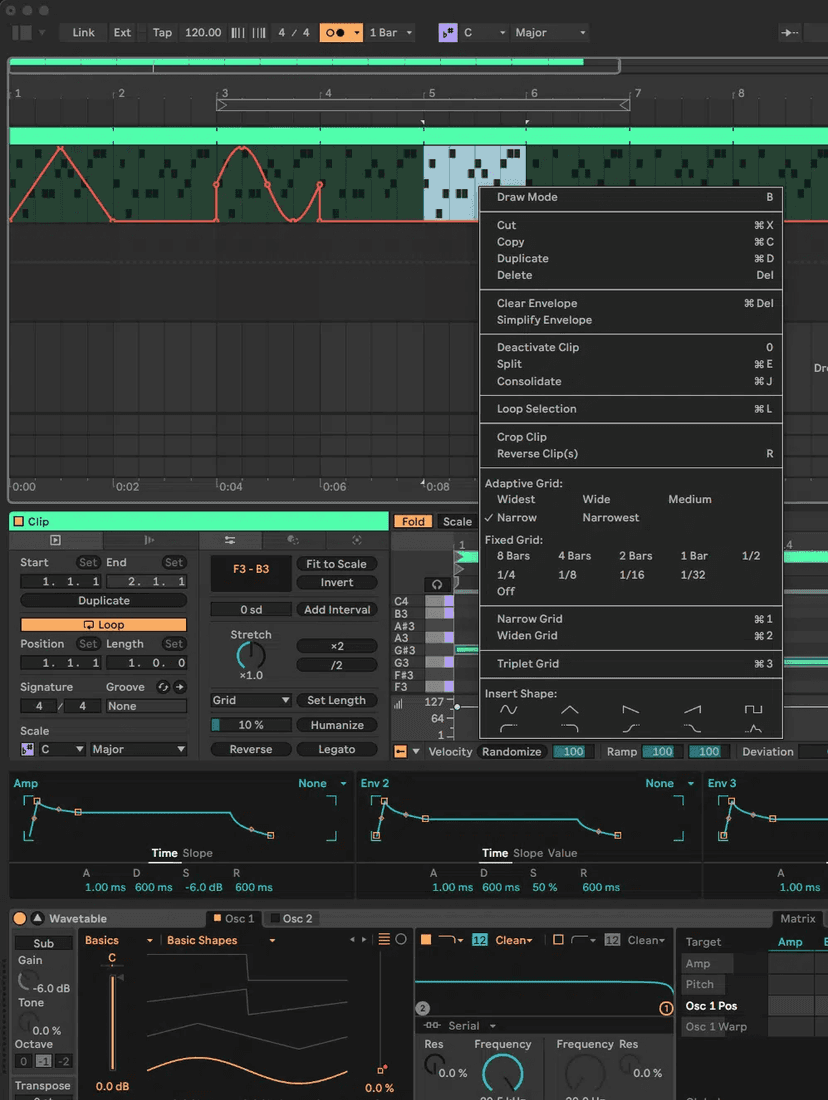
Drawing automation is made easier with the help of the preset curves we can pick from the context menu.
There you can also pick from one of the curves to use it over the selected time span. Just swipe over a time span and pick a curve!
Automation and Modulation Keyboard Workflow Updates on Ableton 12.2
It is now possible to add, edit and delete automation breakpoints using a new keyboard workflow. The workflow includes a single-selection concept for breakpoints, enabling navigation and editing via keyboard and mouse. Screen readers provide feedback for each action.
Navigation
Select the current breakpoint: Enter on a breakpoint
Create and select a new breakpoint: Enter without selecting a breakpoint
Move the insert marker along the grid: left and right arrow keys
Jump to the next/previous breakpoint: Alt (Win) / Option (Mac) + left and right arrow keys
Select an existing breakpoint at the insert marker: Enter
Restore highlight of the previously moved breakpoint: Undo
Editing Selected Breakpoint
Move the breakpoint in time/value: arrow keys
Delete the breakpoint: Delete
Edit the value: start typing
Commit the change and deselect: Enter
Cancel the change and deselect: Escape
Select the next/previous breakpoint: Tab and ShiftTab
Mouse Selection
Select a breakpoint and move the insert marker: Alt (Win) / Option (Mac) + click
Change Envelope in Arrangement
Cycle through automated parameters of all devices on a track: Alt (Win) / Option (Mac) + up and down arrow keys
Cycle through all parameters of all devices on a track: ShiftAlt (Win) / ShiftOption (Mac) + up and down arrow keys
Fades
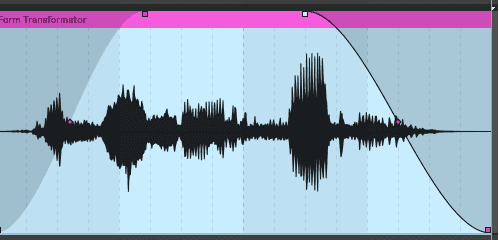
Fades are always visible on the clip in content mode, and resizing a clip keeps the fade length intact.

Automate Tempo And Time Signature
Automating time signature and tempo changes in Live isn’t all that straightforward, especially if you’re doing it for the first time.
You probably won’t need to automate these parameters a whole lot, but when you do want to, it’s nice to know how to go about it! Read on for a quick tutorial.
Automating Tempo
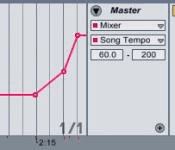
This one’s pretty straightforward. Right click on the tempo (at the top left of the screen) – a menu should appear – and click on show automation lane. Now, you should be able to use the draw tool to adjust automation as usual.
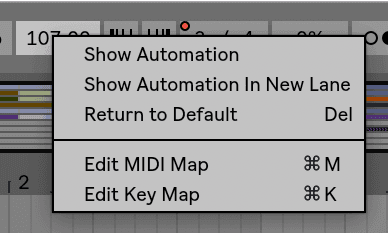
Right Click > Show Automation Lane applies to way more than just tempo. You can get to the automation lane for pretty much any parameter by using the same method (try it on a volume slider and see for yourself).
Using Locators for Navigation and Performance
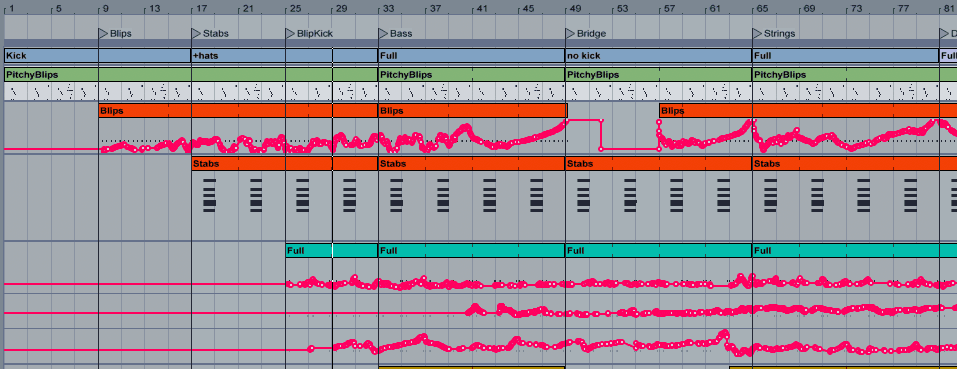
The use of Locators makes the Arrange view a great performance place as well. Locators allow us to launch different track sections in accordance with our global quantization settings. Locators can also be key/midi mapped and set on the fly.

Creative Audio Editing
Ableton has always been at the forefront for processing and manipulating audio in innovative and drastic ways starting with its pioneering warping functions.
Live Suite 12 has some slick and easy to use tools for making creative audio editing in and drastic ways starting with its pioneering warping functions.
Arrangement easier while significantly improving the overall editing workflow.
To access the time within a clip for editing, “unfold“ its track by clicking the button next to the track name
Clicking and dragging in the waveform display below the clip’s horizontal strip allows you to select time within the clip.
Grab clips above center (little hand) to move them to another track or position in time.
We can also stretch warped audio clips by shift dragging the upper border of a clip..
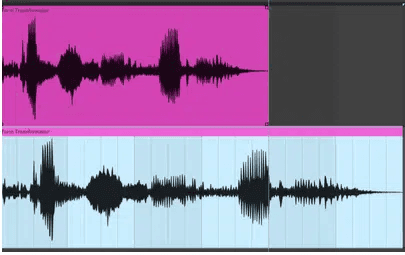
Stretching or reversing of entire clips or selected sections can be done very fluidly… and the result can then be consolidated (cmdJ) in a new audio clip for later use in Session.
Thanks to these easy editing function the arrangement view is an inspiring place for cutting edge sound design with audio.
To split and isolate a clip, just select, move or edit the selected part!

Slide across the lower part to select a section..press 0 to deactivate it..
Reversing and shifting clip content in selection:

Press R to reverse selection..Alt/Shift and slide clip content!
Clicking into the Arrangement background selects a point in time, represented by a flashing insert marker. Clicking and dragging selects a timespan.
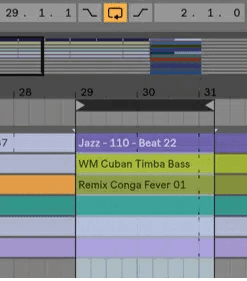
Use Cmd L to activate the arrangement loop for the selected time, or to set punch in/out points
Loop Selection: selects the time span of the loop across all tracks
Navigation and Zooming
The insert marker can then be moved in time with the left and right arrow keys, or between tracks via the up and down arrow keys.
Holding Option key while pressing the left and right arrow keys snaps the insert marker to locators and the edges of clips in the selected track or tracks.
Notice that you can adjust the height of the unfolded track by dragging the split line below the Unfold Track button.
Note that you can actually unfold all of your tracks at once by holding down the Option modifier when clicking the button.
Clicking on the loop brace is a shortcut for executing the Edit menu’s Select Loop command, which selects all material included within the loop.
Holding [Shift] while clicking extends an existing selection in the same track or across tracks. You can also hold [Shift] and use the arrow keys to manipulate the selection
Typing Z after you select a timespan will zoom in across all tracks, shift Z will zoom out.
Use S to minimize all tracks so can get to view your entire arrangement if you have a big set.
Time Commands
The …Time commands — Cut Time, Paste Time, Duplicate Time, Delete Time and Insert Silence — are covered in the MIDI Recording chapter. They insert and remove time across every track at once, which is how you add or remove a bar from a finished arrangement without dragging anything.
The Split command can divide a clip or isolate part of it.
Midi Recording in Arrangement
Erase vs overdub recording:

Take Recording and Comping
Live organizes multiple passes of an audio or MIDI performance into individual takes. Pick the best moments of each performance and combine them to create your perfect take. Or approach sound design in a new way by splicing together random samples from your library.
Do this now
- Enter MIDI Map mode and map four knobs on your controller to a filter, a send, a delay mix and a volume.
- Record a pass of yourself moving them.
- Now look at the difference between what landed as automation and what landed as modulation.
That distinction catches everyone once. Better it happens now.