Max for Live has a reputation for being a programming environment. It is, but it also ships a set of finished devices that solve problems nothing else in Live solves. You never have to open Max to use any of them.
Envelope Follower
Takes the amplitude of any audio signal and turns it into a modulation source you can map to any parameter in Live.
That is sidechaining without a compressor, and it is far more flexible: map a kick drum's envelope to a filter cutoff, a reverb send, an LFO rate, anything. Ducking is one use. Making a pad breathe with the drums is a better one.
LFO
A free LFO that maps to any parameter, with more shapes than the ones built into devices, plus Smooth, Jitter and a Sample and Hold mode.
The point is not that Live lacks LFOs — it is that device LFOs can only modulate their own device. This one modulates anything, including another LFO's rate.
Shaper
Draw a modulation curve and it plays back synced to tempo. An LFO whose shape you drew by hand, with breakpoints on the grid.
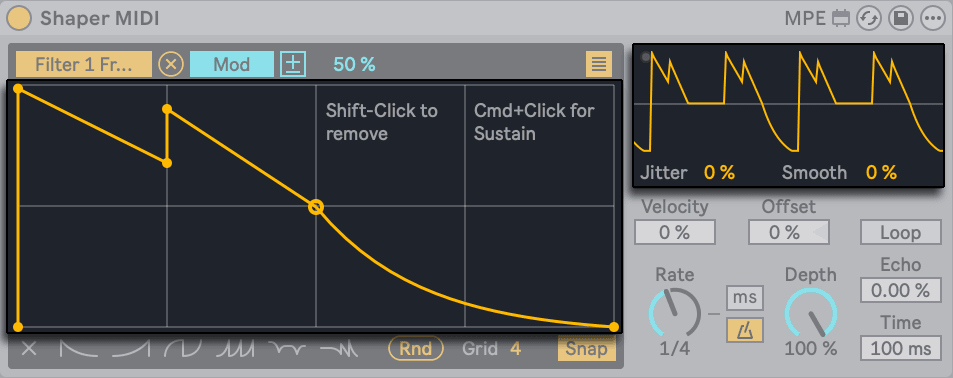
Use it for anything rhythmic that a sine or a saw cannot describe — a filter that opens on beat 1, holds, and snaps shut on the last sixteenth.
Expression Control
Maps incoming MIDI — velocity, aftertouch, mod wheel, pitch bend, note number — onto any parameter. It is how you make a patch respond to playing rather than to automation.
Note Echo
A delay for MIDI notes rather than audio. The repeats are real notes, so they can be transposed as they repeat, or have their velocity fall away, or be fed to a different instrument. A pitch-falling MIDI delay is a sound you cannot get from an audio delay.
MPE Control
Maps the per-note dimensions of MPE — slide, pressure, per-note pitch — onto parameters. Necessary if you have an MPE controller, and useful even if you do not, because Live can generate per-note expression from the note editor.
Do this now
- Put Envelope Follower on your kick track.
- Map its output to the Dry/Wet of a reverb on a pad.
- Set the amount negative.
- The pad's reverb now closes on every kick and opens between them — a pumping that follows the drums without touching their level.